Using an iPad for Photography Workflows: A Complete Guide

When we first published this guide in early 2018, the iPad was still emerging from the doldrums of an identity crisis.
For years, it seemed Apple wasn’t sure what they wanted it to be: a serious computer for “real work”, a basic consumption device, an artist-focused creative tool, or even something in between.
Their answer, which we’re finally seeing take shape, is that the iPad is meant to be the center of a modular computer system that adapts to the needs of its users. It’s also clear that they would like to welcome additional kinds of users into the fold — including those who have more demanding workflows.
Happily, many of the updates feel custom-tailored to the needs of photographers using an iPad, and as someone who’s inhabited that role for years now — I haven’t owned a laptop in nearly a decade — I’m thrilled.
To be practical, an iPad photography workflow has to encompass everything from shooting, importing, culling, editing, and the final export. The ideal scenario is to be able to trust the iPad to replace a laptop as my daily photography companion.
It needn’t do so entirely — I’m happy to continue using my desktop-based collection of apps when I’m at home and need their specific capabilities — but I should feel confident taking nothing but an iPad with me when I head out on a shoot or take my next trip.
Now more than ever, I do.
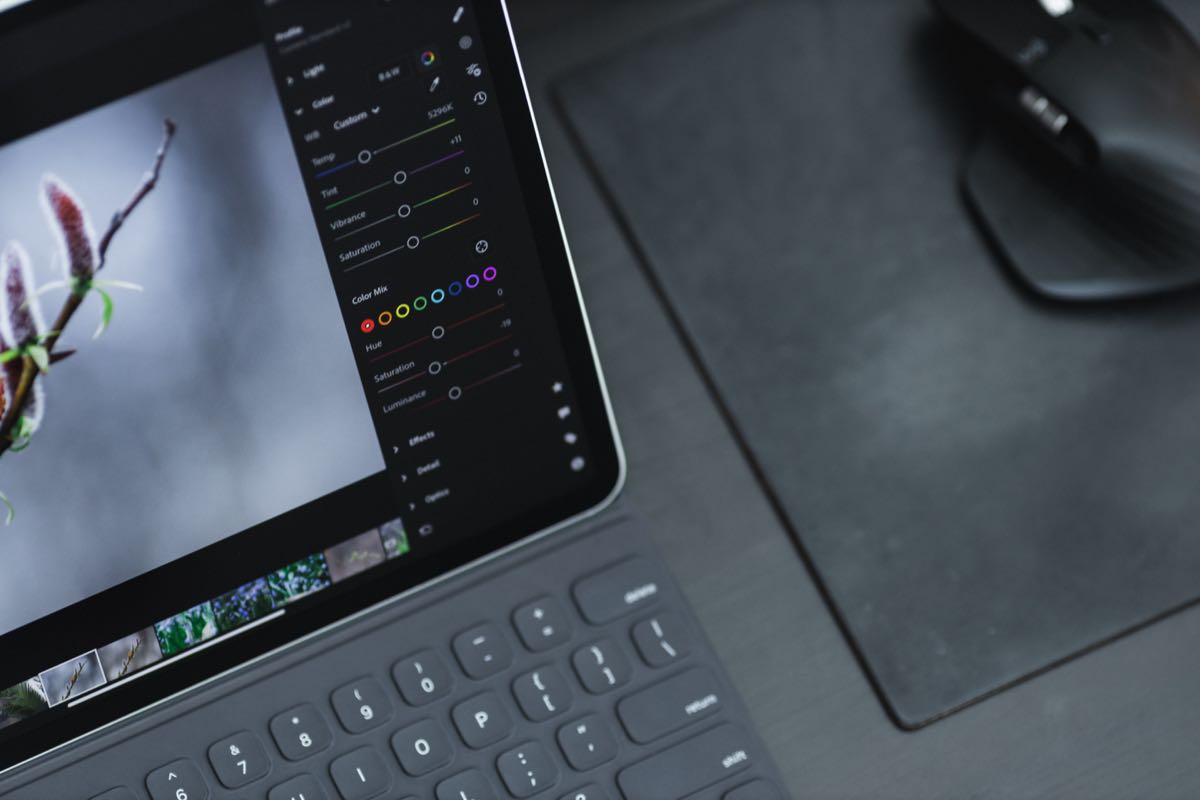
Table of Contents
- The New iPad Landscape
- Third-Party App Improvements
- Preproduction and Using an iPad During a Shoot
- Importing Camera Photos on an iPad
- Managing and Storing Photos
- Editing Photos
- Saving and Sharing
- What’s Missing
- Conclusions
Must-Have, Most-Used Photography Apps
We spend an inordinate amount of time sorting through hundreds of apps to find the very best. Our team here at The Sweet Setup put together a short list of our must-have, most-used apps for taking and editing photos on iPhone and iPad.
The New iPad Landscape
For photographers, the iPad experience of 2020 is almost unrecognizable compared to where it used to be.
We’ve gained the ability to directly import photos into Lightroom, we have cursor support built in, we have a desktop-class web browsing experience, we can connect to external displays, access and use external storage, and the hardware line-up is more diversified and generous with functionality across the price spectrum.
The net result for photographers is that working on an iPad feels more like working on a Mac than ever before, with the added benefits of a more versatile form factor, more flexible input options, better battery life, and support for LTE.
iPadOS Improvements
The most impactful changes have been the ones that pertain to the handling of files.
In the past, it was impossible to do something as simple as import photos directly into Lightroom on an iPad. You had to first import photos to the native Photos app, pull them into Lightroom from there, and then delete the redundant copies in Photos to save space.
It was a cumbersome workflow at a crucial juncture in the process, and I know many photographers wrote off the iPad as a result, asserting (very reasonably) that it was too much of a hassle to be worth it.
Apple has opened up file management significantly since then, not only allowing Adobe to build the direct import flow we’ve always wanted, but also allowing for external storage devices to be used across the operating system. With the newer generations of iPad Pro, this all happens over a familiar USB-C connection for dongle-free simplicity.
Apple Photos has also been significantly overhauled, not only in terms of its beautiful new way of presenting photos, but also in terms of its editing tools.
It’s also worth noting that macOS features like Sidecar have opened up new ways of using an iPad as part of your desktop workflow too — without having to involve any third-party apps. You can use it instead of a Wacom or similar drawing tablet for pen-based retouching, which remains a staple of professional portraiture workflows.
Third-Party App Improvements
Developers have understandably jumped at the opportunity to take advantage of these improvements to the platform.
Adobe, besides bolstering Lightroom’s import and file management capabilities, also launched Photoshop for iPadOS just in time for its 30th birthday. This time, it’s not a cut-down experimental version, it’s the real thing. They’ve already made strides toward bringing it up to feature parity with the desktop version, and it won’t be long now before the full spectrum of tools and capabilities is fully cross-platform, including Lightroom / Photoshop round-tripping.
Of course, Adobe is hardly the only player in this space.
Affinity Photo continues to evolve, and we celebrated the arrival of several important new contenders in the photo editing space including Pixelmator Photo and a native iPad version of Darkroom.
With so many critical limitations being lifted at the operating system level, third-party developers are finally able to unleash their ambitions and build powerful, professional-grade apps for iPadOS.
Preproduction and Using an iPad During a Shoot
While I would never use my iPad to take photos, it can be a useful tool during the planning and capture phases of a project.
Here are a few of the tasks I turn to my iPad for when I’m preparing for and executing a shoot:
- Keeping a Shot List: A checklist in my notes or task management app helps me stay on top of what I need to capture.
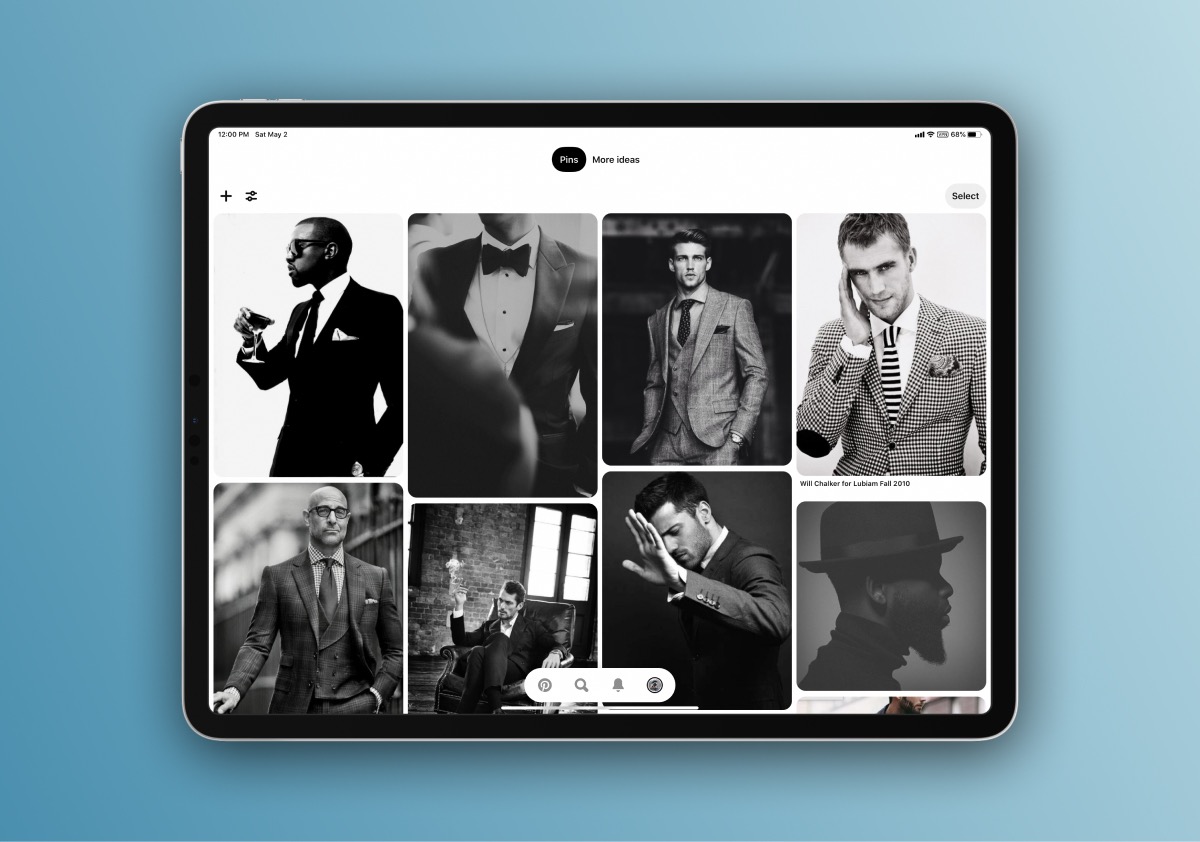
- Assembling a Mood Board: I tend to assemble mood boards with new clients, often using a mutually-familiar tool like Pinterest so that everyone can contribute and refer back to the collection.
- Signing Paperwork: The iPad has copies of any documentation I need clients to sign (like model releases) and an Apple Pencil makes it a breeze to get that done without worrying about printouts.
- Playing Music: Having music playing during a shoot is a great general tip for keeping up the energy, so my iPad finds itself doing double duty as a Spotify machine, beaming music to a portable Bluetooth speaker.
That doesn’t even come close to encompassing all the various communication, travel, and other logistical uses I find for it. But all of that is table stakes — useful but not interesting.
Taking it to the next level is where things get fun. iOS is rife with apps that can enhance a shoot and I want to briefly mention two compelling examples.
PhotoPills
The first is PhotoPills.
This popular app is designed to help photographers plan the perfect shot, most famously by letting you plot the trajectories of the sun, moon, and stars across the sky and giving you the tools to find out when and where you need to be to get everything lined up exactly the way you imagined.
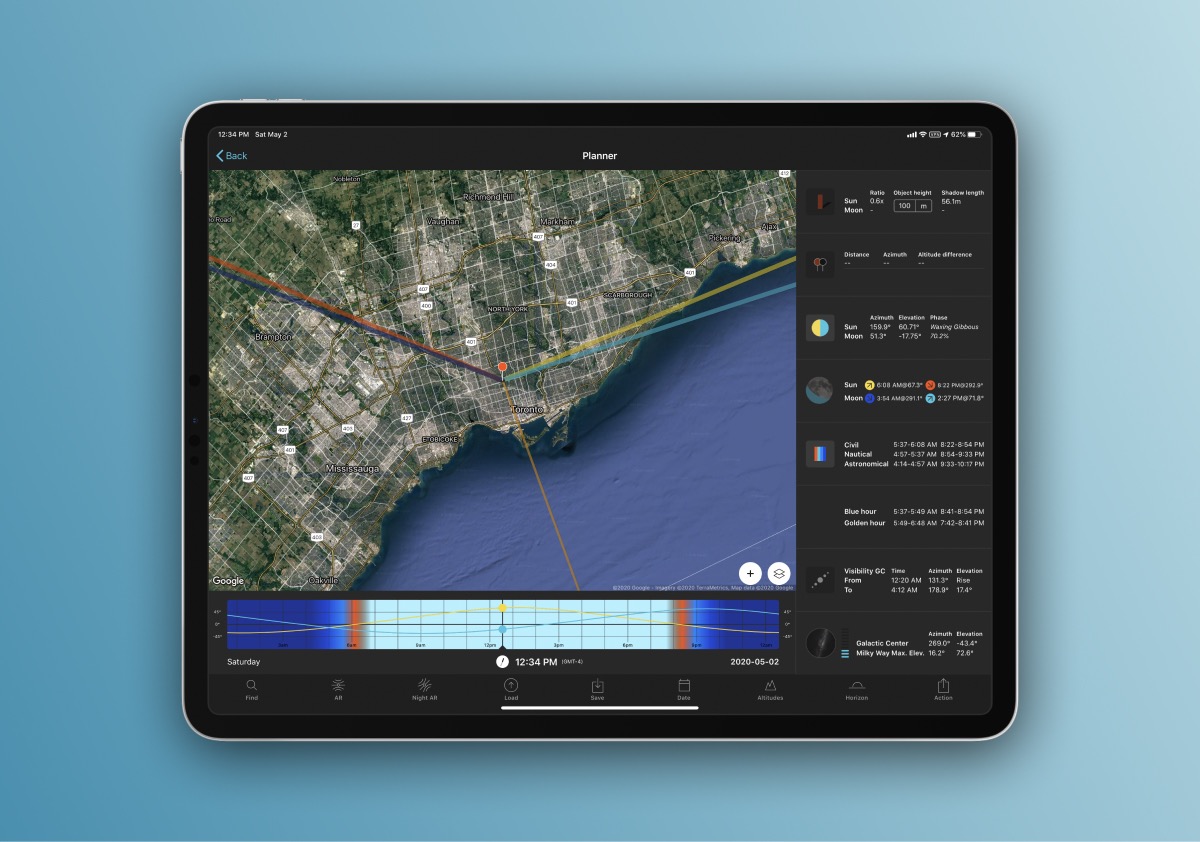
A robust AR view keeps the process feeling intuitive and futuristic, and the app includes a number of calculators to help you nail the right settings for stars, find your hyper-focal distance, choose the right time lapse interval, and more.
Beyond that, PhotoPills also features a thorough library of over 10,000 points of interest, specifically curated for photographers. This comes in handy in conjunction with Instagram’s Explore tab for finding location inspiration, especially while traveling to a new place.
Cascable
The second app I use during shooting is one that we’ll be returning to later in this guide as well. It’s called Cascable, and it’s a powerful toolkit for wirelessly connecting to and controlling a wide range of cameras.
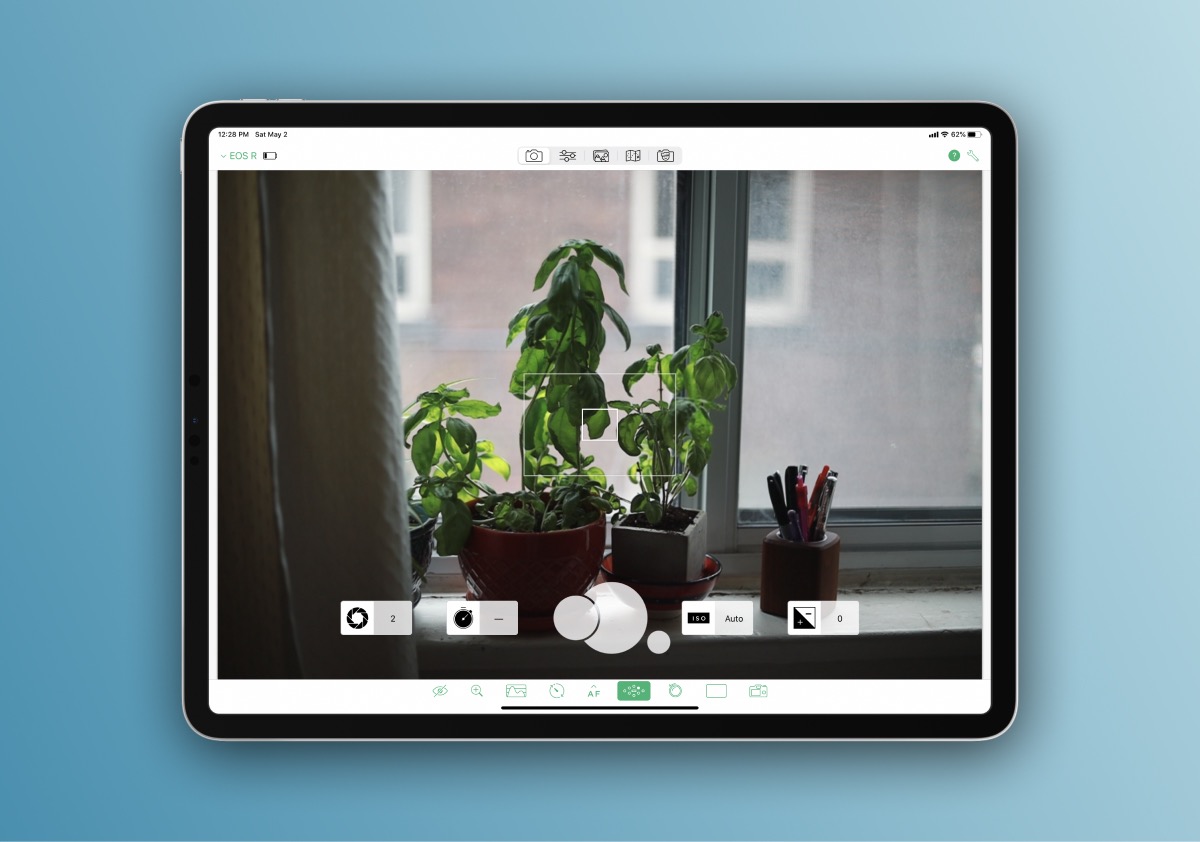
Once you’ve connected to your camera using its onboard Wi-Fi, Cascable takes over and gives you a remote live view, with control over exposure settings, shutter release, etc. with touch-to-focus and useful display augmentations.
The exact capabilities vary by camera, but this degree of control has advantages both in the field and in the studio.
In the studio, Photo Review turns this into something resembling a classic tethering solution, albeit one that’s slower. Better still, you can beam the image view to a nearby TV via AirPlay for a larger preview.
In the field, the real power comes from the Shutter Robot feature. This automation tool has four modules:
- Self Timer
- Bulb Timer
- Intervalometer
- Exposure Bracketing
Each allows you to set up, trigger, and review results for each of these common shooting tasks.
Cascable and PhotoPills are perfect examples of how an iPad can be a useful companion in the pre-production and execution phases of a shoot, but the real question — and the area where iOS devices have traditionally struggled to keep up with a professional workflow — is what happens next.
Importing Camera Photos on an iPad
Whether I’m traveling or shooting at home, I end up with one or more SD cards full of raw (and sometimes JPG) images. The iPad is a perfect tool for working with those shots, but first I have to get them onto the tablet in the first place.
There are four main approaches to this:
- Using one of the official Apple Camera Adapter dongles to import photos directly from my camera and/or SD card either over Lightning or USB, depending on iPad model.
- Using the apps provided by the camera manufacturer to import the photos wirelessly.
- Using Cascable to import the photos wirelessly or via a USB connection.
- Using an SD-equipped portable drive to access the photos.
There are benefits and drawbacks to each approach, so let’s examine them in turn.
Using the Apple Camera Adapters
We live in an age of dongles and even this corner of dongle life presents an opportunity for confusion.
Apple currently sells not one, not two, but three relevant adapter products. Six if we include the USB-C variants you’ll need to use if you have a 2018 or 2020 iPad Pro.
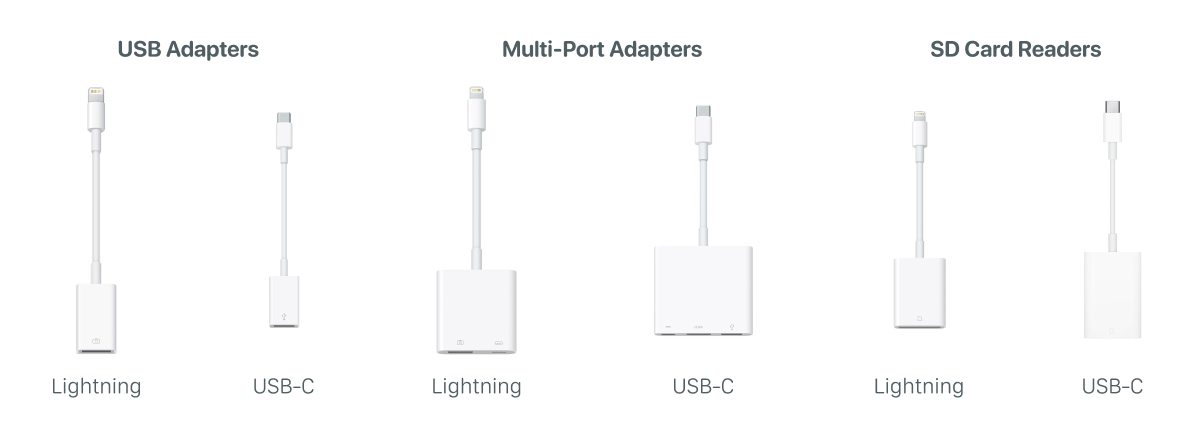
The first is the Lightning to USB Camera Adapter, a simple thing that offers a familiar USB-A port and nothing else. You plug a USB cable in, hook the other end up to your camera, and import away. Use the USB-C to USB Adapter instead if you’re on one of the newer iPad Pros.
The second option is the Lightning to USB-3 Camera Adapter. As the name suggests, the key difference with this one is that the USB port supports USB-3 transfer speeds, allowing for much quicker importing (from devices that support USB-3).
This dongle also has a separate Lightning port so you can keep a charger connected while you use it, and while it has “Camera Adapter” in the name, it’s actually much more versatile. This is the dongle to use if you’re connecting USB hubs, external sound cards, or other peripherals.
Newer iPad Pro users should opt for the similar USB-C AV Multiport Adapter instead if they need the extra ports, but can otherwise stick to the USB-C to USB Adapter as it already supports the faster transfer speeds.
The final option is the Lightning to SD Card Camera Reader. This slim dongle accepts standard-sized SD cards and pulls photos straight off them. Again, those of you who use the newer iPad Pros should make sure to get the USB-C to SD Card Reader instead.
So which one should you pick? My recommendation (and personal choice) is the Lightning to SD Card Camera Reader or USB-C to SD Card Reader for USB-C iPad Pros.
That being said, if you’re lucky enough to own one of those newer iPad Pros with a USB-C port, you don’t have to buy the official Apple adapter — any USB-C card reader should work.
I own the USB-C to USB Adapter as well, but I mostly keep it at home for use when I’m podcasting (for connecting my audio equipment).
Using the Manufacturer-Specific Apps
This is my least favorite option on the list, mostly because every camera connection app I’ve tried — from Fujifilm, Olympus, Canon, etc. — has been pretty bad.
Even setting aside the often-abysmal design, these apps tend to be slow and have all sorts of bewildering limitations. Most egregiously, some don’t allow the import of raw files from your camera, which is a complete non-starter for the way many photographers work.
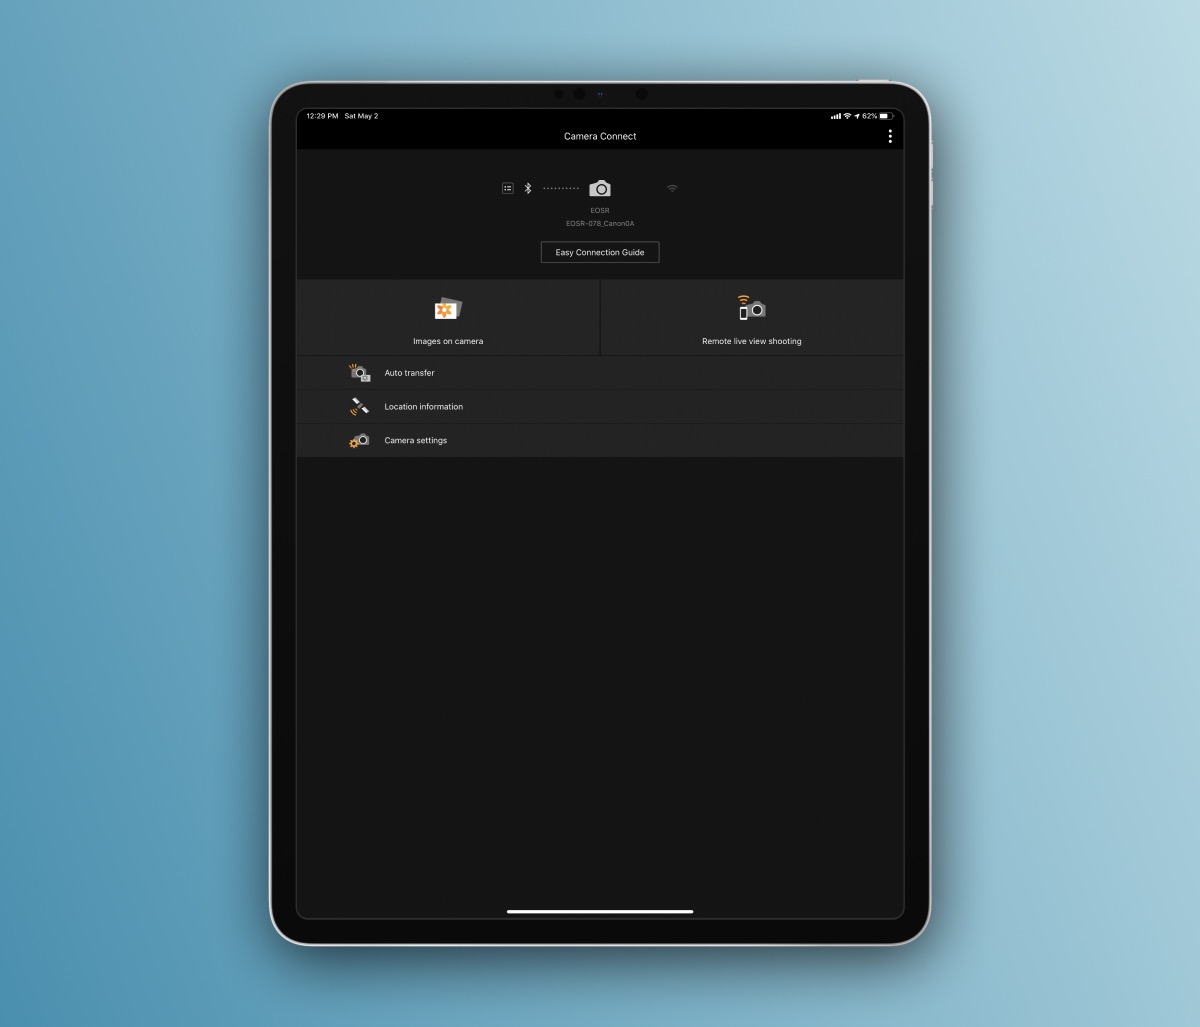
As of this moment, only Olympus and Canon offer the ability to wirelessly import raw files through their respective apps.
However, the apps do work as long as you keep your expectations basic. They can beam JPGs to your iPad and most also have a remote live view system like Cascable’s. Many have begun to make use of Bluetooth connections as well to simplify pairing, or to send GPS location data from your phone to your camera while using less power.
The lack of raw support and slow speeds (Sony is a notable exception to this rule — their app transfers JPGs over very quickly) preclude me from using this option if I can avoid it.
Using Cascable to Import Wirelessly or via USB
The other side of Cascable’s value proposition is that it can use its connection to import photos from your camera to the iPad in whatever format you want: raw, JPG, or both.
As of its major version 5 update, Cascable also supports direct USB connections for faster transfers, and an overhauled automatic import feature.
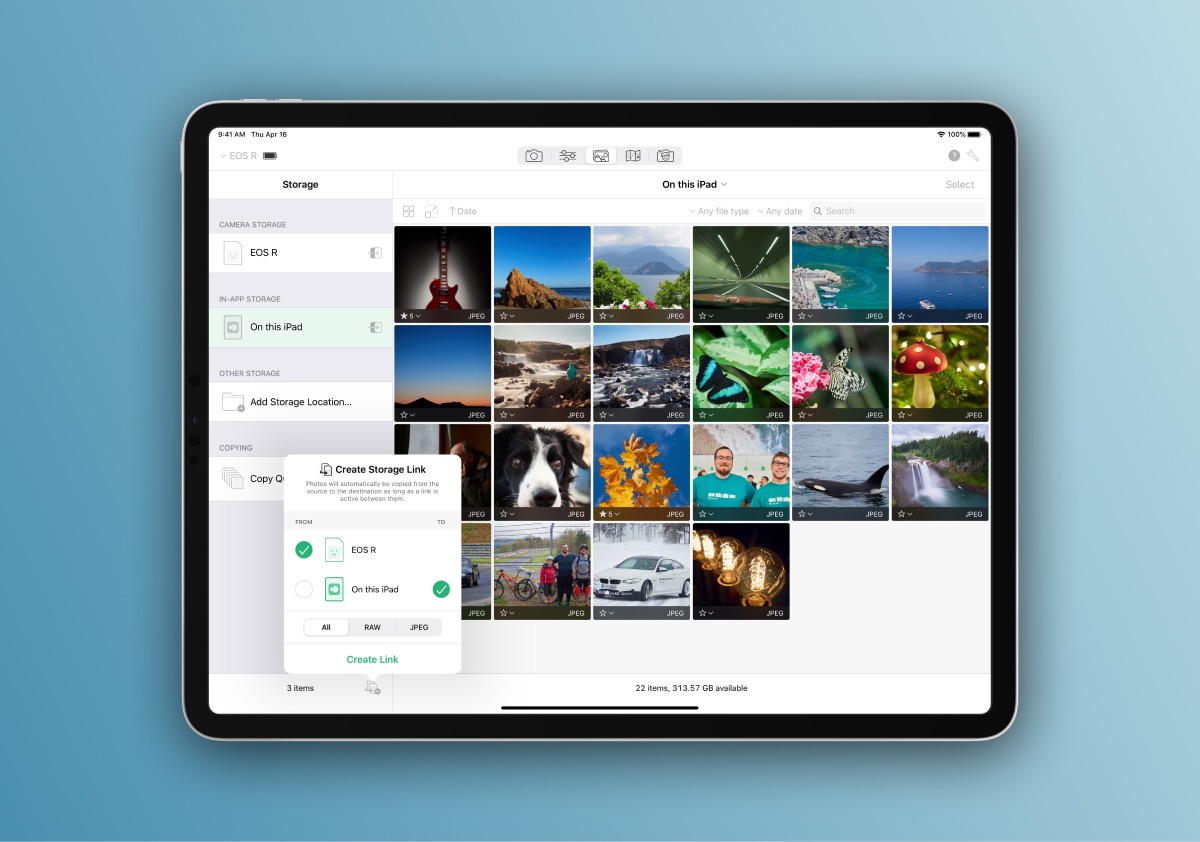
These new “Storage Links” are like recipes for what kinds of image files to pull off of your connected camera (raw only, JPG only, or both). You can also specify what storage destination should be used (including connected external drives), and storage links are camera-specific so you can have totally different ones set up for different cameras if you like.
Supporting raw transfer immediately makes it my favorite wireless option. Even still, I use it for JPGs too because — at least for the cameras I use regularly — it is consistently faster than the manufacturer apps.
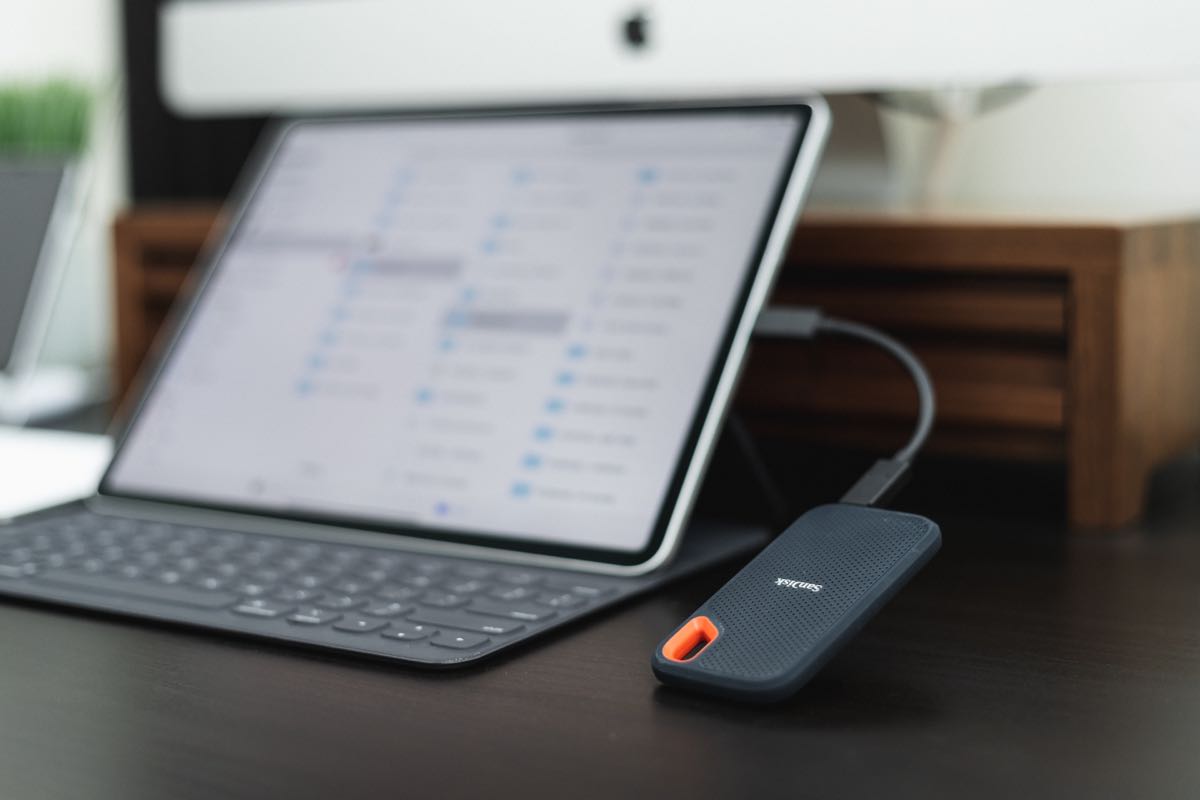
Using a Portable External Drive
This is the wildcard option.
It’s a little less portable and a little less convenient, but it has the crucial advantage of providing another layer of backup because the files can exist in three places: the SD card, the portable drive, and the iPad.
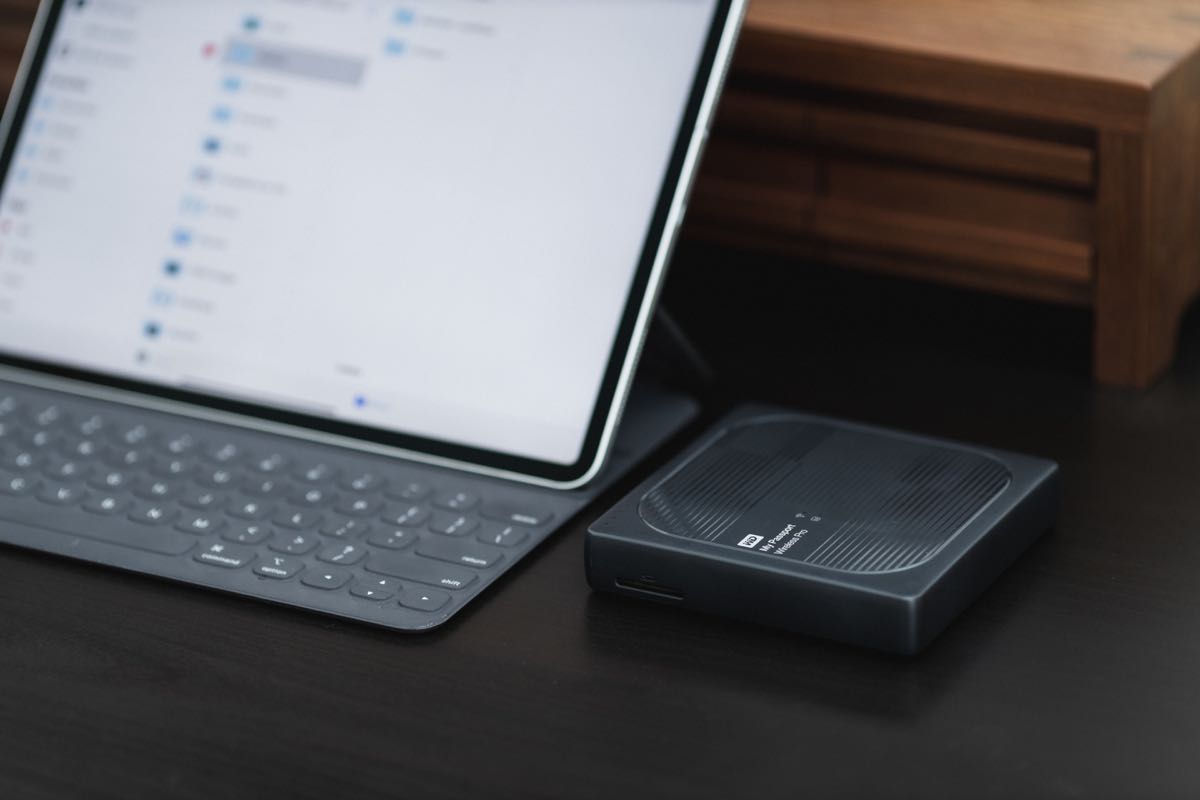
There have been a few portable drives with built-in SD card slots, but the one I own and have personal experience with is the Western Digital MyPassport Wireless Pro. I bought it for use while traveling and have now put it through its paces enough to confirm that it works extremely well as a portable data companion on the go.
I chose it because of the card slot, but also because it has a few additional tricks up its sleeve:
- USB-3 support for speedy data transfer.
- Dual-band 802.1ac Wi-Fi for streaming data to your devices.
- Internet pass-through, so you can connect the drive to the internet and your devices to the drive, using it as a sort of mobile router.
- Password-protected access.
- 10-hour battery life.
- Integrated 6,400 mAh power bank for charging other devices.
- Movie and TV show streaming so you can save space on your devices.
Needless to say, it’s a very cool peripheral.
Since I bought mine, Western Digital have released a new SSD model with improved durability and vastly improved speeds. Other manufacturers have also developed similar devices, including Lacie’s DJI Copilot, and the expensive but powerful Gnarbox.
Others still have taken the modular chassis approach, where you can put in your own drive instead of relying on an integrated one that can never be replaced. This is a promising solution for photographers who demand the utmost flexibility.
No matter what option you choose, the workflow is simple: you plug your SD card in and it automatically backs it up to the drive (no need to have your iPad around). Then, you can either import those files to Lightroom or your iCloud Photo Library from the disk by connecting it to your iPad, or you can access them directly from the drive via the Files app if you’re not interested in having them in an app-specific container.
I typically perform two separate imports for each card when I’m traveling: one to the drive as a backup and a second to the iPad via the USB-C to SD Card Reader for culling and editing on the go. In other words, I’m relying on the drive primarily as a backup, storing it separately from my used SD cards when I pack my gear.
Get Our Best Photography Tips & Workflows
Transform your photos and edits from average to awesome with our in-depth, mobile photography course. It’s jam-packed with training, ideas, and lessons that can literally transform your photography overnight.
Managing and Storing Photos
With the file handling restrictions relaxed, managing photos on the iPad is no longer as challenging as it once was. Regardless of what approach you take, photos can now be organized and managed with almost the same degree of freedom and fluidity as you’d have on a Mac.
The current landscape of photo management options on the iPad is dominated by a handful of key players:
- iCloud Photo Library
- Adobe Lightroom CC
- Google Photos
- Cloud and External Storage
As before, it’s worth examining each in more detail to understand which is the best fit for your needs.
iCloud Photo Library
The default choice is the right one for a lot of users. In fact, it remains our pick for the best cloud photo management solution.
iCloud Photo Library has come a long way since its inception, offering more robust editing tools, a reliable system for storing edits non-destructively (even if they come from third-party tools), and the unbeatable ubiquity of having access to all your photos no matter what device you’re on.
Other apps sync photos across devices. On iOS, it’s only iCloud Photo Library via Apple Photos that can do it seamlessly, in the background, no matter what — the perks of being a built-in app.
That’s a big advantage that no one else can touch.
It’s easy to get swept up in the geekery of using powerful third-party apps to edit and manage photos, so I just wanted to take a moment to dispel the notion that this is somehow necessary.
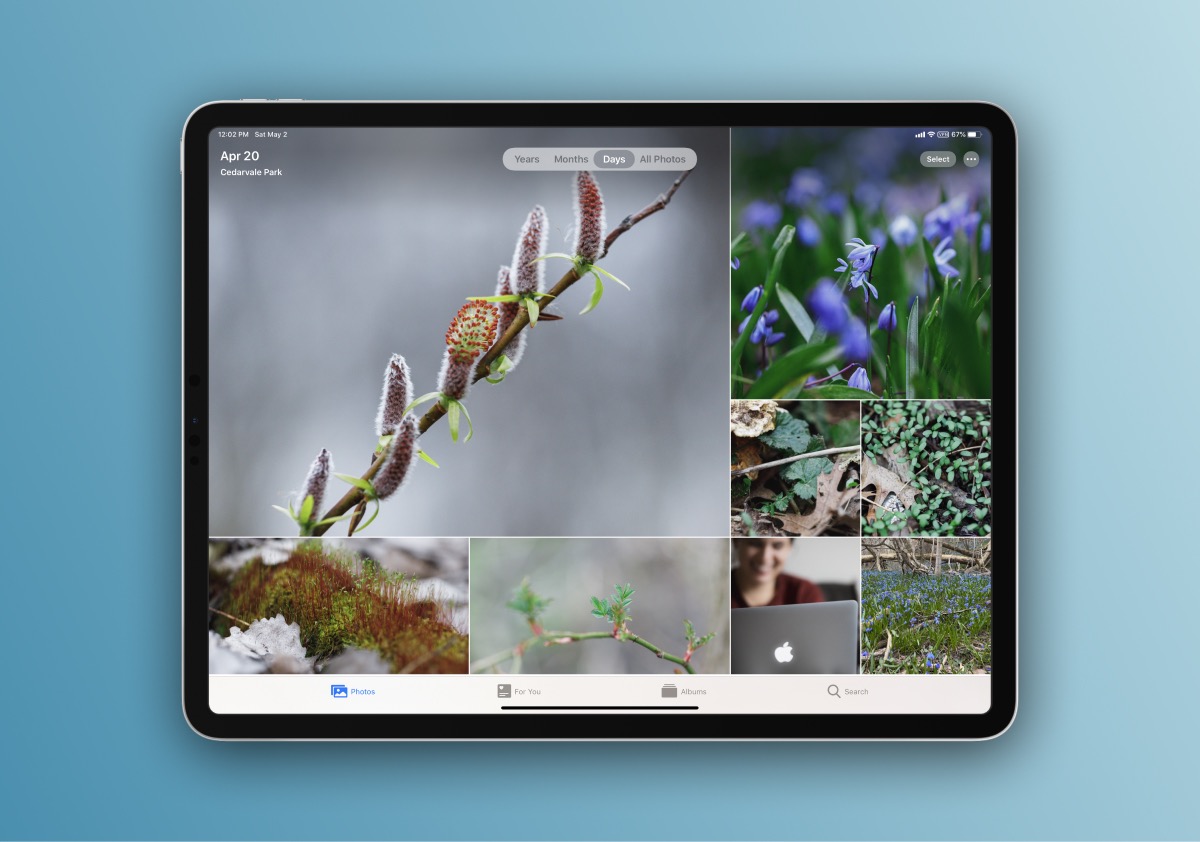
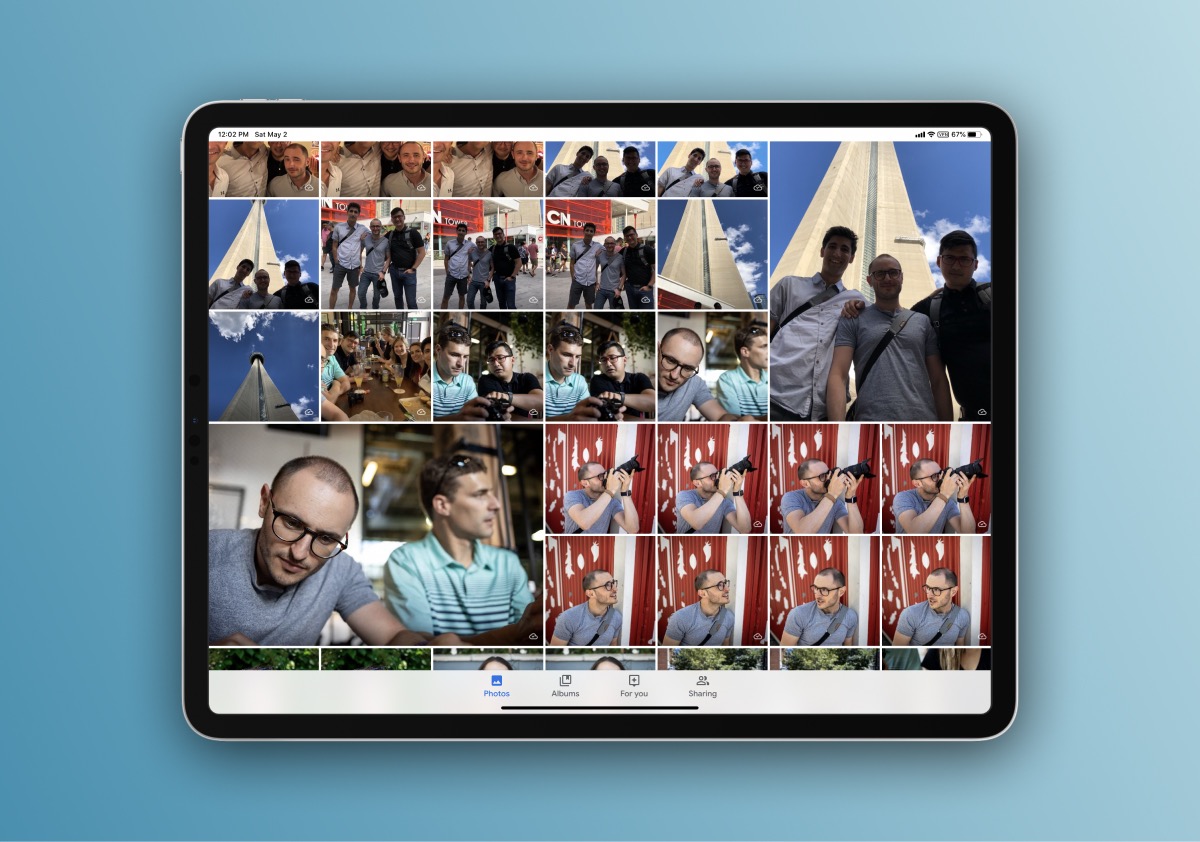
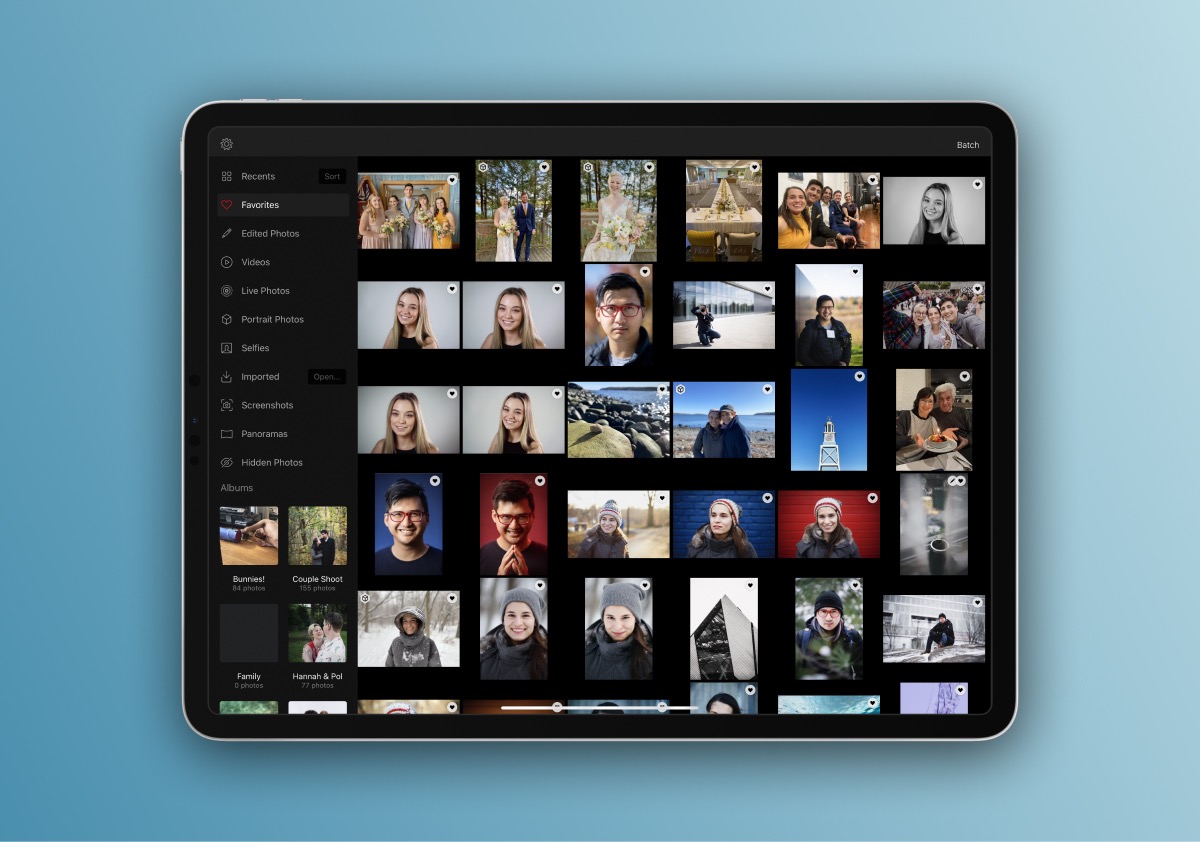
When you consider its wonderful new intelligent views and overhauled editing tools (that also work with videos!), Apple Photos begins to look like a complete solution that can fulfill the needs of many amateur and enthusiast photographers.
There are some caveats to keep in mind though.
Most important is the fact that you cannot edit raw files using just the Photos app. iCloud Photo Library will store and sync raw files, but it only allows access to the embedded JPG preview for editing within the app itself (you can easily edit raw files using third-party apps, as we’ll soon discuss). To make things more confusing, there’s no way to distinguish raw files from JPG files in the library in the Photos app on iOS — no icon, no label…nothing.
Needless to say, this is a huge drawback for any photographers expecting to avoid using additional apps.
Unfortunately, there are more problems too.
The “Optimize Storage” feature can be unpredictable and frustrating. What it’s supposed to do is keep the full-resolution versions of recent and favorited files saved locally, and selectively offload older files to the cloud, leaving only small previews on the device.
While ideal in theory, it’s too aggressive in practice, even if you have plenty of free space left on the device. I can’t count the number of times I’ve imported new photos, only to have them immediately offloaded to iCloud, requiring me to re-download them minutes later just to move them to another service or to show somebody.
As of iOS 13, it’s still not possible to specify which photos or albums should stay on the device. This general lack of transparency and control over the files means that you may be forced to eschew the “Optimize Storage” option and keep all your photos saved locally. This gets you around that problem, but introduces a new one: you have to have enough storage space on your iPad to hold your entire Photos library — not a practical choice for those of us with larger libraries.
All that being said, if you’re mainly dealing with JPG files or you’re fine to use a third-party app for editing your raw files, then iCloud Photo Library’s problems are easily dismissed.
Adobe Lightroom CC
The only option designed specifically for professional photographers, Lightroom has evolved into quite a powerful ecosystem of apps.
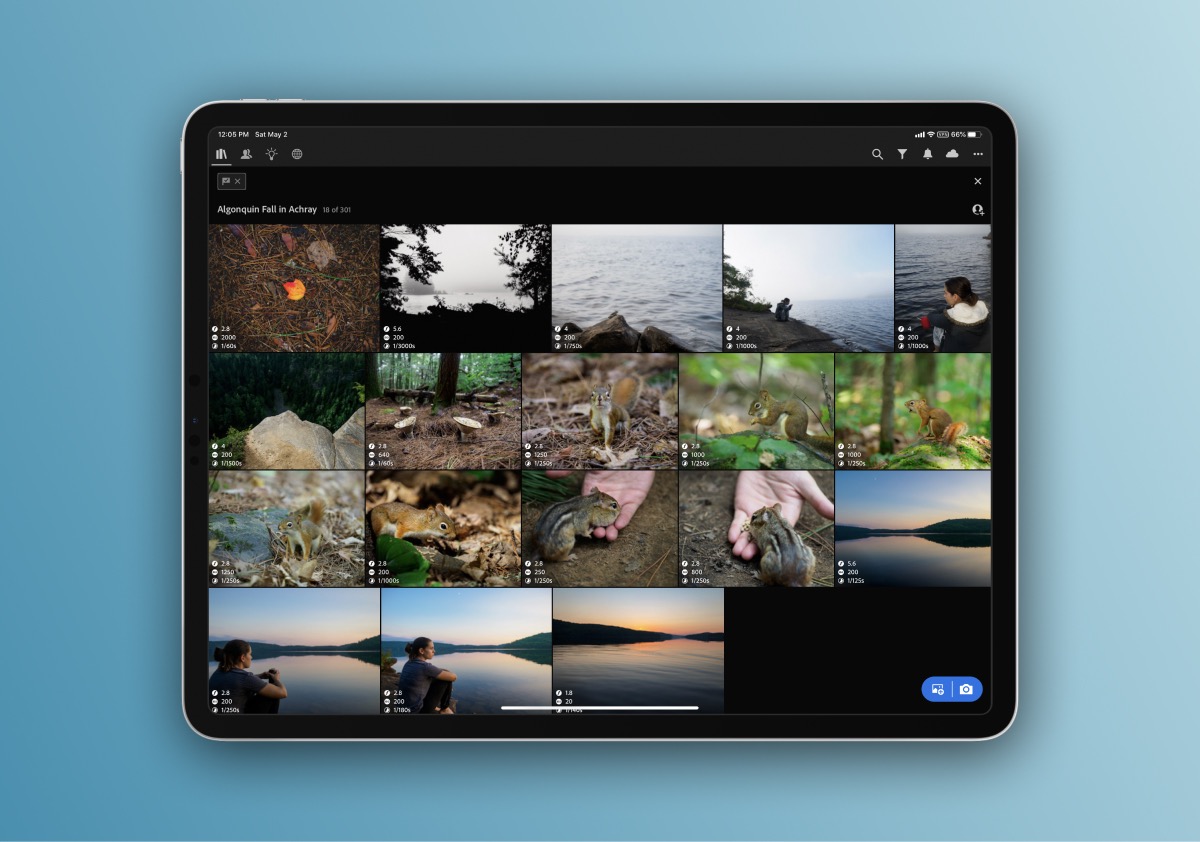
On iOS, Lightroom now allows direct importing of photos, and it handles the full range of file formats and editing tools that its desktop counterpart does (note that the desktop app I’m referring to here is Lightroom CC, not Lightroom Classic).
You can flag and rate photos, create folders and albums, use the AI-powered Sensei capabilities for search and face recognition, and decide per-album whether you want to keep a local copy of the full-resolution files or just lower resolution Smart Previews.
All of this syncs seamlessly to the desktop versions of Lightroom (CC or Classic), beaming your original raw files to the cloud for safekeeping and easy access from any of your devices.
Google Photos
One of the most popular alternatives to iCloud Photo Library is Google Photos.
Google has put the full brunt of its vast computational intelligence behind their Photos product, allowing it to provide natural language searching, automatic edits, sharing recommendations, and more.
Like all other third-party apps, it has limited background uploading capabilities, so it can be a bit of a hassle to get an initial sync completed. Smaller incremental syncing generally happens without issue, though.
As far as raw files are concerned, Google Photos is similar to iCloud Photo Library: it will sync them, but you need to use a different app to edit. The difference is that Google supports raw files from far fewer cameras than Apple does, unless you convert the files into Adobe’s platform-agnostic DNG raw format. That’s great to know, but since there’s no practical way to convert files to DNG on an iPad, it leaves those of us with unsupported cameras behind.
Google Photos is more of a consumer-oriented choice, ideal for those who aren’t keen on manual organization. It provides intelligent automation to help you sort through your shots, plus the world’s most capable search to make sure you can always find the image you’re looking for.
It also has a special trick up its sleeve: Google has introduced the ability to share your library with a spouse or family member. This ability to maintain a shared library has been a feature frequently requested of Apple too, and while it isn’t yet possible to do with iCloud Photo Library, they now have a great implementation to look to for inspiration.
Cloud & External Storage
As the iOS and iPadOS Files app continues to improve, it’s opened up a new possibility for file management that replicates the very oldest approach: files on disk.
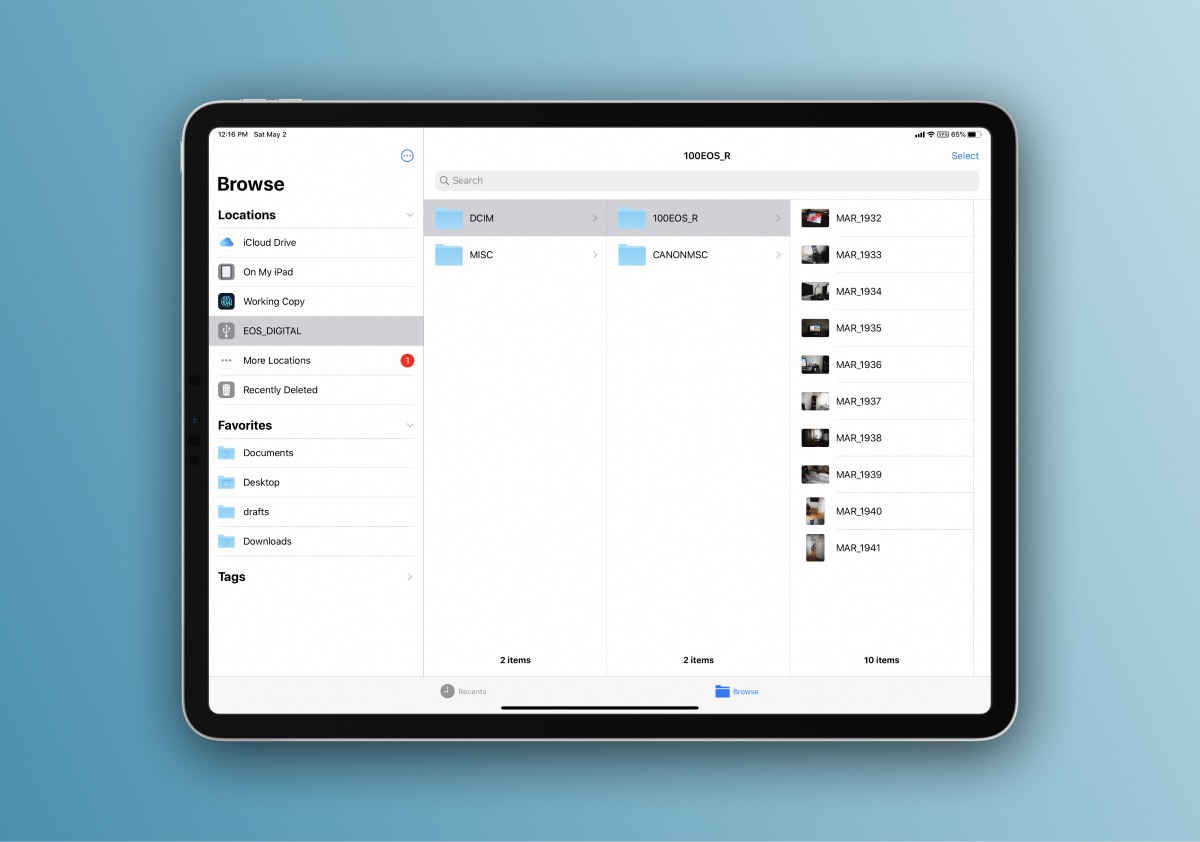
With the ability to access SD cards and other external storage locations directly from within the Files app, you can bypass photo-specific apps for organization and simply manage the raw and JPG files themselves.
These files can live on your iPad’s local storage, on a different external drive that you connect, or in any connected cloud storage provider’s sandbox.
For example, you could pull files off of your SD card and funnel them directly into a Year-Month folder structure in Dropbox, iCloud, or any other storage location in Files. If it’s a cloud storage solution, they’ll be uploaded to the respective cloud.
Managing photos used to be the single most onerous part of using an iPad for photography. It’s a relief to see that the roadblocks have been effectively removed.
What we’re left with is an import and file management experience that’s either similar to what you would get on a Mac, or effectively identical if you’re a Lightroom user.
This alone will open the door to iPad use for a tremendous number of photographers who have been waiting in the wings for an opportunity to jump in.
Editing Photos
In my mind, there are two main approaches to editing photos. The first, and probably the most common for iPad and mobile users, is editing by using filters.
Filters are effectively development presets, many of which seek to emulate the look of a classic analog film stock, or a popular movie color grade. They’re a fun and quick way to get a photo looking presentable with minimal effort, and honestly that’s often all it takes for casual use.
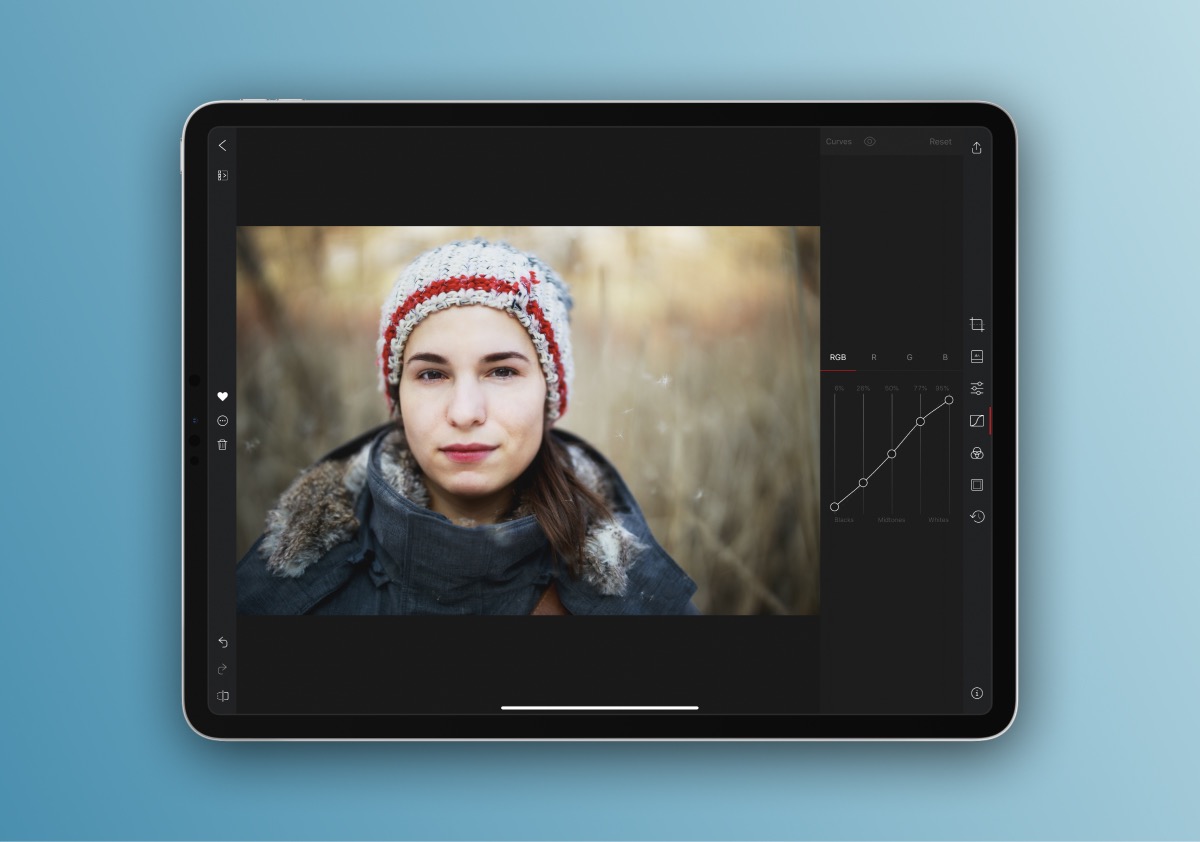
The second editing approach involves getting your hands dirty. Curves, sliders, HSL toning, selective adjustments…the full spectrum of high-end photo editing tools is available for iPad users, and the tactile experience of editing — especially with an Apple Pencil — is often preferable to the desktop equivalent.
This category features an immense variety of apps (including the native Photos app) that tackle either editing approach, but I’ll focus on the handful that I use and trust.
Basic Editing Using Filter Apps
When I’m not interested in detailed manual editing, or I just want to quickly experiment with different looks, there are two main apps I turn to: VSCO and Pixelmator Photo.
VSCO is a well-known camera and filter app, and the iPad version provides an expansive canvas for working on photos. I’m lukewarm on most of the original filters, but I’ve been enjoying the VSCO X subscription that unlocks new, more customizable filters, all of which have been extremely satisfying to use.
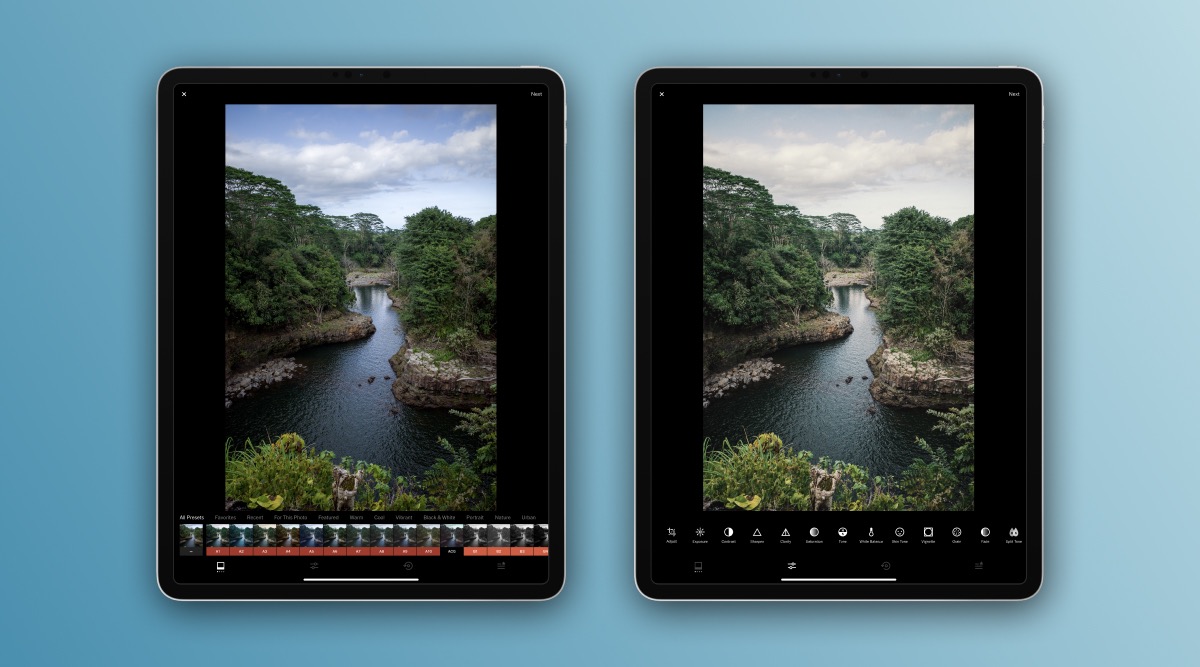
VSCO’s main downside remains its interface (it’s icon-heavy to the point of obscurity) and its workflow, which requires importing shots into the app’s storage container before editing, and then exporting them back out once you’re done.
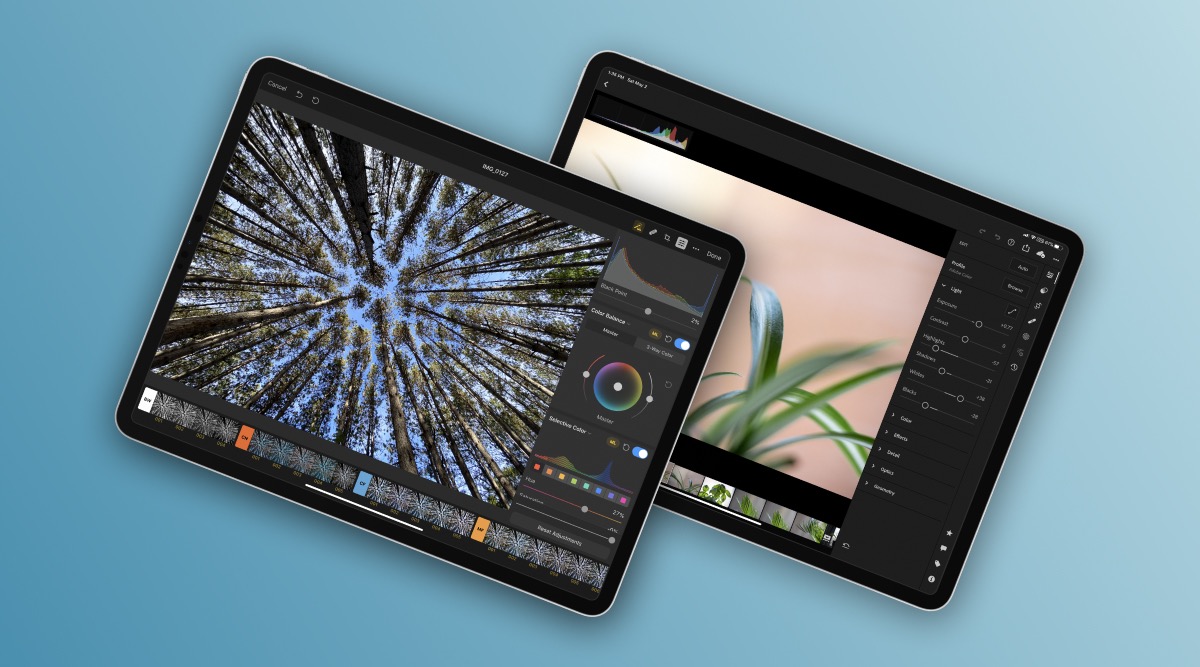
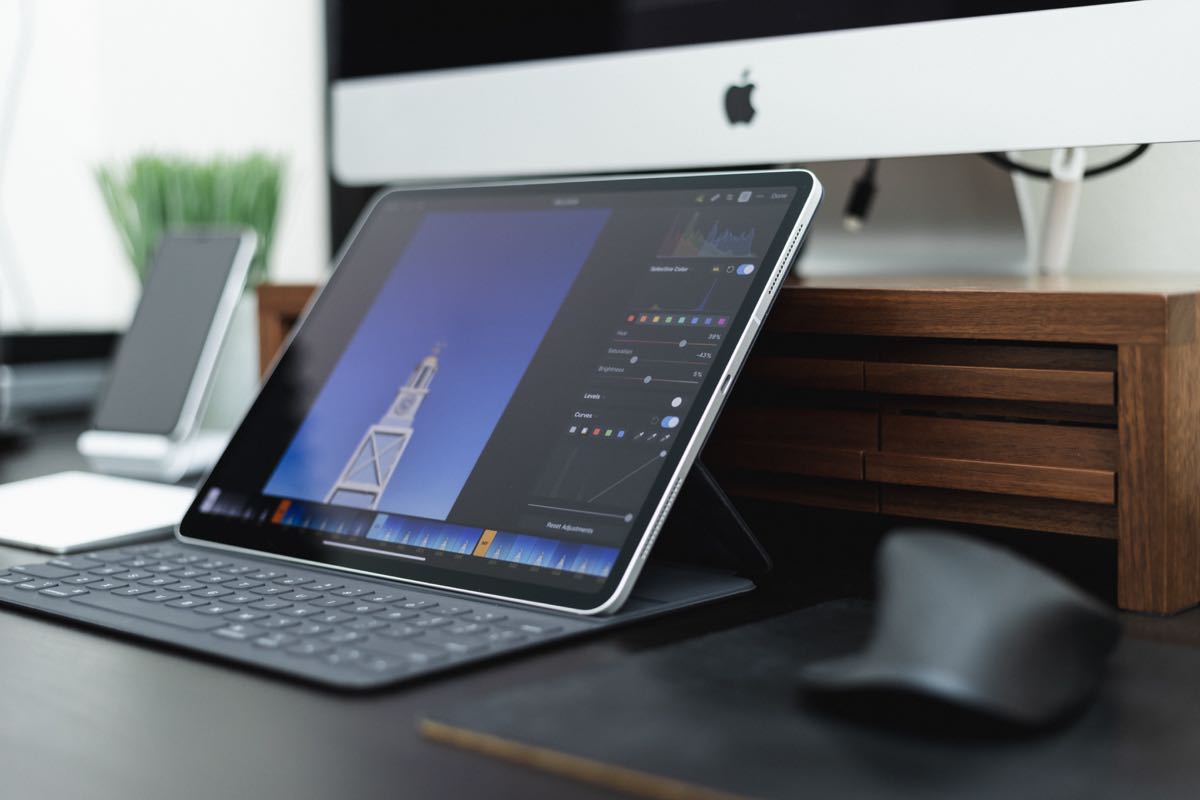
Pixelmator Photo is a bit of an oddball. While it does have excellent filters, it’s not technically a filter-oriented app. In fact, it’s quite the opposite: a richly capable editing environment with professional tools and editing automation powered by Machine Learning.
It’s these ML-based capabilities that I find most compelling. You can use them to get a head start on matching the look of your photo to a reference, or simply to have the app intelligently analyze your photo and apply tasteful automated edits as a starting point. This can either be accomplished from a series of ML-enhanced filters, or you can selectively toggle an ML-calculated starting point for each adjustment module in the app for a more granular approach.
![]()
What appeals to me is the restraint that Pixelmator shows.
I wouldn’t have been surprised if the app applied its smarts in a heavy-handed way for effect, but it’s often quite subtle and I haven’t yet run into a situation where I thought the results were garish.
Advanced Editing
When the time comes to do some serious editing work, I turn to Darkroom, Lightroom Mobile, Affinity Photo, and — most recently — Photoshop.
Darkroom, our favorite editing app for iOS, tends to be a go-to for me when it comes to editing any shots I’ve taken on my iPhone. I like the immediacy of its workflow, allowing me to access my iCloud Photos directly without the need to import anything.
Alongside its own set of filters, it has a full suite of core editing tools, including curves, HSL, exposure and contrast adjustments, grain, sharpening, and a sophisticated way to handle photos shot using portrait mode that have depth information embedded.
Furthermore, its export options include features for copying hashtag sets for Instagram, putting your photos into adjustable frames, and even watermarking them. You also have a proper bulk editing workflow for applying an edit across multiple photos at once, something that’s sadly not possible when you’re editing in Apple Photos.
Recently, Darkroom launched an update that unlocks the use of all its tools for video files as well, instantly transforming it into a powerful color grading app with real-time processing and previewing.
As good as Darkroom is, when it comes time to edit photos from my camera, I almost always turn to Lightroom. Lightroom’s library is where all my camera photos live, and the editing capabilities are sophisticated and familiar to me after years of use.
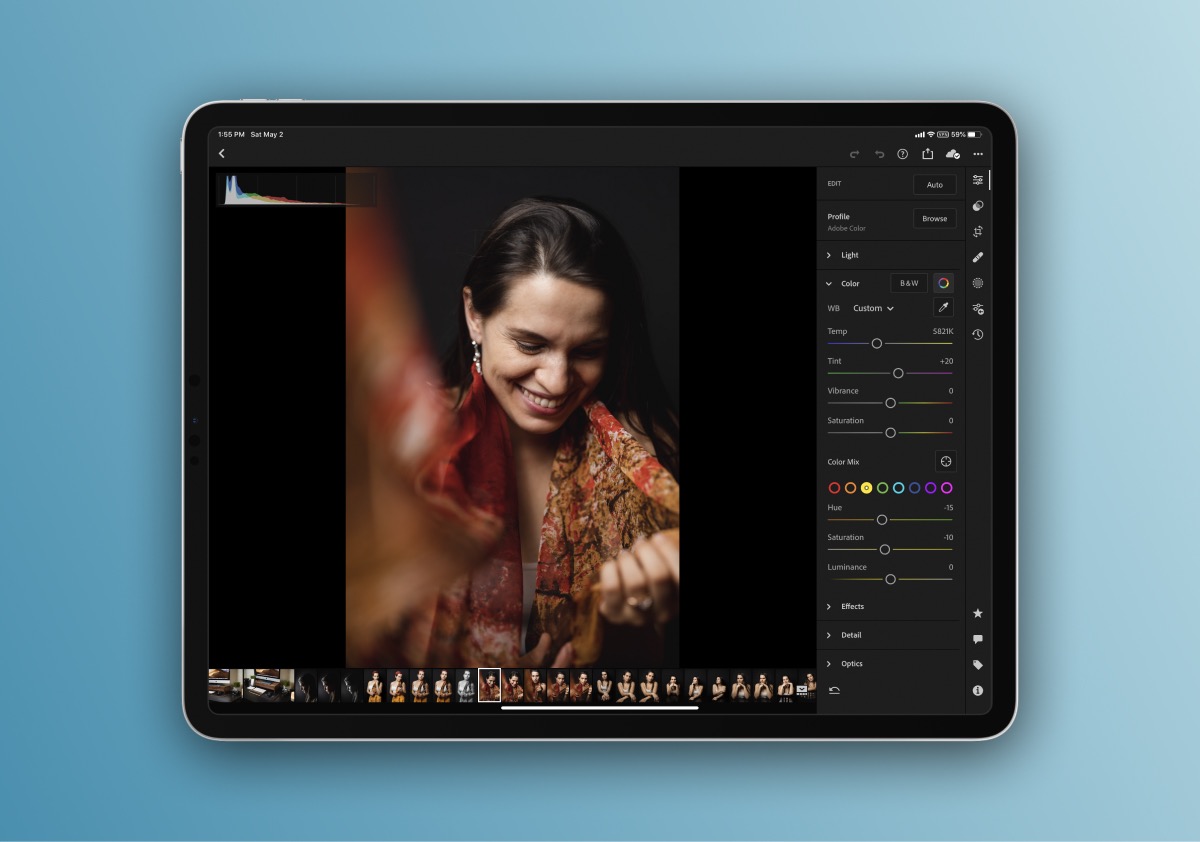
Lightroom also has the benefit of syncing my desktop preset library, meaning I have access to all my personal and commercial presets no matter what platform I choose to edit from.
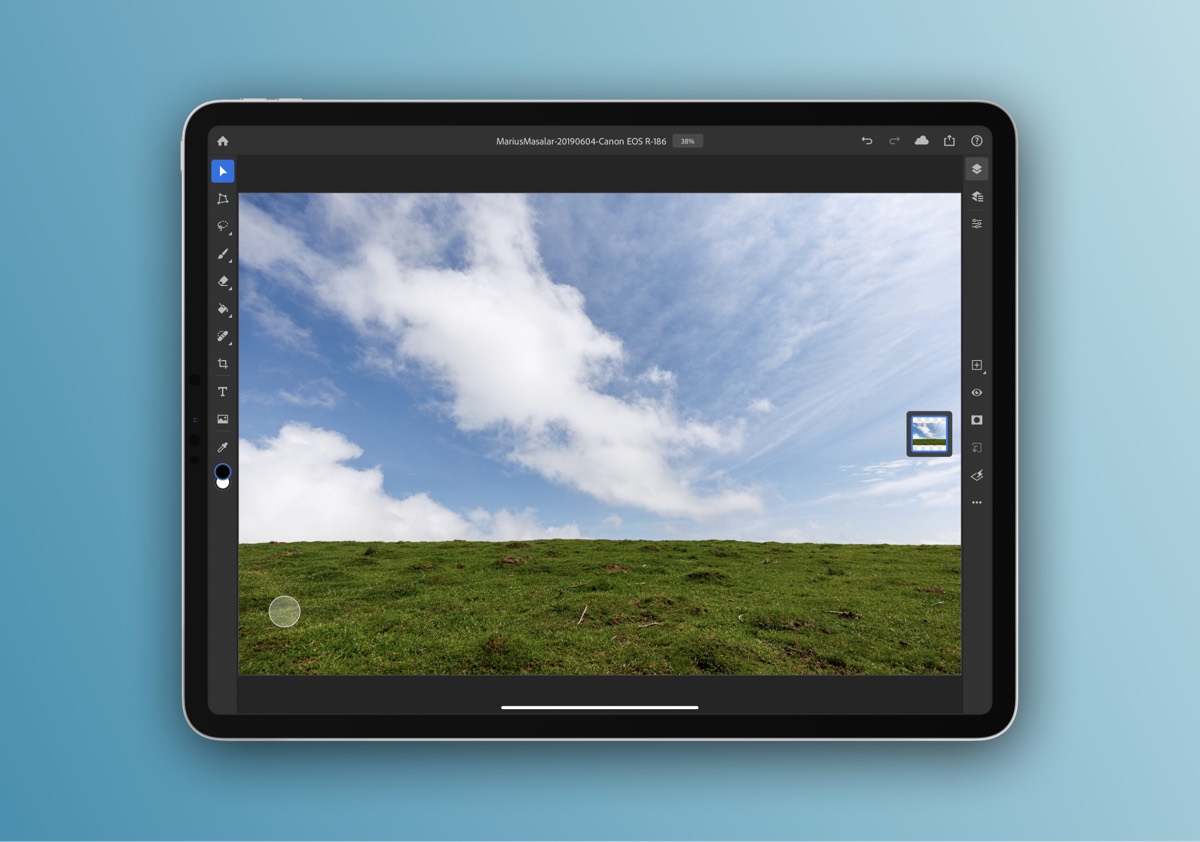
The others — Photoshop and Affinity Photo — come into play more sporadically. In the case of Photoshop and Affinity Photo (close competitors in many ways), I turn to them mainly when I intend to manipulate a photo more extensively (cloning objects out, HDR or focus stacking, panorama merging, etc.) or when I need to create some sort of composite or combo layout.
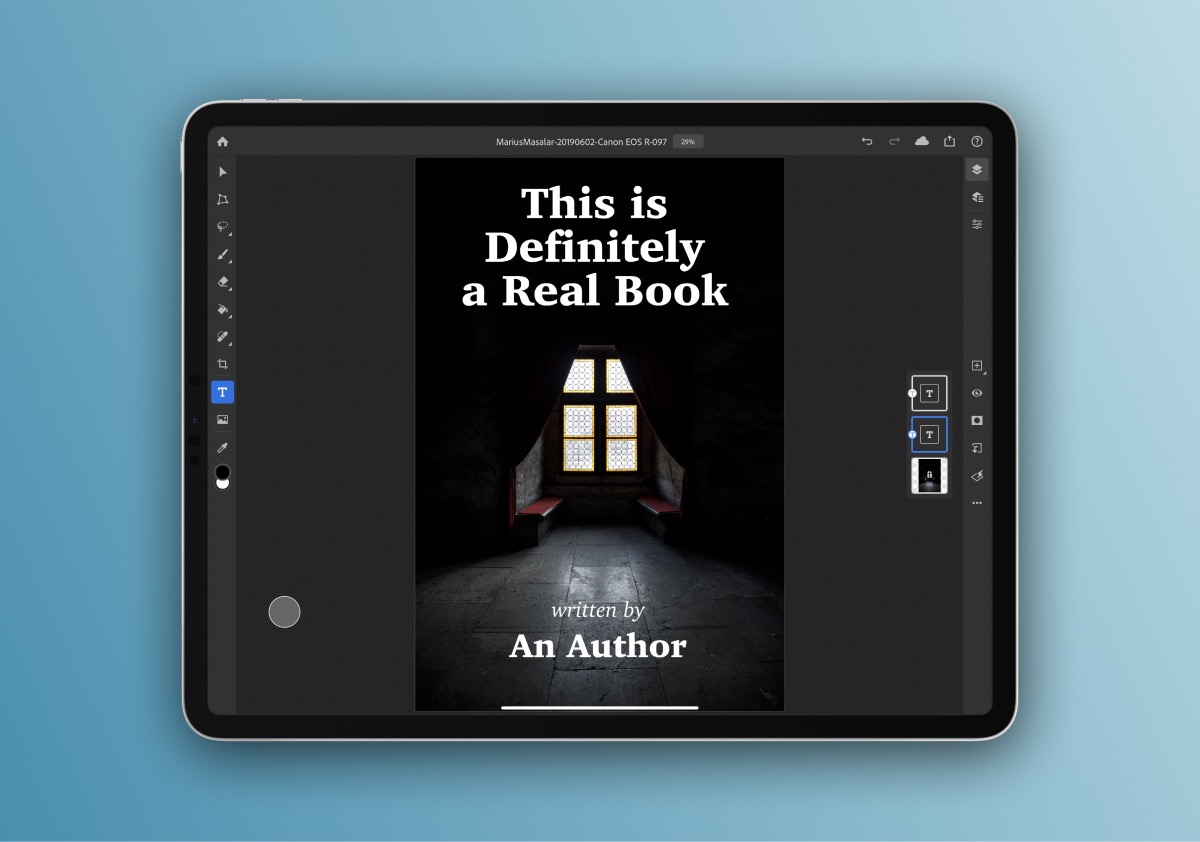
It’s worth noting that Adobe’s plans for Photoshop on the iPad are ambitious, and before long we’ll have a full round trip workflow between Lightroom and Photoshop just as we do on the desktop. This means that, eventually, even the most sophisticated retouching workflows will be possible on the iPad, and may even be superior to their desktop equivalents thanks to the immediacy of the Apple Pencil.
We’re not quite there yet, but the future is bright.
All the apps I mentioned above support editing of raw files, a crucial criterion for my usage, but if that’s not important to you then there are many more apps — including the likes of Polarr and Afterlight — that are worth a look.
Saving and Sharing
The final piece in the iPad photo workflow puzzle is taking our edited shots and delivering them to their final destination, whether that be a social network, a client, or back to our storage system of choice.
All of the editing apps above make it simple to export your finished work back to wherever it came from, either as a copy or as a new version of the original file.
As far as social networks are concerned, most have their own apps to facilitate posting, and while it used to be the case that there was no direct way to publish photos to Instagram from an iPad, that’s no longer the case.
Instagram updated their website to allow uploading from mobile devices, including iPads. The full posting flow is available, including for Instagram Stories, and if you pin the website to your home screen (like you’d do with any other Safari shortcut), it’s almost like having an Instagram app.
It sounds like a small thing, but photographers used to employ all sorts of wacky workarounds, like putting files into iCloud/Dropbox/etc. and retrieving them from their phones to post.
All of that is, thankfully, behind us now.
What’s Missing
As we’ve now seen, it’s possible to accomplish all of the core tasks in a photographer’s workflow on an iPad.
The question is whether or not doing so is worth the difference in interaction and experience, and it also begs the question of what gets left behind in the transition.
For me, the downsides of an iPad-first workflow boil down to the following:
- No Proper Tethering Solution: Tethered shooting is an essential part of many studio photographers’ workflows, particularly when on set with clients. While there are several solutions involving a laptop, and basic workarounds through apps like Cascable, there’s no true tethered shooting solution available for iPadOS yet.
- Professional Print Output is Impossible: There’s no way to properly prepare files for printing — no ICC profiles, no soft proofing, etc. Print is probably my favorite outcome for the photos I take these days, so the inability to get from panel to paper in a serious way is unfortunate.
- Better External Display Support: Though we’ve had the ability to simply mirror our iPad screen to an external display for years, iOS 13 brought with it a basic level of support for using an external display as a true separate screen. Unfortunately, the implementation is very basic and most apps don’t offer any control over what gets displayed or how. Now that the Magic Keyboard and cursor support so elegantly transform the iPad into a docked desktop-like computing experience, the external display support needs to improve as well to complete the picture.
- We Need More Professional Apps: I’m a big fan of all the apps mentioned above, but the ecosystem needs more competition at the very top. I want to see Capture One’s raw processing, DxO’s de-noising, Aurora’s HDR processing, and Luminar’s AI-powered skin retouching on my iPad as soon as possible.
Are these limitations enough to stop me using an iPad? Of course not. Only a couple of years ago, the list was much longer.
Conclusions
The iPad is a unique workspace for editing photos.
It takes the tactile immediacy of something like a Cintiq tablet and unshackles it from a desktop editing environment. You can directly manipulate items on screen, make precise adjustments with the Apple Pencil, and do it all from the comfort of your couch, the seat of an airplane on the way to your next shoot, or wherever life takes you.
With the advent of cursor support and external display connectivity, you can also choose to use it as the center of a desktop-like setup that happens to run iOS instead of macOS. And — crucially — you can switch between that desktop-like setup and a fully portable one at a moment’s notice.
This flexibility is the key to the iPad’s appeal.
If you don’t need the modularity of the iPad’s approach to computing, then there’s no reason to switch from a more traditional approach that’s working fine for you. The advantage will be felt most keenly by photographers who need to stay mobile, for whom a compact and long-lasting device like the iPad can serve as a nimble but capable companion for work and play.
Of course, the Surface Pro is a pen-enabled tablet too, and it runs all the top-end software out there. But the iPad benefits from its limitations — iOS and its apps were designed from the ground up to fit a modern, mobile lifestyle. Mobility and efficiency is in its DNA. It wasn’t retrofitted to a platform designed for the computing paradigms of yesteryear.
The pace of improvement, especially in the past year, leaves me feeling very confident about the future of the iPad in a professional photography context.
Get Our Best Photography Tips & Workflows
Transform your photos and edits from average to awesome with our in-depth, mobile photography course. It’s jam-packed with training, ideas, and lessons that can literally transform your photography overnight.