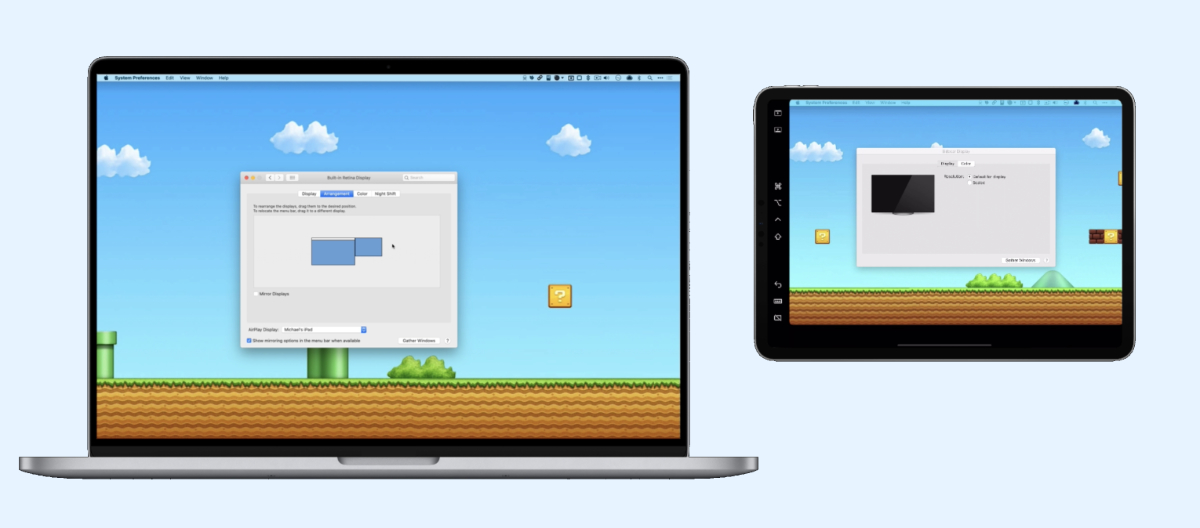
Best App for Using Your iPad as a Second Monitor or External Display
Sidecar
The iPad is an incredible device in itself, but it can also offer Mac users a portable option as a second display.
Eight years ago, when my oldest daughter was born, I spent 20 weeks across Canada working and visiting family. I reluctantly gave up my dual monitor setup and spent time trying to figure out how I could use my brand new iPad 2 as a display with my 13″ MacBook Pro. At that point, I used Air Display with my iPad to get a dual monitor experience while working. While it worked, it wasn’t amazing.
Luckily, we’ve come a long way with many decent contenders for making your iPad an external monitor for your Mac.

In fact, we’ve come so far in this category that Apple now offers its own, built-in option for using the iPad as an external display for your Mac. Sidecar is a new feature inside macOS Catalina that is easily implemented, easily used, and even expands the functionality of your Mac beyond mere screen real estate.
Get Started with Sidecar…
VIDEO TUTORIAL: How to Setup Sidecar
Learn how to make the most of the second monitor you already have. Give your productivity a boost whether working from home or on the go.
We’ll show you…
- An Overview of Sidecar Settings on the Mac
- How to Position your Sidecar Display Correctly
- Walkthrough of Sidecar Features on the iPad
We’re grateful for such an easy-to-use feature built right into macOS, but there are a few consequences.
For one, a sherlocked feature enables more folks to expand their capabilities with a Mac and iPad, but it also results in a third-party app developer competing against Apple. In many cases, this results in an abandonment of the third-party app entirely.
Second, because of the size of Apple as a company, it’s often the case that a sherlocked feature only slowly grows in functionality. Third-party developers are generally much better at pushing features closer to the bleeding edge than Apple is.
As a result, we’ve had to name two separate app choices in the category of using your iPad as external display. We know many folks are avoiding macOS Catalina entirely, as the latest operating system from Apple breaks functionality for 32-bit apps and utilities and has generally been buggier than macOS releases in years past.
For those using iPadOS 13 and macOS Catalina in tandem, Sidecar is the easy pick as the best way to use your iPad as a second monitor.
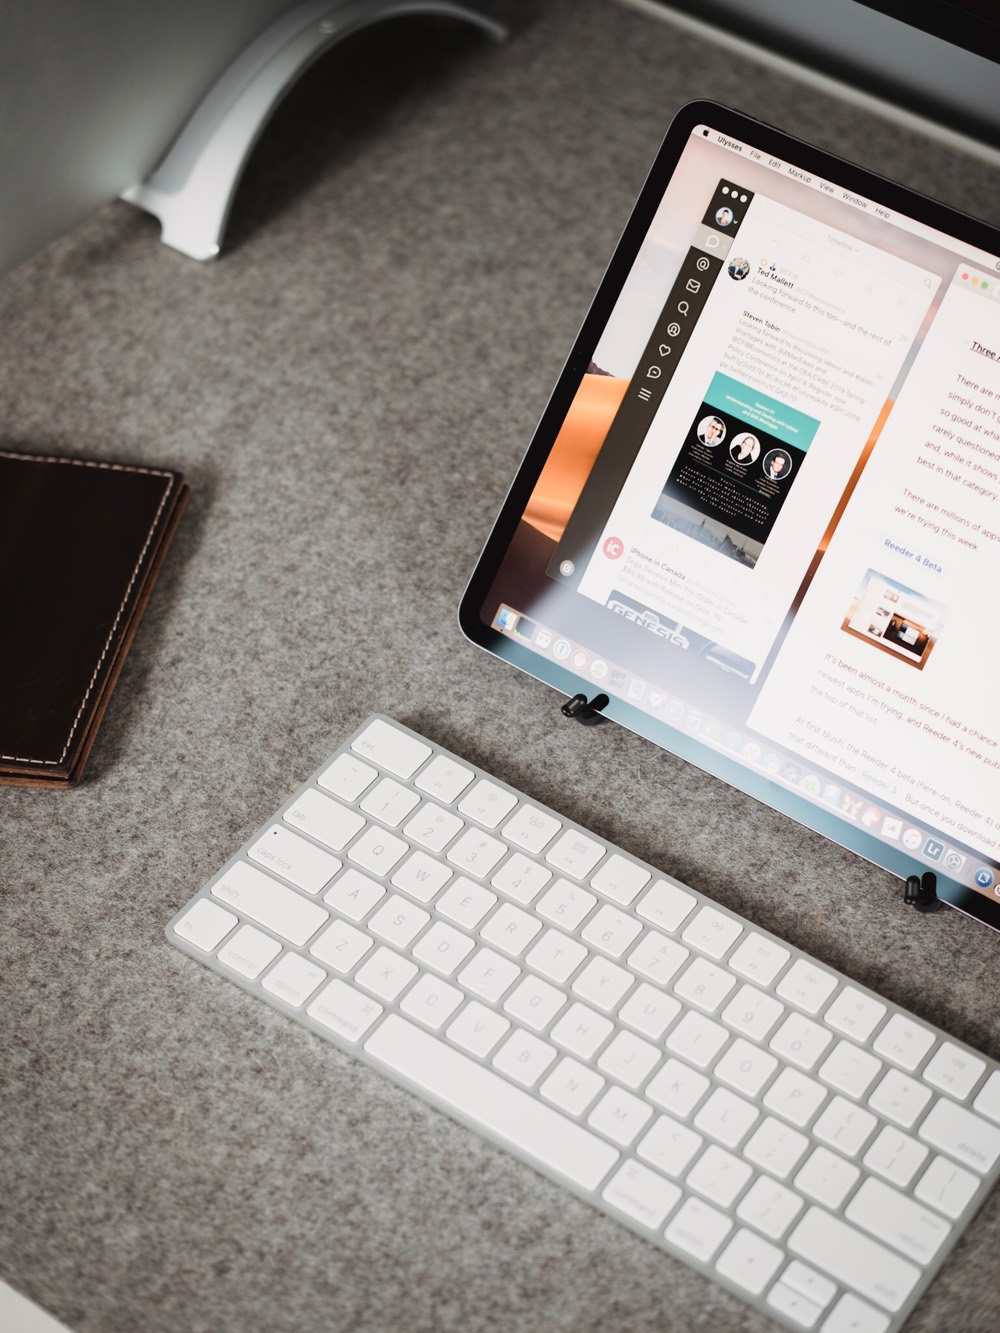
For those who are avoiding macOS Catalina, our former pick (Air Display 3) is still a great pick for second monitor and dual-display workflows.
And for those who are using their Macs in a headless variety (i.e. as a server), the hardware Luna Display option is still the winner.
What is this category?
The apps we’re looking at today allow you to use your iPad as a second monitor, or (in some cases) run your Mac in a headless configuration and use only your iPad as the monitor.
If you’re only looking for a way to remotely connect to your Mac from your iPad, then you should look at VNC apps like Screens.
Criteria for Great Apps that Allow You to use your iPad as a second monitor
-
Ease of use — It’s reasonable to want a quick and easy way to implement an iPad as a second display. Ideally, the feature is built into the operating system and is one click from being implemented. If not built right in, I don’t want to play around with settings. I want to open the app on my iPad and get to work. Similarly, if I’m using my MacBook Air in clamshell mode, which is most often, and want to connect for a second to test something, I don’t want to open the MacBook Air to make it work. I want to easily connect and do the work I need to do.
-
Speed (because we all hate lag) — We’ve come a long way since my first experience eight years ago. If you’re using your iPad as a second screen, any type of lag on that second screen is going to drive you nuts. Even if you’re simply using it as reference material for a writing or coding project, your web browser should remain responsive the entire time you use it.
-
Is Wi-Fi required? — In our previous review, we said that Wi-Fi was not required, and we’ll stick by that while also noting that wireless connections have come a long way. As you’ll see in the review, it’s quite possible to use a wireless version of the best apps.
-
Does it work with a headless setup? — With more people moving to iOS as their primary computing platform, it’s becoming common to only use a Mac in a headless configuration. While some people spend to get a Mac Mini, others retire their old daily driver laptop into a headless Mac in their house. This time around, we added criteria to take this headless Mac setup into account.
Winner (for Apple’s Latest Software): Sidecar
If you’re running the latest macOS from Apple, then we think Sidecar is the best option for using your iPad as an external display / second monitor.
Sidecar is easy to use, easy to implement, works seamlessly between macOS and iPadOS 13, and even allows backwards keyboard support should you enjoy using your iPad’s Smart Keyboard Folio.
Firing Up Sidecar: How to use your iPad as a Second Monitor
Provided your Mac and iPad meet the system requirements (specifically, a Mac running macOS Catalina and an iPad running iPadOS 13 is required), it’s very easy to implement Sidecar and expand your Mac’s screen real estate.
First, click the AirPlay icon in your Mac’s menu bar and choose the option to connect to your iPad. Or, you can click and hold the green expanding button in any macOS window and select Move to iPad. So long as your Mac and iPad are near one another, the connection can be made wirelessly with ease. If you want to plug in your iPad to maintain power, you can charge through your Mac or via a wall adapter with ease.
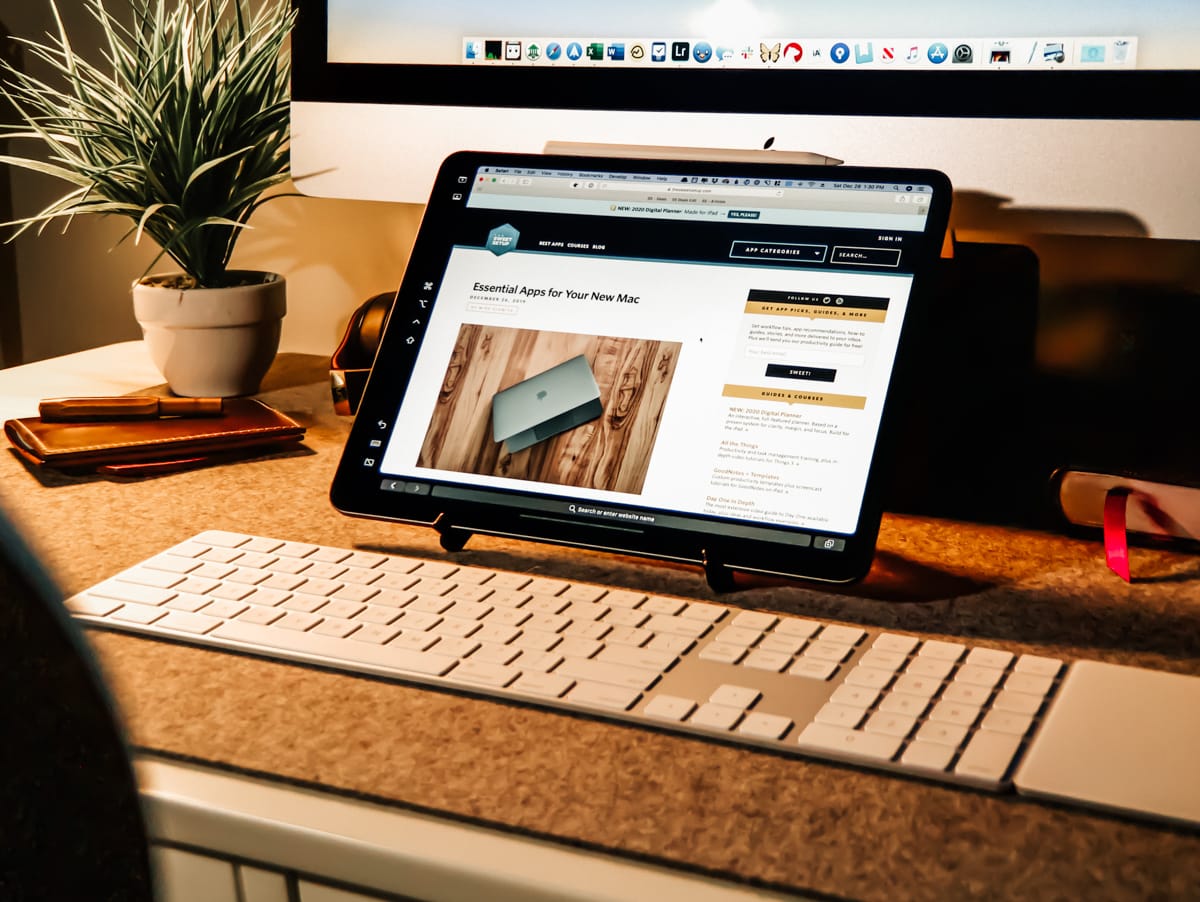
Once initiated, your iPad acts like any other external display (albeit with extra functionality). You can organize your displays in System Preferences and select which display you want your dock to be glued to. You can choose to mirror or extend your displays with the now blue rectangle in the AirPlay menu on your Mac. Or you can adjust a bevy of options inside Sidecar preferences.
Understanding the Sidecar Side Bar
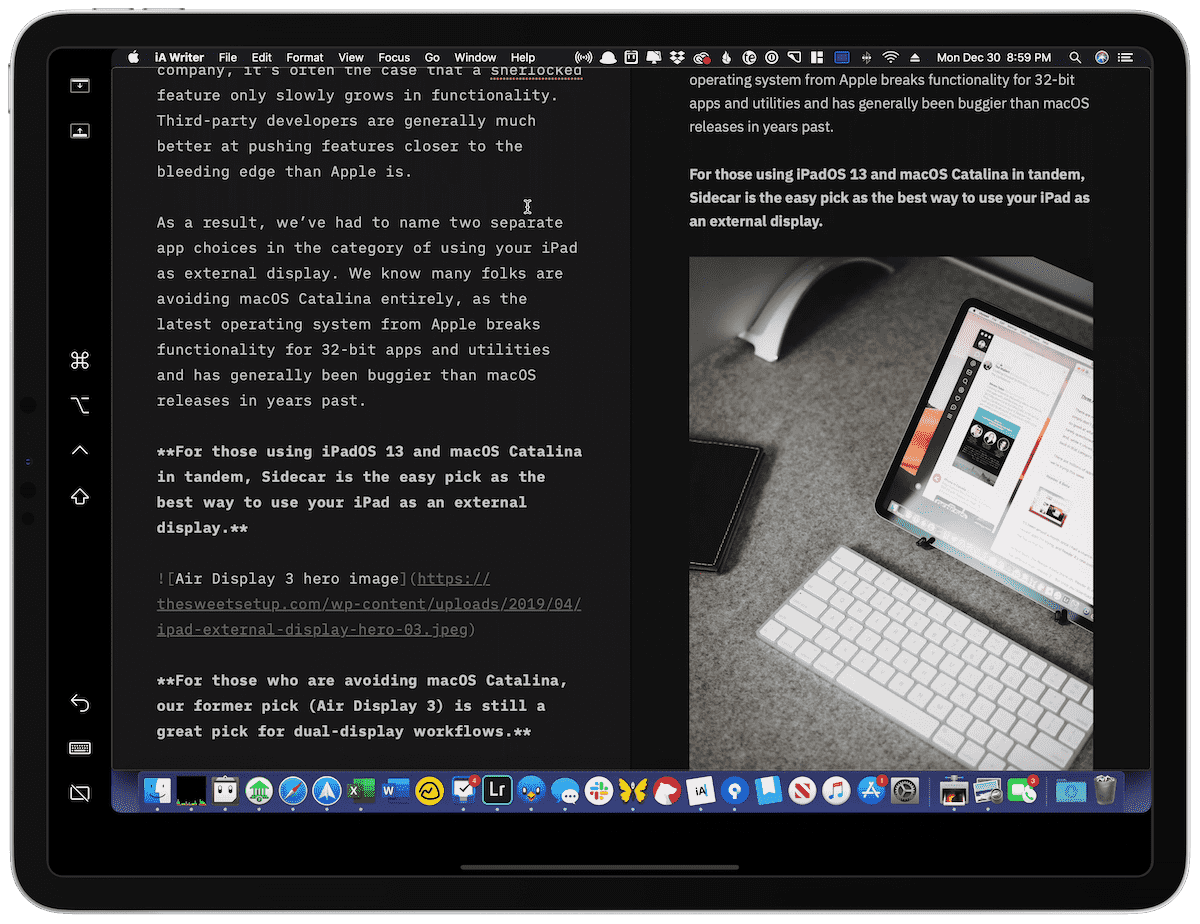
Wrapping around the edge of Sidecar on the iPad is a sidebar with a variety of options and common controls. Working through from top to bottom:
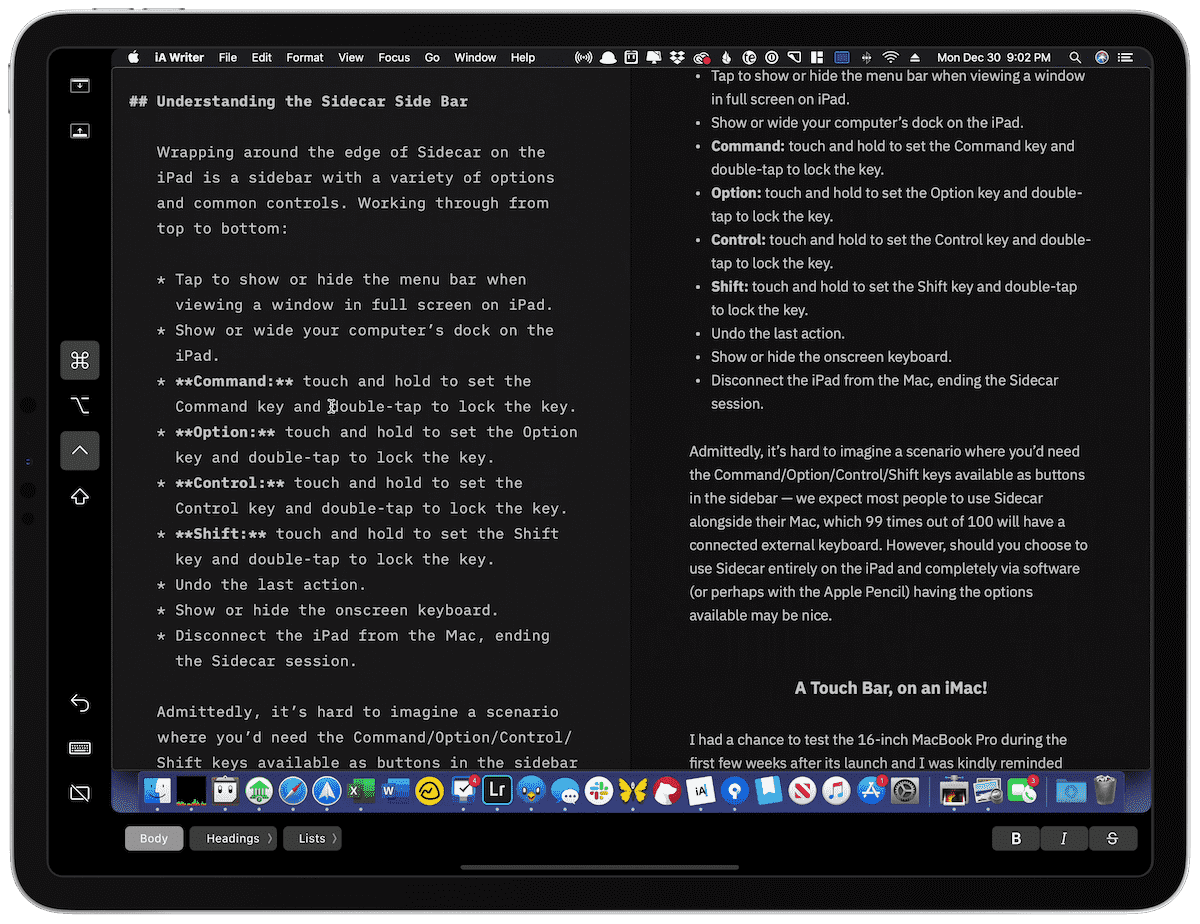
- Tap to show or hide the menu bar when viewing a window in full screen on iPad.
- Show or wide your computer’s dock on the iPad.
- Command: touch and hold to set the Command key and double-tap to lock the key.
- Option: touch and hold to set the Option key and double-tap to lock the key.
- Control: touch and hold to set the Control key and double-tap to lock the key.
- Shift: touch and hold to set the Shift key and double-tap to lock the key.
- Undo the last action.
- Show or hide the onscreen keyboard.
- Disconnect the iPad from the Mac, ending the Sidecar session.
Admittedly, it’s hard to imagine a scenario where you’d need the Command/Option/Control/Shift keys available as buttons in the sidebar — we expect most people to use Sidecar alongside their Mac, which 99 times out of 100 will have a connected external keyboard. However, should you choose to use Sidecar entirely on the iPad and completely through software (or perhaps with the Apple Pencil), having the options available may be nice.
A Touch Bar, on an iMac!
I had a chance to test the 16-inch MacBook Pro during the first few weeks after its launch and I was kindly reminded how much I missed having a Touch Bar on my iMac. I’m likely in the minority in this, but the ever-changing shortcuts built into the Touch Bar make navigating apps that much smoother.
As it is, there’s no Touch Bar support if you have an iMac or non-Touch Bar enabled Mac. Sidecar provides Touch Bar support for non-Touch Bar Macs, though it may not be the easiest muscle memory to create.
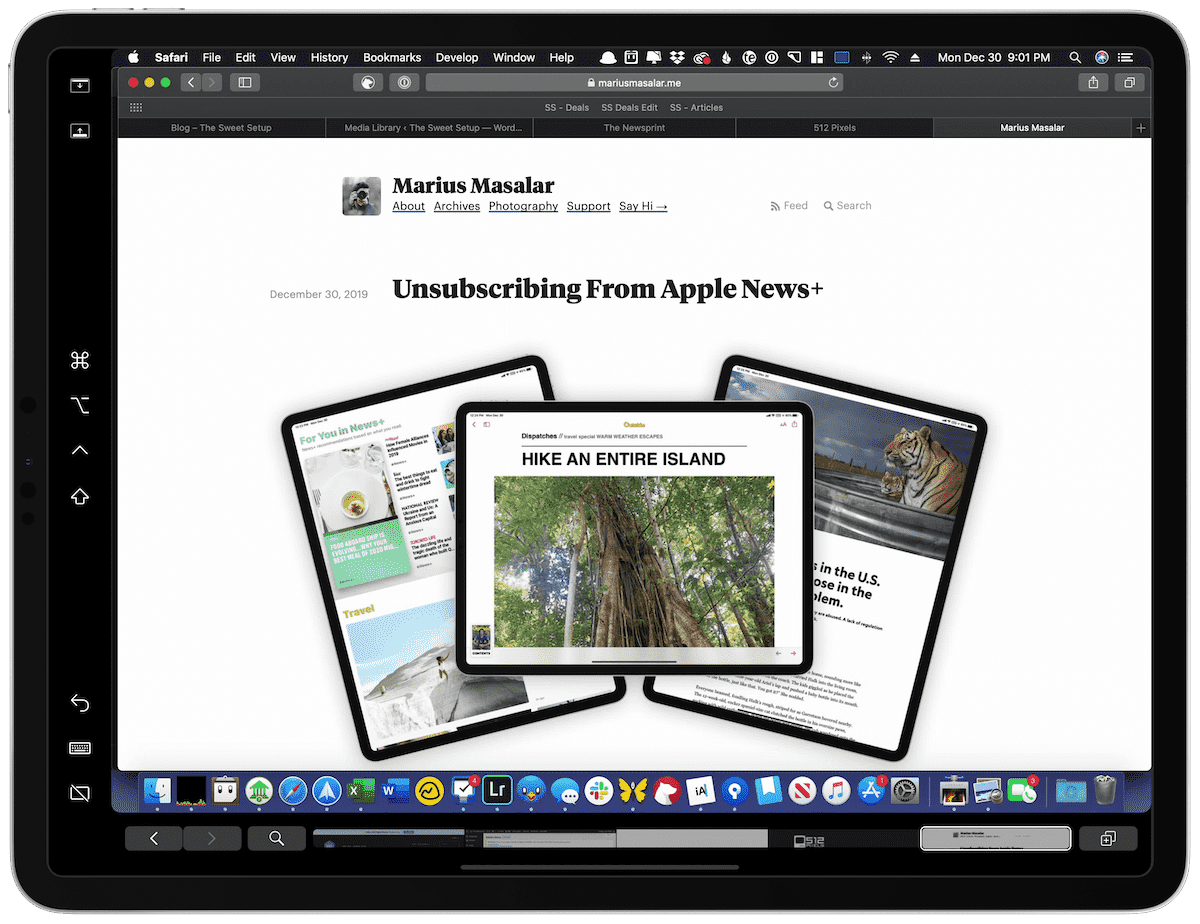
Provided you have the Touch Bar preference enabled in Sidecar Preferences, apps with Touch Bar controls place the controls on the bottom edge of your iPad’s display when Sidecar is active. Once initiated, using the controls is just like any Touch Bar enabled Mac.
It should be noted that Touch Bar controls only show up if you move the active app window to the iPad. As I’m writing this in Ulysses, I’m currently using Sidecar on my iPad next to my iMac. The Ulysses window is on the iMac display and Ulysses’s Touch Bar controls are not visible on the iPad. Once I move Ulysses over to the iPad, the Touch Bar controls become visible along the bottom side.
So, at least in this first version, Sidecar is not a Touch Bar workaround for iMac users who want a Touch Bar.
Sidecar’s Gestures and Using the Apple Pencil
I’ve been a bit surprised by how Sidecar reacts to the touch of my finger. For whatever reason, when a window is dragged over to the iPad in Sidecar, I expect to be able to touch anywhere on the iPad and have my pointer jump to that position on the iPad display. This would be a lot like how input controls behave in an app like Screens VNC.
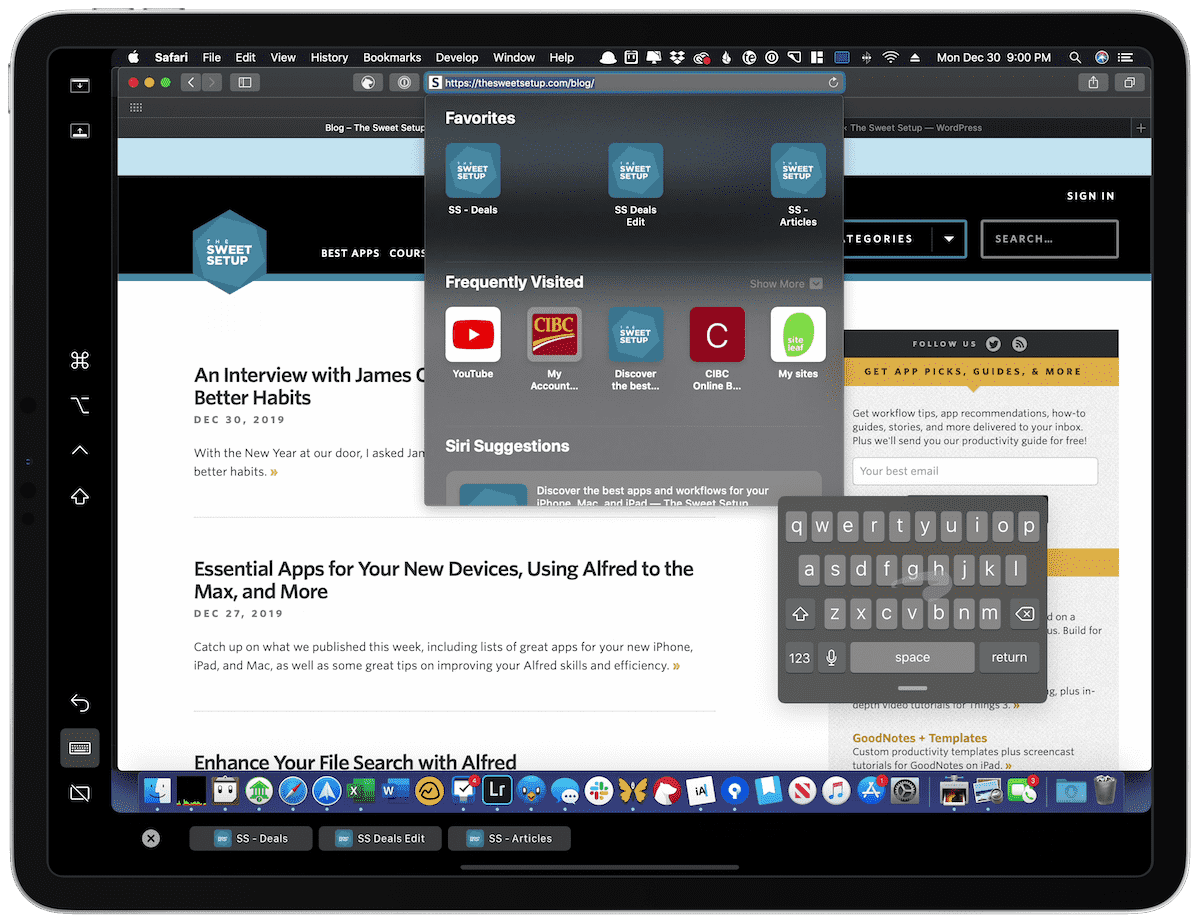
Instead, you can’t use your finger to navigate your mouse when in a Sidecar session. You can use your fingers with regular Multi-Touch gestures, but an Apple Pencil is required to move the pointer around, click, select, and perform tasks on the iPad.
Via Multi-Touch, you can achieve the following with your fingertip:
- Scroll: Swipe with two fingers.
- Copy: Pinch in with three fingers.
- Cut: Pinch in with three fingers twice.
- Paste: Pinch out with three fingers.
- Undo: Swipe left with three fingers, or double-tap with three fingers.
- Redo: Swipe right with three fingers.
Using an Apple Pencil, you can click, select, and even edit photos while in a Sidecar session. The Apple Pencil behaves exactly how you expect your bare finger to work — tapping the screen results in a click, tapping and holding allows you to select blocks of text or drag objects/windows around, and more. If you’re using an app like Adobe Lightroom and have an edit brush created, you can use the Apple Pencil to paint in your edit, just like you do in Lightroom for iPad.
If you use the Apple Pencil to move your pointer around on the iPad or if you just use your mouse/trackpad, some latency will be visible as you watch the pointer move around the screen. It’s not bad overall and is entirely usable, though, like the Smart Keyboard below, I doubt gamers will be playing first-person shooter games in Sidecar sessions. The connection improves slightly if you connect Sidecar via USB, but the difference is minimal.
Using the iPad’s Smart Keyboard
If you have a Smart Keyboard Folio attached to your iPad, you can use the keyboard to control your Sidecar session as well. This entire paragraph, for instance, was written on the iPad’s Smart Keyboard Folio with the Ulysses window positioned on the iMac. All control buttons, like Control/Option/Command work exactly as you’d expect and the latency between the iPad keyboard and the iMac is negligible. I don’t expect gamers to be using the Smart Keyboard in this fashion, but writers shouldn’t have any issue with the latency.
Switching Between iPad Apps
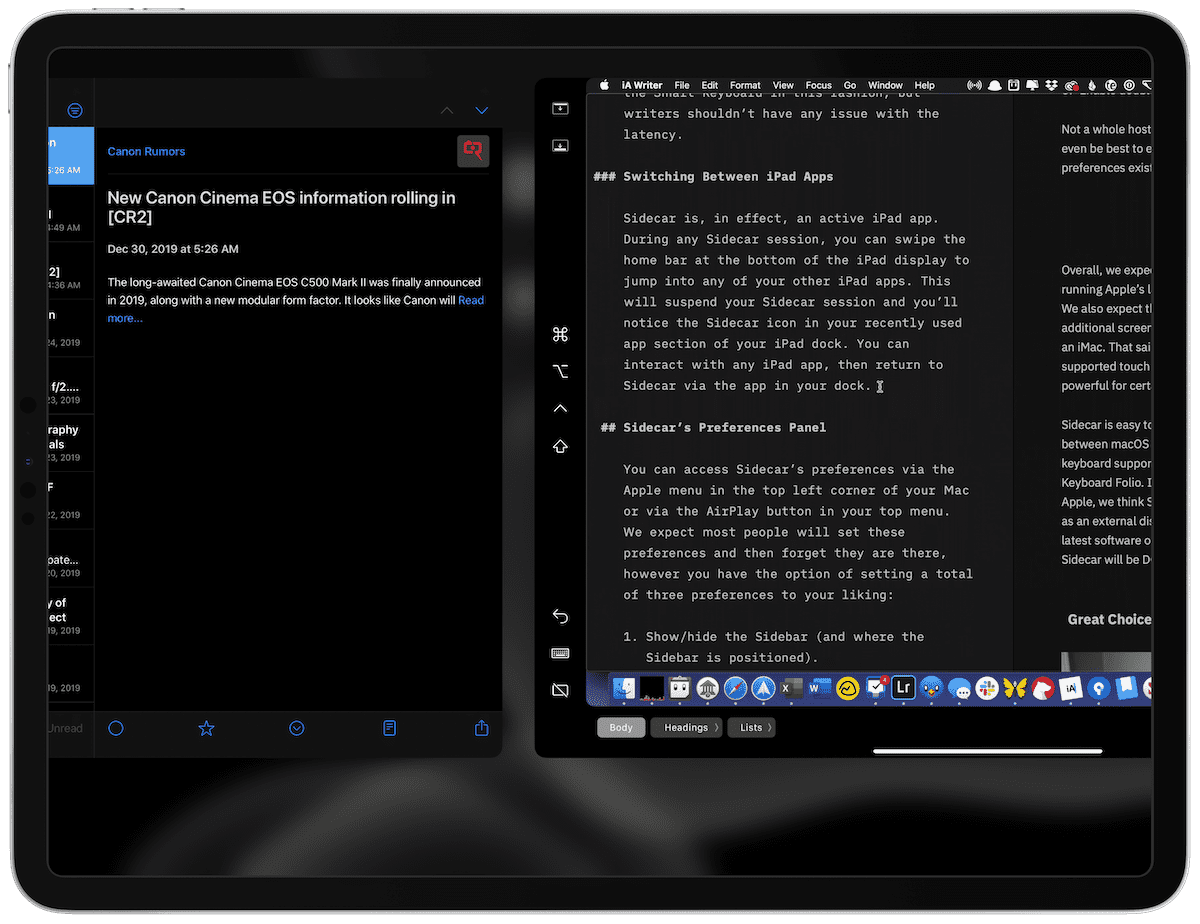
Sidecar is, in effect, an active iPad app. During any Sidecar session, you can swipe the home bar at the bottom of the iPad display to jump into any of your other iPad apps. This will suspend your Sidecar session and you’ll notice the Sidecar icon in your recently used app section of your iPad dock. You can interact with any iPad app, then return to Sidecar from the app in your dock.
Sidecar’s Preferences Panel
You can access Sidecar’s preferences from the Apple menu in the top left corner of your Mac or through the AirPlay button in the menu bar.
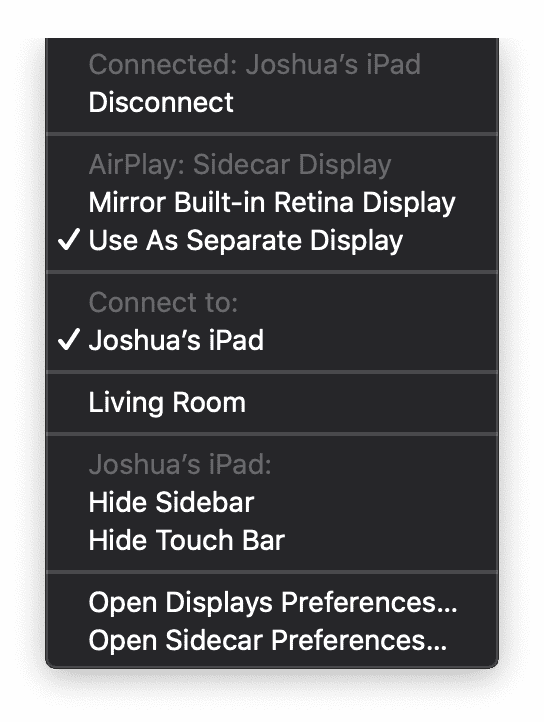
We expect most people will set these preferences and then forget they are there, but here are the three preferences that you can change to your liking:
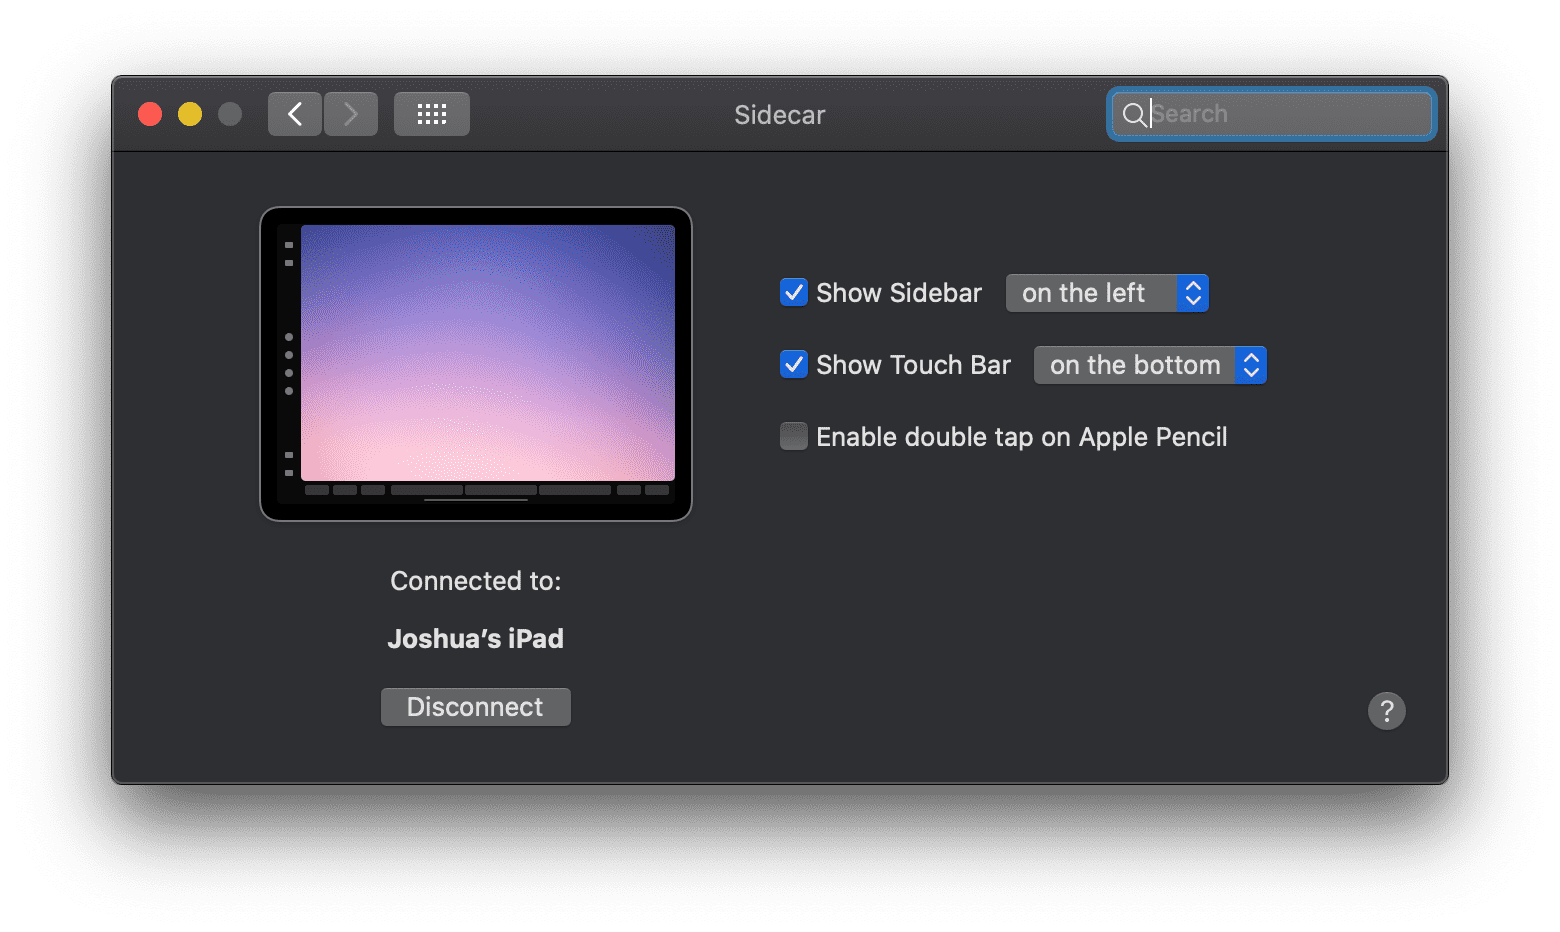
- Show/hide the Sidebar (and where the Sidebar is positioned).
- Show/hide the Touch Bar (and where the Touch Bar is positioned)
- Enable double tap on Apple Pencil.
Not a whole host of customizable options here, and it may even be best to enable everything and forget the Sidecar preferences exist.
Wrap Up
Overall, we expect Sidecar to be used by those who are running Apple’s latest operating systems on the Mac and iPad. We also expect those with MacBooks to use Sidecar, as the additional screen real estate is less impactful when used with an iMac. That said, having a Touch Bar and an Apple Pencil supported touch display alongside an iMac could be very powerful for certain people.
Sidecar is easy to use, easy to implement, works seamlessly between macOS and iPadOS 13, and even allows backwards keyboard support should you enjoy using your iPad’s Smart Keyboard Folio. If you’re running the latest software from Apple, we think Sidecar is your best option for using your iPad as an external display. However, if you’re not running the latest software or if you need a headless macOS option, Sidecar just isn’t an option.
Great Choice: Air Display 3 for pre-Catalina Macs
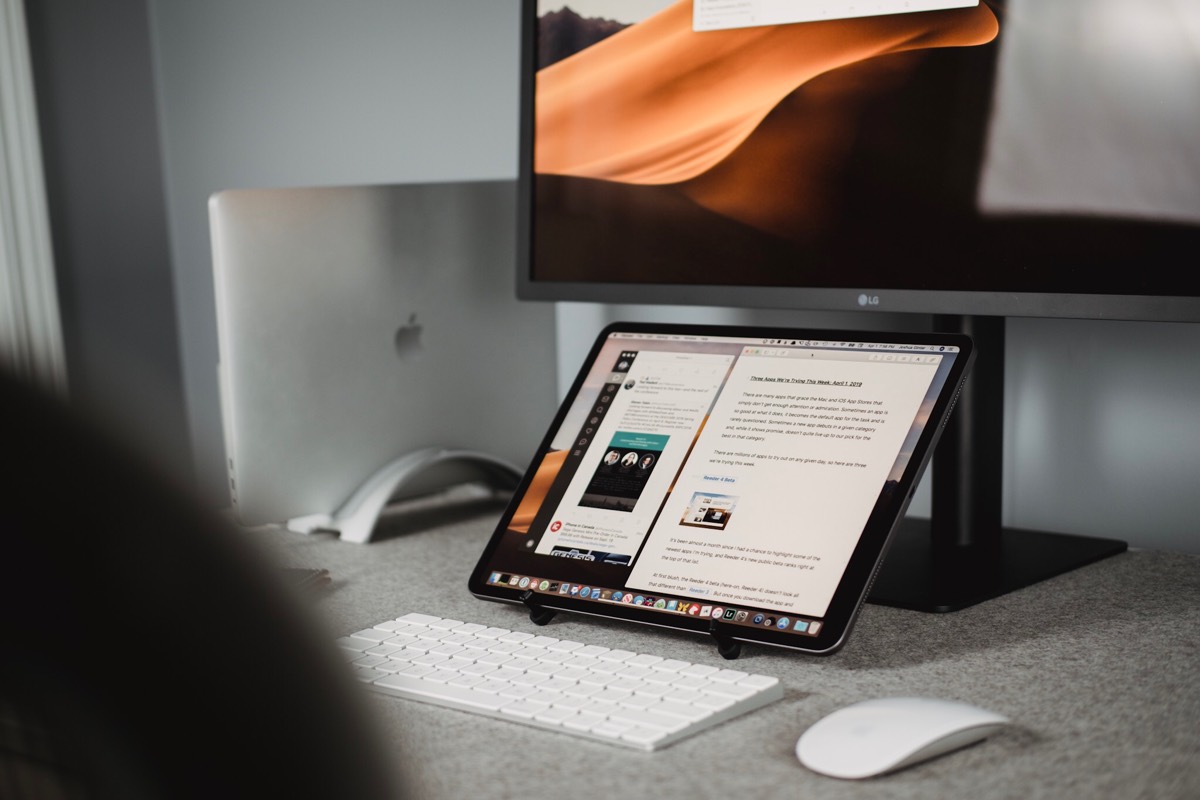
If you only need to use your iPad as a second display, then Air Display 3 is a great choice. Provided you have the latest versions of the software installed on both iPad and the Mac, Air Display 3 works like a charm. However, since Air Display has been sherlocked in macOS Catalina, we haven’t seen many updates to the app in the recent past.
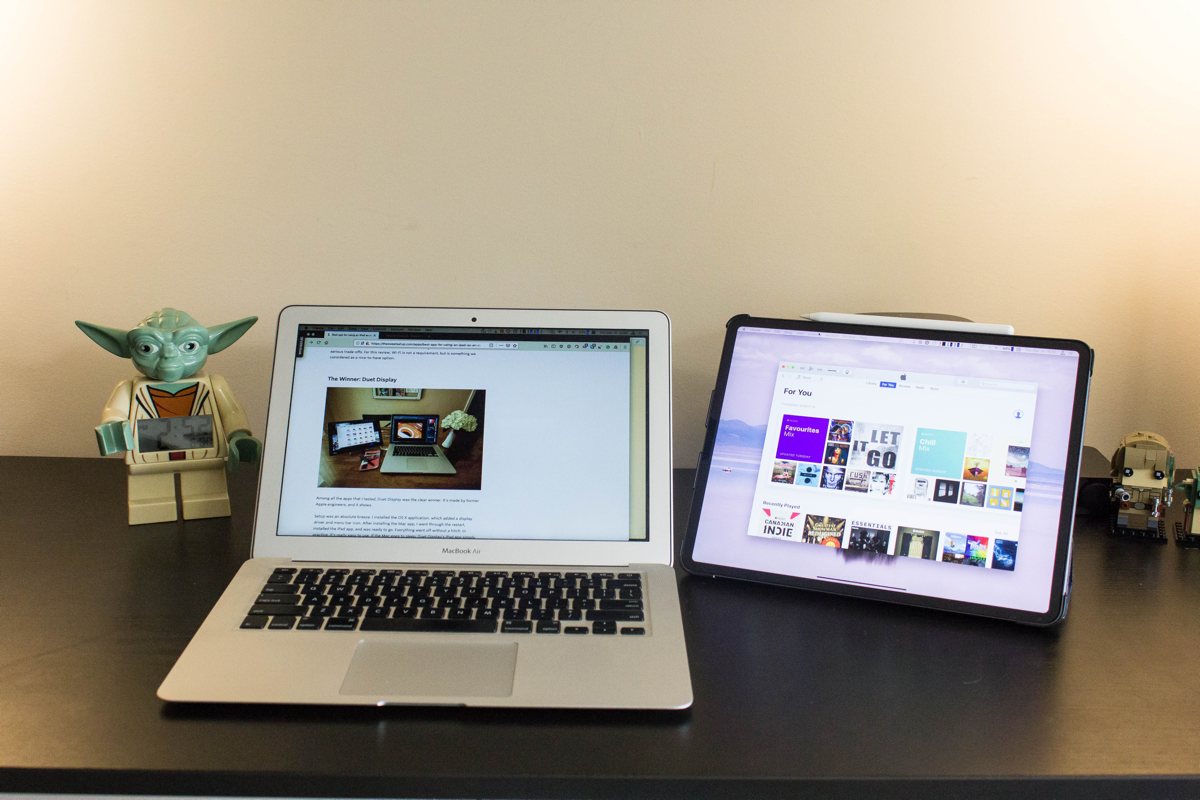
In the lag department, Air Display 3 is very smooth. I was surprised that even in its wireless setup Air Display 3 was fast and clean on my iPad, even at higher resolutions.
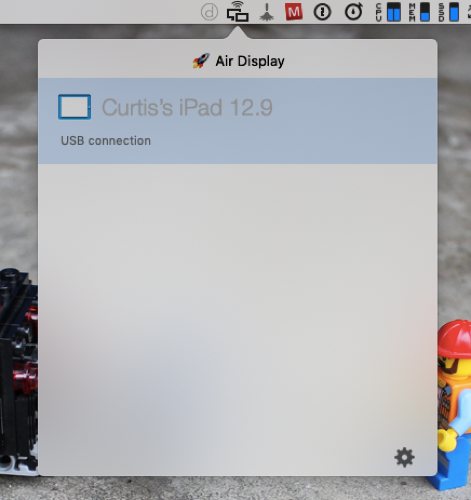
The final thing that put it over the top as my first choice for a dual display setup is that you don’t need to carry around a dongle like you do with Luna Display. Air Display 3 is software only and the wireless connection is fast enough that you don’t even need to plug it in in many cases. I happily worked for a few hours without a wired connection and rarely noticed that there was any lag. It may not be as smooth as the built-in Sidecar for Catalina Macs, but for pre-Catalina Macs, Air Display’s lag performance is great.
Another interesting feature that I tried briefly with my wife’s 9.7″ iPad Pro was connecting multiple displays. Air Display also worked well in this use case as I drove two external wireless displays with my MacBook Air. With multiple wireless monitor connections, the lag became noticeable, but as soon as I went back to only a single iPad, it returned to performing flawlessly.
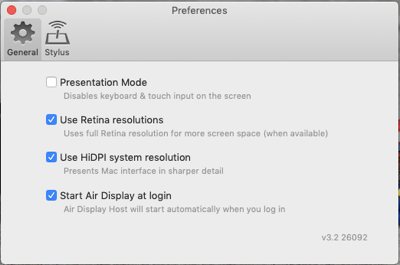
The only spot that it fell down was in the headless connection department. I’ll talk more about that with Luna Display, but suffice to say that reconnecting in a headless setup with Air Display 3 was hit and miss in its wired configuration and almost totally a miss with its wireless setup.
For Headless macOS: Luna Display
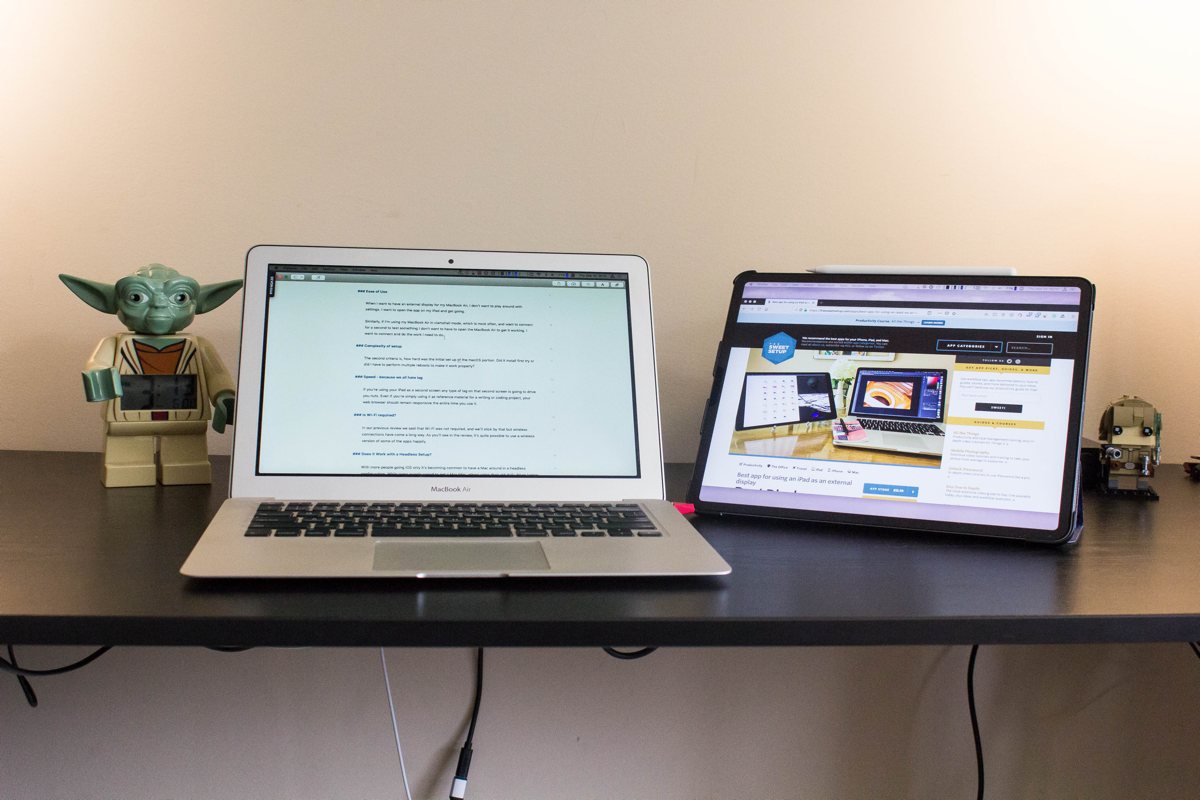
While Sidecar is a great built-in solution for Apple users, it does have some limitations. More advanced users (specifically those that want a better multi-touch experience or have an artist-focused workflow) should consider Luna Display.
First, the most obvious limitation is that Sidecar only works with iOS 13 and macOS Catalina. So if you have older hardware or have held off upgrading your Mac because you use it for work and prefer the stability of an older OS, then you won’t have access to SiderCar.
Second, Sidecar requires fairly close proximity to your Mac. The signal starts to falter when you move more than 10 meters away. And while you wouldn’t want to be that far away from your Mac when using your iPad as a second display, this can be annoying if you want to mirror your display to your iPad.
Luna Display solves both of these problems with a hardware solution that costs $79.99 and is available for both USB-C and Mini DisplayPort. Just plug the hardware into your Mac, install the software on your Mac and iPad, and you have a reliable connection with low-latency and nearly lossless output no matter where you are on your wireless network. It’s a little pricey, but if you want better support for multi-touch gestures or the ability to use your iPad as the primary display, it’s a much better option.
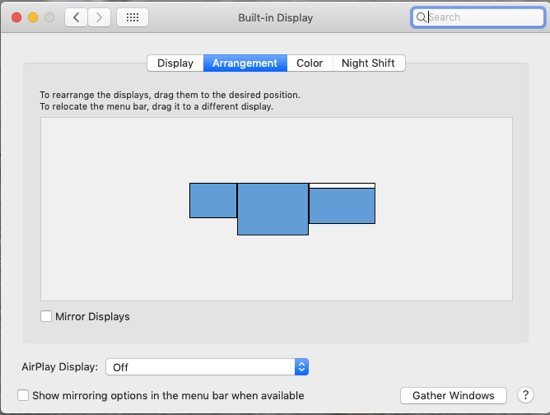
Because Luna Display physically plugs into your Mac, it’s able to recognize your iPad as a true second display. This gives you the full range of the screen, as well as keyboard and trackpad functionality if you use some of the other modes that Luna Display offers. It also enables GPU acceleration, which helps provide a smoother experience and gives Luna Display the ability to add a couple of additional access modes.
Mac-to-Mac Mode
One thing you can do with a Luna Display is use a second Mac as a second display. For example, if your primary computer is a MacBook Pro but you have an old iMac laying around, you can use the display on the iMac as a second monitor. It’s a handy feature, especially for people who use a laptop as their primary computer.
With Mac-to-Mac mode, you have trackpad and keyboard support for both computers. Any Mac running macOS 10.8 Mountain Lion or later can act as the secondary monitor, but the primary Mac must be running macOS 10.11 El Capitan or later. The feature was added with Luna Display 4.0, but doesn’t require new hardware. Just make sure that your apps are up to date on both of your Macs.
Headless Mac Mode
Another thing you can do with Luna Display that you can’t do with Sidecar (or AirDisplay) is use your iPad as the monitor for a headless Mac setup. For example, if you have a Mac Mini running as a home server that you occasionally want to access but don’t need a full computer setup for, just plug in a Luna Display and you can access macOS from your iPad.
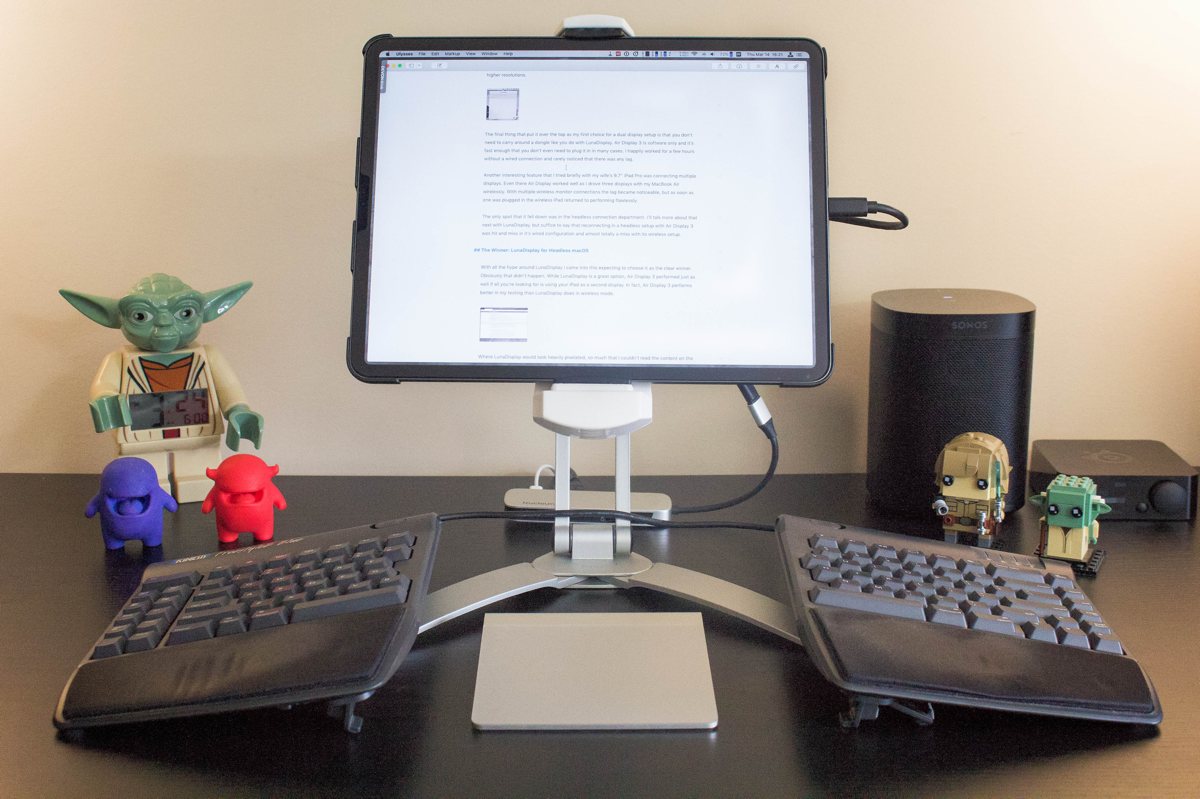
Your iPad will work as a monitor and touch interface from anywhere on the same wireless network. Luna Display even has a [handy tutorial][1] on how to set this up on their blog.
Runner Up: Duet Display
This review period spanned a significant update for Duet Display, so my initial impression wasn’t great. I had a bunch of random disconnects of the app that I was never able to figure out. I’d get up to get a drink and come back to find that Duet Display disconnected. Unfortunately, macOS thought the display was still connected so I had a bunch of windows hidden on a screen I couldn’t access.
Both versions of Duet Display I tried had more lag than either Air Display 3 or Luna Display. I even purchased the yearly subscription for Duet Display Pro so I could test out the wireless screen support, but after an afternoon of restarting my Mac and reading through help documentation, I still couldn’t get it to connect.
Finally, there were some odd display issues in macOS while using Duet Display. Nothing in your main work area, and nothing that would stop you from working, but shading and coloring wasn’t right in the menu bar.

If you don’t need wireless or any of the features in their subscription options, then the base Duet Display is great and it’s the cheapest option to start using your iPad as a second screen to your Mac.
Get Started with Sidecar…
VIDEO TUTORIAL: How to Setup Sidecar
Learn how to make the most of the second monitor you already have. Give your productivity a boost whether working from home or on the go.
We’ll show you…
- An Overview of Sidecar Settings on the Mac
- How to Position your Sidecar Display Correctly
- Walkthrough of Sidecar Features on the iPad
Other Apps We Reviewed
iDisplay
iDisplay is another app in this category that worked reasonably well, but it didn’t make it into the picks because it’s not the cheapest option and doesn’t do anything better than our current choices if you want to use an iPad as a second screen. However, if you have an Android tablet, it’s a good place to start since it supports macOS, Windows, Android, and iOS.
GoodDual Display
GoodDual Display was tested in the last look at this category of apps, and we said that if you could get it on sale it was a no-brainer. With the current version, it really isn’t worth trying compared to the other options. While it offers a host of resolutions for your iPad, none of them match the actual aspect ratio of the iPad except for 1024×768, which looks terrible.
Another deal-breaker was that my cursor kept getting stuck on the second screen unless I used Command + Tab to change to an app on a different screen.
Conclusion
Although it may not seem like one of those categories with huge demand, using an iPad as an external display is one of the questions we receive quite often. This app category is a strong and interesting one that has come a long way since I used Air Display 1 when traveling for a few months. If you need any further proof of the importance of this category, the fact that Apple built its own first-party Sidecar feature shows how fundamental the feature can be for some users.
If you’re a macOS Catalina and iPadOS user, there really is no more clear-cut choice than Sidecar. Sidecar initiates very easily, works seamlessly either wirelessly or with the supplied iPad Pro USB-C cord, and even provides additional features like a Touch Bar and Sidebar. A feature with this much power and smooth performance that comes free of charge is nearly impossible for third-party developers to compete with.
If, however, you’ve decided to skip macOS Catalina for whatever reason (and we recognize there are more than a few reasons why one would choose to do this), our former pick should do the trick. Air Display 3 hasn’t been updated in a long time, but it’s former performance on macOS 10.14 Mojave was very impressive.
If you’re an “iOS first” person like me, then you’ll need to put up with the hefty price of Luna Display to get a really nice headless macOS setup. A wired headless setup with Luna Display was good enough for me to spend a few days doing print design for a local non-profit without feeling the need to take my old monitor out and put it back on my desk.

