
The best photo editing app for the Mac
Lightroom
It’s no longer enough for a photo editing application to be great at what it does in isolation. Modern computing is defined by connected workflows. The ability to pass tasks seamlessly between devices, between contexts, and between coworkers is increasingly important.
That’s why, despite some potent new competitors, Adobe Lightroom remains our pick for the best photo editing and management application for mainstream users. Lightroom provides a strong editing and photo library management environment, but it also builds a powerful ecosystem of apps, learning resources, and community around those tools.
It’s a joint pick, in fact, because Lightroom now exists as two distinct versions: the cloud-first Lightroom CC, and the familiar, more powerful Lightroom Classic CC. Both have their merits, and we’ll discuss what kind of user each is best suited for.
Get Our Best Photography Tips & Workflows
Transform your photos and edits from average to awesome with our in-depth, mobile photography course. It’s jam-packed with training, ideas, and lessons that can literally transform your photography overnight.
How We Chose
It’s important to note that this comparison is specific to photo editors that also provide Digital Asset Management (DAM) features.
This all-in-one approach is appealing not only because it provides an integrated workflow, but because it allows you to manage your photo files with more organizational control than a simple file structure would. We’re interested in tools that are designed to take you from initial import and culling all the way to final polish and export.
As a result, while standalone editors like Adobe Photoshop, Affinity Photo, Pixelmator Pro, Skylum Luminar, etc. are fantastic at what they do, they are beyond the scope of this piece.

Main Criteria
That first restriction narrowed our field of contenders significantly, and from there we considered the remaining apps according to the following characteristics:
-
Features and processing quality: It’s all too common to see photo editors judged based on their initial rendering of a file rather than the potential results after processing. While initial rendering can be a useful data point, it doesn’t say enough about the quality of the processing engine.
We took the time to comparatively edit a variety of photos across all the apps in an effort to see which provided the best results up front, which provided the most editing leeway, and which got us from raw file to edited output most efficiently.
-
Design and ease of use: Though much of the core functionality is shared between apps in this category, the way tools are presented, how granular the controls are, and how customizable the interface is can all influence how you work.
We looked for something that’s relatively easy to start with, but has room for growth as your needs and skills develop.
-
Ecosystem: A crucial aspect of an app’s appeal is the ecosystem of supporting resources that build up around it, both from the manufacturer and from third parties.
The availability of communities, tutorials, classes, presets, etc. can not only help with the initial learning process, but also speed up workflows for more confident users.
-
Price and cost structure: Cost is a tricky subject, but in general we’re looking for products that have a clear, understandable cost structure and that feel like good value for money.
This is very subjective territory and we recognize that there are differing schools of thought on price ranges, single-payment vs. subscription, and so on that are beyond the scope of this comparison.
Lightroom is the Best Mainstream Photo Management and Editing App for macOS
Adobe has been firing on all cylinders with Lightroom development this year, introducing an entirely new cloud-first version of the app, establishing a strong cross-platform presence, and improving core processing tools like color profiles.
Today’s Lightroom is a refined, ubiquitous environment for managing your photo library, whether you choose the re-thought cloud-based Lightroom CC, or the more familiar, professional-oriented Lightroom Classic CC.
Features in Lightroom Classic CC
Lightroom Classic CC is the evolution of the familiar Lightroom we know and love. It borrows a limited version of the cloud syncing capabilities from its younger sibling, Lightroom CC, while retaining the robust feature set it’s always had.
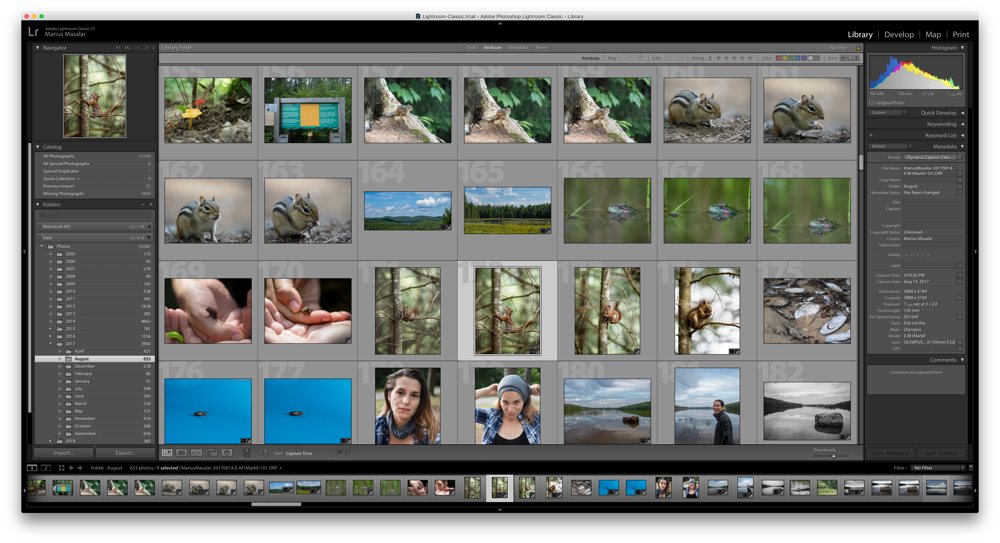
This includes a powerful catalog system capable of handling thousands and thousands of photos with ease, plus the tools for triaging and organizing those photos quickly. Similarly, you have thorough metadata editing controls; a deep, nesting keyword system in place to help categorize photos by content; and a map module dedicated to managing geotagging information.
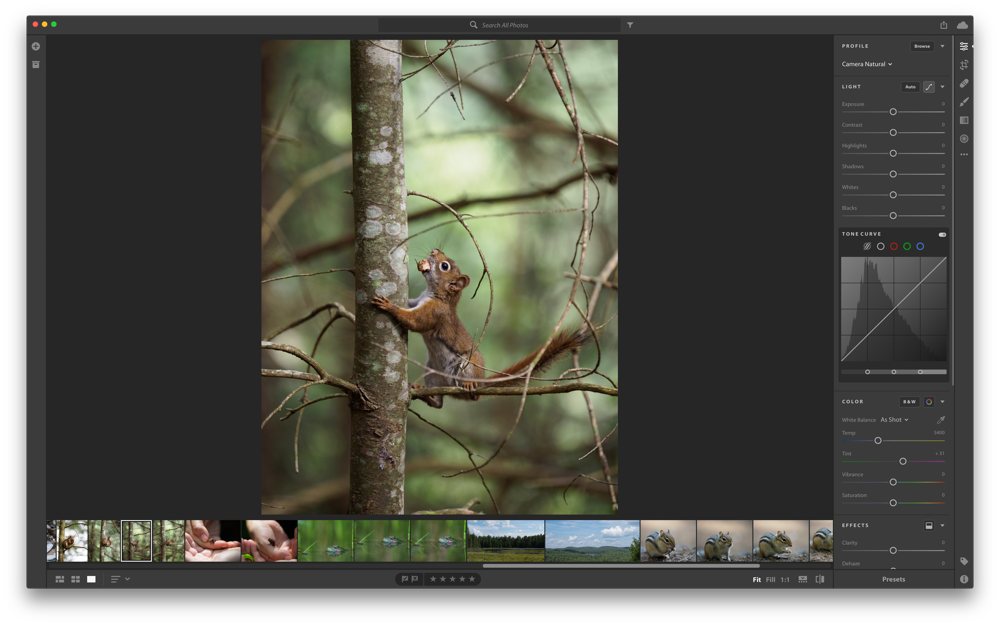
When it’s time to edit your selects, Lightroom Classic CC features very capable core editing tools, from exposure, to color balance, to detail. It’s a well-chosen assortment, and most of the sliders are more intelligent than their name suggests, performing several tasks behind the scenes to achieve their intended effect. This is particularly true of combo sliders like “Dehaze,” which performs several contrast-related adjustments in a single action.

Beyond the basics, Lightroom Classic CC includes merging capabilities for processing HDR photo stacks, as well as stitching together panoramas. These are unique to Lightroom Classic CC, as most other tools require you to handle this kind of task externally.
Once you’ve edited your shot, Lightroom Classic CC offers a dedicated print module for preparing for physical output, and you can set up digital export presets in a variety of formats and fidelity settings.
Features in Lightroom CC

New to Adobe’s ecosystem is Lightroom CC, a streamlined version of the app built around cloud storage and cross-platform sync.
Compared to Lightroom Classic CC, Lightroom CC has no Print module or proofing tools, no Map module or support for geotags, no tethering support, no HDR or panorama merging, limited batch editing, limited keyword support, no smart collections (there are only “albums”), no face recognition, no file renaming, no adjustment history, JPG-only export (and only in the sRGB color space), and support for a single catalog only (you can’t create multiple catalogs like you can in Classic CC).
This sounds like a lot of missing stuff, but in exchange you get a number of important benefits:
- A unified interface and tool set across Mac, Windows, iOS, Android, and (to a more limited extent), the web and Apple TV.
- The ability to sync and edit raw files and presets across those platforms (instead of just Smart Previews like with Lightroom Classic CC) and manage storage use on each device separately.
- Leaner, faster operation.
- Access to the Adobe Sensei cloud intelligence for smart search and organization without having to manually keyword everything.
Lightroom CC retains all the core photo editing tools from its older sibling, and Adobe has been updating it at a breakneck pace to fill in the functionality gaps. Case in point, Adobe has introduced synced presets, whereby any of your custom presets within Lightroom CC will be automatically synced to Lightroom CC for iPhone, iPad, and even on the web. For many users, the inclusion of synced presets may be the kick to jump over to Lightroom CC full-time. While there is still a large gap between the capabilities of CC vs Classic CC, this gap has dramatically narrowed over time at a very fast pace.
Note: Synced presets are only available on Lightroom CC. Presets will not sync between Lightroom CC on the iPhone or iPad and Lightroom Classic CC on the Mac.
In the meantime, being able to access and edit your raw files from any device is a spectacular feature, one that genuinely transforms the way you can think about photo processing in ways that adding a new tool here and there really doesn’t.
Unlike iCloud Photo Library, Lightroom CC lets you manage storage very precisely, so you can explicitly choose which albums should be stored locally and which should remain in the cloud until you call them down. This is crucial for phones and tablets, where storage space is often at a premium. Of course, the fact that it’s cloud-based means that you’ll need a strong internet connection to take full advantage, but assuming you have that, it’s tremendous.
While it can be daunting to trust your photo library to the cloud, in my usage, the system has been flawless—no delays, no strange errors, no missing photos. Adobe clearly spent a lot of time making sure the underlying architecture is solid, and it has paid off.
Get Our Best Photography Tips & Workflows
Transform your photos and edits from average to awesome with our in-depth, mobile photography course. It’s jam-packed with training, ideas, and lessons that can literally transform your photography overnight.
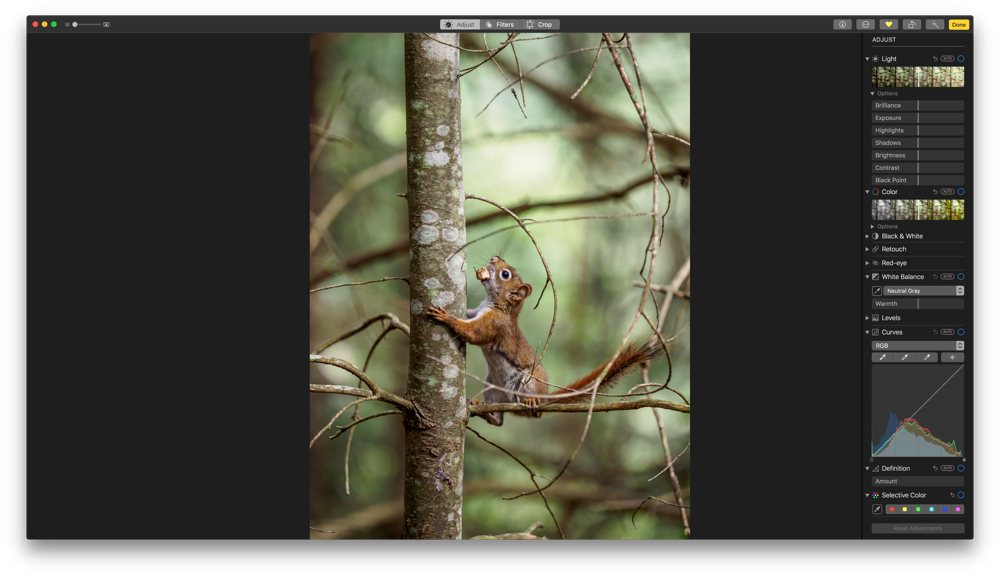
Design in Lightroom Classic CC
Lightroom Classic CC hasn’t changed its overall look and feel much over the years, which is both good and bad.
It’s good because it’s now familiar and those of us with years of muscle memory built around its interface won’t be forced to re-learn anything.
It’s also a bit of a negative point though. I remember when I first switched to Lightroom from Aperture (RIP), I was surprised by how cluttered it felt. There are a lot of sections and panels, and it can be a bit much to take in at first.
Once you do though, you begin to grasp the logic. The interface exists as a set of purpose-built “modules,” including Library for organizing and Develop for processing, and you can customize your Lightroom Classic CC experience to hide ones you don’t use (Web, in my case).
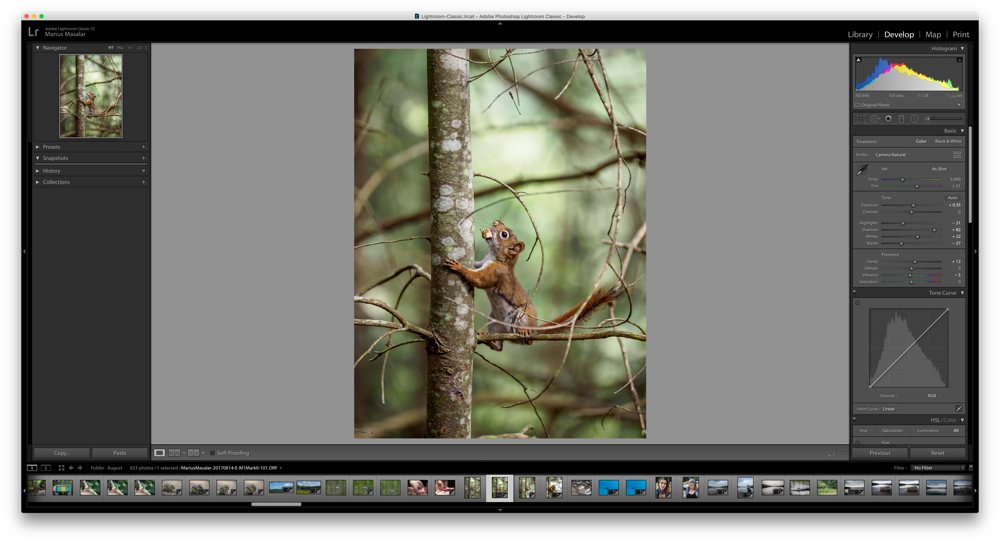
Within the Develop module, all the controls are glued to the right side of the screen and exist in a fixed order. It’s a sensible order, following the usual path from exposure corrections through color and contrast adjustments, all the way down to perspective and calibration tweaks.
If you find yourself following that processing path for every kind of image, then you’ll feel right at home. But it feels rigid compared to the way other competitors, like Capture One Pro, allow you to customize not only the order of tools, but also which side of the screen any given panel is attached to for a truly personalized workspace. The closest you can get to customizing your Lightroom Classic CC workspace is showing or hiding certain panels, and showing your name/logo in the corner of the window.
It took me quite a while to get used to the denser, fixed interface conventions in Lightroom, which is part of why I’m excited about the new Lightroom CC starting from scratch.
Design in Lightroom CC
By taking a clean slate approach with Lightroom CC, Adobe freed themselves to explore what a contemporary photo management and editing environment should look like.
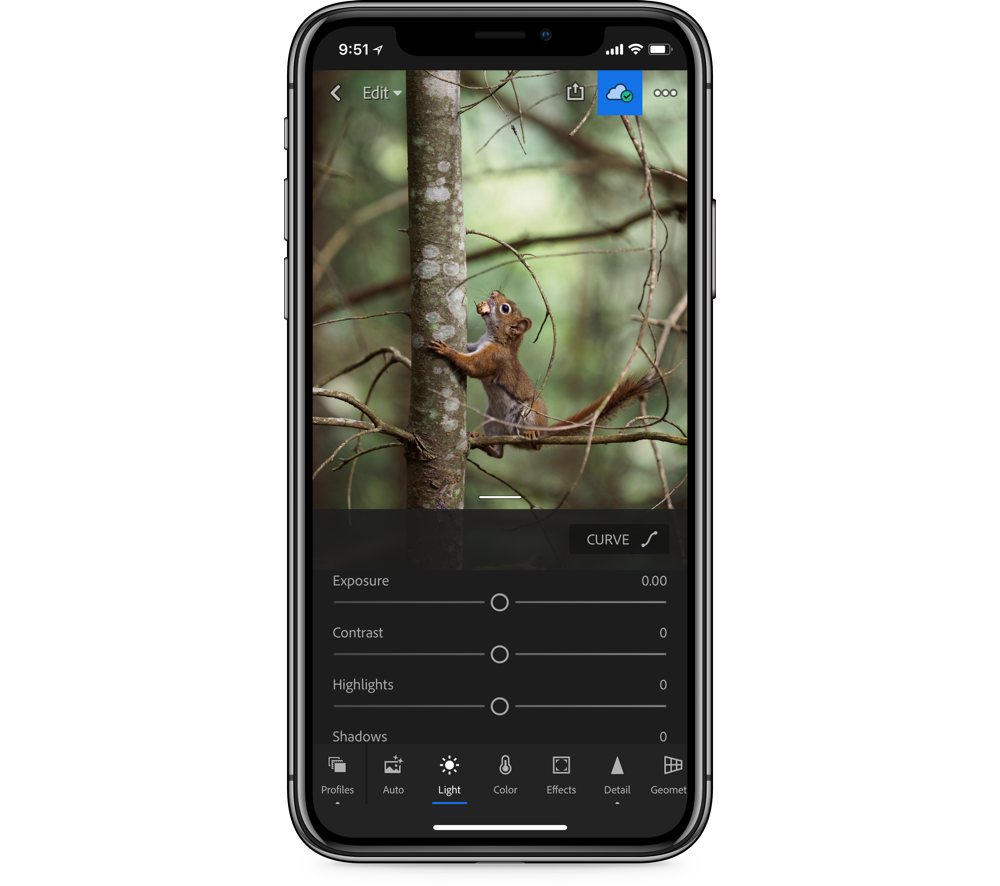
Their main focus was on having it scale seamlessly across different devices and screen sizes. This seems like a strange idea until you experience the result in person; it allows you the freedom to choose your editing device based on what you prefer to work on. In many cases, especially for existing users, that will remain a traditional desktop or laptop computer.
In my case though, it means my iPad Pro, and I can make that choice knowing that I’m not giving up functionality. That’s the power of cross-platform feature parity.
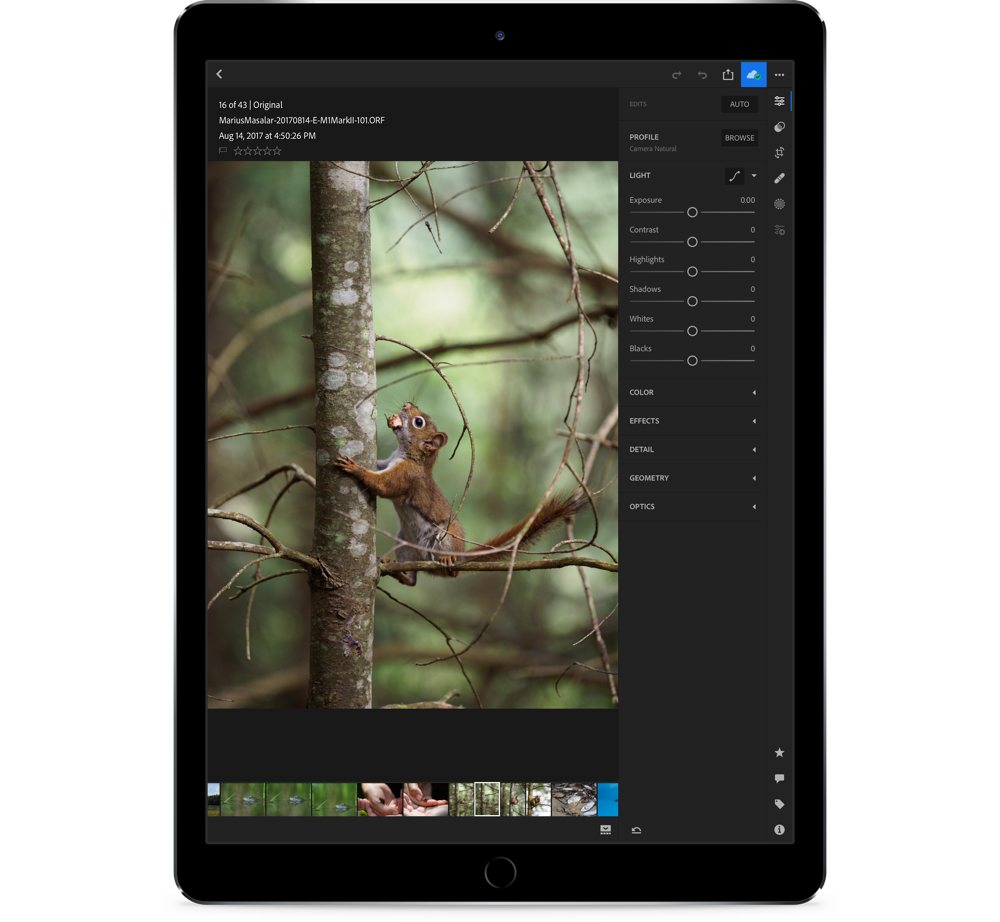
In more concrete terms, the new interface is a lot less busy, and a lot less modular. The left sidebar is now dedicated to your photo library and the albums it contains, and the right side has become a home for different editing panels. All of these slide in and out of view, but you never actually leave the app’s main view. The tools change, but the context doesn’t.
Also notable is the very prominent search bar that now lives front and center at the top of the app. This search field is powered by Adobe’s cloud-based Sensei AI technology, which competes with the likes of Google and Apple Photos to intelligently recognize content and metadata from your images and present results accordingly. It works well, and because it is powered by machine learning, will continue to improve as more people use it.
By consolidating things into a single-window design, Adobe has made Lightroom CC feel cleaner, easier, and quicker than its older sibling for mainstream use.
The Lightroom/Adobe Ecosystem Advantage
Scale is a powerful ally in any comparison between apps, and Adobe’s tremendous reach and established history in the industry have given it an unfair advantage.
The number of resources — from both first and third-party vendors — is simply unmatched. If you need a tutorial, hundreds exist. If you want some presets to work with, you’ll find almost endless options. Forums, YouTube channels, and entire websites exist around this community.
Then there’s Photoshop. Users of both Lightroom Classic CC and Lightroom CC have the most seamless roundtrip workflow with the photo editing titan.
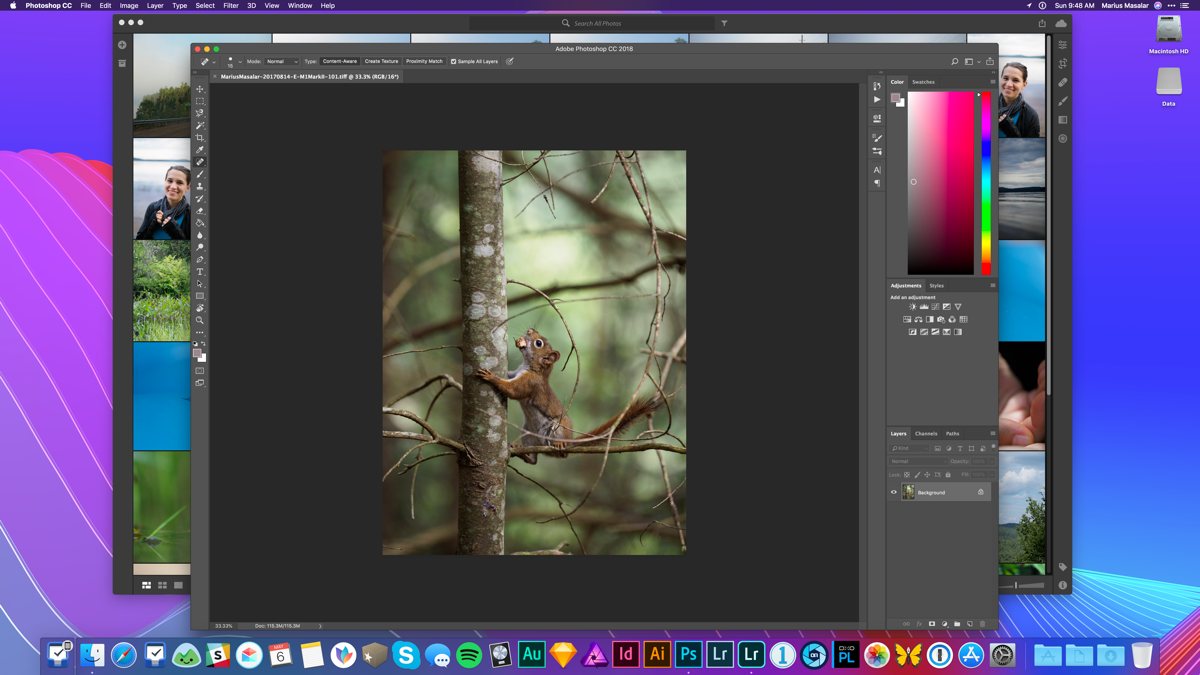
This is particularly important for professional users, who will find that any gaps in editing functionality within Lightroom are handily filled by Photoshop. In this way, some pros may find themselves preferring the streamlined experience of Lightroom CC, knowing that they can toss images out to Photoshop when they need more powerful editing capabilities.
Ultimately, while features and design can be argued back and forth, ecosystem is one area where Adobe is so far ahead of the competition that it’s basically no contest.
Lightroom Cost & Pricing
Adobe is no longer offering standalone licenses for their Creative Cloud apps, a fact that has put a lot of subscription-averse people off of using their products.
For the rest of us, Adobe has two main plans dedicated to photographers: the Lightroom CC Plan, and the Creative Cloud Photography Plan. Both plans start at $9.99USD/month, but they offer very different things.
The Lightroom CC Plan gives you access to the new Lightroom CC, as well as 1TB of cloud storage for your library. The Creative Cloud Photography Plan, on the other hand, only gives you 20GB of storage, but it includes Lightroom CC, Lightroom Classic CC, and Photoshop. You can also increase your cloud storage up to 10TB for an additional fee.
Both plans have their merits. The former is ideal for mainstream users who won’t need the editing power of Photoshop and who will be used to cloud-based photo libraries thanks to the ubiquity of iCloud Photo Library and Google Photos. They’ll get a powerful editing tool that works everywhere, and the cloud storage functions as an offsite backup of their image library too, a service you’d otherwise have to pay for separately.
The Creative Cloud Photography Plan is a good fit for advanced users and pros. It gives you the full spectrum of Adobe’s photography apps, and assumes that you’ll prefer to use local catalogs in Lightroom Classic CC, hence the stingy default cloud storage quota. It’s easy to get more storage though, so for a bit more money you can have the best of both worlds.
Runner-Up: Capture One Pro is the Best Professional Photo Management and Editing App for macOS
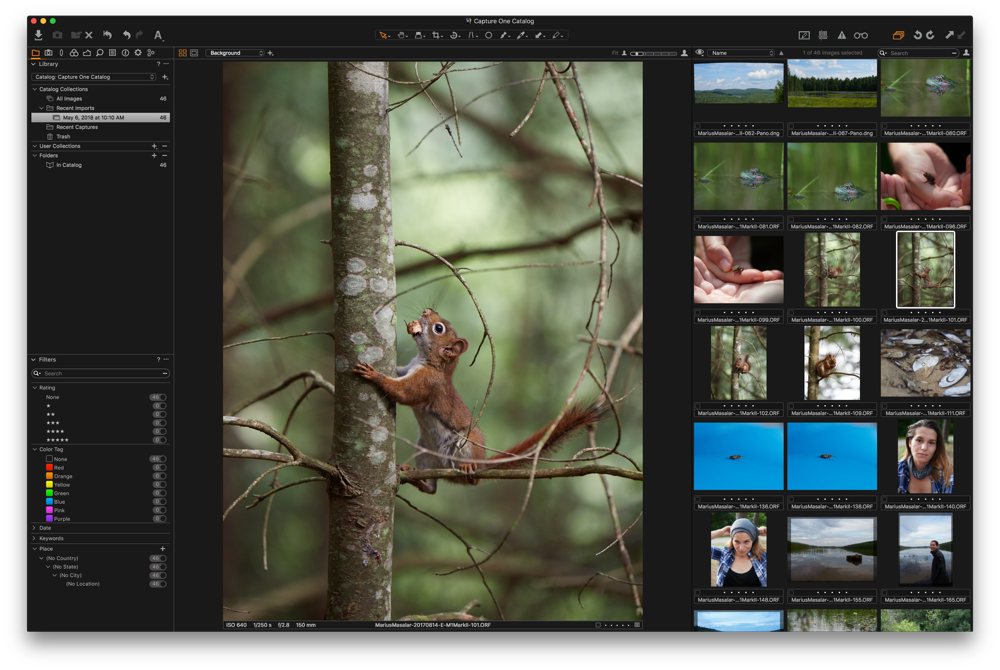
Despite casting a wide net with its two incarnations, Lightroom can’t possibly encompass the needs of all photographers. Luckily, this leaves room for some excellent competitors, the most impressive of which is undoubtedly Capture One Pro. Now in its 11th edition, Capture One Pro is a proven powerhouse, trusted in high-end studios all over the world.
Many of its adherents swear that it provides superior processing to Lightroom, a claim that’s difficult to test. While it’s true that the default rendering tends to be more pleasing, that only accounts for the starting point (and Adobe’s new Adobe Color profile in Lightroom closes the gap by providing a rather…familiar rendering).
In my usage, I do prefer the output I get from Capture One Pro, but that has more to do with the nature of its tools than their capability. They’re almost always more granular, more sophisticated, and more customizable, allowing for different approaches to processing. While the tools are more complex, understanding them allows me to get to a pleasing result faster than I can in Lightroom, despite having significantly more experience using Lightroom.
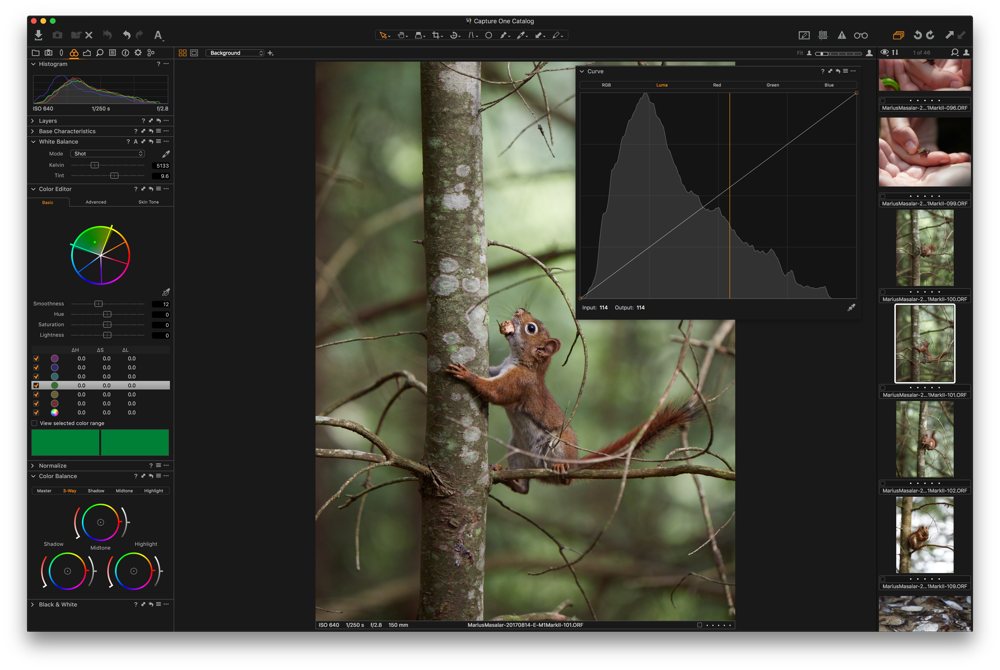
Color tools are vastly superior, offering a powerful wheel-based editor with precise controls for making adjustments to specific color ranges, and a dedicated skin tone module. Similarly, where Lightroom gives you a basic “Split Toning” tool, Capture One Pro provides dedicated highlight, mid-tone, and shadow color balance wheels, each of which has its own hue, saturation, and lightness adjustment control.
In the Curves tool, Capture One Pro goes beyond the RGB curve with a very useful “luma” curve that can manipulate contrast without affecting color saturation. Speaking of contrast, where Lightroom has a single “clarity” control, Capture One Pro has four clarity algorithms you can switch between, each of which behave differently. It also provides a dedicated “structure” tool for refining micro-contrast (separate from the sharpening tool). And for adding that finishing touch, you can choose between six grain algorithms instead of just one.
What’s more, all of these adjustments can be made on layers, like in Photoshop, with dedicated masking tools and opacity controls to help tailor the effect to taste.
These are just a few examples of where Capture One Pro’s tools take a step beyond what Lightroom offers. Features like annotations, sessions, tethering, Photoshop round-trip support, and more really push the envelope for professional usage.
In terms of workflow and capabilities, the biggest advantage is in Capture One Pro’s flexibility. The interface is deeply adaptable, allowing you to add or remove tools from the sidebar, detach any tool and resize it for more precise control, re-order tools, even move the location of the sidebars entirely to create dedicated layouts, called Workspaces, that you can save and recall with a keyboard shortcut.
Compared to Lightroom, the main features that are missing are the same degree of cross-platform support, cloud sync, and a few specialized features like HDR/panorama merging, or an equivalent to things like Survey view for culling shots.
And all of its power comes at the expense of intuitiveness. Capture One Pro is more daunting to start with than either version of Lightroom. Also, while it’s been around for years and has a large user base, it still has nowhere near the ecosystem richness that Lightroom has, with relatively few third-party preset (or “style” in Capture One parlance) packs. Credit where credit is due though: Capture One Pro has an extremely active YouTube channel that’s constantly putting out excellent tutorials and hosting webinars to help people get started.
Capture One Pro’s flexibility extends to pricing as well. You can choose to purchase a perpetual license for $299USD, which gets you all updates until the next major version. Or, you can get a subscription license for as low as $20USD/month (annual subscription with monthly billing). Pre-paying for the year saves you 25%, for a total of $180/year.
Capture One Pro is unashamedly focused on professional users, but the growing library of tutorials make it a great choice for ambitious beginners as well. Still, it’s very much an “old-school” sort of app, built around the idea of bringing home your photos, importing them into a computer, and editing them on that machine only.
Other Contenders
While Capture One Pro’s track record, polish, and processing quality cement it as our runner-up, there are a number of other extremely promising competitors that deserve a mention.
Apple Photos
While we’re fans of iCloud Photo Library as a general photo management solution, people who are looking to take their photography seriously may run into the limitations of Apple’s service.
For one thing, handling of raw files is rudimentary and inconsistent across platforms. File management in general is a lot less refined, with almost no export options, and only two choices for file storage: keep a local copy of everything, or trust Apple to manage local/cloud storage distribution for you (“Optimize Storage”). The unpredictability of the latter makes for an untrustworthy system when you need to be sure that a certain album is available when you need it, even offline.
That being said, organization is good: Apple Photos includes the ability to create smart albums, and handles face and location data, along with keywords. Search is also very good, competing favourably with Google Photos and Adobe’s Sensei.
If you work primarily with JPG files, Apple Photos makes for a simple, seamless pick that’s built right into your Mac and offers affordable storage tiers for more storage.
DxO PhotoLab
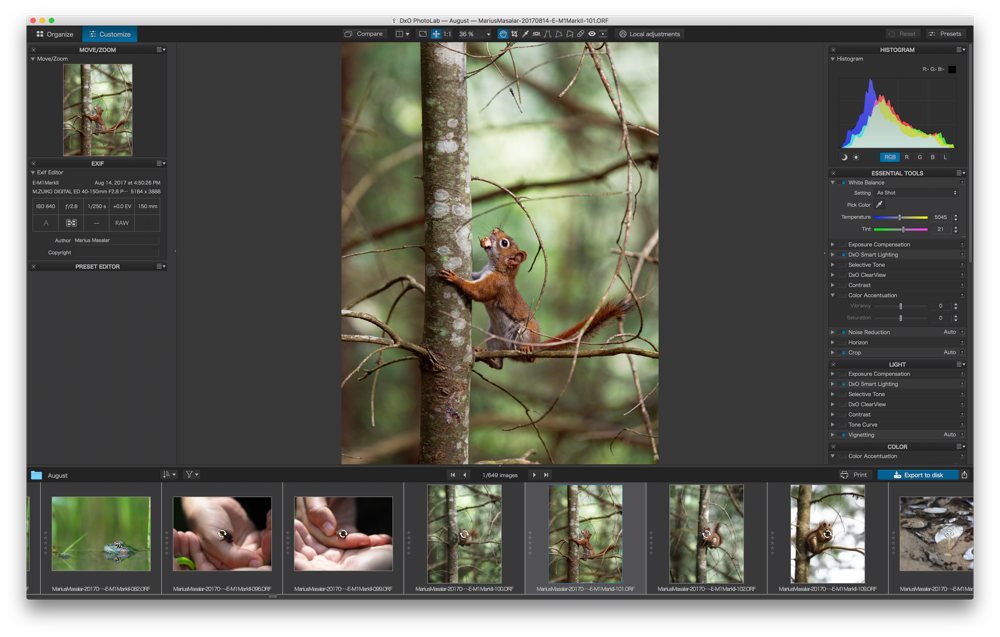
The second is DxO PhotoLab, the successor to DxO Optics Pro.
In many ways, DxO’s processing is a bit ahead of the curve. It had a tool called ClearView long before Lightroom introduced Dehaze. It had Smart Lighting before Capture One Pro added a Brightness slider. And, of course, its PRIME noise reduction algorithm is legendary, capable of cleaning up images that I would have thought unsalvageable in other editors.
Thanks to its parent company’s extensive research and review of imaging technology, PhotoLab also has sophisticated camera/lens combo correction profiles to optimize sharpness, distortion, and aberration more precisely than any other app.
Setting aside its uncertain future, PhotoLab falls short on a few fronts. Firstly, its interface is cramped, and many of its best tools are hidden in the clutter. For instance, PhotoLab has a secret weapon that I love: the ability to impart a color rendering from classic cameras. I often use this to apply a beautiful classic Canon color tonality from the 1Ds Mark III to my Olympus photos for a pleasing starting point.
Unfortunately, the tools for organizing and culling photos are rudimentary, exports are slow, and PhotoLab doesn’t support Fujifilm cameras at all, which cuts a lot of photographers out of the picture.
Still, it’s a capable, affordable choice that starts at $129USD for the Essentials version, though you should probably spring for the $199USD Elite edition for access to the best tools.
ON1 Photo Raw 2018
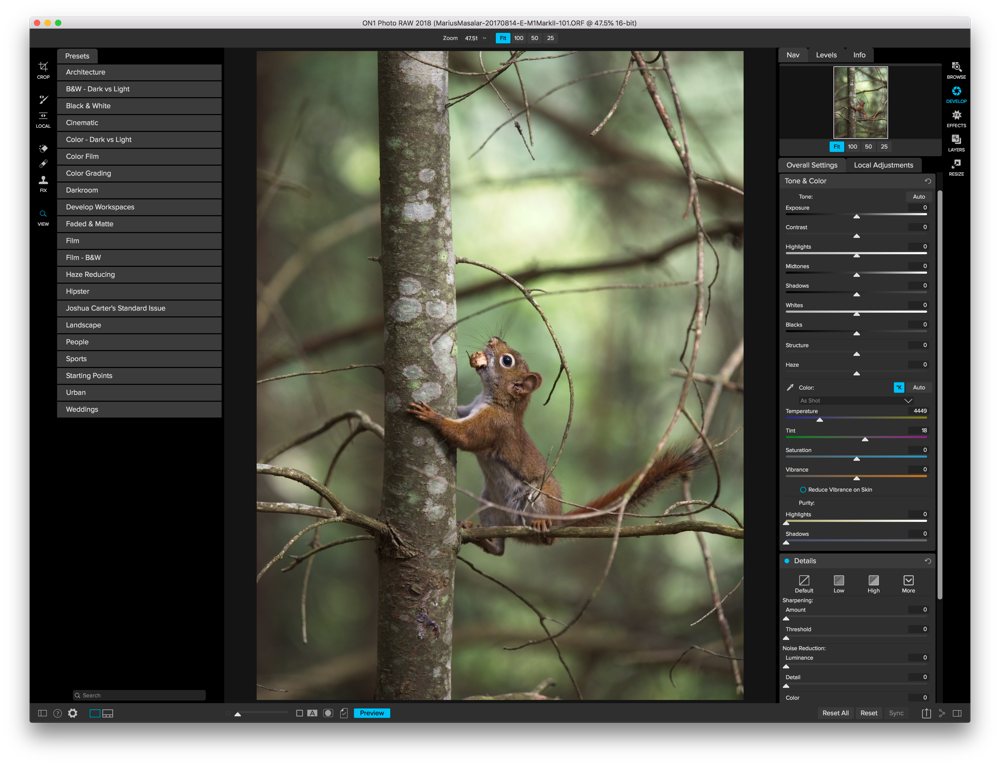
One of the newest options in this space is ON1 Photo Raw 2018.
Photo Raw is an amalgamation of several formerly-separate apps or algorithms that come together to form an extremely feature-rich choice.
It has a dedicated skin retouching module similar to Capture One Pro, it features native HDR and panorama merging like Lightroom, and comes complete with a comprehensive and intuitive set of image editing tools.
Certain tools, including the marvellous Dynamic Contrast, are separated into an Effects tab rather than the normal edit area. I would prefer they all live in the same area, personally, but it’s not a big deal.
One area that does deserve its own module is the Resize tab, which provides amazing resizing results tailored to your intended output, with presets for print and screen. The algorithm running under the hood is the famous Genuine Fractals one, known for producing very detailed, natural looking enlargements even when pushed to extremes.
ON1 Photo Raw 2018 is a very close contender for the top spot, but its relative youth as a product has some consequences, like the quality of the image having changed noticeably even since launch. Improvement is great, of course, but it’s hard to build workflows around a tool that’s still growing.
Still, this is one scenario where taking a chance on a newcomer can be a great idea, and the price of entry is a reasonable $120USD for a perpetual license, or $130USD/year for a perpetual license along with free upgrades to the next version and a bevy of extra content and monthly loyalty rewards.
Darktable
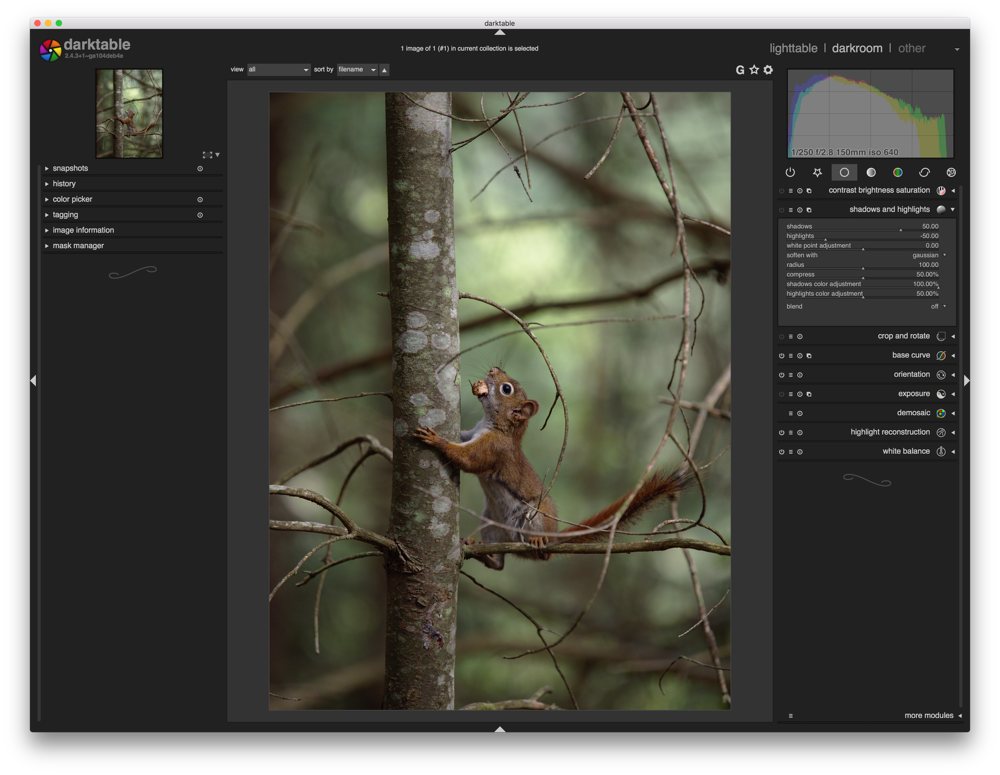
It wouldn’t be fair to discuss this category of apps without considering the open source options.
Darktable is very much an open source version of Lightroom. It shares a similar interface paradigm, similar features, and of course has the tremendous advantage of being completely free. In some areas, particularly the degree of control over masks, Darktable is superior to all the others.
Unfortunately, as is often the case with open source software, there’s an off-putting lack of interface polish, user experience sensitivity, and accessibility to new users. The app’s many editing tools are often cryptically named, and the interface is decidedly non-native feeling, to the point where it might leave you disoriented unless you have some familiarity with Linux software (Darktable is available on macOS, Windows, and many Linux distributions, but is clearly built for the latter).
If you’re willing to read the manual and the idea of getting powerful editing and organization tools for free appeals to you, then Darktable is a very capable option.
RawTherapee
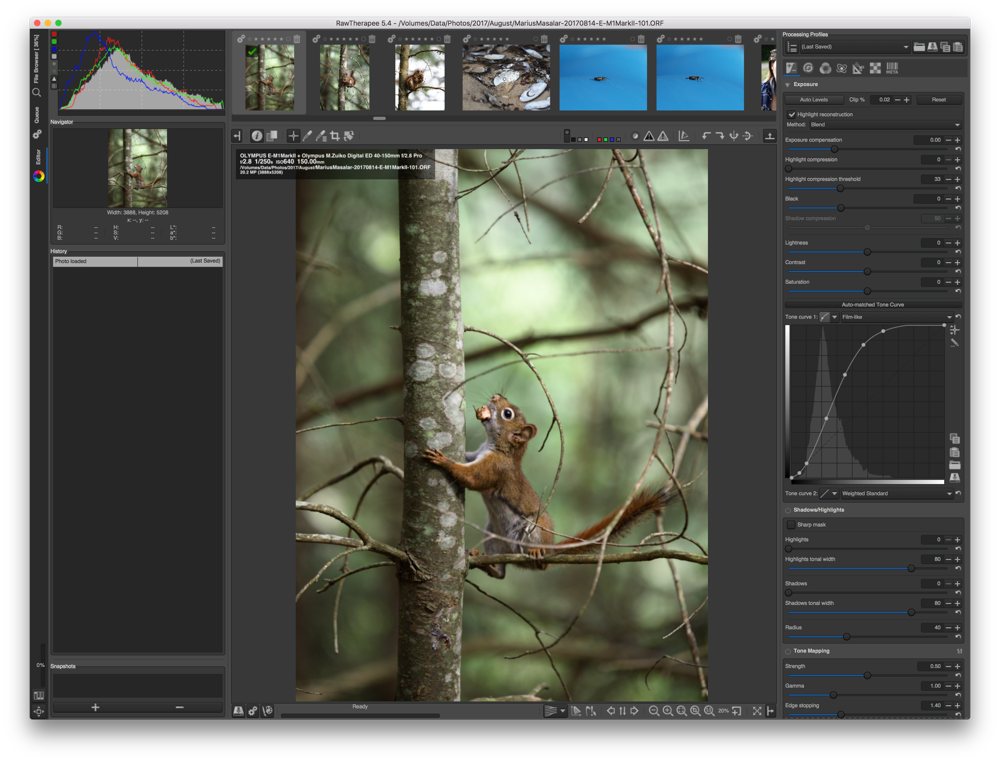
The last contender is probably the most powerful image editing suite available. It is also the least accessible.
If Darktable is the open source version of Lightroom, then RawTherapee is like an open source version of Capture One Pro designed by a syndicate of alien engineers who are aware of human beings only as the inconvenient creatures that report bugs and otherwise interrupt their pursuit of the über editor.
Using RawTherapee is an exercise in humility. Its dense, terrifying interface is home to a labyrinthine array of tools that bear only a passing resemblance to their relatives in other apps. Wherever Lightroom hides five obscure, inscrutable parameters from you by consolidating them into a single slider marked “Contrast,” RawTherapee will reveal all those hidden parameters and invite you to manipulate them.
Have you ever heard of the l*a*b color space? Do you know what wavelet editing is? Have you been clamoring for 13 different choices of algorithm for raw file demosaicing? If so, RawTherapee is the editor for you!
Get Our Best Photography Tips & Workflows
Transform your photos and edits from average to awesome with our in-depth, mobile photography course. It’s jam-packed with training, ideas, and lessons that can literally transform your photography overnight.
Conclusion
With such a low barrier to entry (thanks to the smartphone revolution), it’s no longer just dedicated hobbyists and professionals looking to manage and edit photographs. Everyone can benefit from a good system for organizing, processing, and sharing their shots.
Adobe’s developing Lightroom ecosystem is the ideal choice for most people because it caters to a broad range of needs, from beginner to professional, and does so with the support of a huge community of users, experts, and developers.
While it’s true that other options sometimes exceed Lightroom’s capabilities, they tend to do so in specialized ways that don’t impact a normal workflow.
Beyond the details of functionality, though, the main appeal of Lightroom is its forward-thinking, device-agnostic approach to managing photos. It feels decidedly modern, and while it makes ambitious promises, Adobe is certainly well-positioned to deliver on them.
If you’re in the market for an all-in-one approach to organizing and editing your photos, Lightroom should be your first stop.