The easiest way to back up your Mac
Time Machine
Time Machine is Apple’s solution for the everyday Mac customer. It’s easy to set up and use, and creates an excellent safety net for those who wish to back up their data to a locally-attached external hard drive.
On page 14 of his Mac OS X 10.5 Leopard review, John Siracusa talks about Time Machine (which debuted in 2007 with Leopard) and shares some (pre-Leopard) backup stats of Mac users based on a poll Apple took:
Eighty percent of Mac users said they knew they should back up their data. (This is scary already. Only 80 percent?) Twenty-six percent said they do back up their data. That actually doesn’t sound too bad until you get to the next question. Only four percent back up regularly. In a nutshell, this means that if you could snap your fingers and make one Mac user’s main hard drive disappear, there’s a 96 percent chance that you just destroyed files that are completely unrecoverable.
Welcome to Time Machine
Time Machine has lots of nice features. It is automatic, backing up every hour without any user intervention. By default, it will copy everything on your Mac — system files, applications, accounts, preferences, email messages, music, photos, movies, documents, and more.
The best part of Time Machine, however, is its ability to keep multiple copies of files. Any time a file is changed, Time Machine backs it up, making recovery of a specific version of a file fast and simple.
In practice, this means that if you added one sentence to a Pages document every day, at the end of the month, you’d be able to retrieve a copy reflecting each and every edit point.
It also means that if you delete a file or folder from your Mac, Time Machine will keep a copy around for a while, giving you a window of time in which it can be recovered.
Since Time Machine will do this until the hard drive it is using becomes full, we recommend dedicating an entire hard drive to it, and one that is at least twice the size of your internal disk. The bigger the drive, the deeper Time Machine’s archives can go.
Setting up Time Machine
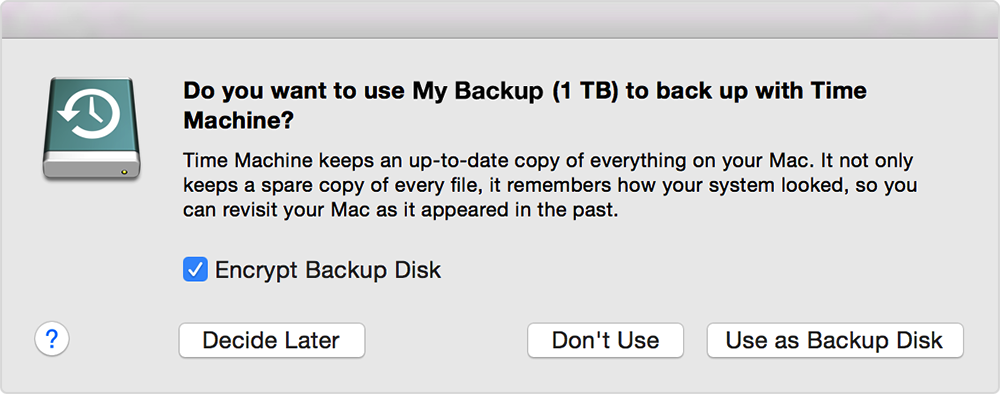
Time Machine is incredibly easy to set up. Simply buy a hard drive and plug it into your Mac. Once you do, macOS will show this dialog box:
Once a drive is selected, Time Machine will begin its initial backup. Depending on the number of files on your computer and the type of drive you’re using, this could take several hours. But, since Time Machine only grabs changed files during subsequent backups, future backups should be much, much faster and hopefully will just happen without you even noticing.
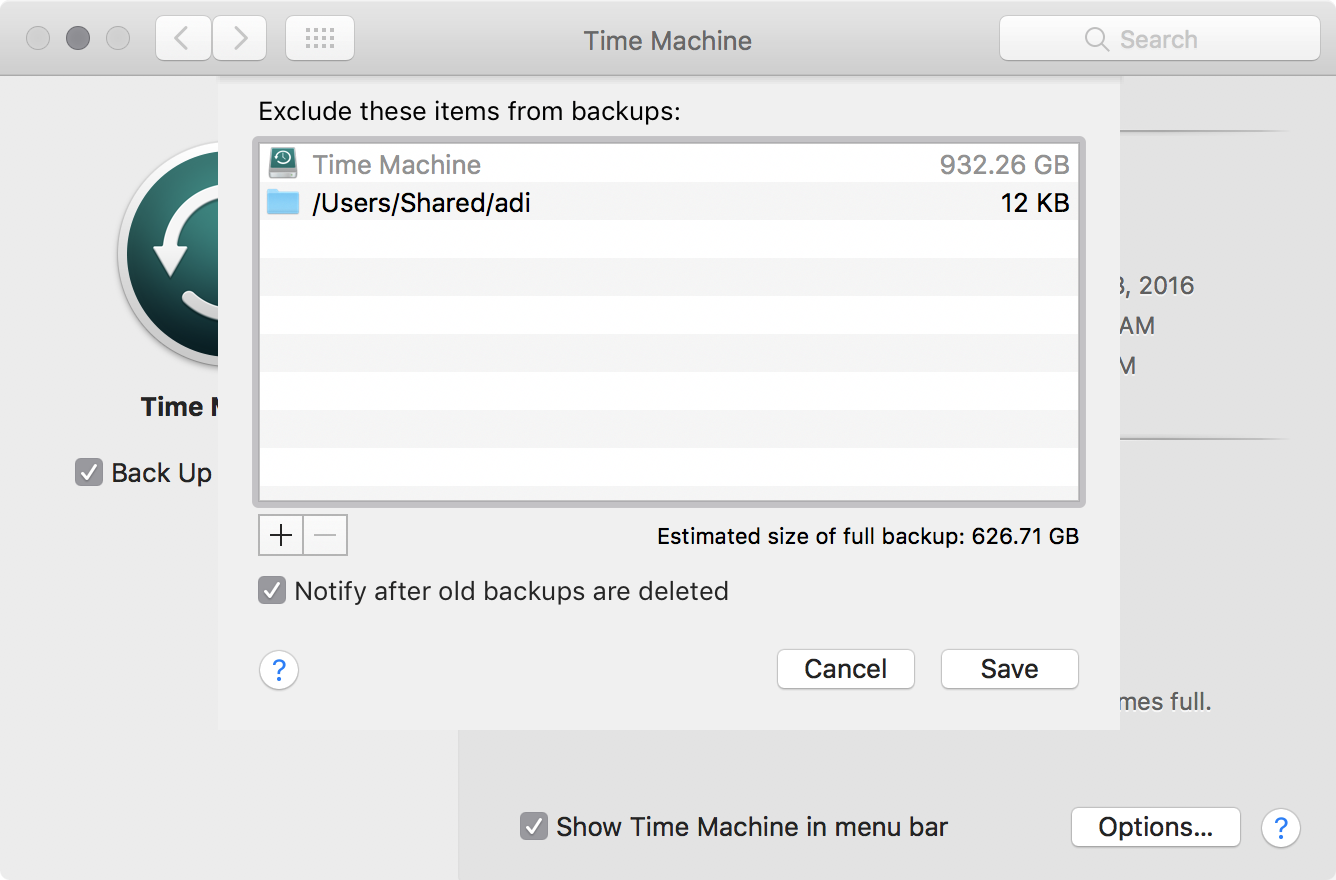
By default, Time Machine backs up all files, but you can change this in System Preferences:
If you’re setting up a Time Capsule, be sure to check out this article on Apple’s support site for more information.
Using Time Machine
Time Machine is designed to run every hour. If your Mac is asleep or misses a backup for some reason, it will begin to work again as soon as it can. In short, as long as the Mac can see your Time Machine hard drive, it will take care of backing up for you.
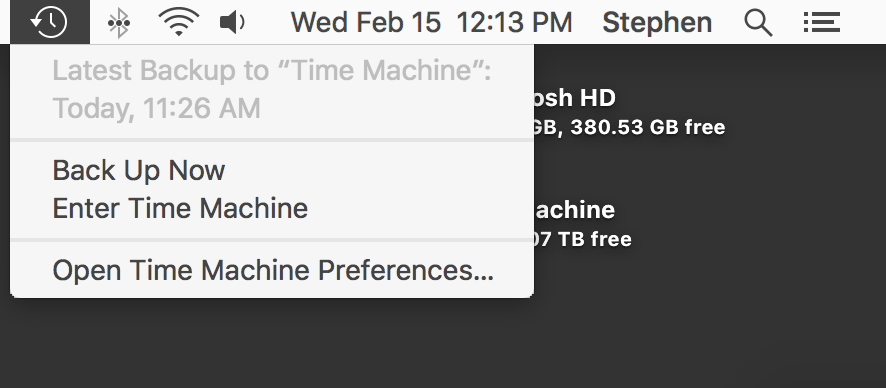
Time Machine is controlled from a simple menu bar application:
The drop-down gives information about the most recent backup, and can be used to pause the application if a backup is currently being created.
While in the early days Time Machine was a resource hog, on modern Macs, there’s no real performance hit when the application is running.
Recovering files with Time Machine
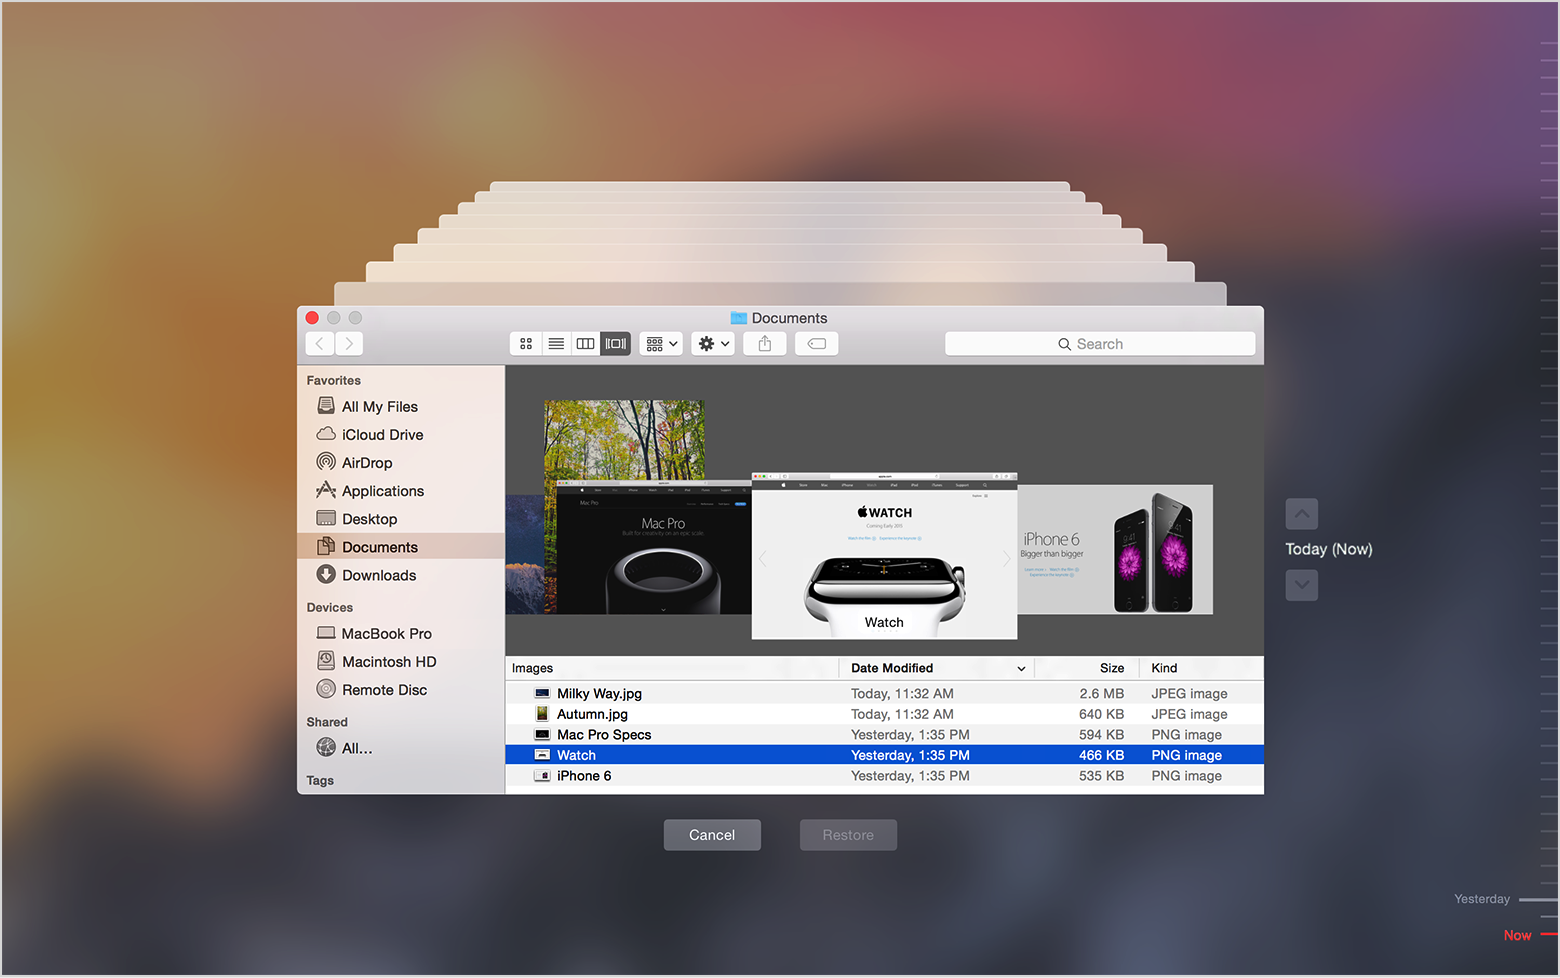
Recovering a file from a Time Machine backup is brilliantly easy. Simply navigate to the Time Machine icon in your Mac’s menu bar and select “Enter Time Machine,” which will bring up this interface:
You can navigate to the folder your file was in with the Finder window, but the real magic takes place with the slider on the right side of the screen. Scrubbing over it with the cursor shows the dates and times of available backups. Recovering something that was accidentally deleted from your Documents folder is as easy as navigating to that folder and going back until reaching a point in time before the file was deleted.
(The same technique can be used if you wish to recover an older version of a file that is still present on your Mac.)
Once you’re done, click the “Restore” button to copy the file from the backup drive and return it to your Mac’s main drive. If a document exists in the directory with the same name, macOS will ask you what it should do.
If you reformat or replace your Mac, Setup Assistant can be used to copy all (or some) data from a Time Machine drive. Simply have the drive plugged in at first boot, and the OS will walk you through restoring your files.
Beyond Time Machine
There’s no reason not to keep a Time Machine backup. It’s easy to set up and maintain, and external hard drives are cheap. That said, it’s not the only option out there. If you’re looking to beef up your backups, check out these articles:

