The Best Pro Writing App for Mac (and iOS)
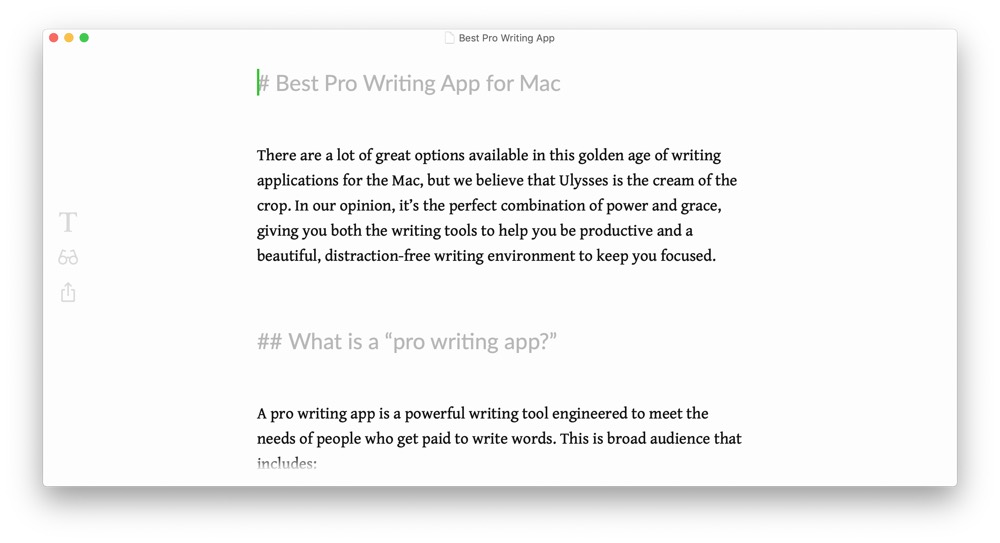
Ulysses
There are a lot of great options available in this golden age of writing applications for the Mac and iOS, but we believe that Ulysses is the cream of the crop. In our opinion, it’s the perfect combination of power and grace, giving you both the writing tools to help you be productive and a beautiful, distraction-free writing environment to keep you focused, making it the best writing app.
What is a “pro writing app?”
A pro writing app is a powerful writing tool engineered to meet the needs of people who get paid to write words. This is a broad audience that includes:
- Screenwriters
- Playwrights
- Authors
- Bloggers
- YouTubers
- Podcasters
- and much, much more
If you fall into any of these categories, write more than occasionally, or get paid for what you write, then a pro writing app is probably a great fit for you.
You could also define a pro writing app as a “focused writing app,” one that assists you in getting your words out of our head and onto the page. The mission of any pro writing app should be to help you produce words that will eventually end up being posted, printed, or published. It’s not something that gives you a ton of formatting options, but rather helps you focus on your words. A good pro writing app should provide an environment that is aesthetically pleasing and makes it easy for you to focus and create, then allows you to export your work to its final destination as quickly (and painlessly) as possible.
Since the words themselves are the end goal, it’s important that the pro writing app you choose provides you with a distraction-free user interface that inspires creativity. It should provide the essential tools necessary to make your job of writing easier, but it shouldn’t provide anything extra that could clutter the interface with options or features you don’t want or need. The design should be as minimal as possible so as not to be distracting, therefore making the features that are not included in a pro writing app just as important as the ones that are.
What makes a good pro writing app?
These are the characteristics we consider important in a pro writing app and the criteria we used when selecting the best one:
- Design — A blinking cursor on a blank page is intimidating enough, so the app must be well-designed in order to provide an inviting writing environment. Design is vitally important as it should strive to eliminate visual barriers so you can enter into a state of flow easily and do your best creative work.
- Ease of Use — The purpose of any tool is to make the work easier. If the app is not easy to use or it’s too difficult to figure out how a certain critical feature works, it can actually make it harder for you to get words on a page.
- Workflow Options — The application you choose to use should adapt to fit your workflow. It should accommodate your preferred methods and styles for capturing and creating content so you can focus on the words — no matter where you are when you decide to write them.
- Export Options — Your words are ultimately going to end up somewhere outside the pro writing app that you select. Flexible export options allow you to quickly and easily move your content from one location to another and make it simple for you to get your content out into the world.
- Sync/Multi-Platform — With the technology tools that are available today, it’s easier than ever to capture inspiration whenever (and wherever) it hits. If the pro writing app you use has companion mobile applications, it can make it even easier to record that perfect word or phrase when you think of it — even if you can’t get to your Mac.
- Update History — The tool you decide to use should be actively developed. Nothing is more frustrating than being fully invested in a platform that is no longer supported because you then have to figure out a way to get everything out and start over in a completely new system (ask anyone who used WordPerfect or QuarkExpress back in the day).
- Price — There have never been more quality options to choose from, and the competition surrounding great writing apps is fierce. This is great news for you as a writer, as it means you have a lot of affordable tools to choose from.
What a Pro Writing App is NOT
Before we dive into this review, an important distinction: a pro writing app is not a word processor. Word processors are very powerful applications that have a lot of unnecessary formatting and layout tools (for our purposes, anyway). These typically don’t translate well on export, so they have limited value unless their proprietary file formats are in fact your ultimate creative destination. And having to support all of these functions and features comes at a price, resulting in a cluttered and cramped writing interface.

All of these options and tools can also get in the way of your writing by encouraging you to tinker with layout options instead of putting words on the page. Many a writer has succumbed to what Steven Pressfield calls The Resistance by fiddling with font settings instead of doing the work.
Word processors also make it very difficult to work on your project outside the application you started with because of their proprietary file formats. Ever open up a Word document you received from someone and were welcomed by a warning message saying a necessary font is not installed? That’s a frustration of working with word processors like Microsoft Word and Pages, and an unnecessary one for our purposes. They tend to cause a lot of frustration when trying to export your words out of their proprietary file format, which quickly makes these additional tools more trouble than they’re worth.
A pro writing app is also not a specialized text editor like Sublime Text, Atom, or BBEdit. These are also very powerful applications with specific use cases, but are overkill for the person who just needs to put words on a page. That doesn’t mean you can’t write in them, just that it’s not the ideal tool to do so. These applications have a lot of very powerful features (like code completion and multiple cursors) that are great for coders and developers, but unnecessary for people who just want to write.
Our Favorite Pro Writing App is Ulysses
Ulysses is an extremely powerful writing tool with well-thought-out features that will provide great support for any writing project. It provides everything you need to be a more productive writer and still maintains a simple UI that limits distractions so you can focus on accomplishing your writing goals. It’s not cheap, but for people who get paid (or want to get paid) to write words, it is a very worthwhile investment.
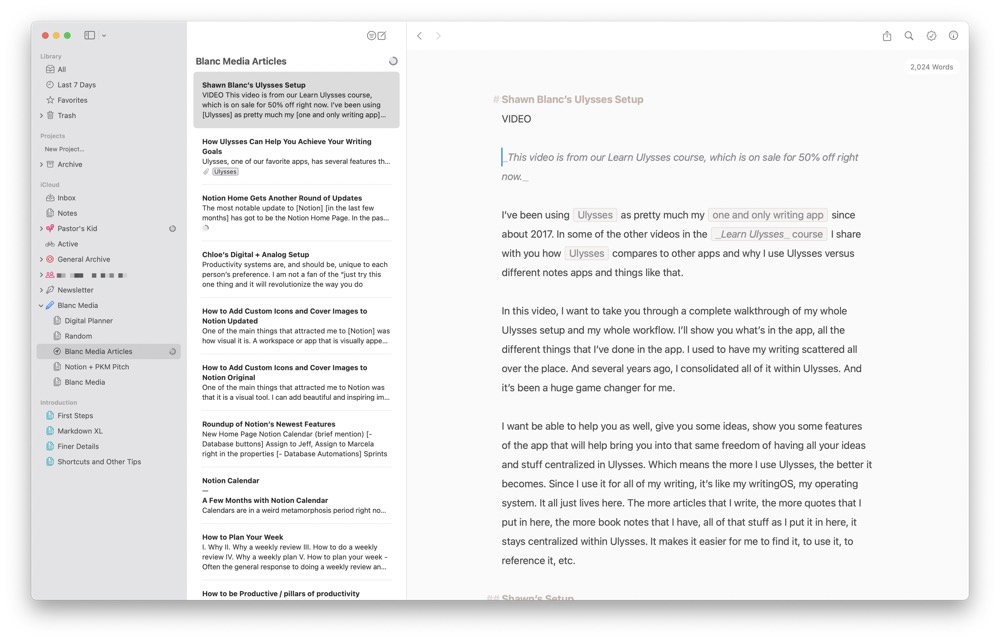
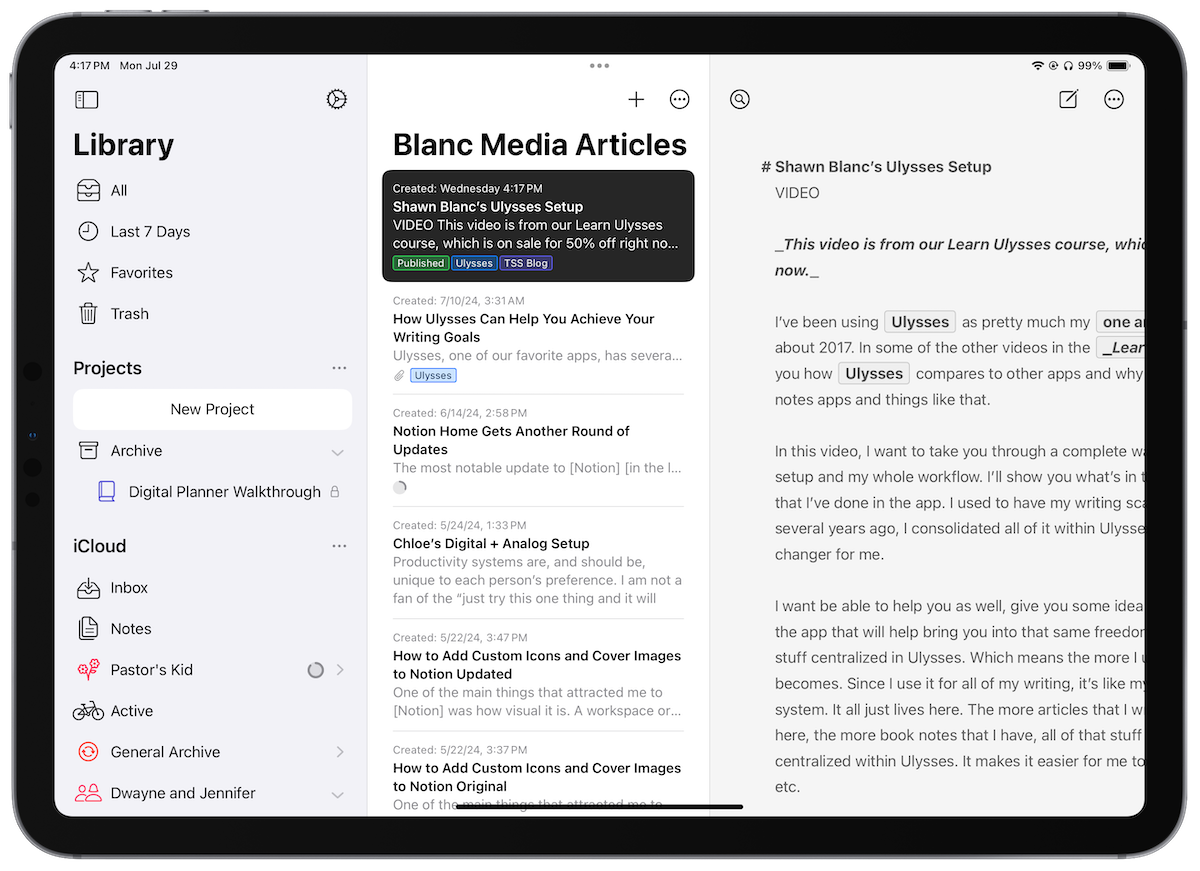
When you first launch Ulysses, you’ll see the main three-pane window with the library on the left, the list of “sheets” (what Ulysses calls documents) in the middle, and the editor pane on the right. There’s also a fourth slide-over Attachments pane, but it it stays out of your way until you actually need it.
The left pane offers a couple locations for storing your writing files, including iCloud (if you want your writings accessible everywhere) and local storage (if you don’t). You can also set up “External Folders” that can point to a location like Dropbox or Google Drive. This can be handy if you use another location or app to capture ideas but you want to flesh them out and do the actual writing in Ulysses. For example, maybe you use a note taking application on your iOS device to capture ideas to plain text files in a Dropbox folder. By adding that to the Ulysses Library as a source, you’l automatically get access to those text files whenever you open up Ulysses.
This flexibility allows Ulysses to fit perfectly into my writing workflow:
- When I get an idea (i.e. “Write article on Best Pro Writing App”), I capture it using Drafts,which saves the note to a Dropbox folder called “Notes.” This might also include a list of apps I think would be useful or other tidbits of information I’ll use when writing.
- When I’m cleaning out my inbox, I’ll find the note and create a task in my task manager. I’ll want to flesh that idea out into a post or article later, so I’ll move the file from “Notes” to another folder in Ulysses which denotes that it is a work in progress.
- I’ll work on the article in Ulysses until I’m finished with it, then export it and publish it straight to the web.
Your writing workflow may differ, but with the ability to add text from many different sources (iCloud, Dropbox, local Mac storage, etc.) Ulysses is flexible enough to accommodate a variety of workflow implementations.

Achieving Your Writing Goals with Ulysses
If you did a side-by-side comparison of Ulysses with some of the other apps we tested, you’d see a lot of similarities, but you’d also see that there are quite a few features that are available in one or more of those other apps that are missing from Ulysses. I would argue this is not only necessary in order to keep the design simple and clean, but actually helps you focus on using the tools that are available which are specifically chosen to assist you in the writing process. In our opinion, the features the developers chose to include are powerful, useful, and easy to use.
One of these tools is Goals. There are a lot of apps that offer a word count, but Goals in Ulysses are a little bit different. For example, you can set your sheet’s goal to be something specific, like at least 1,000 words, or more generic, like about 10,000 characters. Here are the progress metrics you can select from when setting a writing goal:
- number of words
- number of characters (with or without spaces)
- number of sentences
- number of paragraphs
- number of pages
- estimated reading time
Once you select your progress metric, then you need to select the specific measurement you want to use. You can select about if there are no hard requirements for what you’re writing, or you can select at least or at most if your writing needs to meet certain maximum or minimum criteria.
You can also set a deadline if you have to finish your writing project by a specific date. Check the box to add a deadline and select it from the date picker, and Ulysses will automatically calculate the amount of text you have to write each day to finish in time. If your deadline is at night and you plan on writing that very day, there’s even an option to Write on Due Date so the additional writing day gets taken into account.
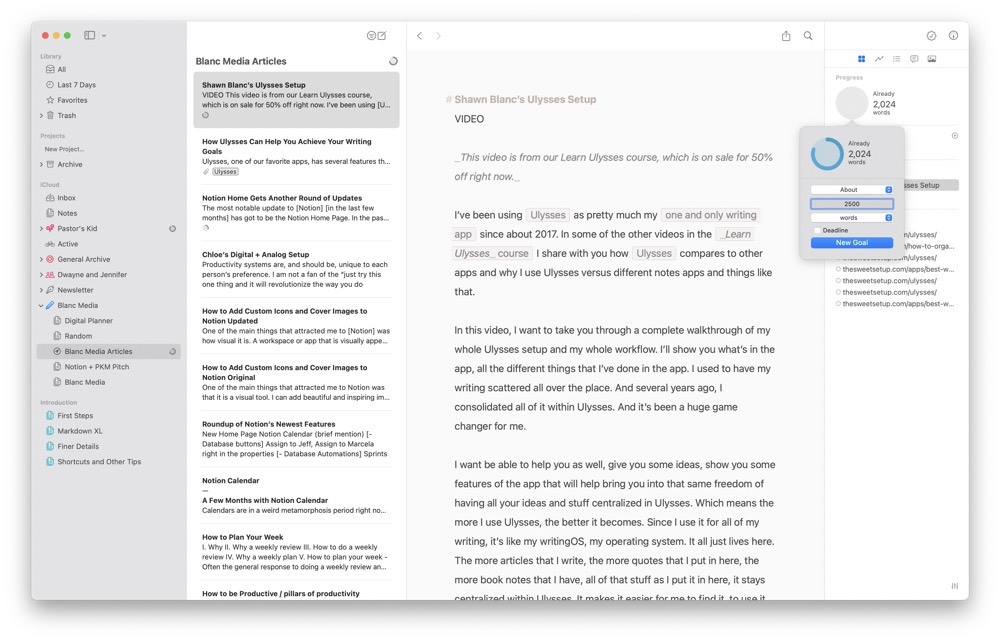
As you’re writing and making progress toward your goal, a small circle in the upper right corner of the sheet box (located in the middle pane of the three pane view) displays your progress. You can also see a much larger version of your sheet goal located in the Attachments pane. Once you’ve reached your writing goal and the circle is complete, it will turn green, giving you a very satisfying visual indication that you’ve met your goal:
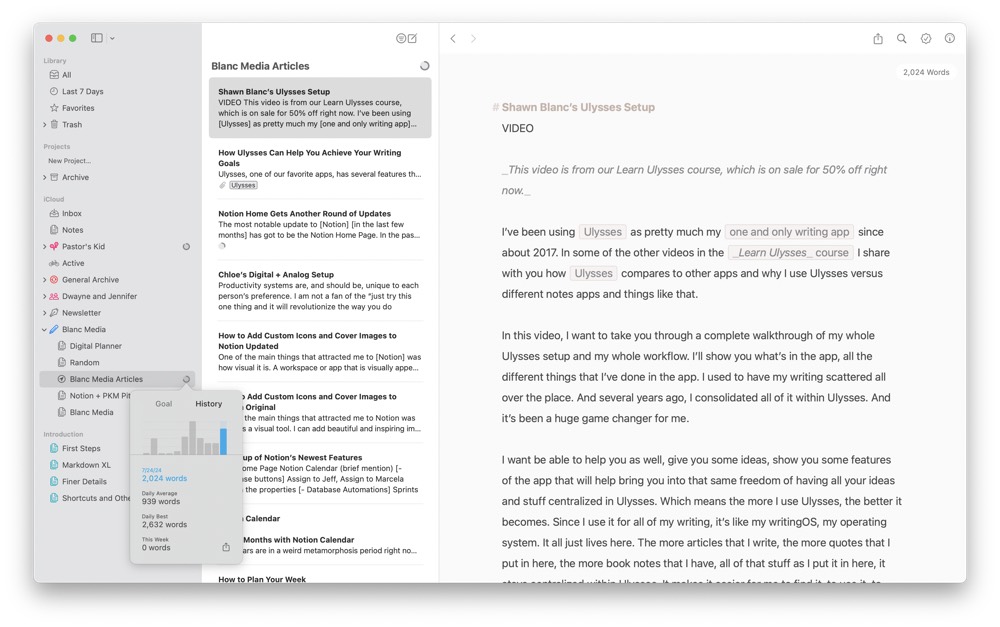
You can even set goals for groups and have Ulysses track your writing history. Once you set a goal for a group, Ulysses will track your writing history so you can see the daily progress you are making on your larger writing goal. Just right-click the group in the Library and select Goal, then select the History tab to see the words you’ve typed today, your daily average, daily best, and the total progress you’ve made this week.
Keeping Everything Organized
Ulysses also gives you everything you need to keep all your writing organized. One way to do this is by using Groups. Groups are kind of like folders on your Mac, allowing you to store related sheets together in a single location. So if you are the type of person who likes to keep your computer files in a nested folder hierarchy on your computer, you’ll feel right at home using groups in Ulysses. You can even create subgroups inside of groups. For example, you might have a group called Newsletter that contains separate subgroups for Drafts you’re working on and Published newsletters. This allows you to work on your newsletter while it’s in the Drafts subgroup, then once you export it you can move it to the Published subgroup to keep everything nice and tidy.

Ulysses also lets you apply keywords to your sheets. Keywords are basically tags, giving you another way to group your files without the confines of folders and physical locations. Keywords are very flexible and allow you to quickly search for related things, regardless of their location. For example, if you’re writing a book with many characters or locations, you could use keywords to filter all scenes starring the same character or location.
But Ulysses’ killer organizational feature is Filters. Filters are kind of like Smart Folders in Apple Mail and allow you to create living folders that have content in them based on specific criteria. For example, a Filter might include documents that contain certain keywords or be based on when you wrote or modified a document, etc. These are really powerful because they allow you to combine things and quickly find anything you’re looking for — even if you have tens of thousands of sheets in your Ulysses library! Filters look almost exactly like Groups in your Ulysses Library, but the contents are automatically updated based on the criteria. So a filter set up to show us Active documents will always show us only the sheets that we’ve been working on at some point in the last 7 days.
A Clean, Customizable Interface
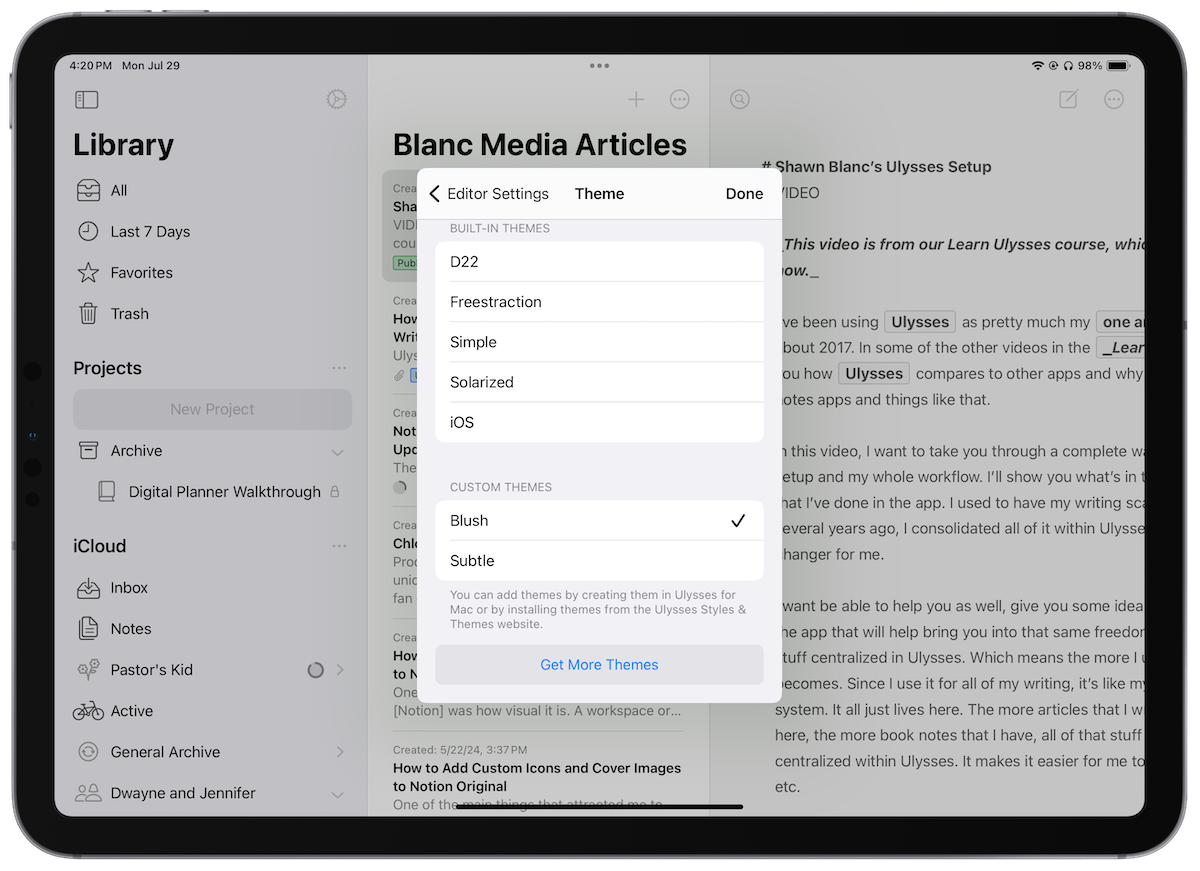
One of the best things about Ulysses is that it just looks great. The minimal interface is sharp, and every feature is carefully considered. Writing in Ulysses is based on Markdown formatting, allowing you to style your text as you write without all the clutter of something like HTML tags for web writers. The visual markup style makes it easy to see things like bold and italicized text, and you can also customize just about every aspect of the app to your liking. You can change the theme, change the font (or upload your own), even select different colors for individual style elements for both light and dark themes.
Ulysses also has a beautiful, distraction-free Full Screen Mode. Full Screen Mode makes it easy to block distractions and stay focused on your writing. While Full Screen Mode isn’t unique to Ulysses, there are a couple of additional features (like Typewriter Mode) that when coupled with Full Screen mode make Ulysses the ideal environment to focus on your writing.
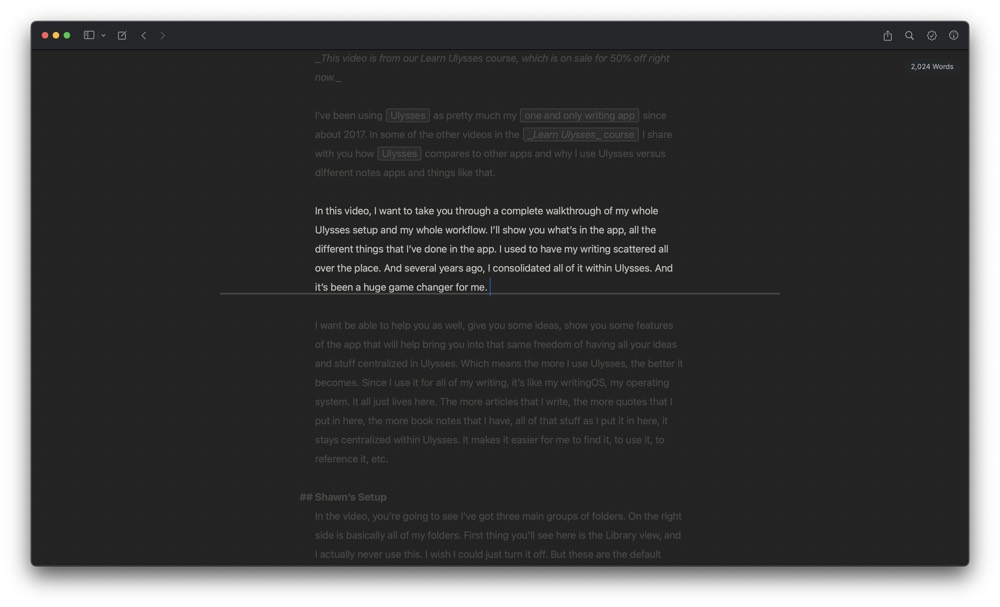
Once enabled, Typewriter Mode can be very beneficial for helping you concentrate on your current position as you type. You can set Typewriter Mode to highlight your current line, sentence, or paragraph, which causes the rest of the text in your document to fade into the background, while remaining legible. When combined with the Mark the Current Line feature, this makes the the words you are currently focused on really pop.
Ulysses also offers a feature called Fixed Scrolling. Fixed Scrolling fixes the current line vertically on one spot while you type. You can choose this spot to be on the top, in the middle or at the bottom of the screen, or opt for variable. When using Variable, you can freely move your cursor with the mouse or arrow keys, but once you start typing the current line will remain fixed.
Ulysses also has a gorgeous built-in Dark Mode. The Dark Mode in Ulysses matches the look and feel of other pro Mac apps and can be easier on your eyes as you write.
Exporting Made Easy
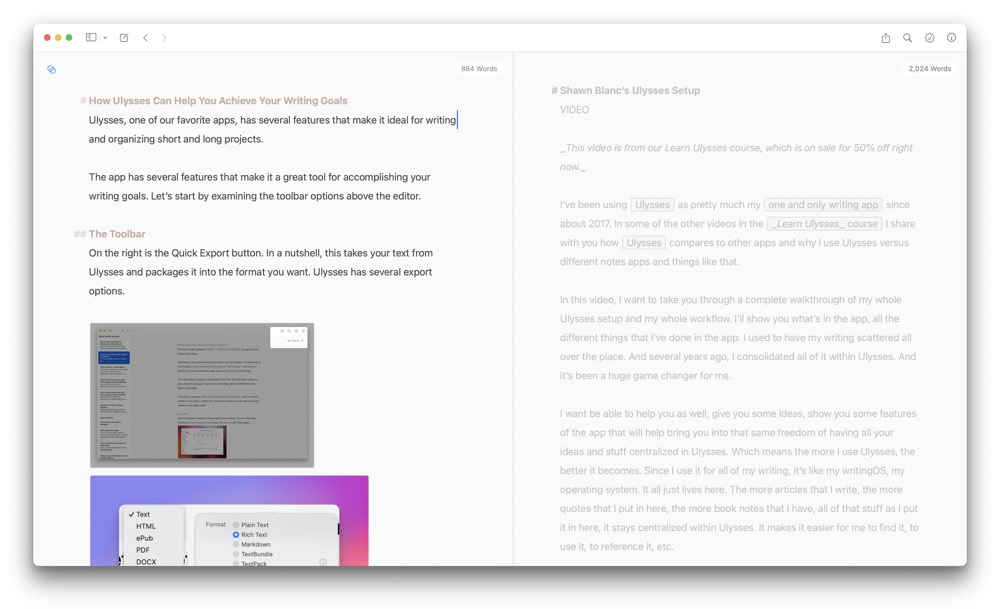
Once you’ve finished writing, Ulysses lets you export your text easily to a variety of standard formats using the Quick Export feature.
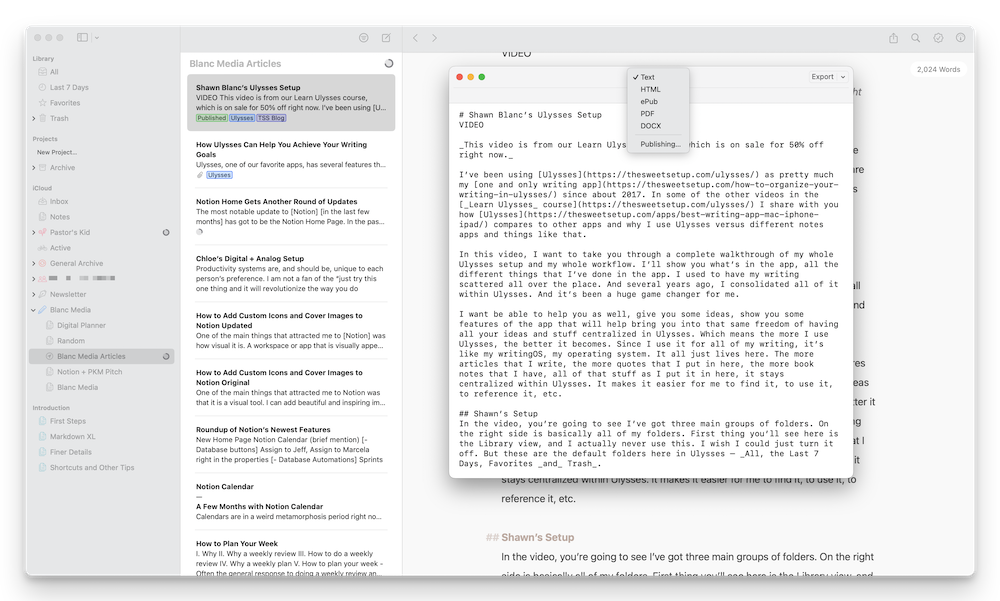
The Quick Export window has a couple different sections. The first section is the format switcher, which lets you choose the format of your text output. You can choose from Text, HTML, ePub, PDF, DOCX, or, if you want to upload your text to a WordPress blog or your Medium account, Publishing. Once you choose your preferred format there are further options to choose from so your document exports exactly as you want. You can, for example, choose an export style and a page size when your output is going to be a PDF document, but not when exporting as text or HTML.
In the top right of the page are the export settings. These vary depending on the format you select.
You can then click on the downward facing arrow next to the Export button and see your export actions. Some vary based on the export format you choose. From here, you can:
- Preview to see what your exported document will look like
- Copy to Clipboard
- Open with, which lists all available applications to which you can send your output
- Send as mail, which allows you to export your output as a mail
- Airdrop which allows you to send your document to another device.
among others…
The large button at the bottom executes the default export action. You can also trigger your default action from the Quick Export window by hitting the Enter key.
Ulysses also has a very clever way of solving the image export problem inherent with Markdown files created in sandboxed Mac App Store applications.
Images in Markdown documents are usually just links to a specific file location (which you can do in Ulysses), but this can cause problems with Apple’s sandboxing rules on the Mac App Store. For example, when sending a file from an app like Ulysses to another app on your Mac, you have to explicitly permit access to image files before they can be displayed in the target application. To solve this problem, the developers of Ulysses have worked with internet genius Brett Terpstra (the developer of Marked) to create a new file format called TextBundle which provides a way to get around traditional sandboxing limitations on the Mac. TextPack — as seen in the latest version of Ulysses for iOS — is the compressed variant of a TextBundle file.
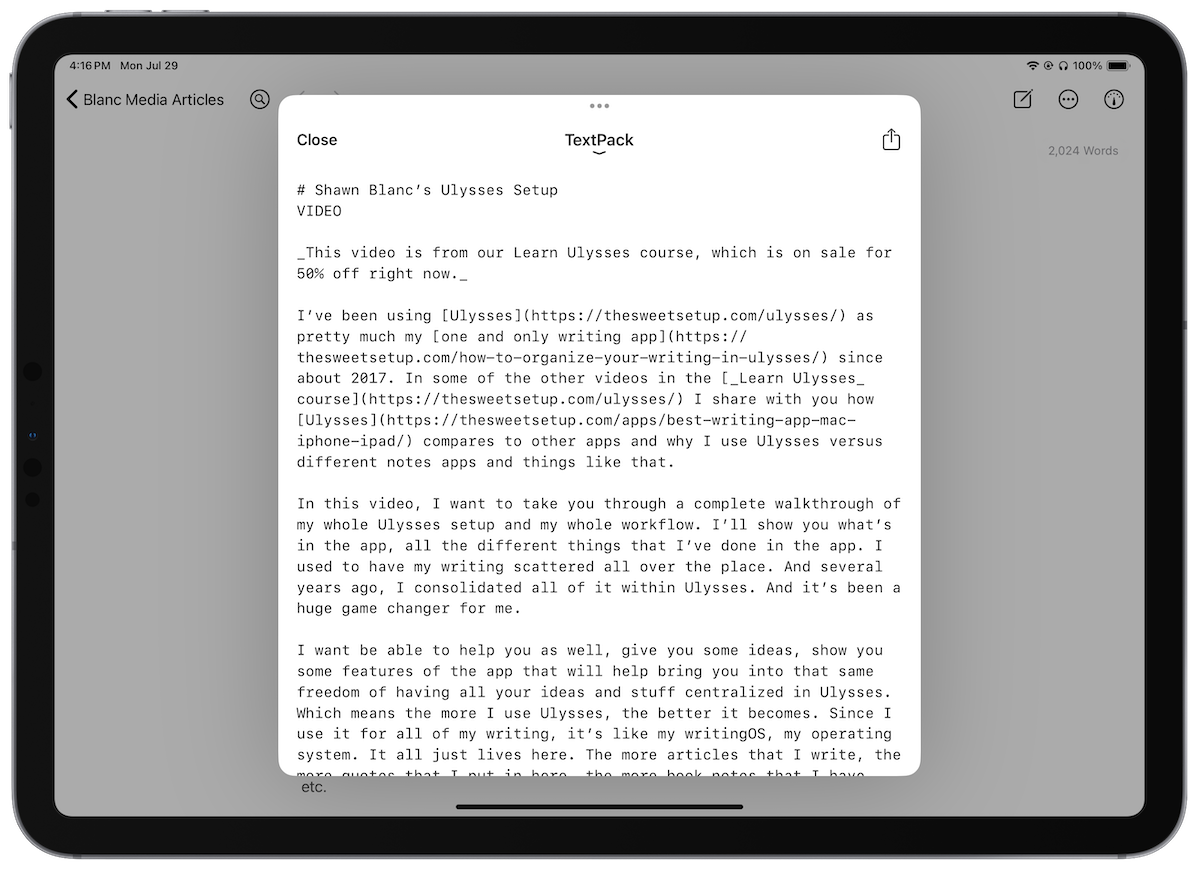
Without getting too deep into the weeds, TextBundle is revolutionary because it basically takes all the assets that the plain text file points to and packages it all together, so if you wanted to edit the plain text file somewhere else (like a PC) all your assets are right there. This opens up some really interesting integrations for Ulysses. For example, you could send an outline in Ulysses in TextBundle format to MindNode and turn your outline into a mind map (with images attached) instantly. Or you could create a Markdown presentation in Ulysses that can be displayed in Deckset. The possibilities are endless.
Perhaps the best part about this TextBundle format though is that it’s still essentially a plain text file. That means it’s still very flexible to edit and doesn’t lock you into a proprietary format like a word processor does. And best of all, TextBundle is an open standard, making it easy for other developers to implement support for it in their own apps.
Backup & Restore
Backup is one of those things that you typically don’t think about until you really need it, and by then it’s often too late. Fortunately, when it comes to backing up your writing, Ulysses makes it incredibly easy and can even back up your work automatically.
One of the handy backup features in Ulysses is called version history. Version history works a lot like Time Machine for your Mac, only for your writing in Ulysses. So let’s say you delete a sentence in your text, and a couple of days later you change your mind and would like to turn back time to restore it. With Ulysses version history, this is no problem.
Ulysses will also automatically back up your work locally on your device. You can toggle backups on and off if you’d like, but it is enabled by default in Ulysses on both your Mac and your iOS devices. On the Mac, Ulysses stores hourly backups of the last 12 hours of work, daily backups of the last seven days of work, and weekly backups for the last six months of work. These backups are stored inside your user’s Library folder, so to prevent accidental loss of your data you’ll definitely want to make sure that you are backing up your Mac as well.
Backup works the same way on iOS, but because the backups are stored locally, Ulysses doesn’t keep as many backups on your iOS device as it does on your Mac because of space limitations. Also, there is currently no version history on iOS. On iOS, Ulysses keeps hourly backups for the last six hours of work, daily backups for the last five days of work, and weekly backups for the past two months of work.
You Get What You Pay For
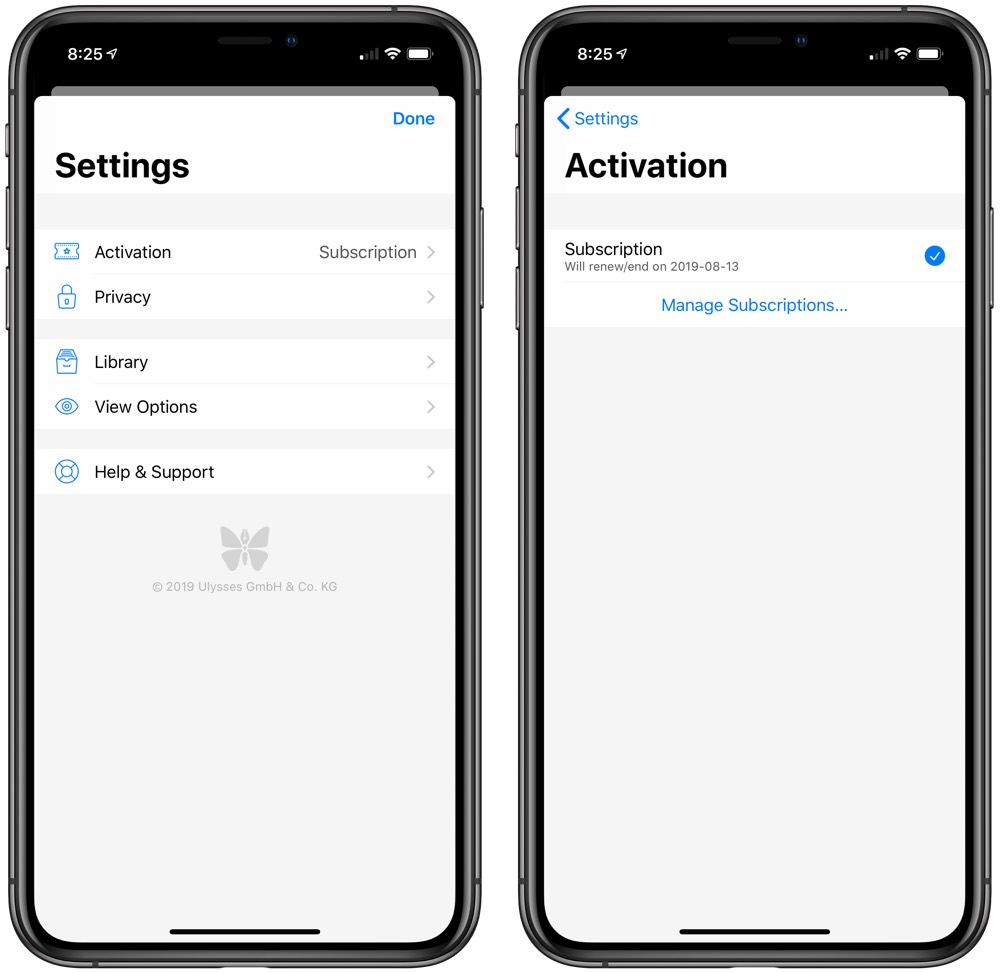
The one thing that will keep many people back from Ulysses is the price. You can’t purchase the application outright anymore, and a Ulysses subscription is $5.99/month or $39.99/year (which includes access to the iOS version). And while we know that some people will balk at the fact that Ulysses is a subscription, we feel it is a fair price for a professional writing tool.
One of the main advantages of the subscription model is that it provides a sustainable business model for the developers, and when it comes to choosing a tool for your work, you want to know that it’s going to be around for a while. Many a writing app have debuted at a lower price point, and many of them are not around anymore. We believe that paying a subscription fee for a professional tool is a great business model, providing the company the resources it needs to keep the app updated. The split-screen feature that allows you to work in two sheets at once is a prime example of the kinds of updates that Ulysses pumps out.
We believe the decision to subscribe to Ulysses is an easy one — as long as you get more than $5/month of value from the application. So how can you decide if the subscription is worth it to you? There are a couple of things to consider:
First, do you currently make money as a writer? If so, it’s easy to justify $5/month for a tool that helps you achieve your writing goals by improving the speed and the quality of your writing. Subscription fatigue is a very real thing, but if you are going to use Ulysses in any sort of professional capacity, you might want to think of it as an inexpensive business expense.
Second, do you aspire to make money as a writer? If so, maybe you could take one of those entertainment subscriptions (i.e. Netflix) and convert it over to a Ulysses subscription instead. Then next time you feel like binge watching the latest show, it can be a cue or trigger to work on your writing habit instead.
Third, do you have a SetApp subscription already? SetApp is a great service from MacPaw (the makers of CleanMyMac, Gemini, and several other great Mac utilities) that provides access to a long list of incredible Mac applications. Here’s just a few of our favorites:
- Ulysses
- MindNode
- Timing
- Marked
- BetterTouchTool
- Bartender
- iStat Menus
- CleanMyMac
- Be Focused Pro
- TripMode
- BusyCal
- 2Do
Since Ulysses is a part of SetApp, you can use it with your current subscription if you’re already a SetApp customer. If you’re not a SetApp subscriber and you’re on the fence about whether to subscribe to Ulysses, take a look at the other apps available and see if you can justify the $9.99/month cost that way.
Other Candidates
There were a lot of other high quality writing apps we looked at when writing this review. None of them quite measured up to our top pick in terms of creating a comfortable writing environment, but many have unique features that deserve a mention.
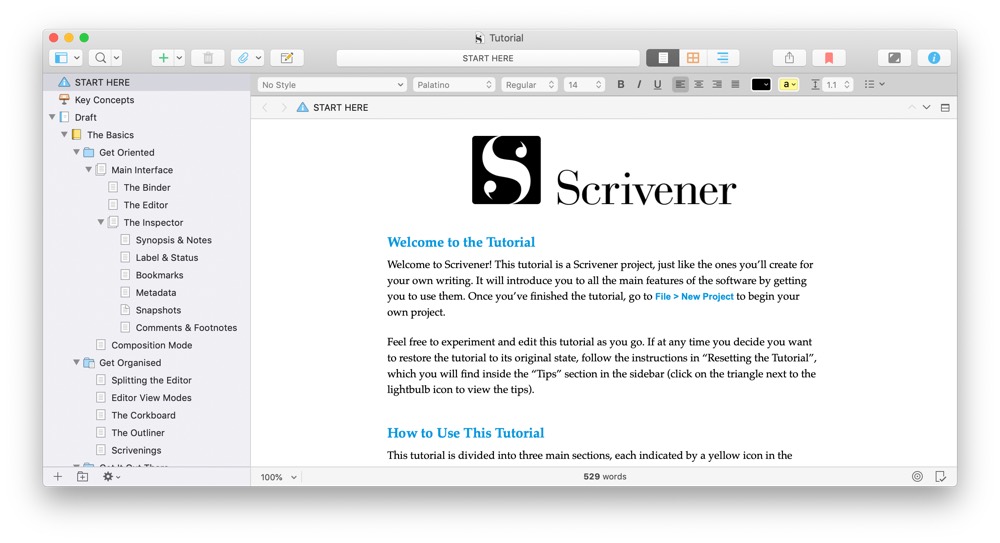
Scrivener
Scrivener ($59) was our previous pick for the best long-form writing app, and it’s done nothing to lose that crown. Unfortunately for Scrivener, Ulysses has just gotten a lot better. With the ePub export in Ulysses being so good, Scrivener is no longer the default choice when you want to publish an ebook. To be fair, Scrivener still does give you a lot more power and options when exporting, and is still your best option if you want to export to the Kindle format.
Scrivener also has an iPad version ($19.99) which is very good. It was even featured in the Best of the App Store in 2016, but requires that you use Dropbox to sync your Scrivener projects instead of iCloud. This makes sync a little more cumbersome, and we still think Ulysses is a better choice for most writing projects.
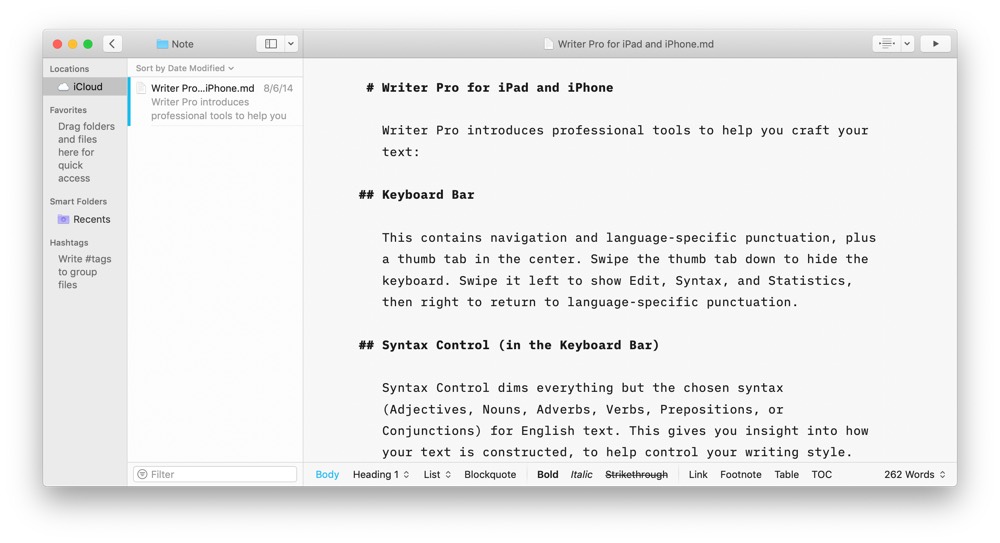
iA Writer Pro
iA Writer Pro offers a couple unique features like Syntax Control, which scans your document and highlights your adjectives, nouns, adverbs, verbs, prepositions, or conjunctions. This allows you to see if your sentences are balanced. This feature is not limited to just English and supports several other languages as well. iA Writer Pro also has a Focus Mode that highlights one sentence at a time by making the surrounding text fade into the background, reducing the temptation to edit.
iA Writer is $28.99 on the Mac App Store and has companion apps for both iOS ($8.99) and Android (Free). There’s also a Windows version which is $19.99 and offers an installable extension for syncing to iCloud. If you use a PC or Android device and want to write on the go, check out iA Writer as it is the only app we reviewed (besides Microsoft Word and Scrivener) that has support outside the Apple ecosystem.
Focused
Focused has one incredibly awesome feature that makes it worth noting called “Zen Mode.” We published an article over at Tools and Toys on music to help you focus, but Focused actually bakes this right into the app itself by providing curated soundtracks designed to help you focus and concentrate on your writing. I personally listen to a lot of the music mentioned in the Tools and Toys article when I write, and the ability to launch it from the writing app and not have to open Spotify or Apple Music (or rely on an internet connection) is a really cool idea.
Focused is $19.99 and in our opinion doesn’t offer the same level of writing assistance that Ulysses does, but is still a very polished app. Focused is also a part of SetApp, so if you have a SetApp subscription you can try both Ulysses and Focused for yourself and see which one is right for you.
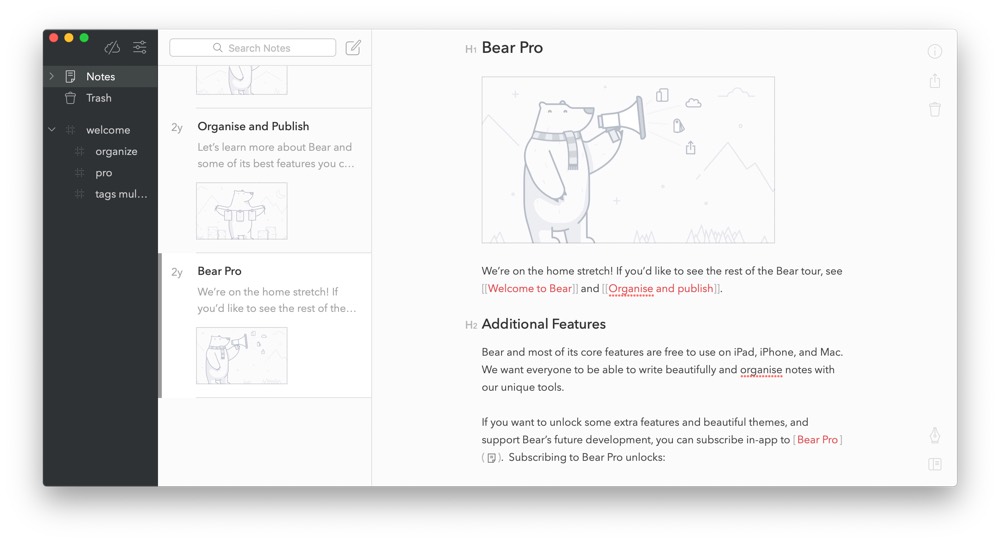
Bear
Bear really isn’t a pure pro writing, but it can be used for smaller writing projects and supports Markdown formatting. It has a beautiful user interface and at $1.49/month or $14.99/year, it is a much more affordable option if you don’t need all the power that Ulysses offers.
Bear is limited in its export options though, and you won’t be able to publish straight from Bear, but it does offer some unique features, like cross-linking between notes, todos, and browser extensions to quickly clip things into Bear. Bear is really a note-taking app (one we think does an excellent job), but it’s so well done that it at least deserves a mention here.
Microsoft Word
We’re including this in the list only because this is what a lot of people think of when they need to write a document, but in our opinion it’s one of the worst options available. Not only is Microsoft Word very expensive (it starts at $70/year with Office 365 and goes up from there), but as we outlined above it locks you into a proprietary file format that is difficult to publish from (if you use the features that it offers). If you don’t use these extra features, then there’s really no reason to use Word as the myriad of features just clutter up the screen.
Word used to be the de facto option for sharing text documents throughout an office, but (thankfully) with the advent of plain text (and Markdown in particular), that is changing. We recommend that you use a tool that affords you the flexibility that these other formats offer.
Pages
Pages is also not a great option for the same reasons listed for Word, but at least it’s free on the Mac App Store and offers you an easy way to get started. It’s actually pretty powerful as word processors go, but still has the same drawbacks inherent with that application type we outlined earlier.
Pages does have free iOS versions that sync reliably with iCloud, so you’ll be able to sync your documents wherever you go with your iPhone or iPad. If you just bought a shiny new MacBook and want something that will allow you write on the go but you don’t have any money to spend on a fancy writing app, Pages will work, but you will run into formatting issues.
Conclusion
Ulysses is an excellent tool for any professional writer. It has a well thought-out user layout, extremely useful features, and a distraction-free writing interface that does a great job helping you focus on the act of writing. It offers a variety of export options and has an excellent iOS companion app for writing on the go. It requires a subscription and isn’t exactly cheap, but we still consider it an excellent value for anyone who wants a tool to help them achieve their professional writing goals.

There are a couple of other interesting options available that offer unique features, but in our opinion none of them provide the blend of a clean user interface and powerful writing tools that Ulysses offers.