Darkroom 4.3 Introduces Support for iOS 13 and iPadOS, and Happens to Be a Great App for Editing Ultra-Wide Photos
As I was testing the latest features to debut in Darkroom 4.3, I put the app to the test with the iPhone 11 Pro’s new ultra-wide camera. The ultra-wide camera’s perspectives have a heavy amount of distortion — especially so when pointed upwards at a subject — and it sent me down a rabbit hole in the midst of my testing.
So, I’ll thank Darkroom 4.3 for sending me down the rabbit hole, even though it wasn’t the app’s array of new features that put me there.
First, those new features.
Darkroom’s New Light Mode
While all the other third-party apps on the App Store have latched onto iOS 13’s system-wide Dark Mode, Darkroom went the opposite direction — Darkroom now sports a beautiful new Light Mode to support iOS 13’s dual themes.
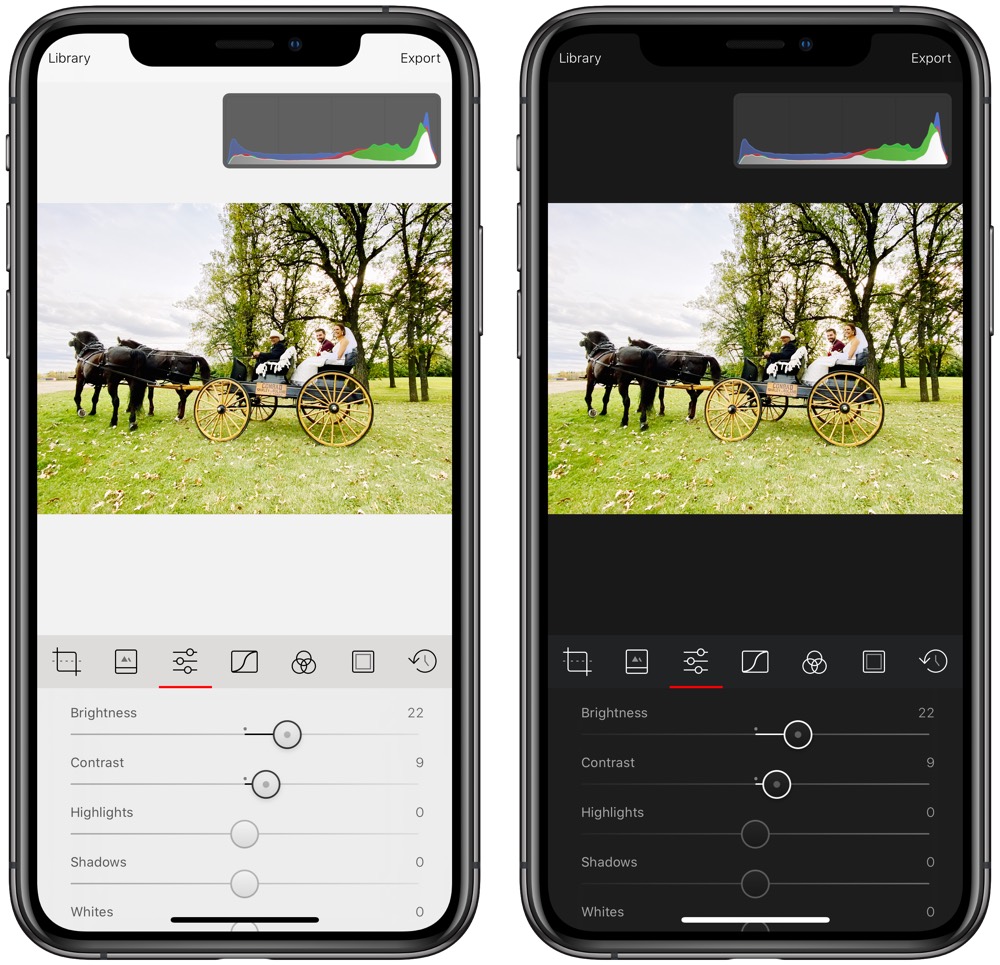
Edit menus and sliders all ship in a soothing off-white grey tone, while the histogram and other elements opt for lighter versions of their normal Dark Mode selves.
You can set Darkroom to maintain its original dark theme even during daylight hours, to stay on the always-light mode right through the night, or to follow iOS’s system-wide theme. I find it best to follow iOS.
Unfortunately, you can’t follow iOS’s chosen theme and automatically update Darkroom’s app icon to its new light version. The new light app icon is reminiscent of many other logo-on-white app icons, but it would be just the icing on the cake if you could auto-switch the color of the icon when the sun goes down.
Maybe next year.
Darkroom for iPadOS
Darkroom debuted on the iPhone and made its way over to the iPad in the middle of December 2018. Since then, all major features have spread across Darkroom for iPhone and iPad evenly.
Admittedly, iPadOS has impacted all universal apps in this regard, but iPadOS has a particular effect on Darkroom for iPad that makes the iPad app significantly more powerful than the Darkroom for iPhone.
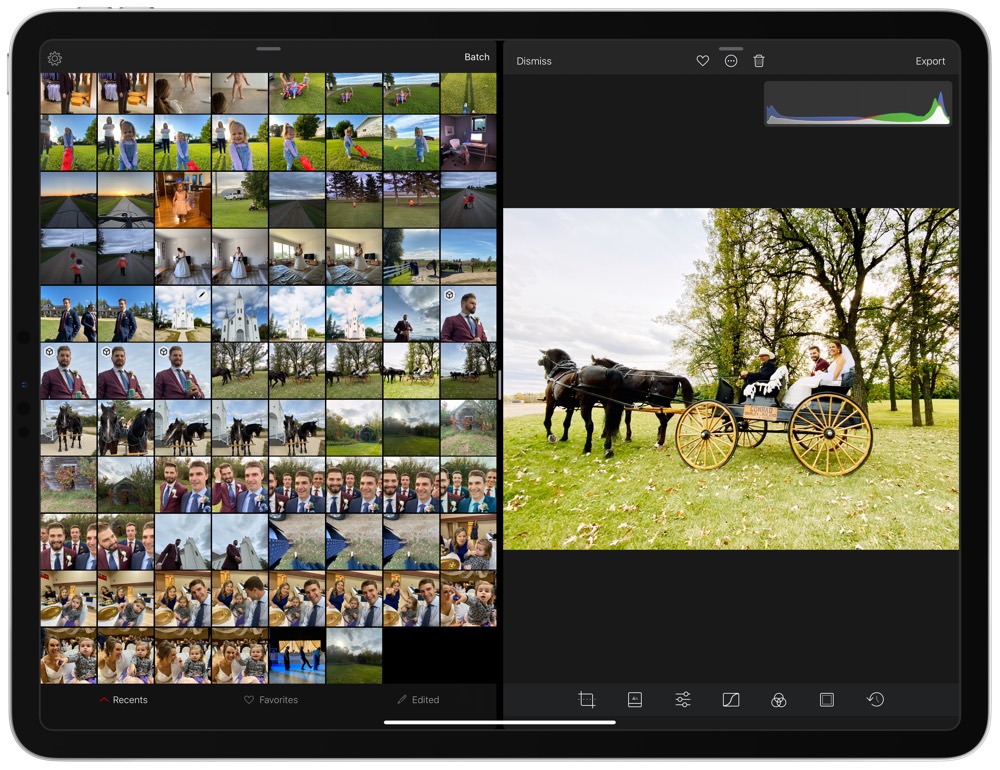
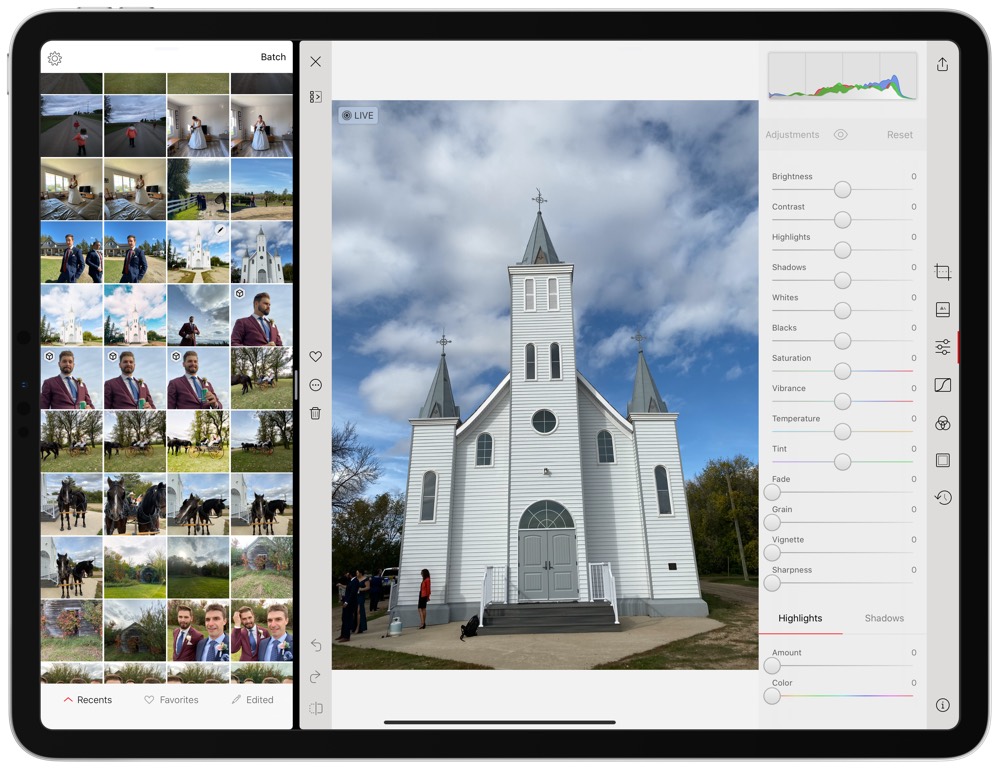
First, Darkroom for iPadOS now supports iPadOS’s multiple window feature, enabling a whole host of editing workflows. You can grab a photo from the photo library and drag it into Split View, allowing you to manage your library on the left and edit the photo on the right.
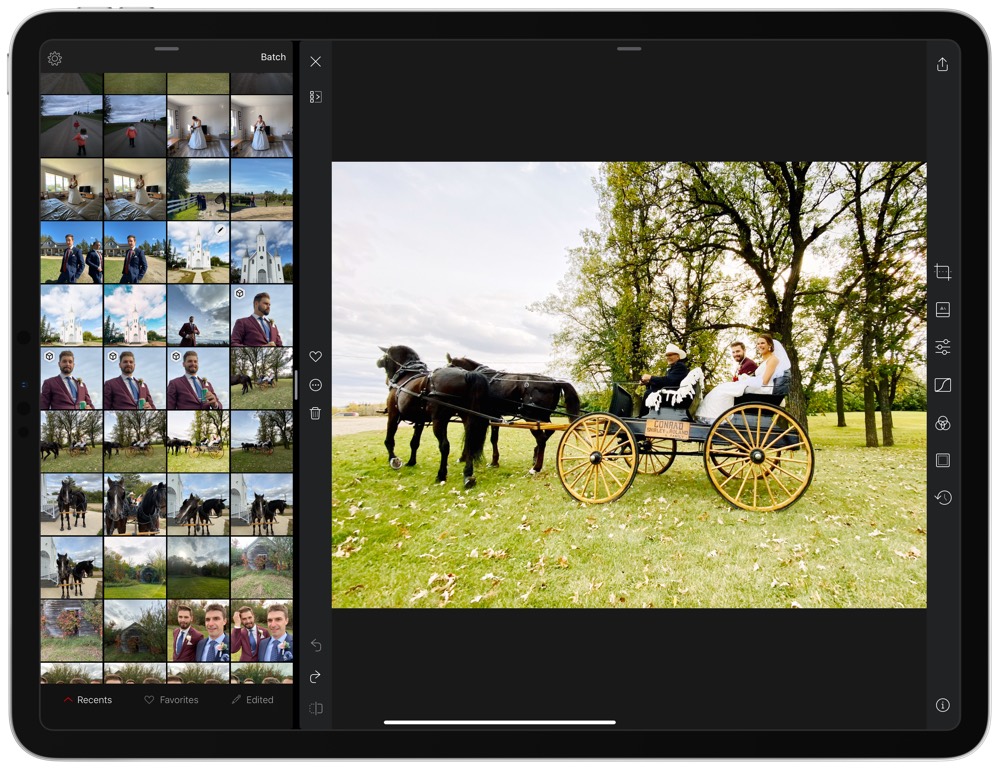
I think this is best used with the library as a 1/3 app on the left side with the full photo taking up 2/3 of the display on the right side.
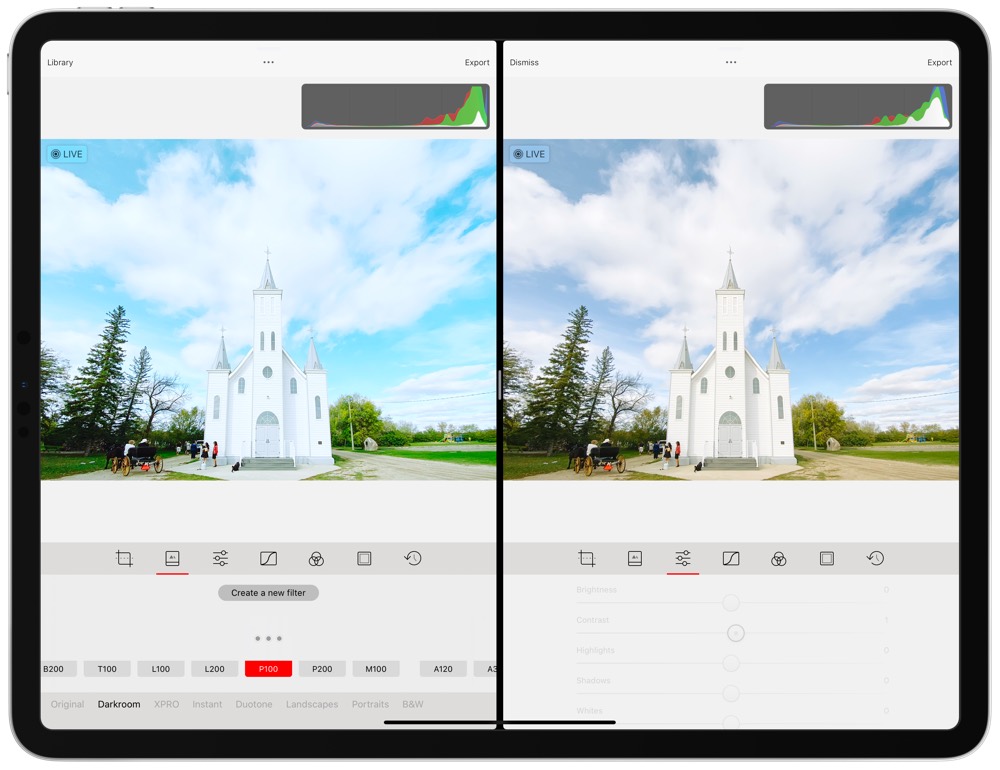
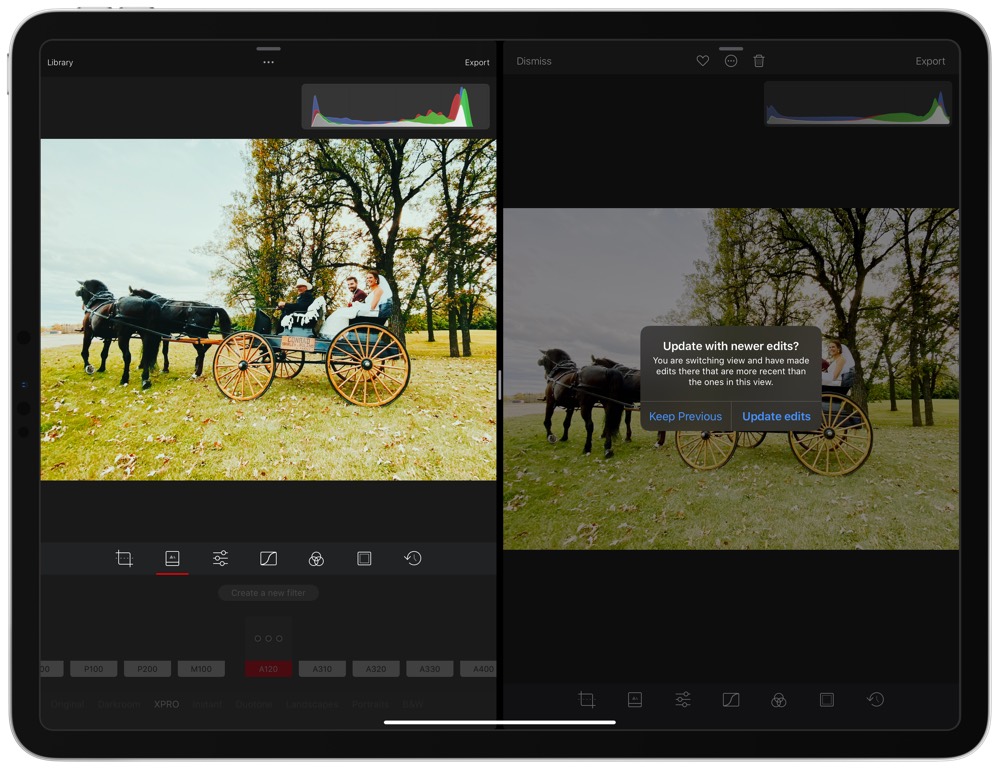
Or you can open the same photo on each side of your iPad, enabling you to trial different editing presets or editing tools. Darkroom will ask if you want to keep the previous edits when you switch from one photo to the other, ensuring you’re working on one photo rather than a duplicate. I find this especially powerful when trying different presets or trying different colors in the color editor.
Now that Darkroom supports wide-scale batch editing, you can have two Darkroom libraries open side-by-side, allowing you to batch edit a wide range of photos all at once.
Darkroom has the unique advantage of hooking right into your regular photo library in iPadOS (unlike Lightroom, for instance, where you have only your Lightroom library available). With these new iPadOS features, I feel Darkroom is becoming a better de facto iOS photo app. You can scroll through your camera roll on the left, shoot the photo to the right side of the screen for previewing or for quickly editing, or apply a quick preset to a batch of photos. This is far superior to Apple’s own Photos app and Adobe’s more locked-down Lightroom app.
New Shortcuts Support
You know what would be super cool? If you could ask Siri to grab all your photos from the last 24 hours, edit them with a specific set of editing sliders and color adjustments, and export them with a nice border, completely ready for Instagram.

What’s remarkable is that it wasn’t Apple winning this photographic automation race. With support for a Shortcuts action, Darkroom 4.3 enables exactly what I described above, and you can quickly create a Siri trigger to ask your iPhone or iPad to complete the edits for you. Super cool.
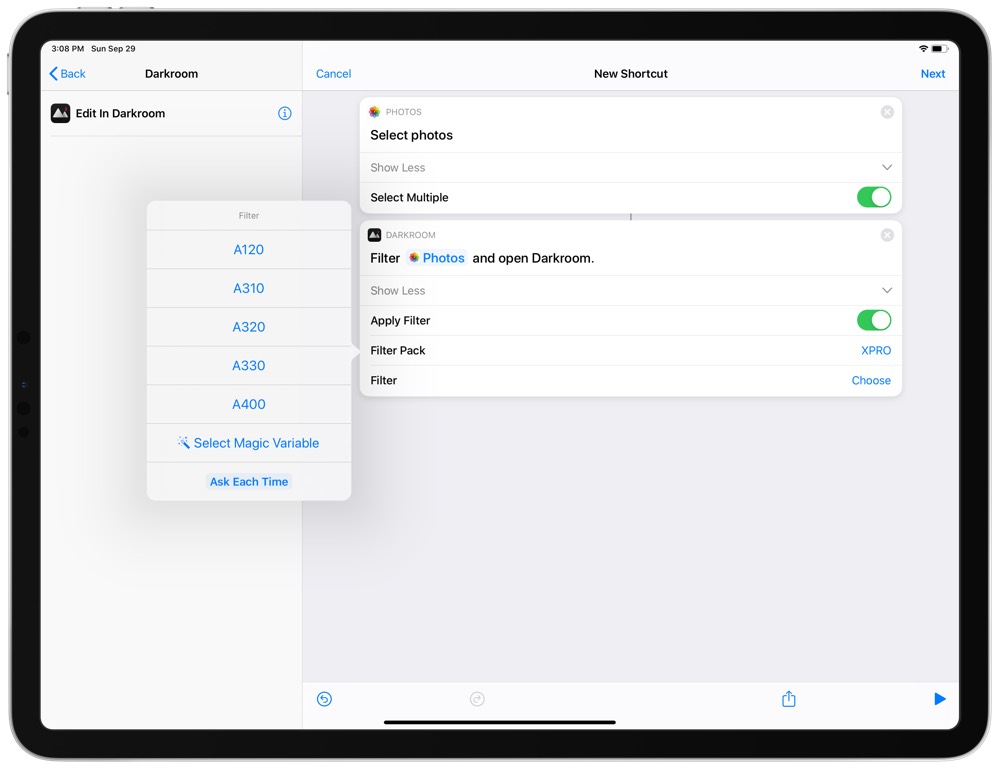
Inside Shortcuts, the new Darkroom action will edit the photos fed into the action with a range of options. You can set a specific Darkroom preset or you can have Shortcuts ask you which preset you’d like applied to your chosen photos (and the intensity in which the preset is applied). You can also have Shortcuts automatically crop your chosen photos to a specific aspect ratio and add a border (frame inset) before preparing the photos for export in the app.
While I doubt this would be too helpful for something as curated as Instagram, I think these types of automations would work wonders for quick snaps at an event, like a wedding or a baby/gift shower. Snap your photos, ask Siri to apply your favorite presets, export the photos to your camera roll, and AirDrop your favorites to your friends around you.
It’s like the Fuji Instax camera, but digital and completely automated.
How to Edit Ultra-Wide Photos
I mentioned above that Darkroom is becoming a better photos app than Photos itself. For calendars, you have Fantastical. For email, you have Spark. For notes, you have Bear or GoodNotes. But for photos, at least until Darkroom really started to take off, Photos.app was the best photos app for iOS.
Darkroom’s stride has placed it at the pinnacle of iOS photography right now. From hooking directly into your default camera roll and photo albums in the Photos app to automated editing workflows in Shortcuts, Darkroom can likely begin to replace the Photos app on your home screen. Not that this is a long time coming, but it feels like a long time coming.
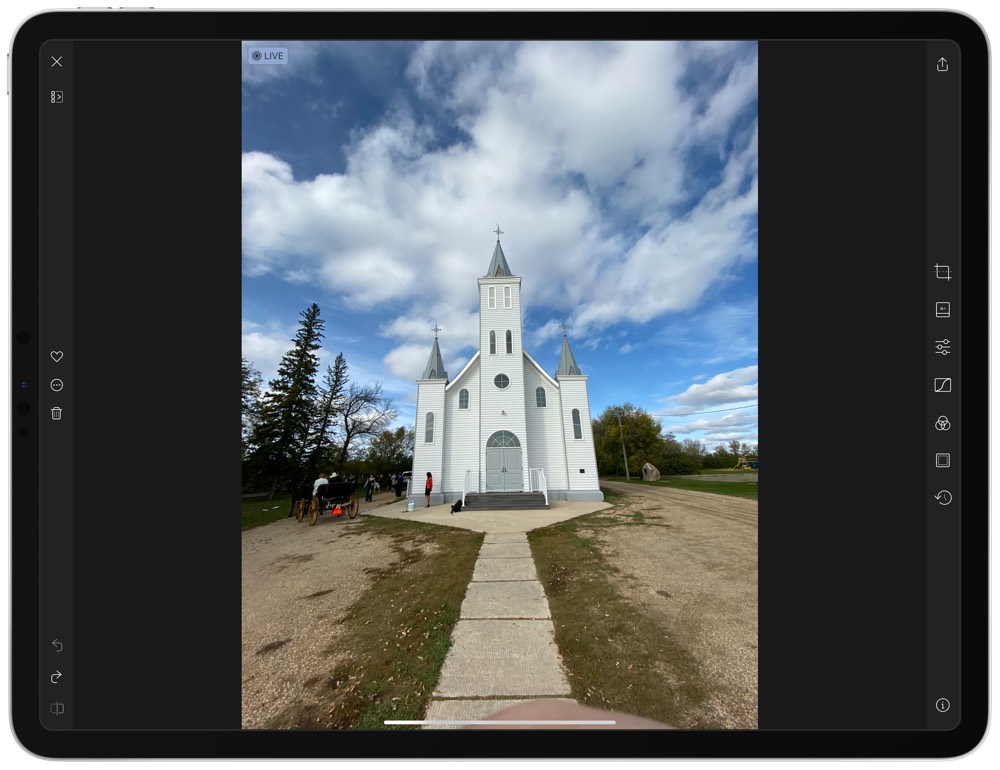
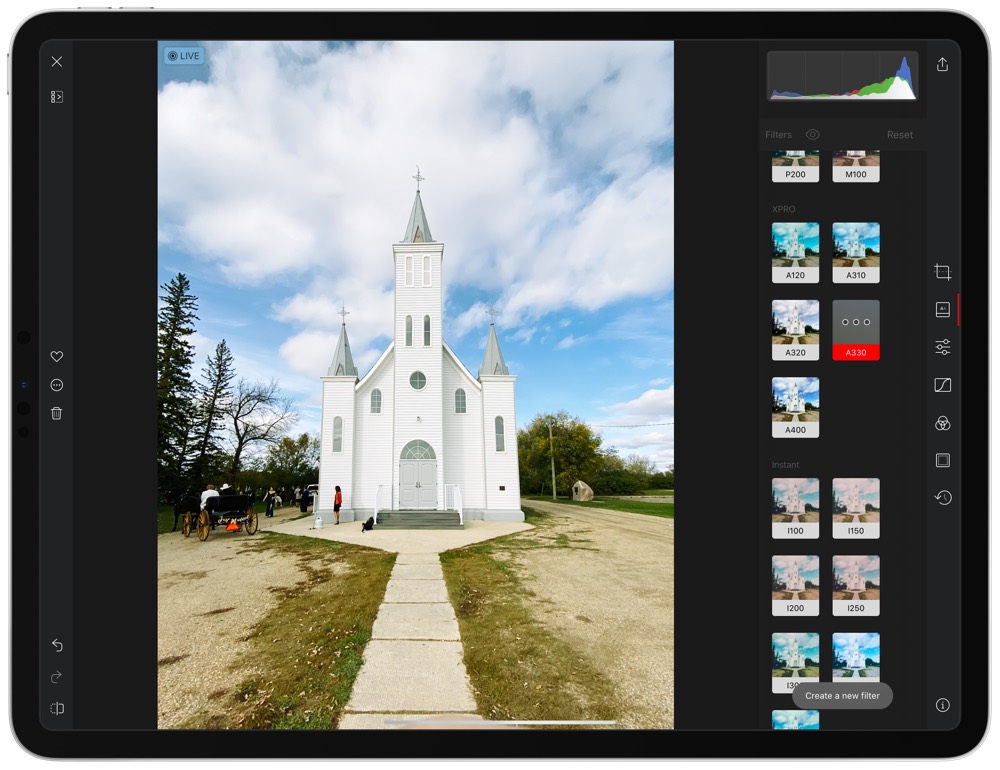
It’s in this context that I think Darkroom is the best photo editing app on the iPhone for editing the iPhone 11 and 11 Pro’s new ultra-wide photographs. These ultra-wide photographs suffer greatly from distortion and there are a variety of ways to make these ultra-wide photos look more natural.
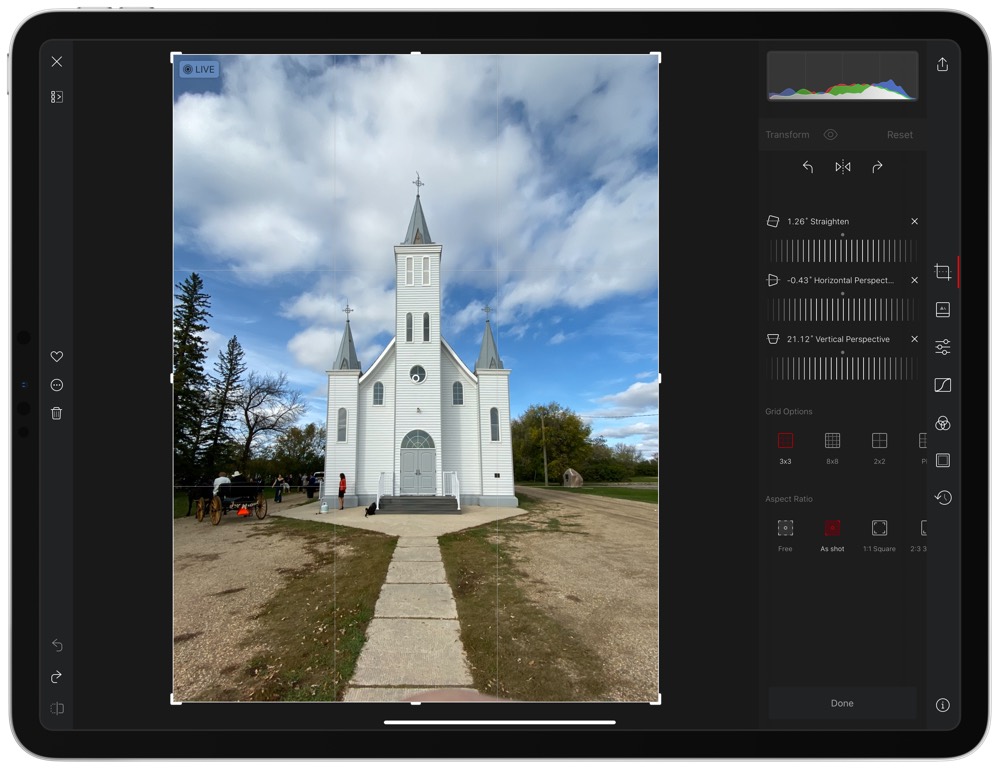
In Darkroom’s cropping view, there are three options above the slider — straighten in the middle, horizontal on the left, and vertical on the right. The vertical slider can slide to the right to fight the effects of distortion in ultra-wide photos, especially architectural shots from the ground up. I’ve found pretty good success in sliding that vertical slider all the way to the right and then making smaller adjustments to nail the perspective.
Of course, this edit can be done in a variety of places. You can complete this edit in the Photos app itself in the cropping section. You can also automate this perspective edit inside Adobe Lightroom for iPad in the “Geometry” tab — tap on “Auto” in the drop down menu for Lightroom to automatically apply the vertical perspective corrections.
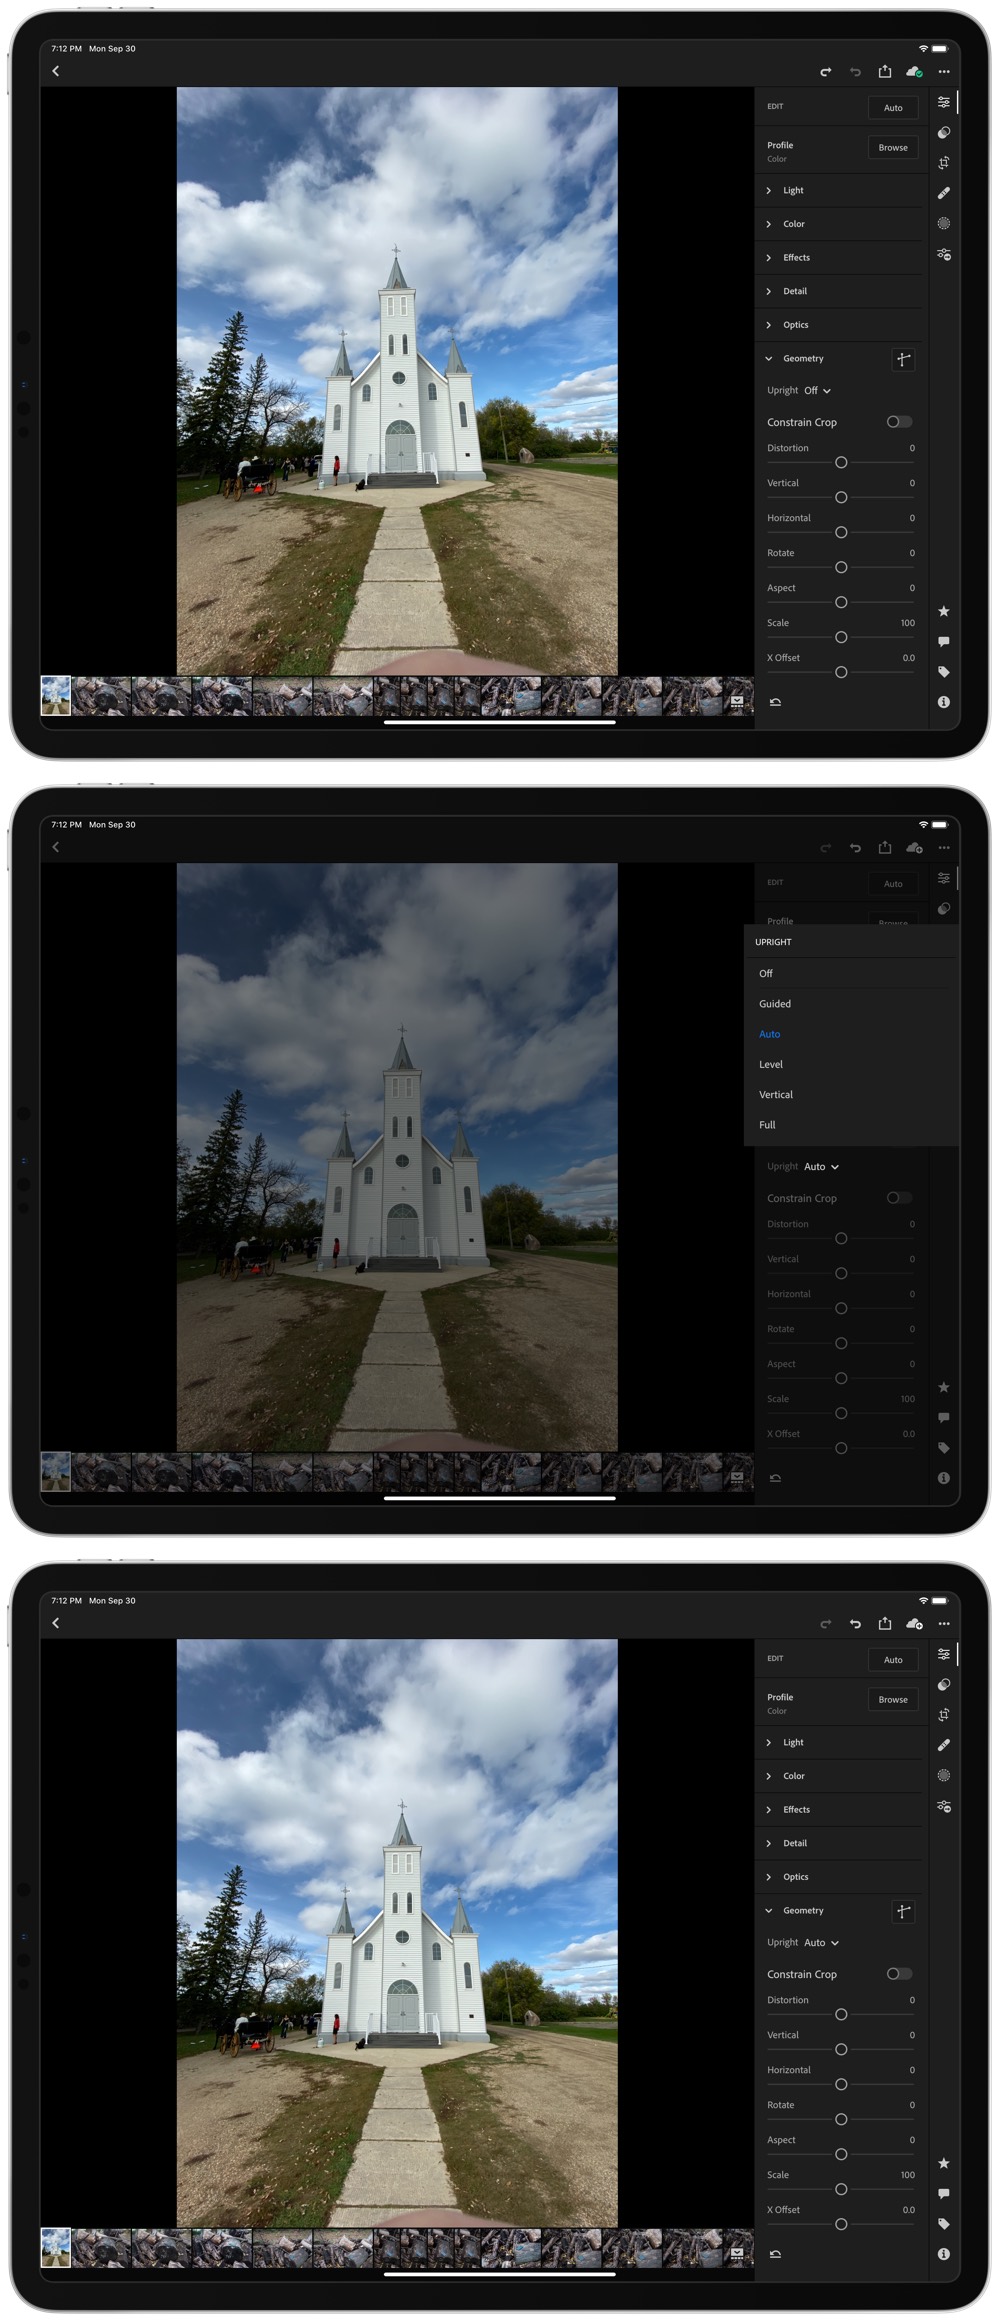
Arguably, this is more powerful inside Adobe Lightroom, as you can perform the edit automatically and avoid any manual errors.
But Adobe Lightroom has the pitfall of requiring its own library. You have to find the photo in your camera roll, add it to Lightroom, and then use the automated Geometry feature. Darkroom directly supports your camera roll, so there’s no need to import to use the vertical perspective adjustment.
To each their own when it comes to photo editing apps, but I find Darkroom’s vertical perspective adjustment to be the easiest, most intuitive way to quickly edit ultra-wide photos from the new iPhone 11 and iPhone 11 Pro.
Wrap Up
Despite all the amazing features that have come to Darkroom over the last 18 months or so, I’ve clung steadfastly to Adobe Lightroom. Lightroom’s synced library and consistent features across the iPhone, iPad, and Mac have outweighed any consequences in having to keep a second library.
But a few things have changed recently:
- I try very hard to keep my camera photos (read: Fuji X-T2 or X-Pro 2) in Lightroom and my iPhone photos separate in iCloud. I’ve segregated the two camera libraries because of quality, mostly — if I were to share my best work with a friend, I don’t want my iPhone photos muddying up my Lightroom library. With the impressive performance of the iPhone 11 Pro’s camera system, that quality line is ever-blurring.
- With the added quality of iPhone photographs comes the added interest in editing and sharing them properly. Darkroom’s incredible array of editing tools — from saveable presets to frame insets — and direct iOS photo library support make it the best app for editing iPhone photos.
- And finally, I’ve been very impressed with iOS’s photo syncing service — if I add a photo to the Photos app on the iPhone, that same photo shows up on the iPad within five seconds. Being able to edit iPhone photos directly with all these new iPadOS features On the iPad is far superior than having to jump through a bunch of importing hoops in Lightroom.
At this point, the only major features Darkroom is missing that I personally can’t live without are selective, gradual, and radial filter tools that utilize the Apple Pencil. Adobe Lightroom is still the only mobile photo editing app that supports such features and, as such, Lightroom will continue be the single most important part to my photography workflow.
Nevertheless, Darkroom for iOS 13 and iPadOS continues the app’s assault up the list of photo editors for Apple’s mobile devices. For iPhone edits where time is of the essence, there’s no better app for the job.
Get Our Best Photography Tips & Workflows
Transform your photos and edits from average to awesome with our in-depth, mobile photography course. It’s jam-packed with training, ideas, and lessons that can literally transform your photography overnight.