The best photo editing app for the iPhone
Darkroom
When we first looked at photo editing apps for the iPhone several years ago, VSCO was a clear frontrunner, with its wide range of gorgeous filters, deep editing tools, and easy export options. Last year, though, they rolled out an update that made the app confusing to use; meanwhile, Darkroom got a bunch of updates that made it our top pick.
Now, though, it’s harder than ever to pick a winner. A lot of the apps we’ve looked at have done a great job cleaning up their user interfaces, and they all seem to offer a bunch of really great filters and tools. Clearly, we needed to take another look and see if Darkroom is still at the top.
The criteria are similar and, in no particular order, here’s what we considered important in a great photo editing app:
- Ease of use
- Support for RAW and HEIF photos
- Depth API support
- Variety and quality of filters
- Sophistication of manual adjustment tools
- Export quality, including preservation of metadata
- Performance
- Value
- Privacy policy
- Frequency of updates
Two new points of assessment this year that I’d like to highlight are RAW and HEIF support and the strength of the app’s privacy policy. The latter is particularly important for this category of apps, as they typically have access to your entire photo library, and you don’t want them doing anything goofy with that permission.
Of course, there’s one thing any good photo editing review needs: lots of photos. So, when the team at The Sweet Setup tasked me with writing this review, I braved a miserable forecast and hiked up Sentinel Pass, near Lake Louise, for your viewing pleasure.
Our Pick
We think Darkroom still represents the best balance of power, ease-of-use, end product, and frequent updates. In fact, the latest major version of Darkroom has truly solidified the app’s lead.
For a start, it’s a beautifully-designed app that feels right at home on the iPhone. Check out the awesome icon, with its carefully-rendered neon glow and “cabling” for a start. And that attention to detail carries through the app, too: it doesn’t use any interface elements straight out of UIKit, but everything feels very fluid, responsive, and crisp. It’s a very elegant app to use, especially with small but great features like hiding screenshots in the photo picker.
Tapping on a photo from your library opens it, but, unlike many apps, there’s no “Import” step or separate library — Darkroom simply reads the photo in place. The process of saving a photo is just as streamlined: you can save your edits in place non-destructively, or you can save your photo as a copy. That makes it really lightweight and easy to bounce in and out of making changes to your pictures. And making adjustments is, if anything, even easier.
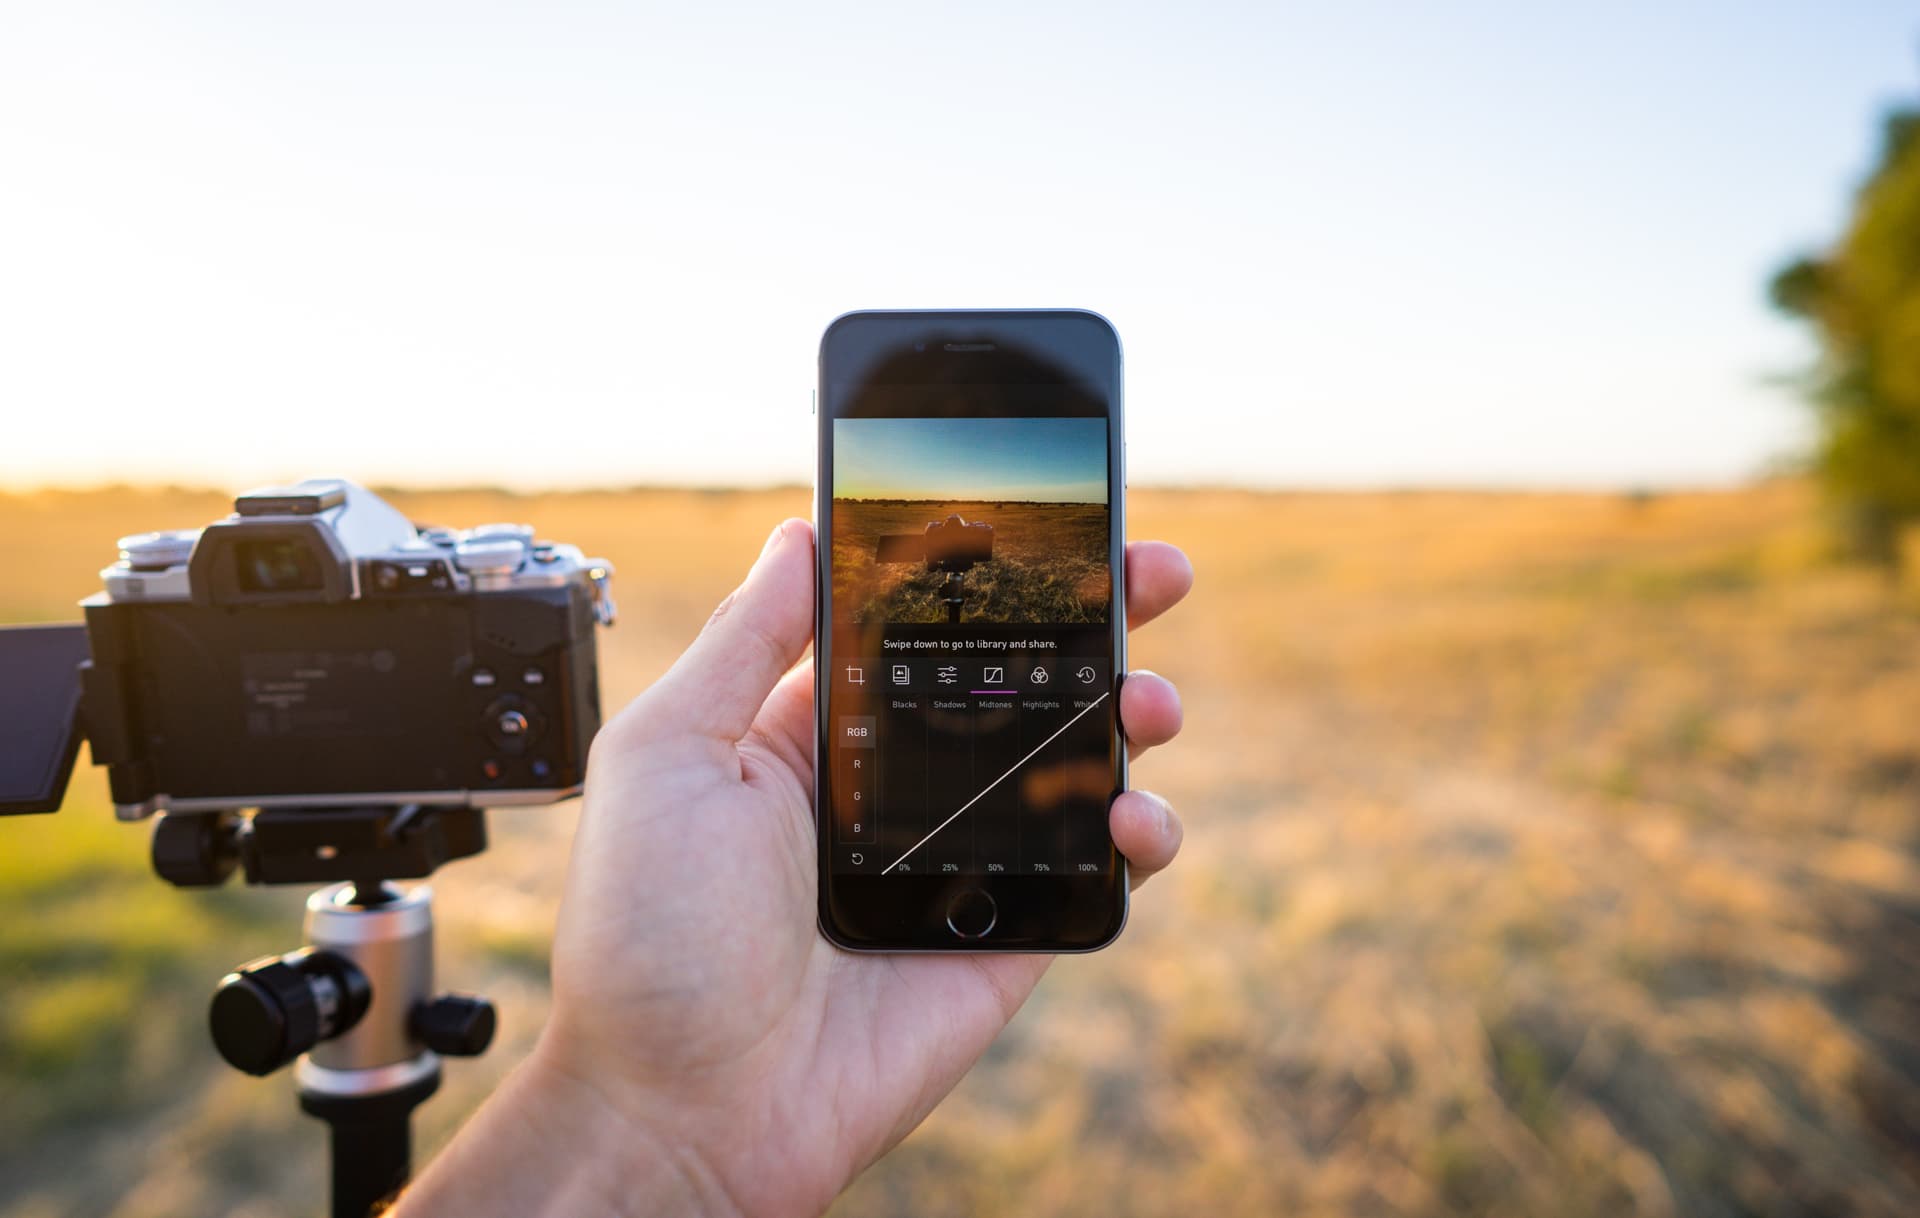
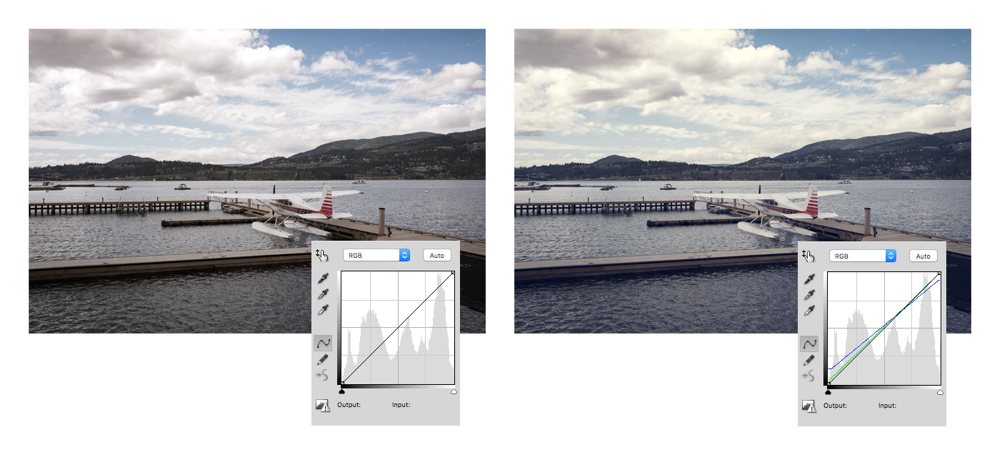
One of Darkroom’s greatest strengths has always been its openness. To understand why and what makes it different, you need to know how filters work in pretty much any photo editing app. Filters are basically predefined combinations of curve adjustments, hue-specific tweaks, and — perhaps — some faux film grain or other textures overtop. Curves change the exposure and balance of an image, and can be used to “crush” the photo’s tonal range closer towards black and white for higher contrast, move shadows and highlights closer to gray for a faded appearance, or even adjust the RGB hue balance at different points along the brightness spectrum. As an example, an easy way to do a split toning effect with a curves tool is to slightly reduce the amount of blue in brighter areas — which gives a creamier appearance to highlights — and slightly increase the amount of blue and green in darker areas, which slightly fades the shadows in the scene.
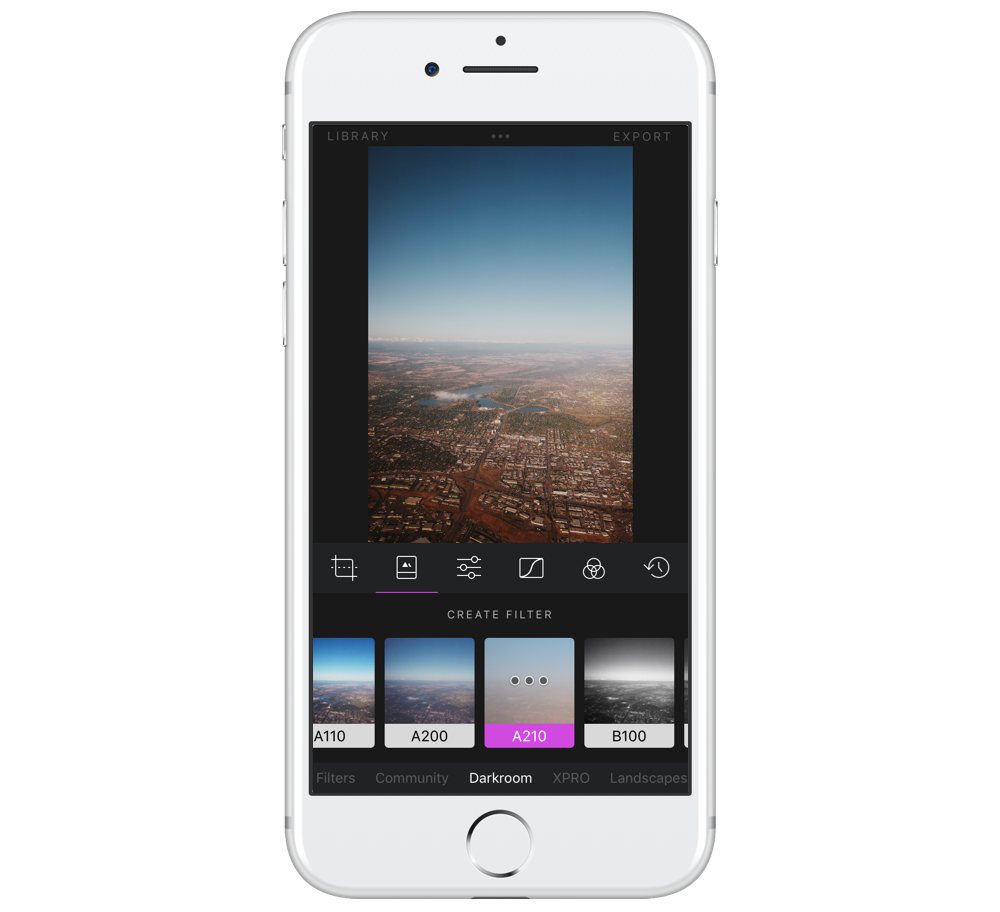
What does that have to do with Darkroom? Well, while most photo editors simply apply the filter overtop the image and treat that as a singular product, Darkroom considers its filters more like presets for the app’s image adjustments. If you like a filter’s general style but want to increase the amount of detail there is in the midrange, no problem — just adjust the filter’s curves.
This, of course, means that you can make your own presets. If you have a few go-to adjustments that you apply to your photos, why not create a predefined filter and save yourself some time? Darkroom lets you do that.
In fact, there are very few faults that we can find with Darkroom. I suppose its biggest drawback is the somewhat limited filter selection: even with all in-app purchases, well, purchased, there are less than forty, about a quarter of which are various kinds of greyscale. That sometimes feels a bit restrictive, but the flexibility of being able to modify and save your own filters helps alleviate the concern.
The only other thing that’s somewhat worrying is Darkroom’s privacy policy, which is fairly generic for a website, but vague for a photo editing app. We’ve reached out to Bergen, the company that makes Darkroom, for clarification on this.
Aside from that, we truly, really like Darkroom. You know those apps that feel like they complete your iPhone? Like, if I were to set up my iPhone from scratch, I’d immediately download Tweetbot, Instagram, Things, Fantastical, and Weather Line without even thinking about it. And Darkroom — that’s on the list, too.
Other Picks
VSCO
VSCO is definitely a reliable contender once again after the team behind it has re-considered the app’s previously-confusing “joystick” interface element. And, by “re-considered”, I mean “removed” — a decision that’s absolutely for the better.
VSCO still provides an absolutely massive selection of filters for purchase and high-quality adjustment tools. Adjustments you’d expect — like brightness, contrast, and saturation — are complemented by more advanced controls over perspective, split tinting of highlights and shadows, and faux film grain that actually looks pretty good.
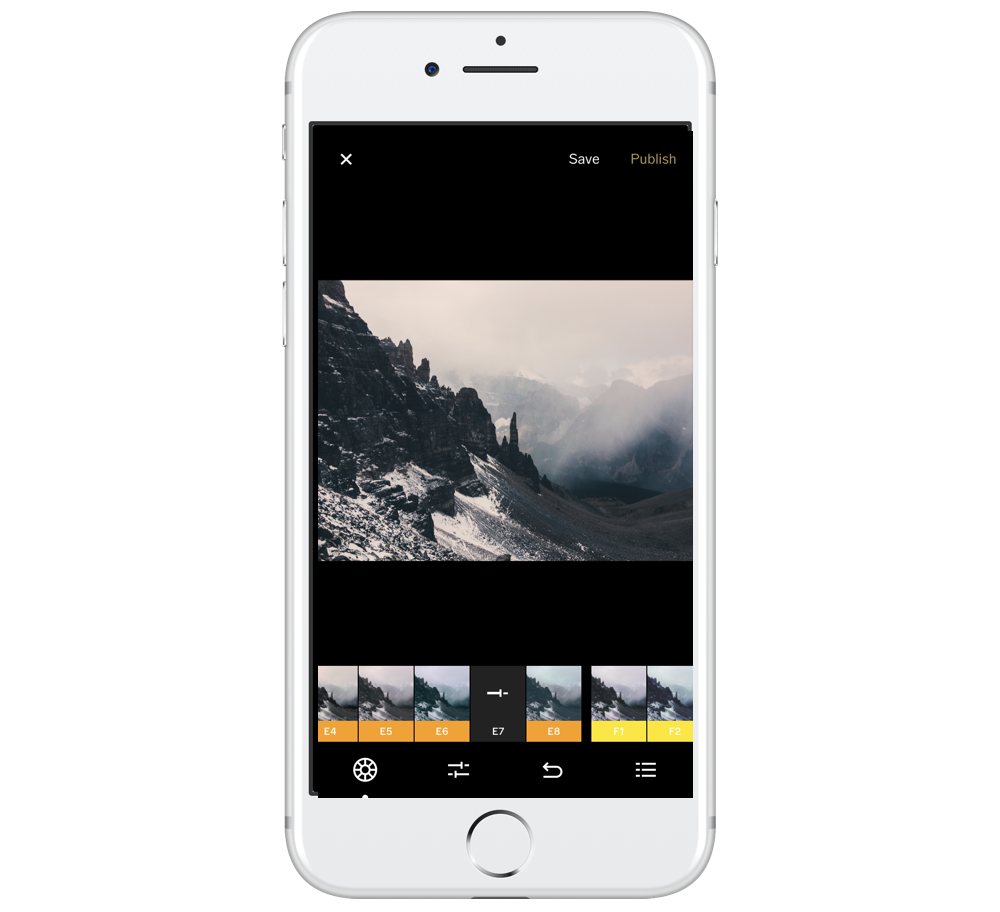
The Visual Supply Company is well-known for their sets of Adobe Lightroom presets — for Windows and Mac — that mimic specific kinds of film, like Kodak Portra 160, Fujifilm Xperia 400, and Ilford HP5. Most of the presets in VSCO for iOS have a similarly filmic look, but, unlike the desktop packs, don’t reference specific films. They come in families with cryptic names like M or C — M, VSCO says, is a set of “moody” and “underexposed” filters numbering M1–M3, while C is both “vibrant” and “classic” in C1–C3, and “chromatic” in C4–C9. I don’t know if it’s VSCO’s wish to avoid comparing these filters to their professional desktop software presets, but, at least in my use, they’ve proved to be built to a very high standard.
With so many vaguely-named options, it can be easy to fall into a trap of memorizing a handful of favorites. It’s best to avoid doing that; instead, play around with as many filters as you can reasonably budget for. You can adjust the strength of filters when you apply them, too, and you may find that you get better results with a lighter touch.
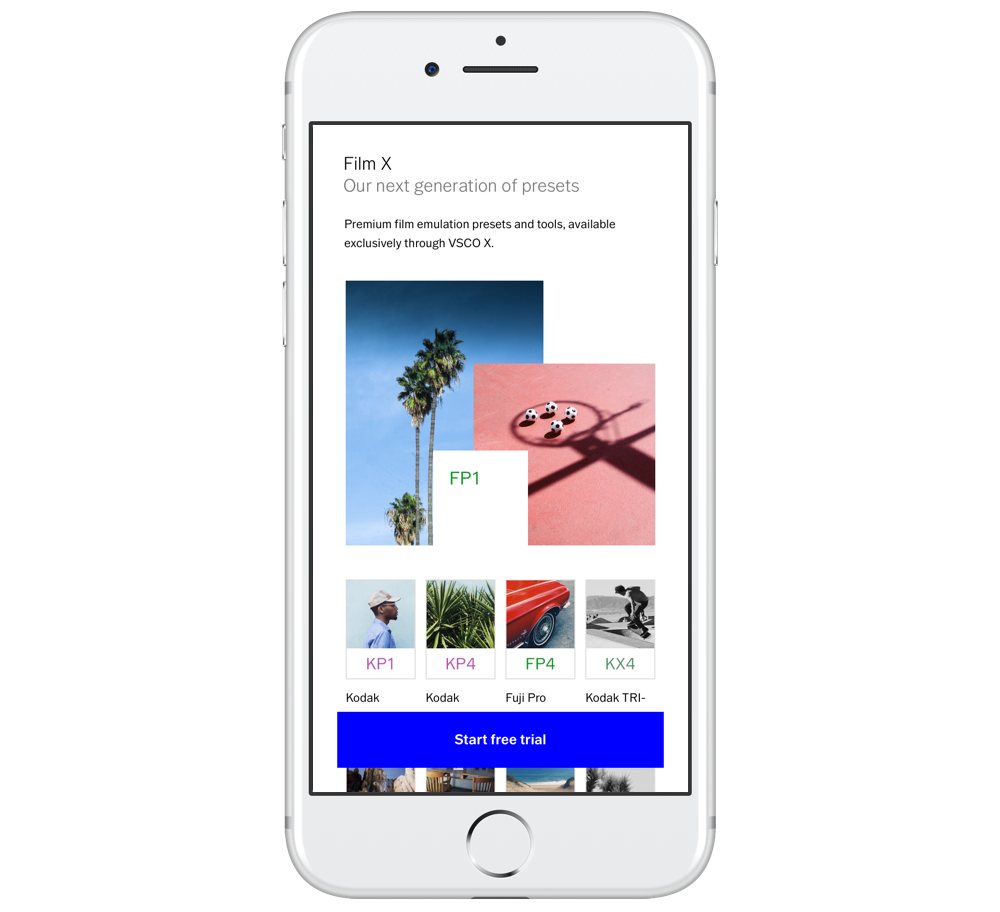
The app comes with a good range of filters for free, and additional packs are available as in-app purchases. But if all that isn’t enough for you, there’s a subscription option available for $20 per year called VSCO X. And, before you ask, it’s pronounced “ex” — we checked. Subscribers get access to all VSCO filters plus some exclusives, including a handful that are true film emulation filters. They look great, but you’ll have to decide upon the value of a subscription-based photo editor for yourself.
VSCO also has its own built-in social network that’s kind of like an artsier, quieter, and non-Facebook-owned version of Instagram. We didn’t factor this into our rating because this is a roundup of the best photo editing apps for the iPhone, but if you like the idea of sharing your images with a more selective crowd, it’s not bad.
For all of its features, there are a couple of things that held VSCO back from being our pick. First, while the interface has been improved from last time, it’s still confusing. The universal Share icon, for example, has been repurposed as a way to post your photo to VSCO’s own network; sharing and saving options are hidden behind the ⋯ button, and even then, getting to the system sharing sheet requires you to tap on Share, then scroll to the bottom of the list and tap More.
The icons across the bottom tab bar indicating different sections of the app are confusing as well. The leftmost one shows three vertical stripes within a circle which, somehow, represents VSCO’s social network. The one in the middle indicates that this is your photo library and camera with a plus sign. On the right is a face, which is probably the easiest icon to understand: it’s where your social profile lives. Of course, that means that if you use VSCO solely as an intermediate step between a camera app and Instagram, two-thirds of the app’s tab bar probably won’t interest you.
Also, VSCO retains its own photo library separate from your main Photos library. You’ll appreciate that if you treat the app like a place to keep only your best photos. But it also means that you’ll be keeping a separate and likely duplicated copy of some photos in your library on your device and in your device backups. This also means you don’t necessarily get to take advantage of iCloud Photo Library’s feature that only stores some photos and thumbnails on your device, and downloads the rest on demand.
Lastly, VSCO’s privacy policy is, like Darkroom’s, rather vague. We’ve reached out to the company for clarification on analytics and user privacy and will update this if we hear back.
For those reasons, we think VSCO is a very solid app, but it isn’t our favorite.
Lightroom
After the previous edition of this roundup, we received numerous questions about why we didn’t mention Adobe Lightroom. The answer is quite simple: it doesn’t really do the same job as, say, VSCO or Darkroom. In many ways, it’s Adobe’s attempt to bring the power and performance of their industry-standard professional photography app to mobile. But because so many people asked about its absence and because of the RAW APIs available in iOS 10 and later, we figured it would be worthwhile to address it.
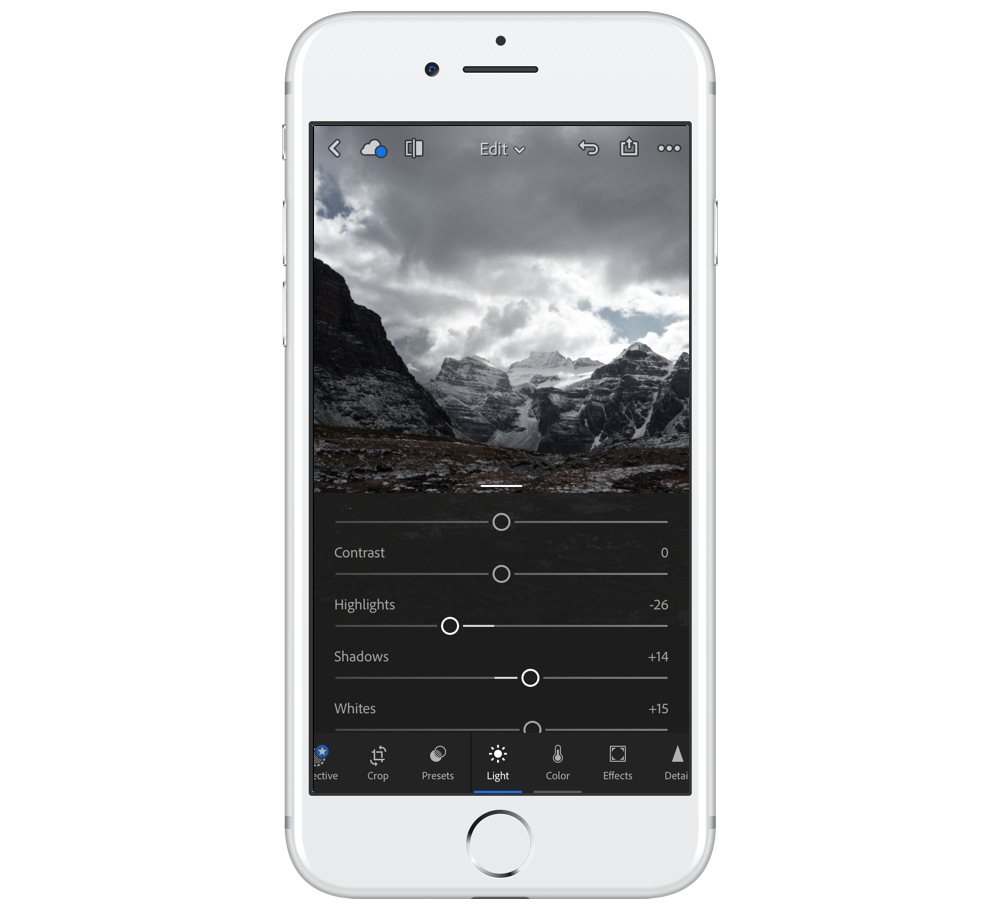
Lightroom is a very clever interpretation of its desktop cousin. It is, of course, not simply a scaled-down version of that app, but its available power is remarkable. Quite simply, it is the best intermediate processing app for RAW photos shot on the iPhone. Unlike most of the apps we’ve mentioned so far, Lightroom has a full RAW editing suite built in. You can adjust exposure, highlight and shadow balance, individual color balance, sharpness, noise, and more — no other app on this list comes close to providing such a deep level of control to the raw camera sensor data.
Unfortunately, because there is so much power available, the path is far less straightforward for turning a meh photo into something amazing. There are only a handful of presets available, and they’re all fairly cheesy interpretations of old photographic processes like sepia, selenium, and cross-processing. So the effects that you might achieve in, say, a minute in Darkroom with just a few taps will require five or ten minutes of making small adjustments to dozens of sliders in Lightroom.
Like VSCO, Lightroom also features its own isolated photo library. If you’re already using Adobe’s apps on your desktop computer, you might find this really helpful, as it integrates with your Creative Cloud library. However, most people probably aren’t stuck with Creative Cloud as much they are to an iCloud or Google subscription. And, because of how much Adobe’s products are treated as a family, Lightroom for iOS is subject to the company’s overall privacy policy.
Nevertheless, Lightroom remains an app to keep in your toolbox, particularly if you’re shooting with a camera app that supports RAW capture.
Apple Photos
If you bought a digital camera in the mid-2000s, you’re probably familiar with all of the junk you got in the box: a strap covered in branding that broke in five seconds, an owner’s manual that you never actually touched, and a CD-ROM filled with software. You might have reasonably assumed that all the software on that CD was pretty terrible, and you’d mostly be right. But every so often, there might be a gem on there. My old Canon DSLR came with a tethering app that allowed me to shoot time lapses, for example, which was awesome.
Anyway, here’s something along those lines that might surprise you: the photo editing app that comes with your iPhone is actually not too bad for simple adjustments that need only a few taps. It has full RAW image support though, for some peculiar reason, RAW images shot with an iPhone app will not fully render; RAW images shot with a dedicated digital camera and viewed using Photos render perfectly, so this bug is pretty bizarre.
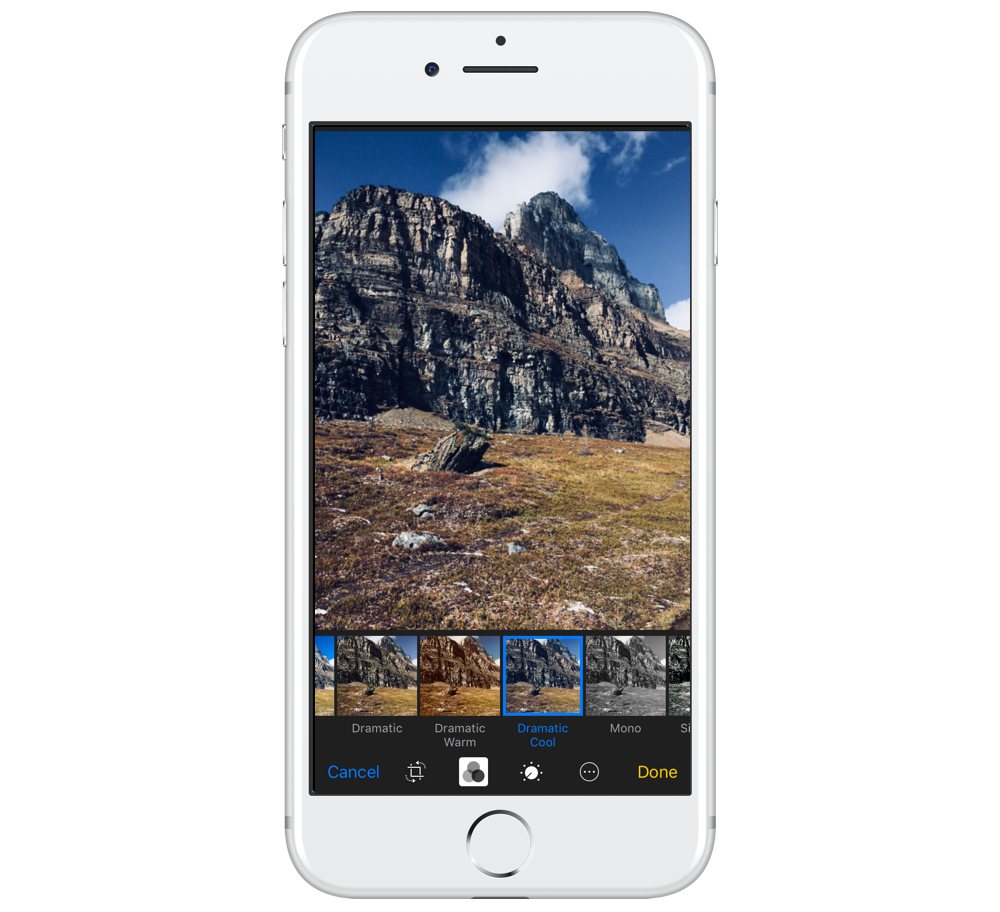
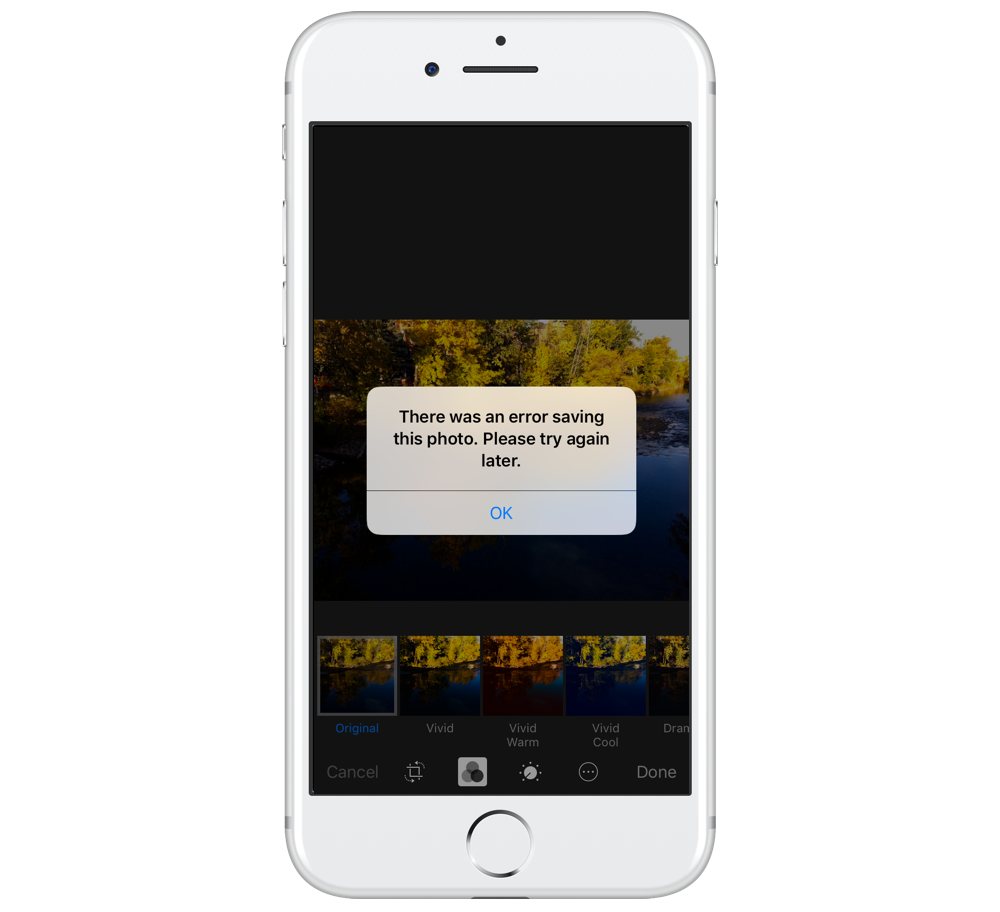
You can tap the Edit button from the toolbar while looking at any image in Photos to bring up the built-in editor. The built-in filters — found by tapping on the overlapping circles icon — are much improved in iOS 11. While the previous largely-gaudy set felt dated even back in 2013 when it debuted in iOS 7, the new ones are fairly tasteful. There are two sets of color filters — Vivid and Dramatic — and each one has warm- and cool-tinted variants, as well as a neutral option. The Vivid filters boost the saturation of the image, while the Dramatic ones lower it. There are also three black-and-white filters if that’s more your speed.
Under the knob-shaped icon, you’ll find three sliders: Light, Color, and B&W. All three provide a really simple way to adjust their respective properties to produce a better photo based on the system’s analysis of the image. For example, you don’t have to manually play around with the Exposure, Highlight, and Shadow controls; you can simply slide the Light slider to change the amount of light in the scene while losing as little detail in the highlights and shadows. Of course, if you want to expand each control into its components, you can do that as well.
There’s one more neat trick hidden away in Photos, which is the ability to convert a Live Photo into a long exposure image. You can do this by scrolling upwards within an opened Live Photo and finding the Effects palette across the bottom.
Photos does have its drawbacks. Mostly, it’s just very limited: no additional filters are available for download, and Apple has historically been very slow to add them; there are no perspective control tools, no curves tool, and no sharpness tool. Also, if you use iCloud Photo Library, you’ll still see those famously-mysterious iCloud errors.
Photos is subject to the privacy policy that you agreed to when you set up your iPhone and iCloud subscription. We think Apple’s track record on user privacy speaks for itself.
Unless you’re going for a look that’s effectively straight out of the camera, you’re probably going to find Photos restrictive. However, it’s worth taking another look at if you haven’t lately.
RNI Films
RNI Films has quietly become one of my absolute favorite photo editing apps, despite some frustrating limitations. If you want to crop, for example, you must do so immediately after importing the photo; there’s no way to do so once you begin diving into its editor. Also, it doesn’t support RAW adjustments, so you’ll have to use an app like Lightroom to create a JPG photo first.
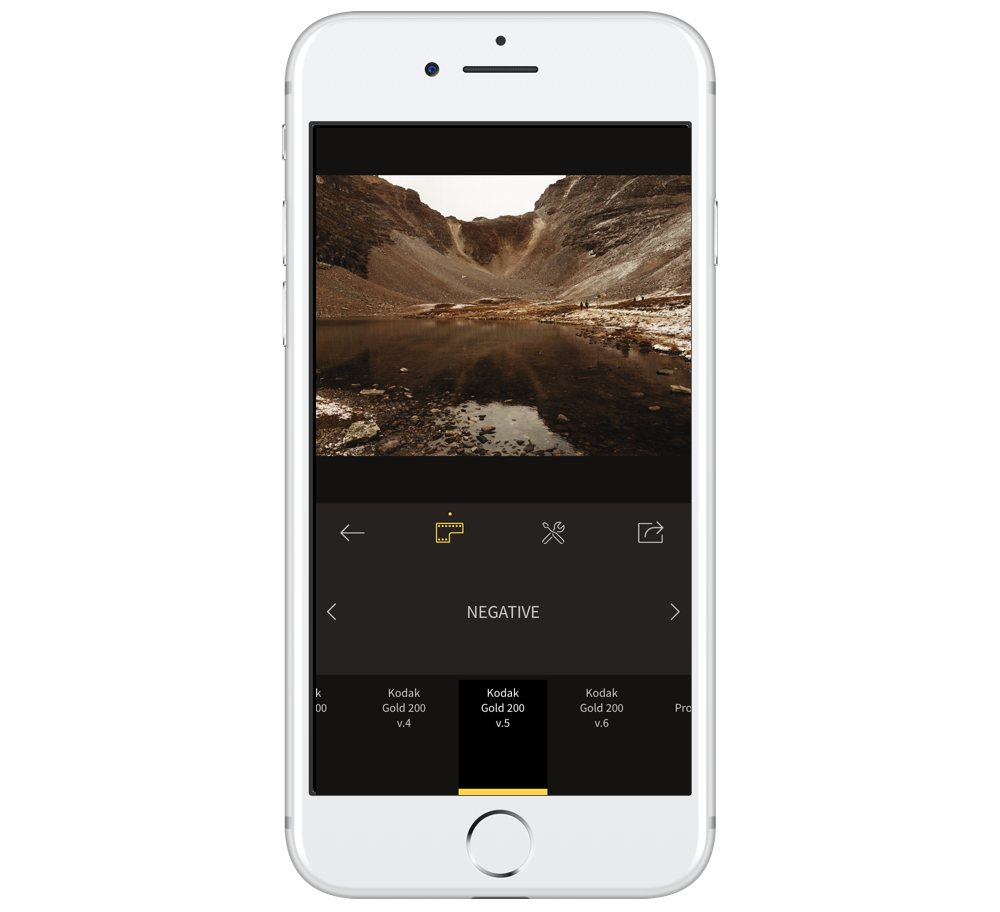
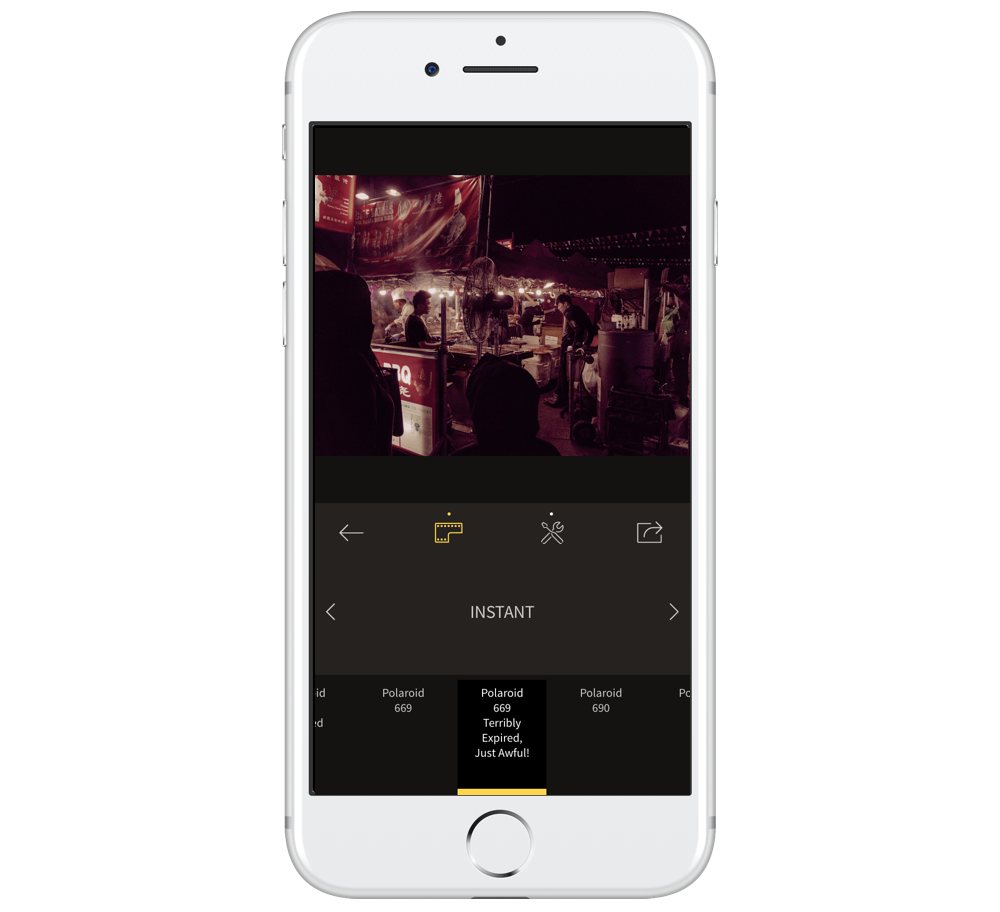
However, if you can look past those foibles, you’ll see that RNI Films has one of the most comprehensive libraries of emulated film stock you’ll find in any iOS app. Like VSCO, the Really Nice Images company makes professional-grade film emulation presets for desktop apps, and it shows: every filter in RNI Films feels usable. Nothing here is too ostentatious; even some of the more bizarre options, like a “Terribly Expired, Just Awful!” Polaroid film can actually look really good on the right photo.
Because this is primarily a film emulation app, the adjustments you make are going to be rather subtle. It’s very difficult to radically transform a photo in RNI Films, so it’s best to start with a photo that’s technically where you want it to be, and then allow RNI to help you create the ideal mood for the image.
It comes with a full battery of editing tools, including some you might not expect, like pre- and post-filter adjustments to temperature and tint. RNI says that the film grain tool even uses grain from real film stocks, not generated grain or digital noise.
In fact, it’s really only the workflow strangeness, lack of RAW support, and the somewhat restricted style of editing that keeps this app from being rated higher in our roundup. It’s very good, and worth checking out.
Snapseed
The Snapseed of 2017 remains the Snapseed you know from many years past. It still has a massive assortment of tools — everything from basic RAW development and white balance — to some pretty wild stuff: the aptly-named Glamour Glow tool gives photos a softly-lit glow, while the Drama tool adds some rather overdone edge contrast.
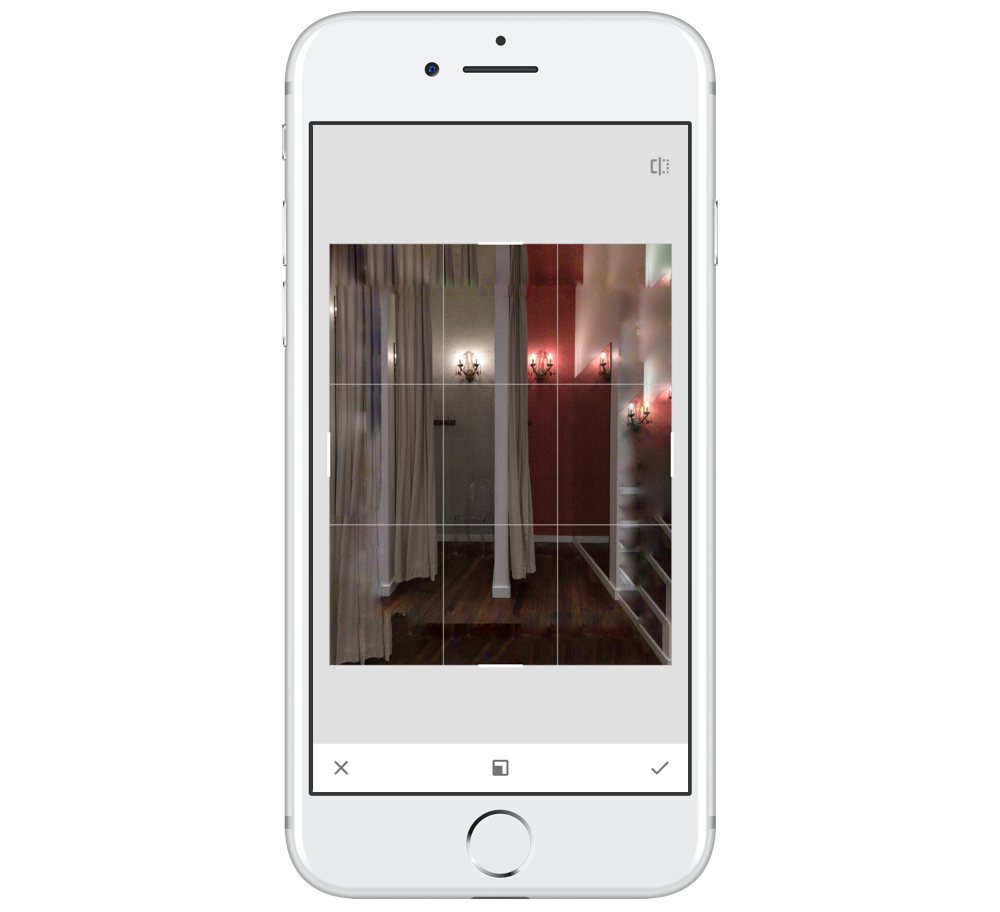
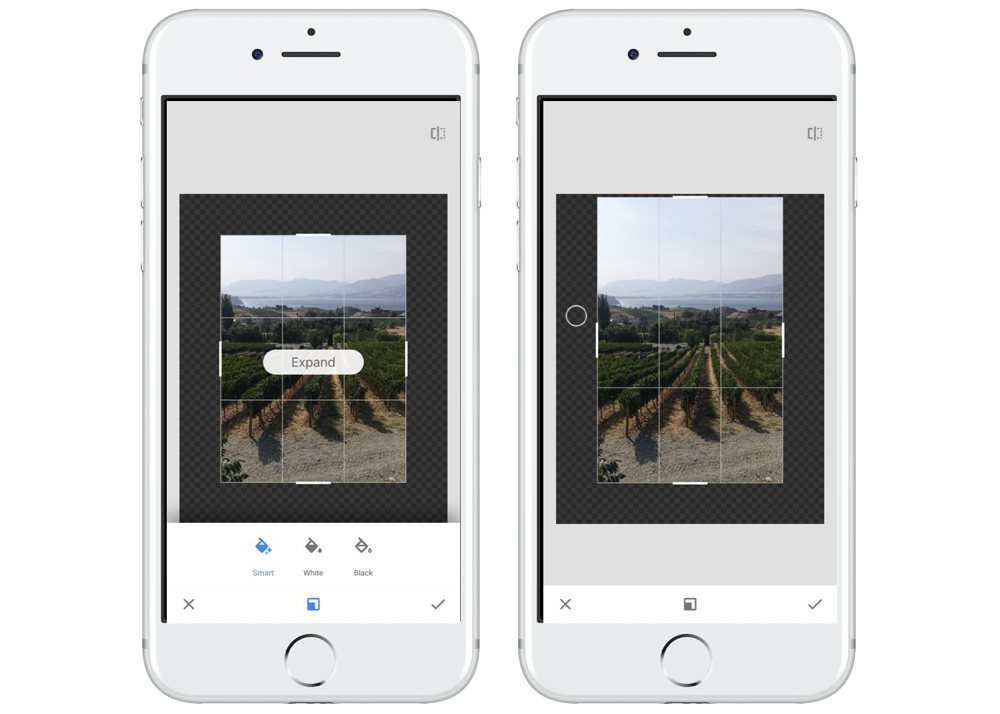
But there’s even more ridiculous stuff in Snapseed. A cropping tool is a basic expectation, but Snapseed also comes with an Expand tool, which fills in areas beyond the captured frame with what it thinks would exist there. I was blown away by the idea of this, but nearly every time I’ve tried it on any photo, I’ve been disappointed. An expanded area looks like an obvious clone of its nearest neighbor; even moderately-cloudy skies are a challenge for Snapseed. The only instance I’ve found where Expand looked good was when I tried it on a virtually empty sky. That’s rather unfortunate, because it’s a really great idea. I do hope it’s something that will continue to get better, especially with Google’s machine learning props.
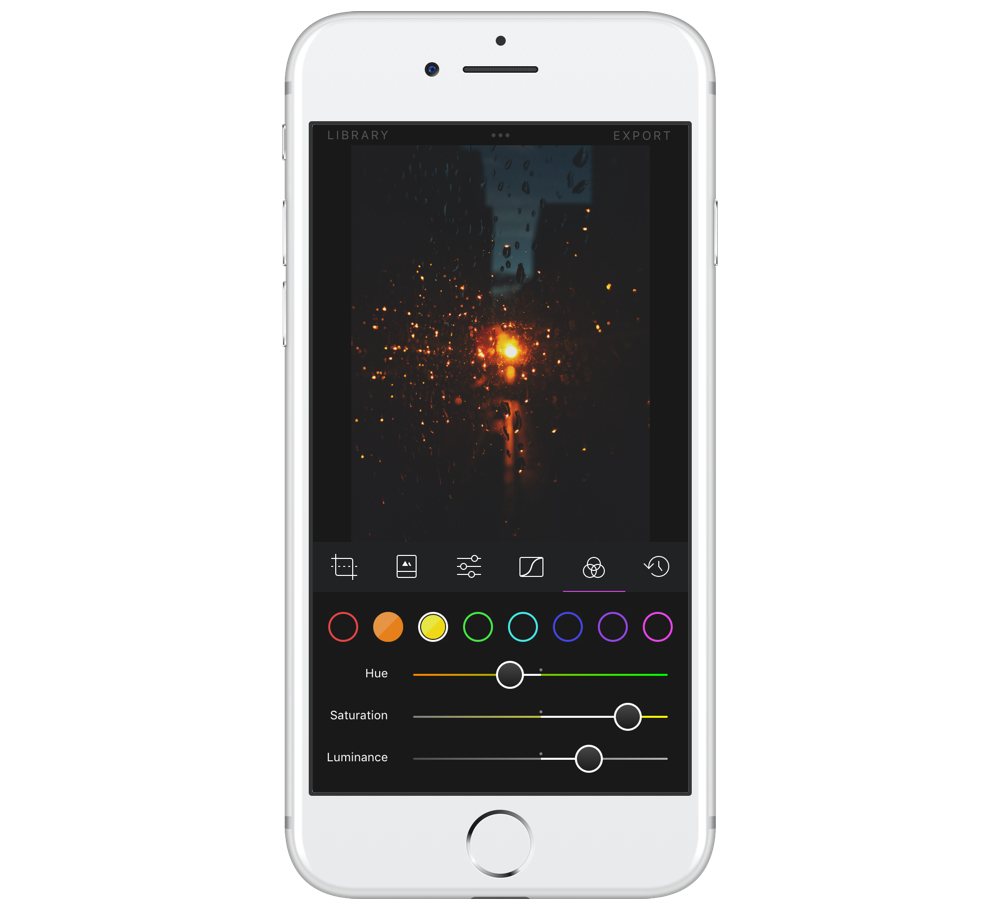
I think Snapseed is a fun app to have on your phone, even if you open it rarely. It still has the venerable Selective Color tool that makes it easy to adjust a specific color in just one area, and that’s worth Snapseed occupying a spot on your iPhone’s Springboard.
PS: If you’re wondering, the brutal forecast for the hike never really panned out. It was a spectacular day to see a valley of larch trees turning golden.