A Few of Our Favorite Obsidian Plugins
Obsidian is a phenomenal notes app, but with a few free community plugins installed, it can become pretty much whatever you want it to be. In this article, we’re going to show you how to install community plugins if you’re not familiar with the process and share some of our favorites.
How to Install Plugins in Obsidian
There are two kinds of plugins in Obsidian:
- Core plugins that ship with the app
- Community plugins developed by others
The community plugins are where a lot of the magic happens.
To access the plugins, click the Settings button in the left sidebar. Click Community plugins, and toggle off Safe Mode. Then, click Browse and you’ll be taken to the Community plugin directory:
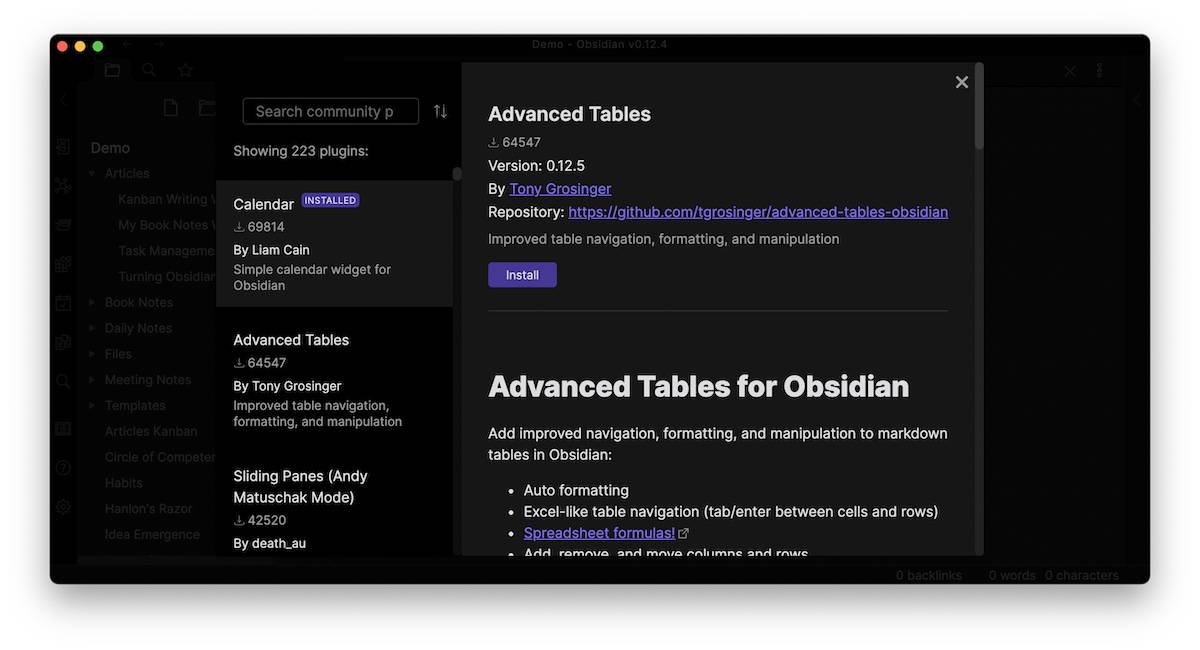
To install a plugin:
- Click the plugin you want to install from the list on the left.
- Click the Install button.
- Click the Enable button.
Your plugin is now installed and ready to be used.
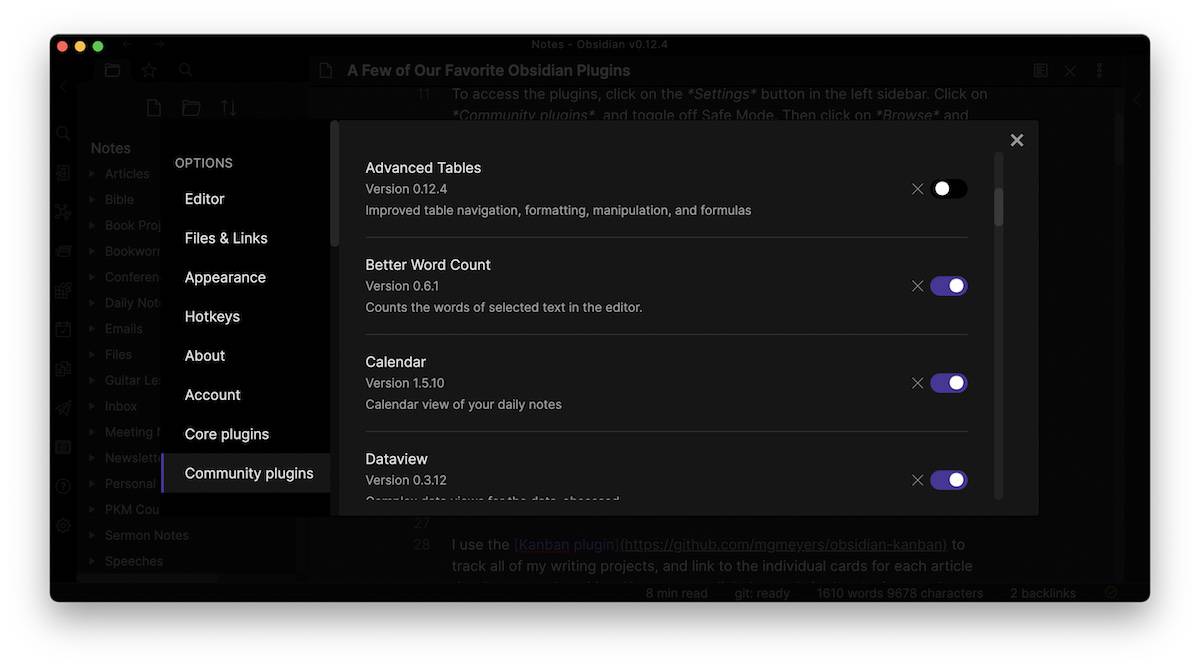
You can also toggle individual plugins on and off once they are installed at the bottom of the Settings → Community plugins screen.
Now that you know how to install community plugins, let’s look at some of our favorites.
A Few of Our Favorite Plugins
Out of all the plugins we’ve tried, these are the ones we consider to be the best of the bunch. Keep in mind that these plugins are being updated and new ones are being added all the time, so you may want to check the directory frequently to see what’s new.
Kanban
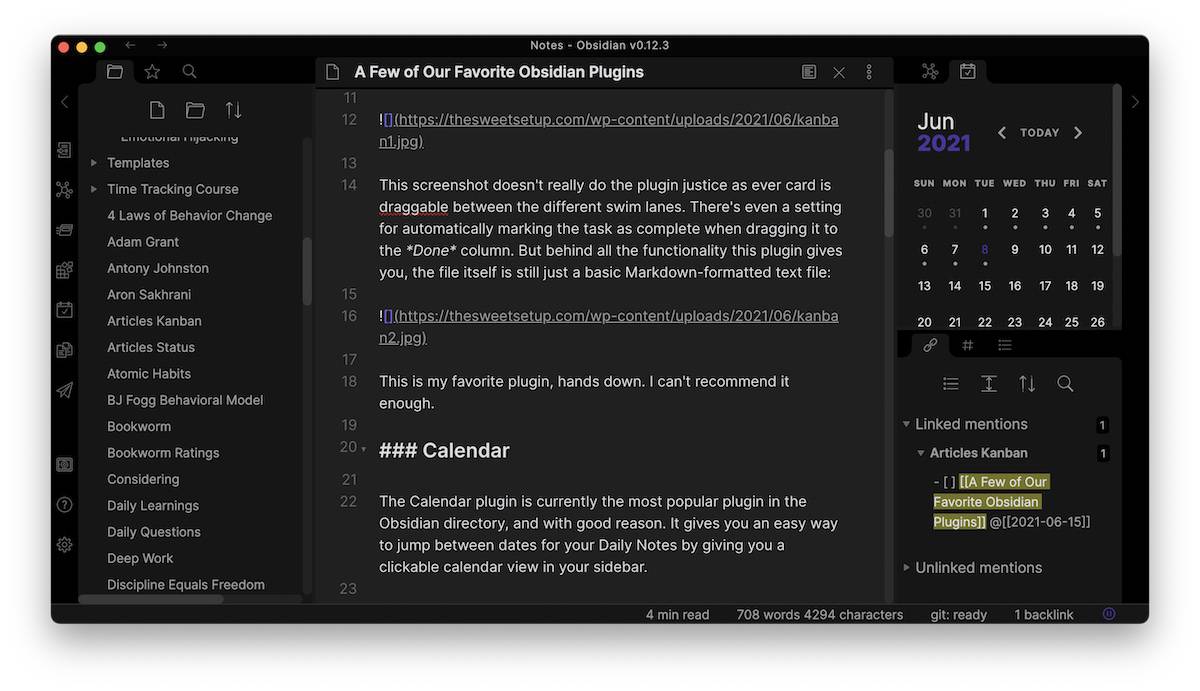
I use the Kanban plugin to track all of my writing projects and link to the individual cards for each article that I’m currently writing. You can even link the cards in the plugin as tasks to your Daily Notes using a date-picker. Here’s what it looks like:
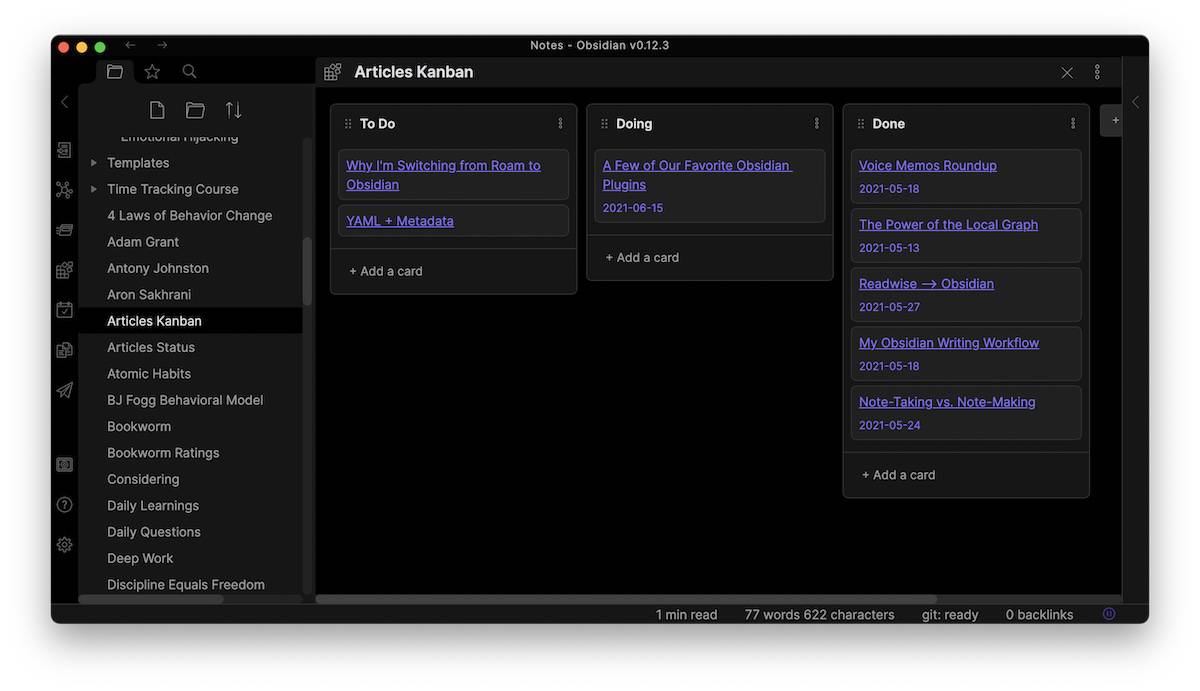
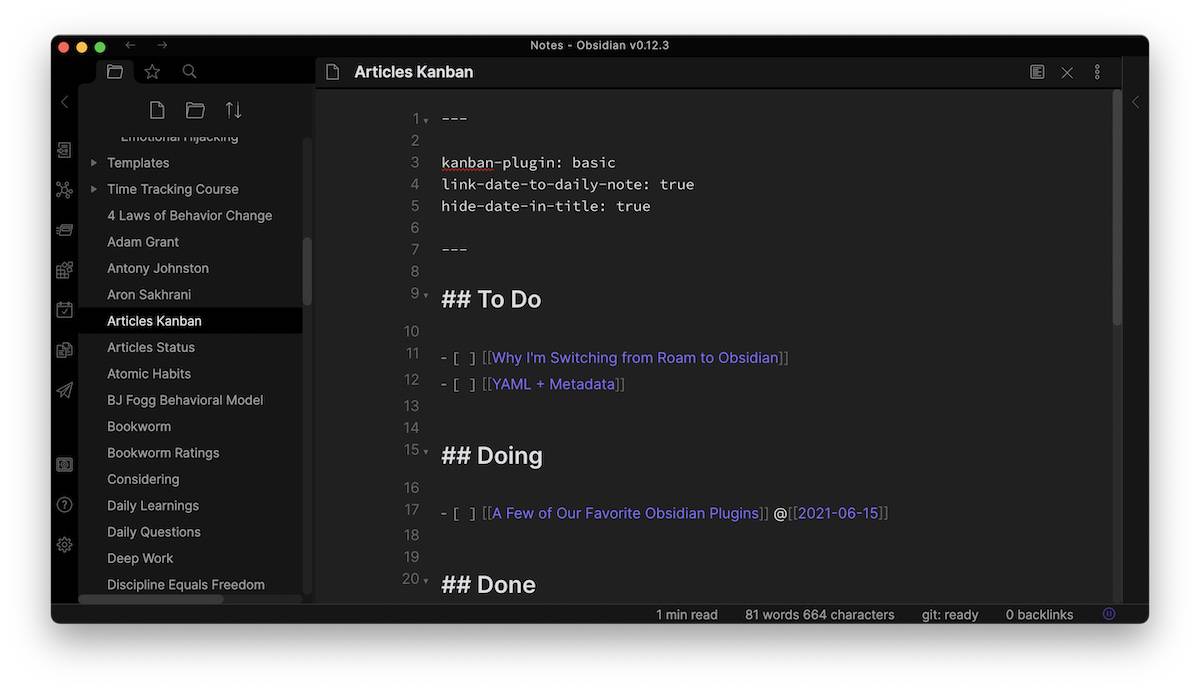
This screenshot doesn’t really do the plugin justice as every card is draggable between the different columns. There’s even a setting for automatically marking the task as complete when dragging it to the Done column. But behind all the functionality this plugin gives you, the file itself is still just a basic Markdown-formatted text file:
This is my favorite plugin, hands down. I can’t recommend it enough.
Calendar
The Calendar plugin is currently the most popular plugin in the Obsidian directory, and with good reason. It gives you an easy way to jump between dates for your Daily Notes by giving you a clickable calendar view in your sidebar.
To jump to a specific date, just click on it in the calendar view. If the date doesn’t exist yet, it will prompt you to create a new Daily Note in the appropriate location. Dots appear under each day in the calendar view to indicate the amount of text in the note and whether there are any unfinished tasks linked to that date.
If you’re going to use Daily Notes in Obsidian, you need the Calendar plugin. It’s that simple.
Review
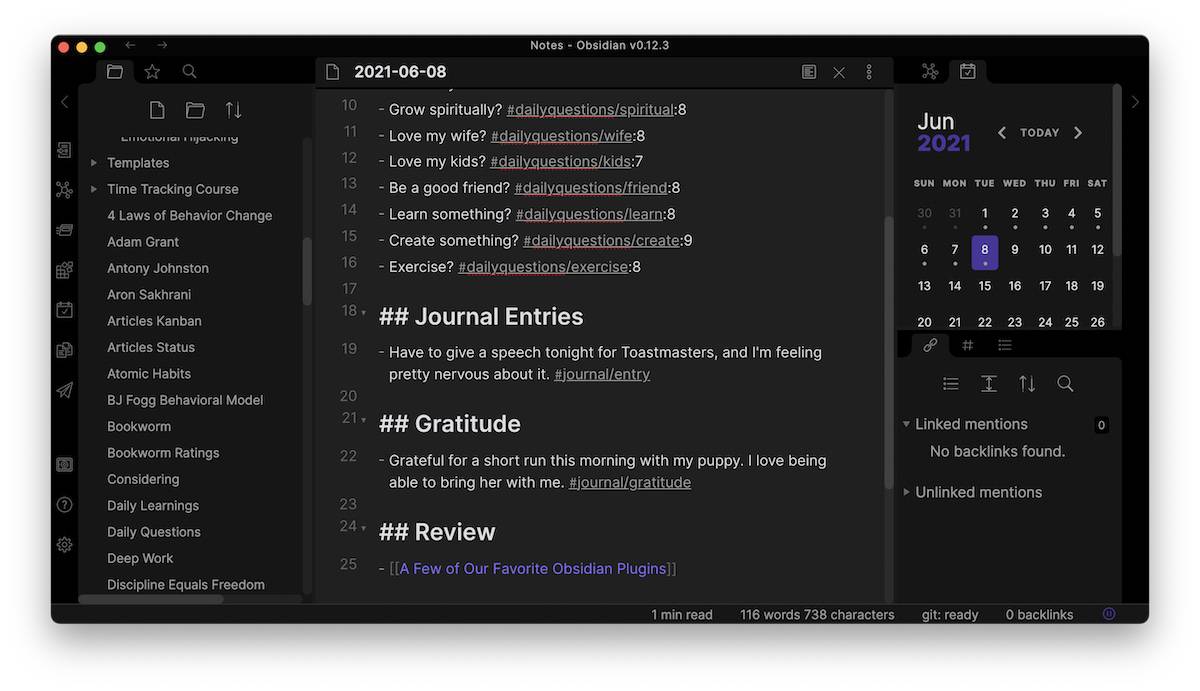
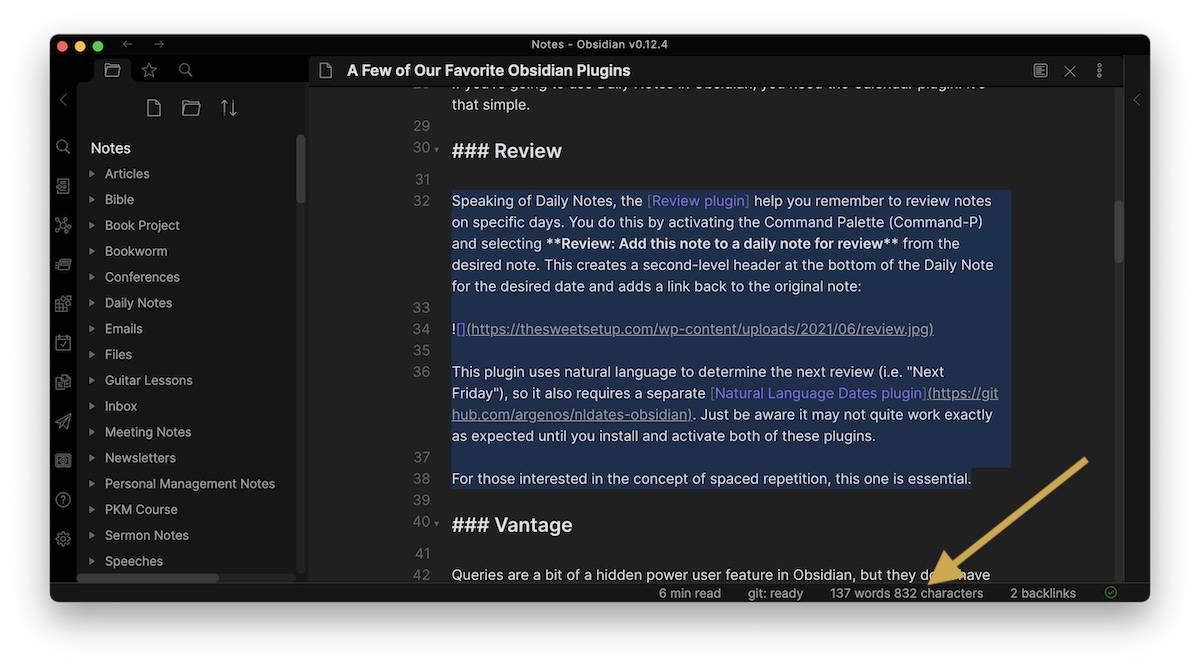
Speaking of Daily Notes, the Review plugin helps you remember to review notes on specific days. You do this by activating the Command Palette (Command+P) and selecting Review: Add this note to a daily note for review from the desired note. This creates a second-level header at the bottom of the Daily Note for the desired date and adds a link back to the original note:
This plugin uses natural language to determine the next review (i.e. “Next Friday”), so it also requires a separate Natural Language Dates plugin. Just be aware it may not work exactly as expected until you install and activate both of these plugins.
For those interested in the concept of spaced repetition, this one is essential.
Vantage
Queries are a bit of a hidden power-user feature in Obsidian, but they don’t have to be. With the Vantage plugin, you can construct powerful search queries without needing to know all of the syntax. Just activate Vantage from the Command Palette (Command-P) and select Vantage – advanced search builder: Build a new search.
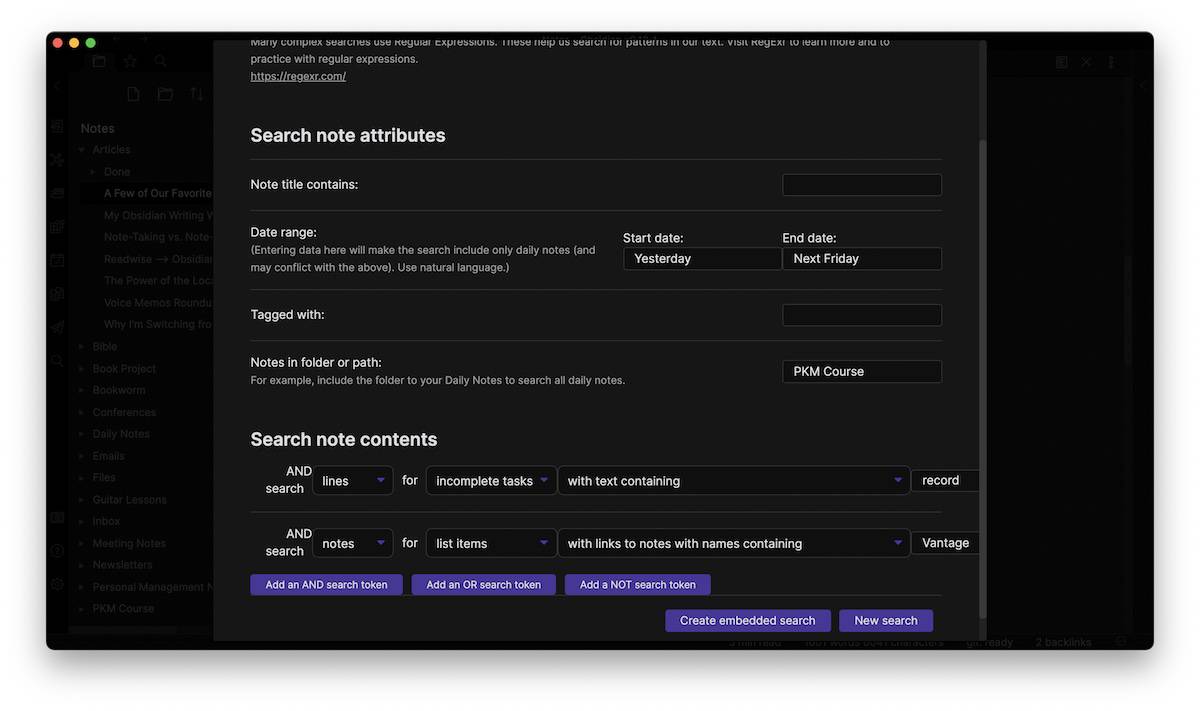
Here’s the code that creating an embedded search based on the screenshot above adds to the current note:
```query

file:(2021-06-10 OR 2021-06-11 OR 2021-06-12 OR 2021-06-13 OR 2021-06-14 OR 2021-06-15 OR 2021-06-16 OR 2021-06-17 OR 2021-06-18) path:(PKM Course)  (line:(/- \[ \].*record.*/)) ((/- [^[.]].*\[\[.*Vantage.*\]\].*/))

```
But the beautiful part about all of this is that you don’t need to understand any of that code. You can build your queries in Vantage and the plugin translates everything for you.
Note Refactor
In the Zero-to-Obsidian workshop, I explained the importance of what I call atomic notes. The basic idea is to break your notes apart into smaller chunks in order to make the most out of the bidirectional links in Obsidian. So for example, in the screenshot below I have the Atomic Habits note open on the right, and a separate note that I broke out as its own note (The 4 Laws of Behavior Change) on the left:
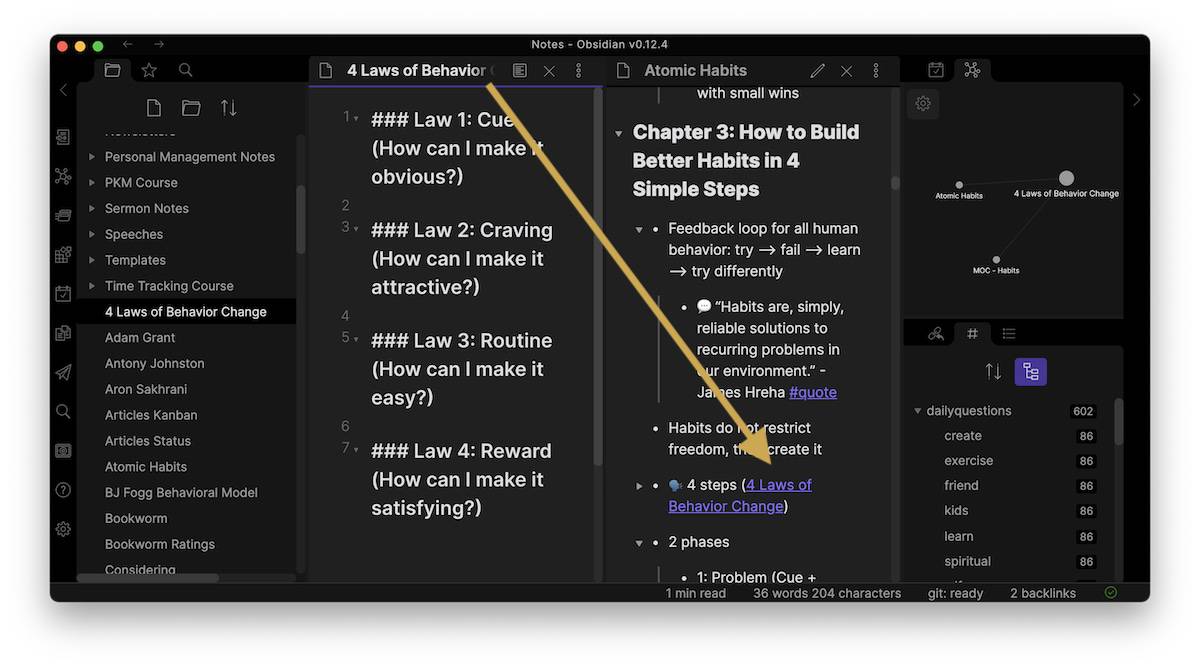
Notice the link on the Atomic Habits page to the 4 Laws page. That’s important.
What the Note Refactor plugin does is take a selection of text and break it out as its own note while simultaneously putting a link into the original note that points to the new one. This makes a bidirectional link between the two notes and is visible in the local graph in the upper-right.
There are lots of different formatting options you can use with this, but it’s an essential tool for building a library of atomic notes.
Better Word Count
Obsidian ships with a core plugin for word count, but the Better Word Count plugin is, well, better. It gives you options to toggle on or off the number of words, characters, and sentences, lets you customize the descriptors for each, and lets you count from a selection as well as the entire document.
It’s pretty simple as far as plugins go, but it makes Obsidian an even better writing tool.
Todoist
The Todoist plugin allows you to embed interactive Todoist tasks into an Obsidian note. The syntax for this plugin is based on Todoist’s powerful web filters, which allow you to embed tasks that meet certain criteria. For example, here’s a simple query for the book publishing checklist I have in Todoist embedded in Obsidian:
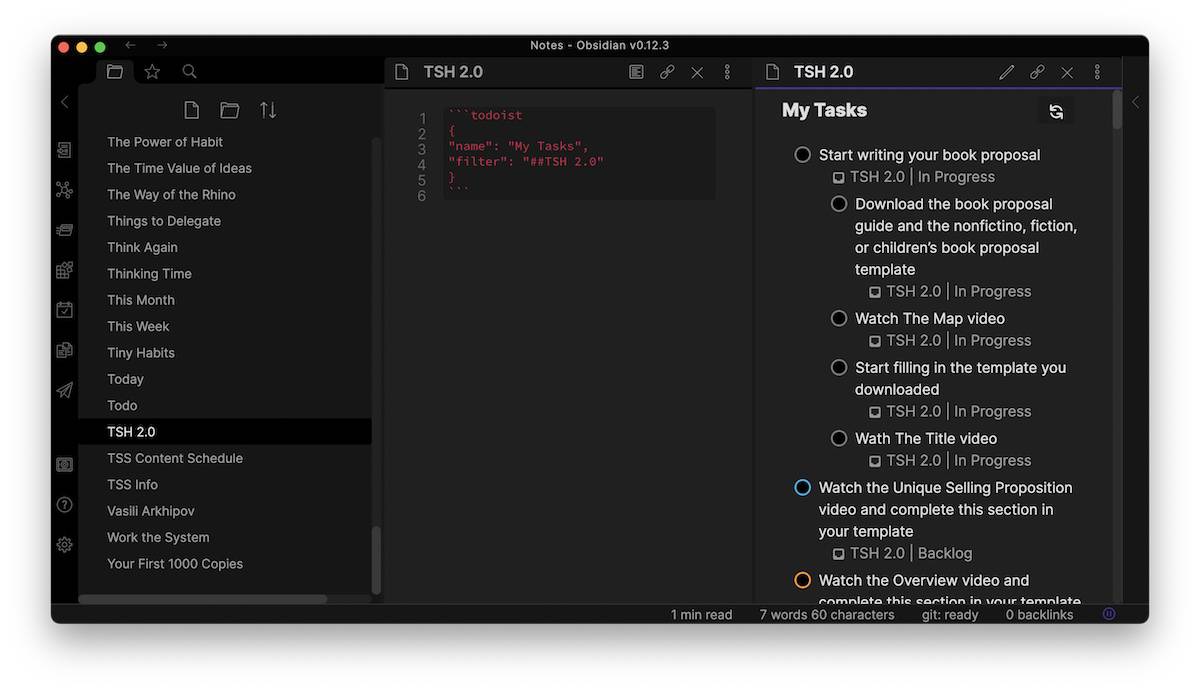
On the left is the actual code written in Edit Mode, and on the right is the interactive rendering of the Todoist tasks in Preview Mode. As you can see, the task names, projects, and even sub-task structure are displayed in Obsidian. The colors come over from Todoist’s priority levels, and each task is interactive so I can check the circle and mark it off as complete in Todoist.
This is a great plugin for anyone who keeps tasks in Todoist but wants a way to visualize those tasks alongside project information inside of Obsidian.
Tracker
The Tracker Plugin is the heart and soul of my Daily Questions journaling workflow (see the post for the video walkthrough). What it does is take values (in my case, numeric values associated with specific tags) and plots them on a graph. Here’s a side-by-side screenshot of the code snippets in Edit Mode and what it looks like rendered in Preview Mode:
![]()
My use case is pretty basic: I assign values daily to the tags on a scale of 1-10 using my Daily Notes for journaling, then Tracker collects all of those and plots them on individual graphs by tag. But there’s a lot more you can do with the Tracker plugin if you’re willing to devote a little bit of time to figure out how to make it work.
Dataview
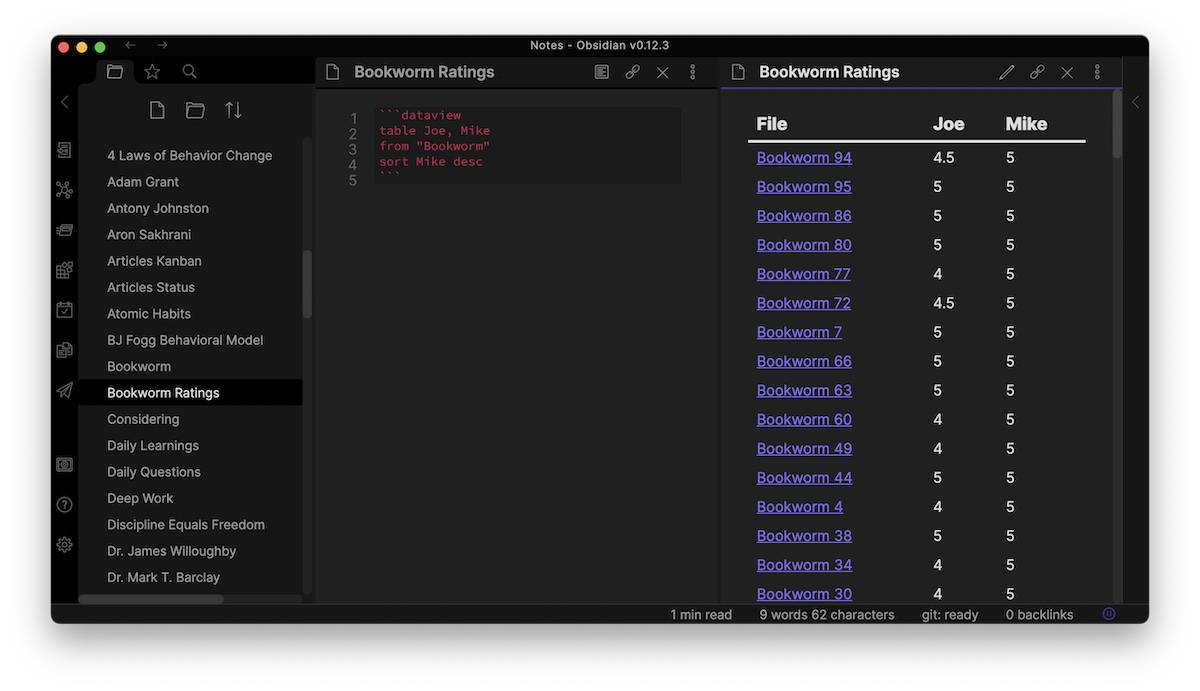
Another great plugin for visualizing data is the Dataview plugin, which turns your Obsidian vault into a database with powerful query tools. For example, I have a note for every episode of the Bookworm podcast I’ve recorded. Using YAML at the top of the document, I can apply individual values for both my rating and Joe’s rating (my co-host) for the book that we covered. Then using Dataview, I can tabulate all those ratings and sort in the desired order. Here’s a screenshot of the Dataview code in Edit Mode (which includes every note in the Bookworm folder and sorts them in descending order based on my rating) and the visualization of that code in Preview Mode:
There’s lots of other stuff you can do with this plugin. See this thread in the Obsidian forum for more inspiration.
Obsidian Git
WARNING! This one is super-nerdy.
Obsidian Git is basically a backup plugin for Obsidian, but instead of creating a local backup of all your files, it sends all your changes to a GitHub repository. In addition to a backup, this also gives you a sort of version control for your Obsidian vault. You can set it up to back up automatically, or use a keyboard shortcut to manually trigger a push/pull.
I learned the hard way that setting up Git on your Mac can be tricky. I don’t really use Git much, so I enlisted the help of a friend who really understands this stuff. But if you’re feeling adventurous, here’s a pretty good guide to getting started.