Obsidian Task Management Basics
Obsidian ships with some basic support for task management, making it a great option for creating a digital bullet journal. But in this video, we’re going to show you how to take those task management capabilities to the next level with a couple of additional plugins.
The first plugin is the Calendar plugin. To install the calendar plugin, click the gear icon in the lower left, select community plugins, and then click Browse. Look for the Calendar plugin and then install and enable this plugin.
While we’re here, we’re going to install another plugin, which is the Obsidian Tasks plugin. Search the Community Plugins directory for Obsidian Tasks, and then click Install and Enable.
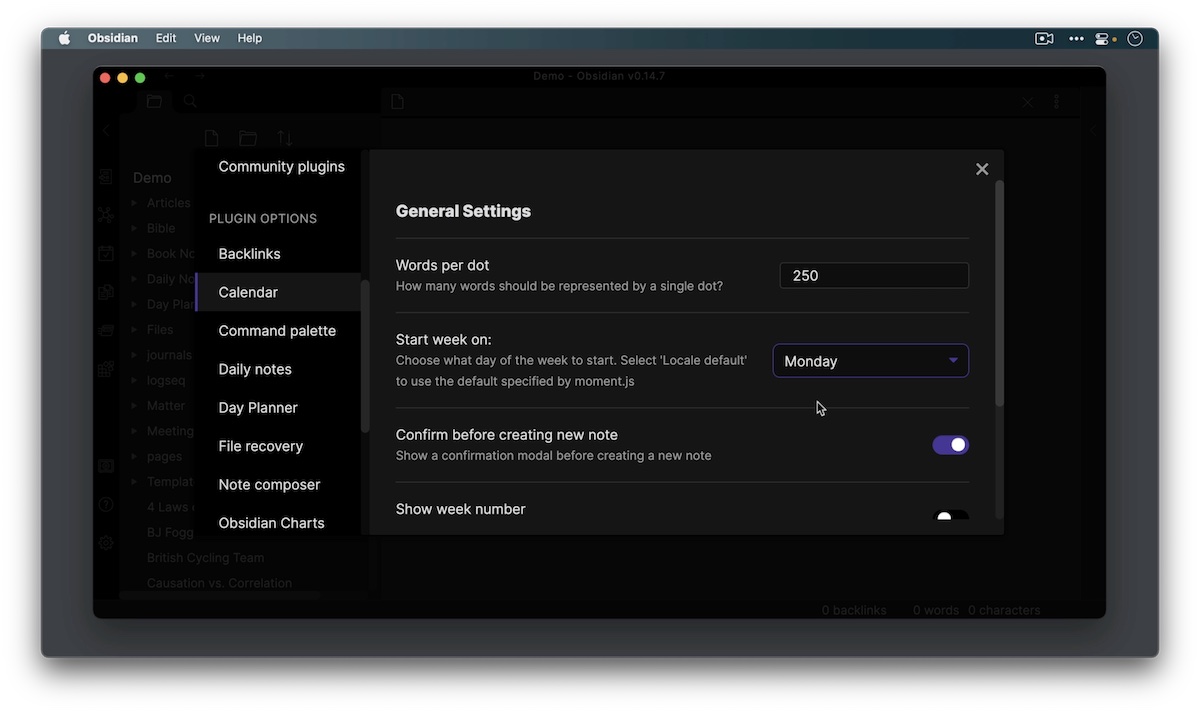
Okay, now we have both of these plugins installed, so let’s close the directory, go back to our settings list, and configure a few settings for each of these plugins. First, click the Calendar option in the plugins list and change the preferences that you want here. I prefer my week to start on Mondays instead of Sundays, so I’ll select that. You can also toggle the week numbers if you prefer. Once you toggle on the week numbers, you can configure what the weekly note formats look like and what template you want to use. But we’re going to leave that for now.
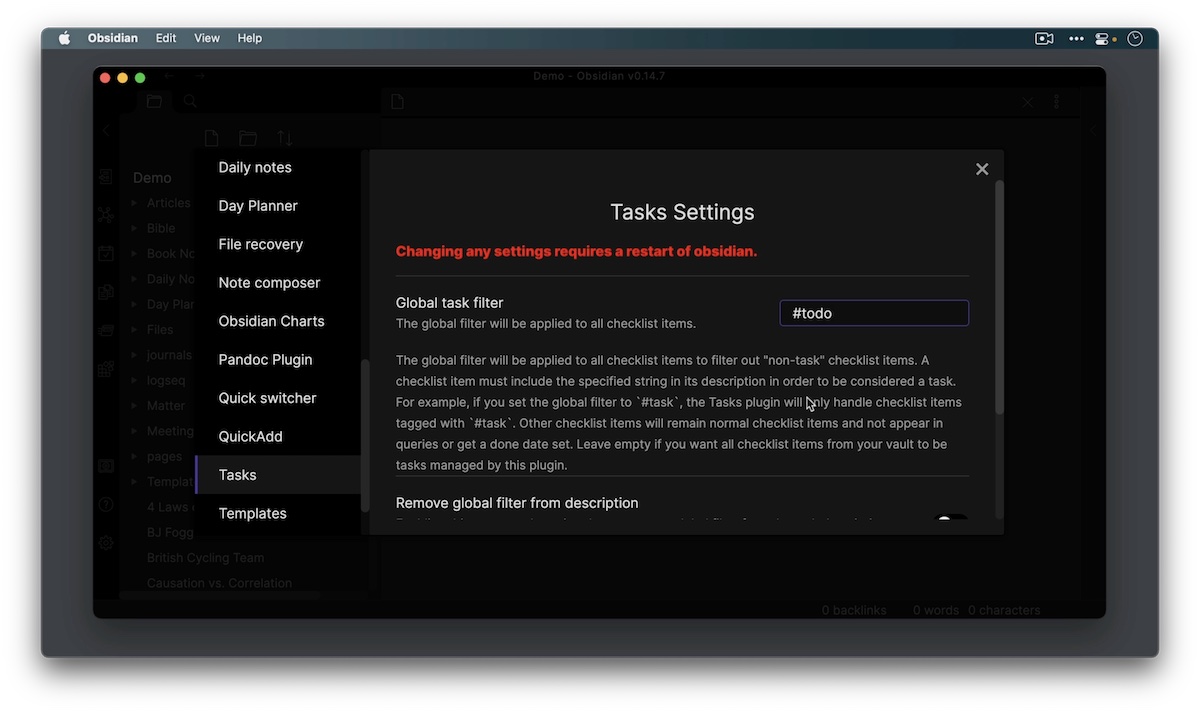
Next, let’s go over to the Tasks plugin and take a look at the options there. The first thing here is the global task filter. This is what we use when we create a task that will identify this checklist item as a task. This will help us differentiate the tasks that the plugin is going to look for in our Obsidian vault from any other checklist item that may appear. By default, it’s going to use #task but I’ll change this to #todo. Next, we can choose whether we want that tag to appear in the description. I’m going to remove that. And we can choose whether we want a done date on every completed task — by default this is on and I’m going to leave that for now.
Now let’s look at the first instance where you might use tasks in your daily notes. With the Calendar plugin, there’s a new option now available in the right sidebar. So let’s expand this and click the calendar option to get a month view for the current month with the current day highlighted. So right now I’m recording this on May 2, 2022. And to go to the daily note for May 2, all I need to do is click that box in this calendar.
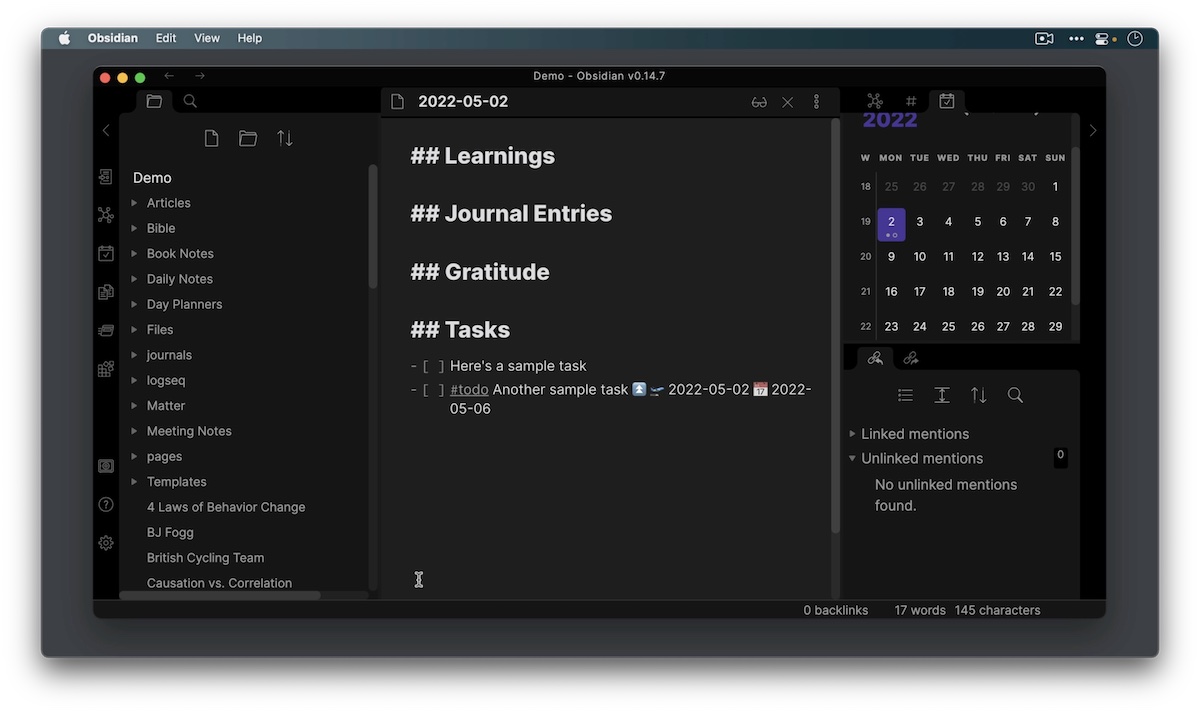
If the file doesn’t exist, the plugin will ask me if I want to create it. Then we’ll create the daily note based on the template settings that I’ve configured for the Daily Notes core plugin, but we cover all of that in a separate video. For now, what we want to do is create a place to capture tasks. So let’s create a new second-level header, and the default way to enter tasks into Obsidian is to use the - [ ]. Here’s what that looks like. Now if we click on the button to switch to the Reading view, we can see this is a simple checkbox. And if I check this box, it marks the task as completed which simply adds an X in between the left and right bracket.
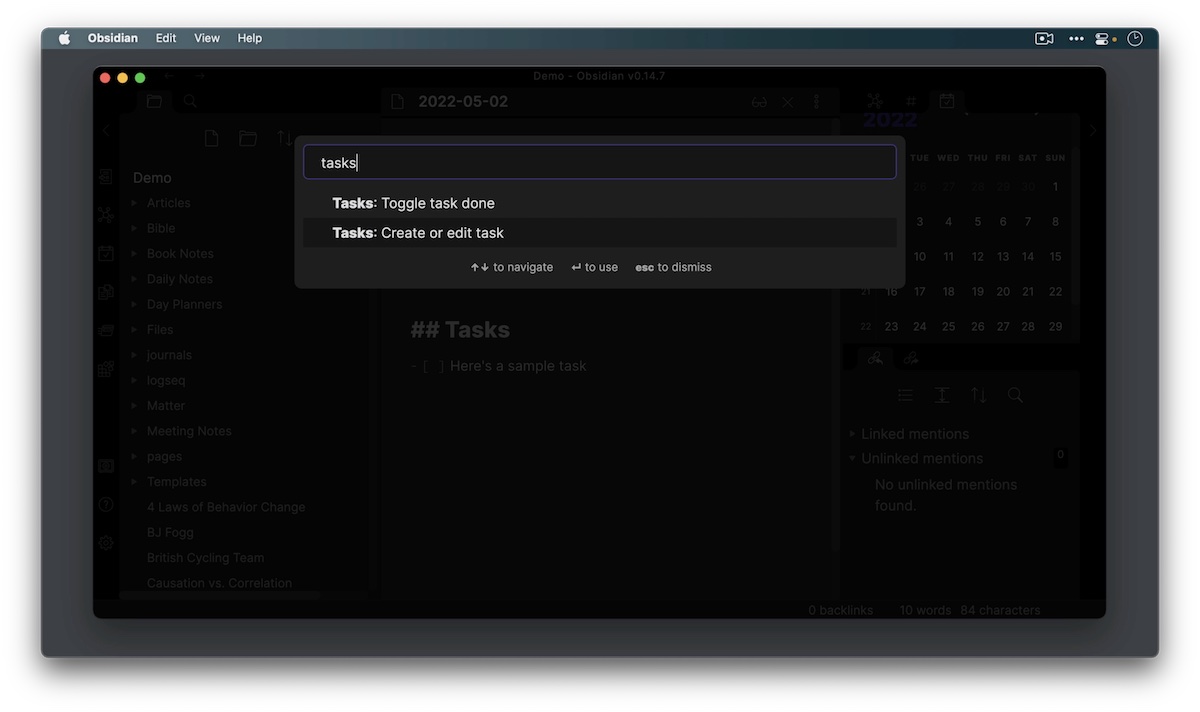
With the installation of the Tasks plugin, we now have an additional filter that we can use to establish queries. This will allow us to search all the different notes in our entire Obsidian vault and show us only the ones that meet certain criteria. Okay, so this is a sample task. We’ll reset this by deleting the X in the middle. Using the new format, we’ll invoke the Command Palette by hitting Command - P, searching for Tasks, and then selecting Create or Edit task.
This will use the Obsidian Tasks plugin and gives us a whole bunch of extra options. So let’s create another sample task.
We can choose a priority level if we want, a recurring date, a due date, a scheduled date, or a start date. I’ll make this due by Friday, which you can see as I use natural language will automatically convert that to the date 2022 -05-06, then we can choose when we want to schedule this or when we want it to start. I’ll say I want this to start today. A start date basically says this is the date when the task is available to be worked on, whereas the due date says this is the date that the task absolutely must be finished by. Once you get this looking just the way you want, click the button to apply.
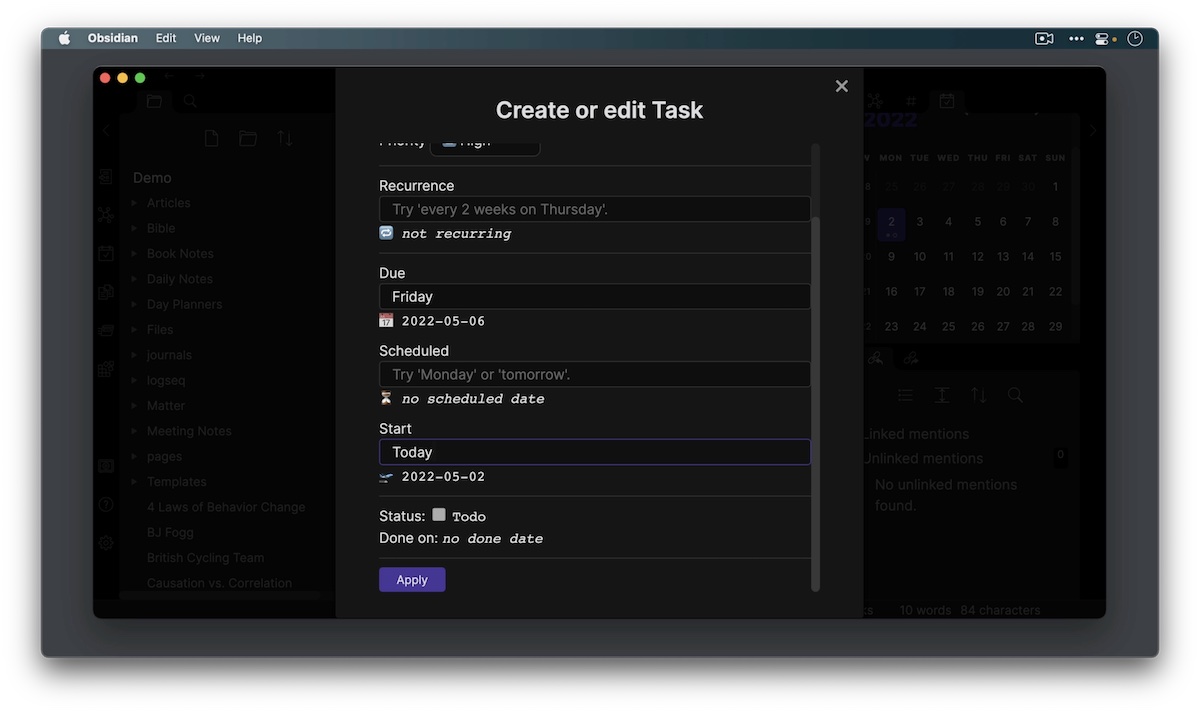
And here is our new task, which shows the high priority, the start date, and the due date, in addition to the #todo filter that we added in the task settings.
All of this is additional information for the task that we can use when creating our queries, but we’ll cover that in another video. For now, just understand that you can create these tasks literally anywhere in your Obsidian vault. And you can even create specific hotkeys to trigger this task entry. So let’s go back to our Settings and go to Hotkeys, which will show us all of the available Command Palette actions. And if we search for Tasks, we can see this one here to create or edit a task. And I’ll click on this button right here to customize this command. And then we just press the hotkey that we want to use and I’m going to use Shift - Control - Option - Command - T.
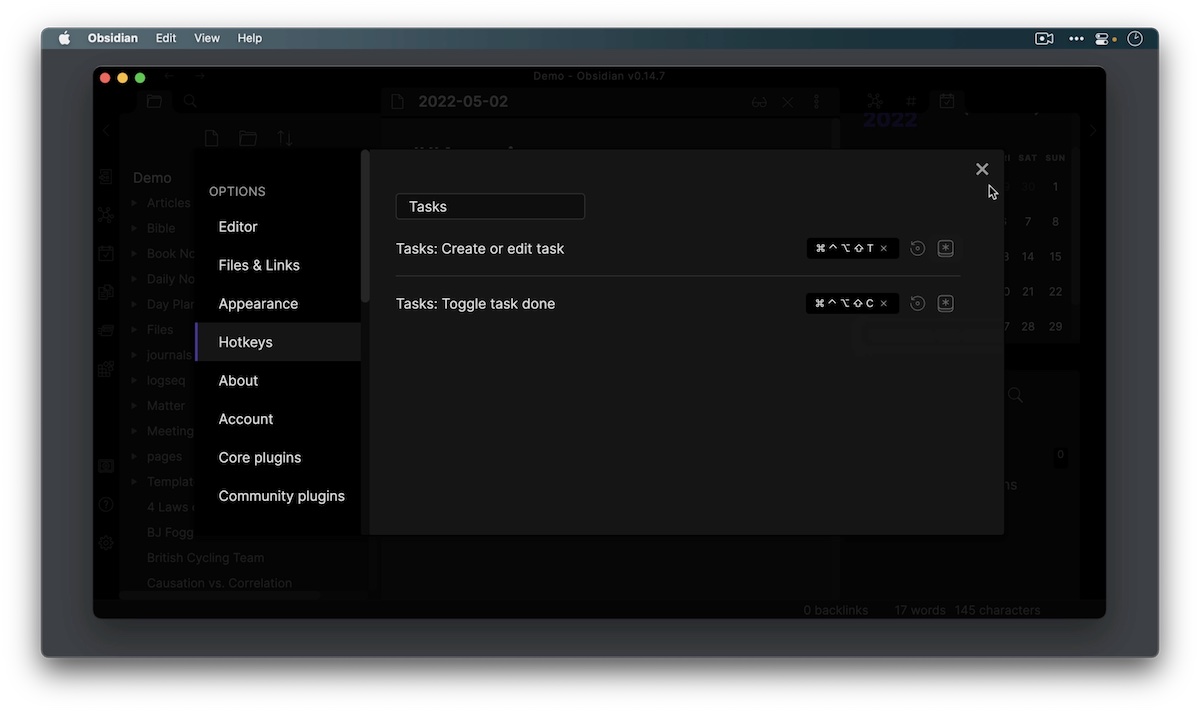
Now I can use that keyboard shortcut to get to that task entry window. We can also create a shortcut for toggling tasks as done. Let’s use Shift + Control + Option + Command C for completed. Okay, now let’s close our settings. Go back to our task. And now when we have the cursor in this line, we can use that keyboard shortcut to mark the task as completed, which also adds some additional information here for the completed date. But the real magic with all of this is the queries. We’re going to get to that in the next video.