How We Created our Master Resource Database

A couple of months ago, we were in a Blanc Media staff meeting and we were talking about one of our resources, an e-book called Procrastinator’s Guide to Progress. And I asked, “Do we have a central place to easily find all of our resources with source files and links?” Well, the answer was…. “um, I don’t think so”. So then I had the idea to track down all of our resources, PDFs, slide decks etc. and drop them into one place. So our Master Resource Database in Notion was born.
Just for a little bit of context, The Sweet Setup and The Focus Course have been around for a minute. Shawn has created dozens of PDFs, courses, and e-books and hosted even more webinars and workshops. We have A LOT of content floating around in the ether. So I wanted to create a place where we could easily access and share it without digging around our site for 20 minutes.
Why use a Notion Database?
For those who might be new to Notion or unfamiliar with relational databases, here is a brief intro (feel free to skip ahead if you’re already a pro). Using Notion’s databases are a great way to store important information that you want to find quickly.
A Database is essentially a dynamic spreadsheet. You can create different views of the same information. For example, you can see it as a simple spreadsheet (similar to what you might see in Google sheets), calendar view, Kanban view etc. The secret sauce of Notion’s databases is that they can talk to each other. I can easily reference information from several data sources in one place. If you want to learn more, check out this article we wrote on relational database.
We do all of our project management inside of Notion. It just made sense to build this master resource database inside Notion. Plus, it connects to all of our projects.
Problems it had to solve
If this whole thing was going to work, it had to solve a few problems for us. We needed a place to store the links to PDFs, source files, Keynote slide decks. We also needed the link where the PDFs “lived” on our site. If it’s part of a course, where is the sales page in case asked about the resource?
We wanted this database to be helpful, but not so complex that it becomes rigid and unusable. Thanks to the versatility of databases and their properties, I think we figured it out.
Database properties
First off, don’t be alarmed by the amount of properties we created. They all serve a purpose, and luckily we can hide the ones we don’t want always displayed.
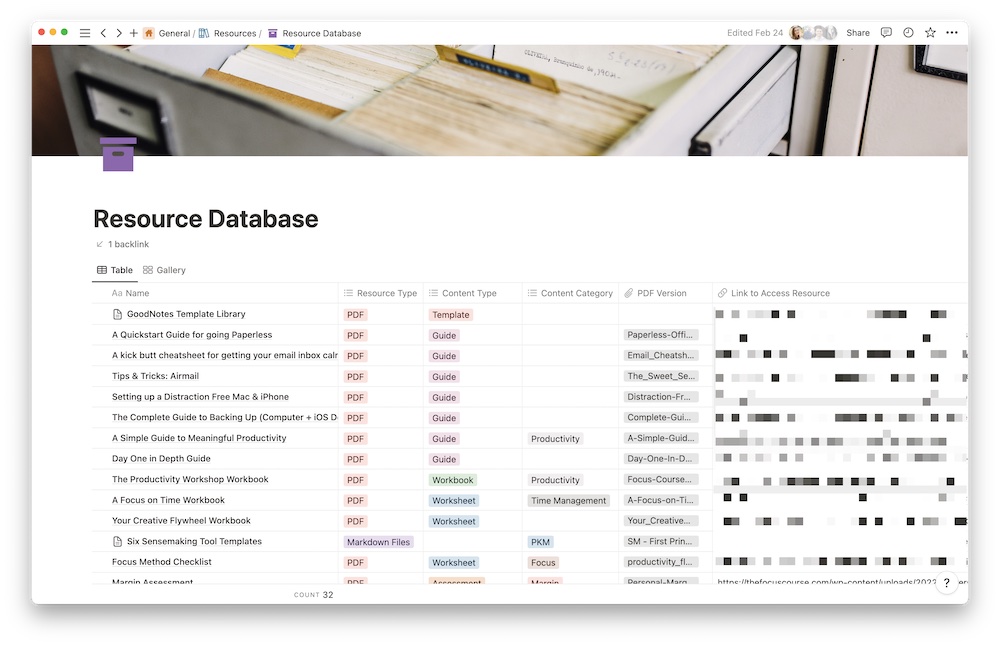
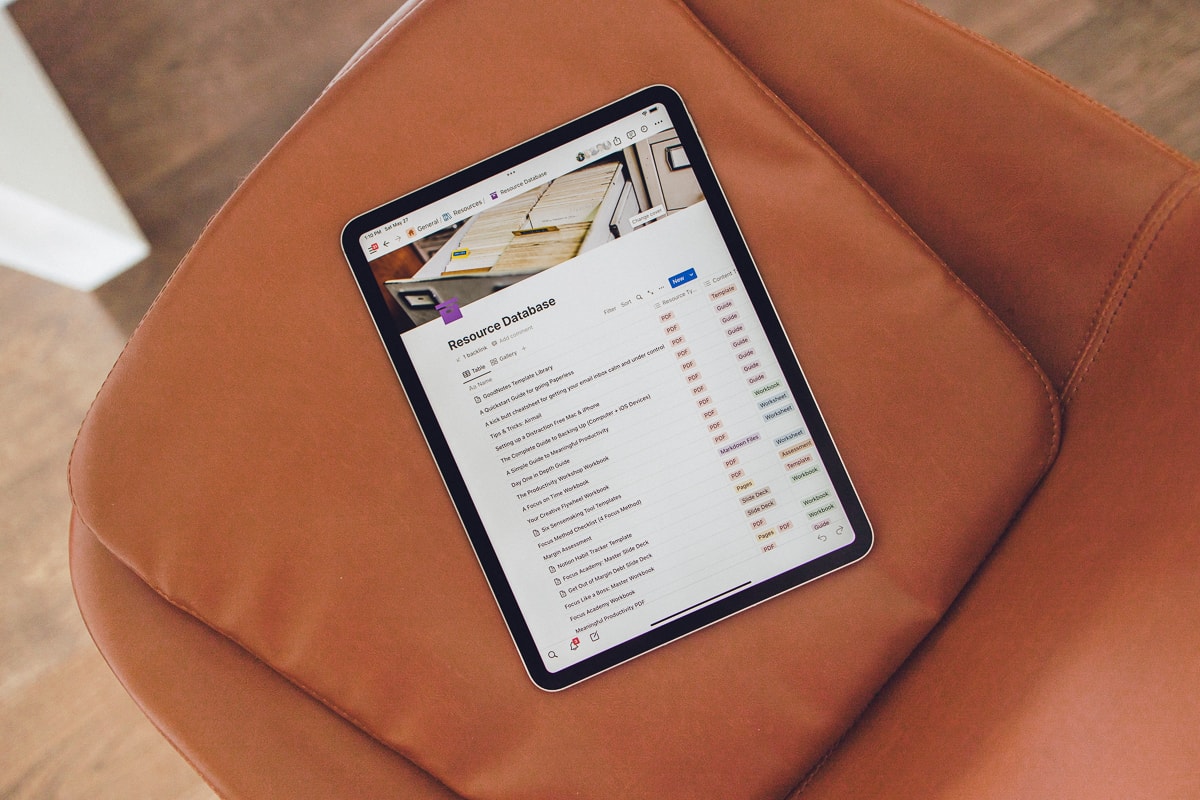
Here’s a list of all the properties we have:
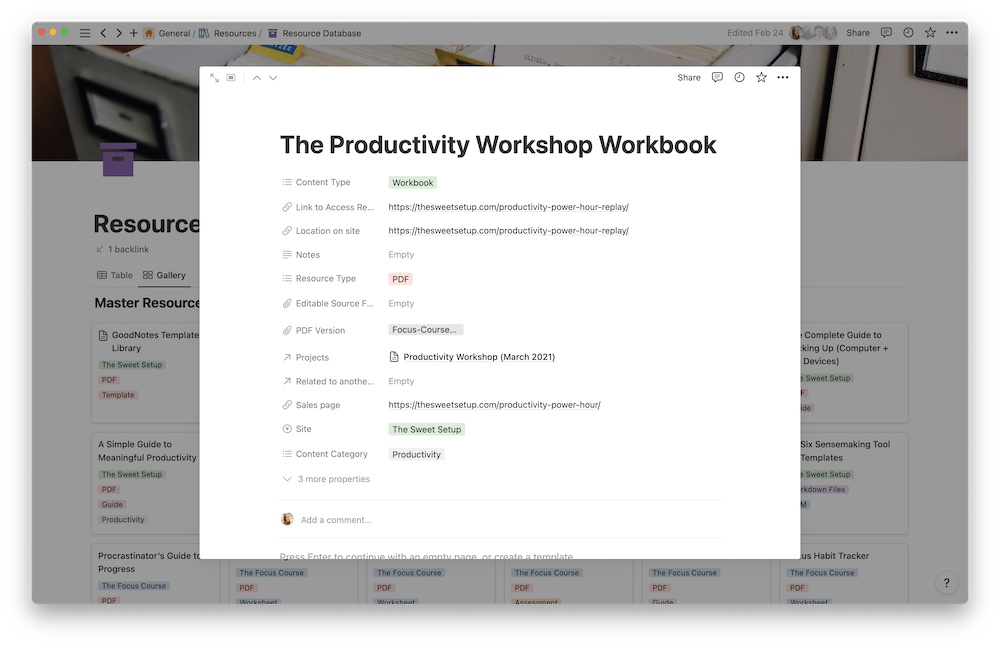
Name: This is pretty self explanatory. This is the name of the resource, like A QuickStart Guide for going Paperless or Margin Assessment.
Resource Type: This is for noting the file type, i.e. PDF, Slide Deck, Pages File… We used a select property for this one (a select property is basically a dropdown).
Content Type: Similar to resource type, we used a select property to distinguish what type of resource it is, i.e. Worksheet, Assessment, Guide, etc.
Content Category: Also a select property. We can add the category for each resource, like “Time Management”, “Margin”, “GoodNotes” etc. This is helpful in case we want to see all the resources that we have on a certain topic, like PKM.
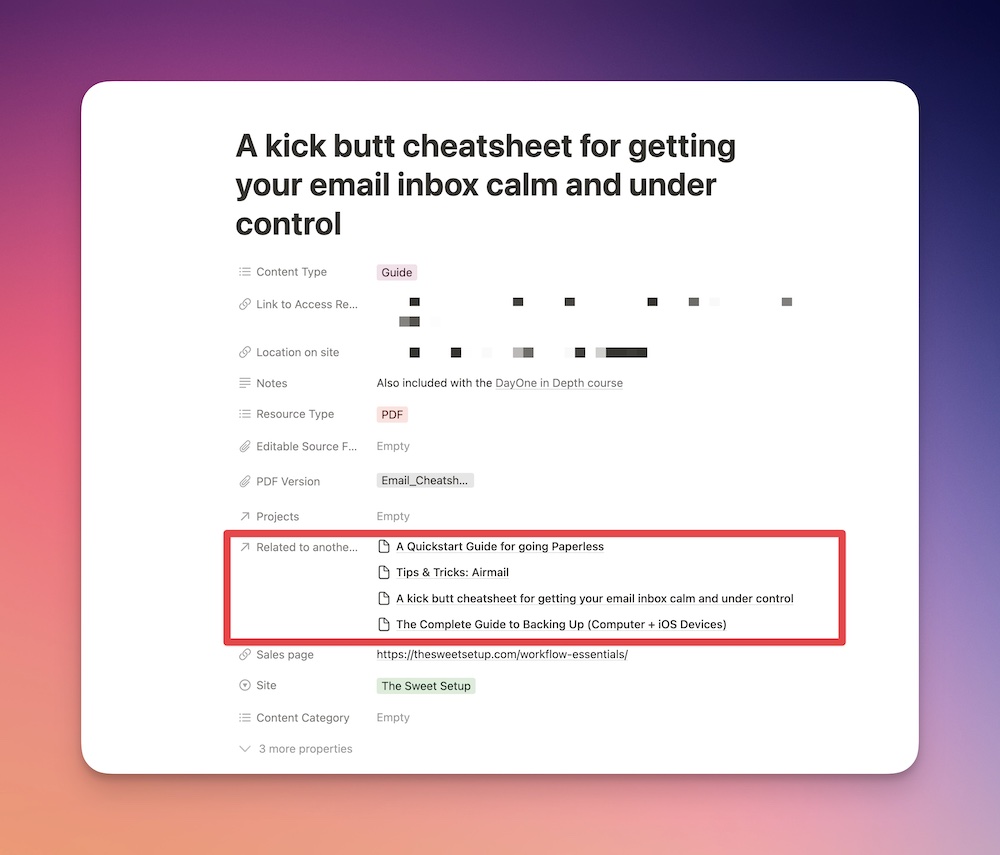
PDF Version: Next we have a file property. Here is where we upload the actual file. So for our Focus Method Checklist, we can upload the PDF file and add the link to find it on our site.
Link to Access Resource: This is where we save the link where the resource lives on our site. So if someone asks us where they can find our Goal Setting worksheet, we can just send them the link to the resource (like when you click on a link and it opens the PDF in your browser or downloads it onto your computer).
Location on site: This is different than the link to access resource. Let’s say that someone wants the workbook for our Focus Like a Boss program. We can send them the actual PDF or we can send them to the page where they can download it themselves, like a course page. In a more common scenario, we have a few dozen of our most popular resources on a dashboard for our Accelerator members. So, we can easily point them to what we call “The Vault” where they can pick and choose what they want to download. So we may not always need the Location on site property, but it’s helpful in some cases.
Editable Source File: This is another file property. We only use this property for slide decks or the Pages version of our workbook. With these source files, we can make quick edits or only export certain sections, if needed.
Notes: Well, this is pretty self explanatory. An example of a note that we’ve written is “Also available in the All the Things Course,” which means that one of our resources is available in multiple places on the site, including the All The Things Course.
Sales Page: This, again, is pretty self-explanatory. In some instances, it’s helpful to know where we sell certain resources, like our Day One in Depth Guide. Sometimes people ask us where they can find certain resources and thanks to this property, we can quickly send them the right sales page to buy the resource.
Site: This is another select property where we can distinguish what site it lives on, The Focus Course or The Sweet Setup.
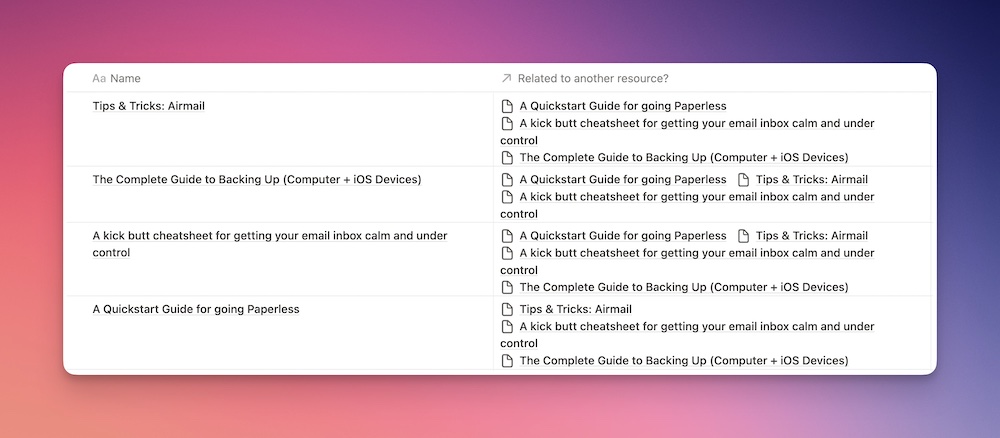
Related to another resource?: This is a relational property. You create a relational database by simply connecting two databases together using a property called relation. This tells one database to pull in information from another database. But in this case we are pulling in information from itself. I created this to connect resources to each other, if needed.
For example, “A QuickStart Guide for going Paperless”, “A Kick Butt Cheatsheet for Getting Your Email Inbox Calm”, and “Setting up a Distraction Free Mac & iPhone” are all part of a bundle called Workflow Essentials. It makes sense to connect them together, but what’s great about connecting them to each other is that once I connect one to another it shows up for each of them. Lost? Check out the screenshots below.
Created by: Again, self-explanatory. This property automatically captures who created the new database entry. This is using a property called “Created by”.
Projects: This is another relational property. Except instead of relating to this page, it relates to our Projects database. If a resource is relevant to a particular project, we can easily connect them. This is helpful in the case of course workbooks. Like the “Focus on Time Workbook” connects to the Focus on Time project.
Use cases
We don’t use every property for every resource. It’s just not necessary. But we still created all of them because it’s pretty handy for some resources.
The main view (the spreadsheet view) might seem a bit overwhelming at first glance. So we created a second gallery view. It only displays a few properties, such as site, content type, and resource type.
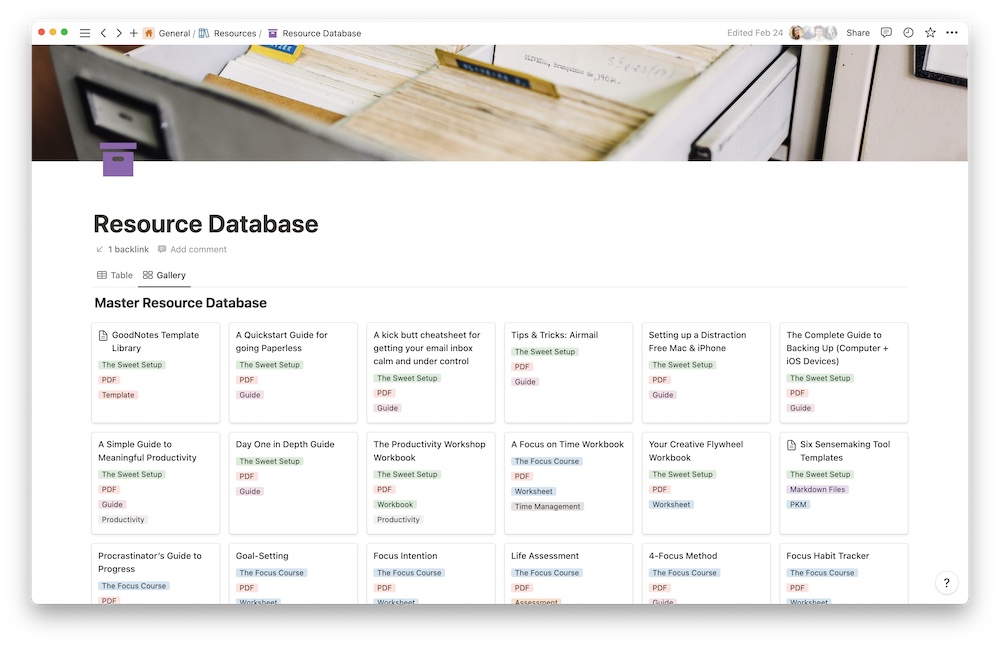
But if I ever want to see all the properties for a resource, I just have to click on it and it will open for me.
This might seem like a lot, but what actually took the longest was hunting down all the resources across our sites. Let me assure you, this has already come in handy, especially in our Accelerator membership. Our members get access to everything, and they ask about certain resources or recommendations. I can easily jump into this database and grab what I need without needlessly looking on our sites.
Productivity Focus Booster 🚀 Simplify and update your task management
If your to-do list overfloweth and you have multiple areas of life to manage, it’s time to get a system that actually works.
Get complete access to all the frameworks, training, coaching, and tools you need to organize your daily tasks, overcome distractions, and stay focused on the things that count (starting today).
Step 1: Refresh → Audit and streamline your current tools and systems and get clear on what’s working for and against you.
Step 2: Upgrade → Build a productivity system that plays to your strengths (even if you find “systems” annoying).
Step 3: Nurture → Make your system stick. Create a flywheel that keeps you focused on what matters most day after day.
Get all this, and more, inside the Focus Club membership.
Join 300 focused members who have access to $5,000 worth of our best courses and masterclasses, the Digital Planner, a Private Chat Community, Monthly Coaching Calls, and much, much more…