How to Use Notion as a Christmas List
If you ask anyone that knows me, it won’t come as a surprise to them that I love Christmas. I love Christmas cookies, the pretty lights, hot cocoa, and I really like presents. And I have no shame in saying it. I really like presents. I like receiving them and giving them.
So much so that buying and giving presents for Christmas has become a competitive sport for me, and Black Friday Shopping (from the comfort of my couch) has become my hobby (by the way, have you checked out the Tools & Toys Christmas Catalog?).
I’ve always loved to give gifts — ever since I was six and decided I wanted to give everyone in my extended family a gift on Christmas. Even when I ran out of money (not like I had much) and ideas and just cut up old fabric and made my cousins their own flags. They were like 13 and not amused.
Anyways. My system for shopping and figuring out what people want for Christmas has evolved over the years. I used to just have a running note on my iPhone, then a spreadsheet. Last year when I was just getting into Notion, I created a simple little setup. But this year I took it up a notch.
Using Notion as my Christmas Wishlist
My family has come to appreciate my organizational Christmas talents, sort of. I make (yes, make is the right word) everyone send me their Christmas lists by November 15th every year. Since I buy pretty much all my gifts the week of Thanksgiving, I like to be prepared ahead of time.
This year instead of just receiving a million texts and links of what people wanted and trying to copy and paste it into a spreadsheet or dealing with a shared Note, I created a Notion page where everyone could add what they wanted to their list. Brilliant, right? It at least saved me a lot of work.
The Family’s Christmas List
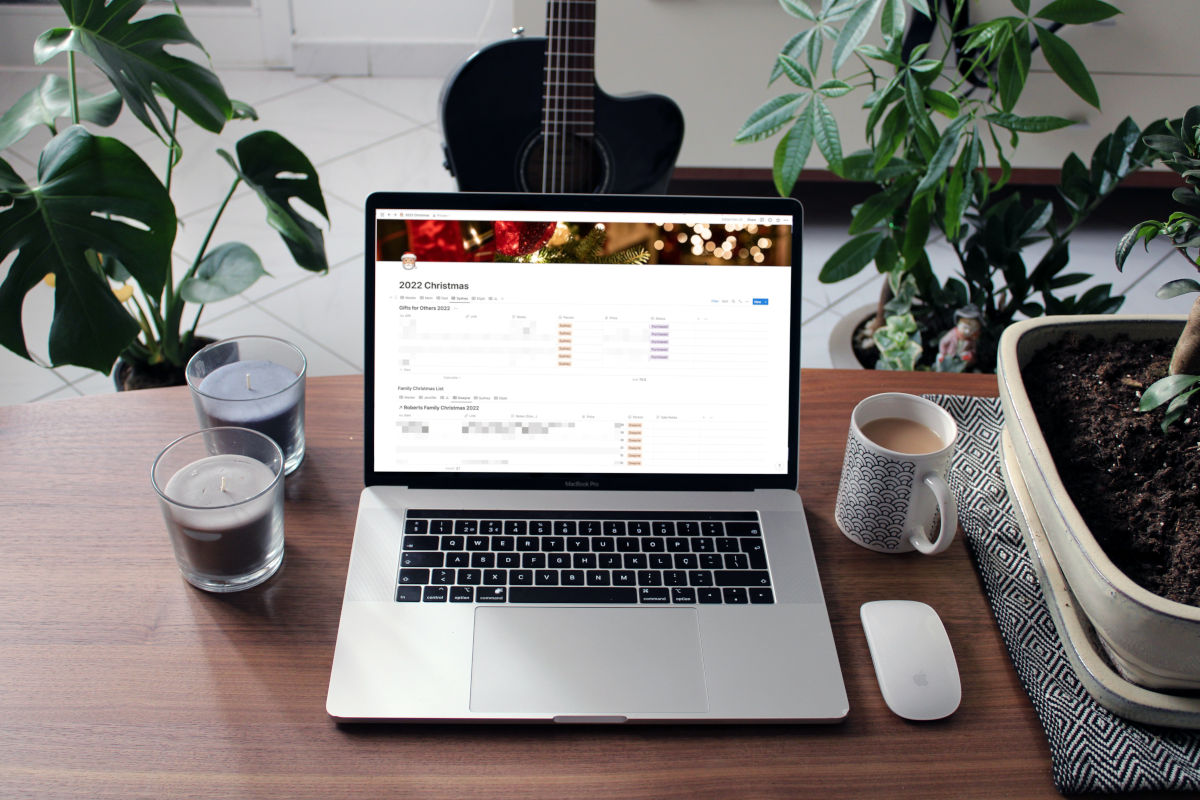
I created a simple page with a database and called it Roberts Family Christmas 2022.
There are a few properties in this database:
- Item
- Person (who wants the gift)
- Price
- Link
- Notes (size, color…)
- Sale Notes
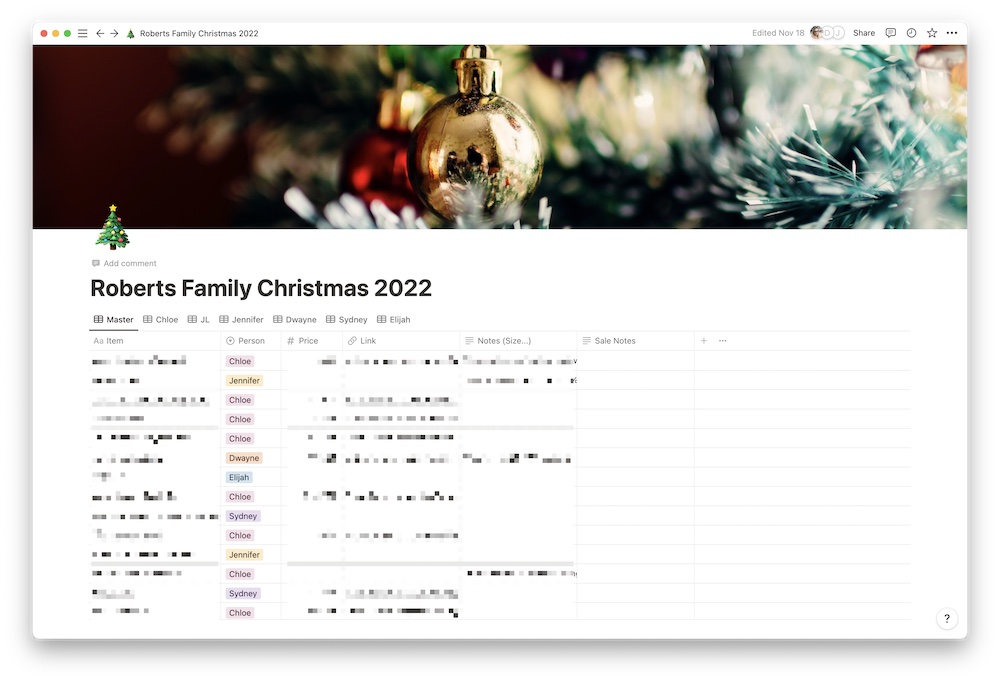
I also created a few views. Each view was filtered to only show the items that each specific person wanted for Christmas. So if my mom wanted to buy presents for my sister Sydney, she just clicked on the view called Sydney and it would only show her the items that Sydney wanted.
The Insane Notion Christmas List
But the Family Christmas list isn’t really the star of the show. That was just how I figured out what everyone else wanted for Christmas (and of course let them what I wanted).
What about figuring out what you want to buy someone? How much you want to spend? How much you’ve already spent on a specific person?
Well, enter the insane Notion Christmas list.
Build the Main Page
I started by building a simple page. Unlike the Family Christmas list, you don’t share this with anyone. You wouldn’t want anyone to know what you’re buying them.
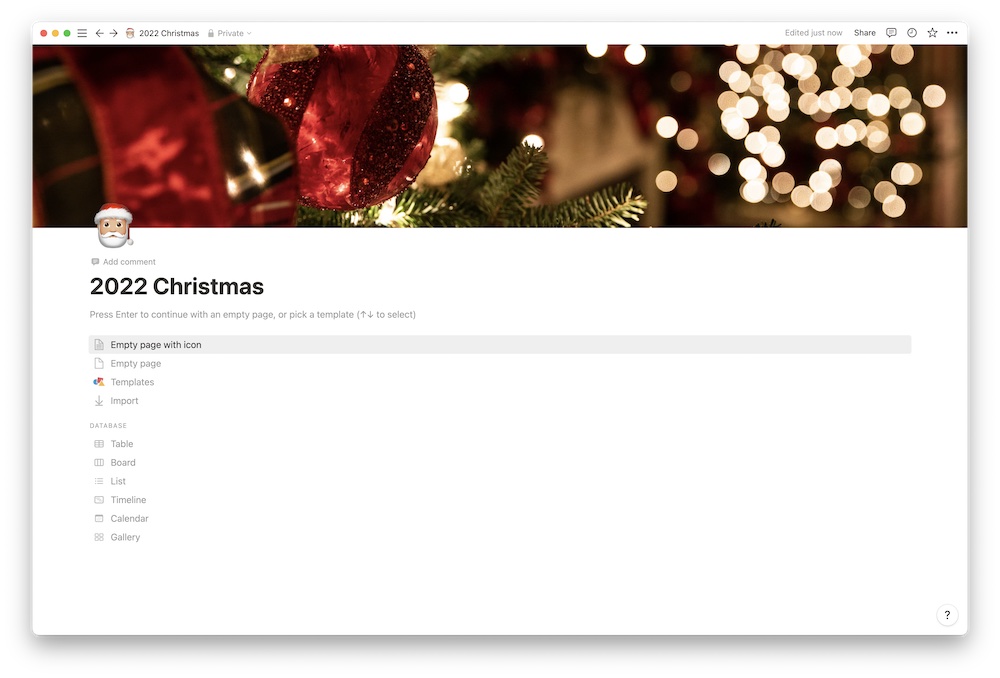
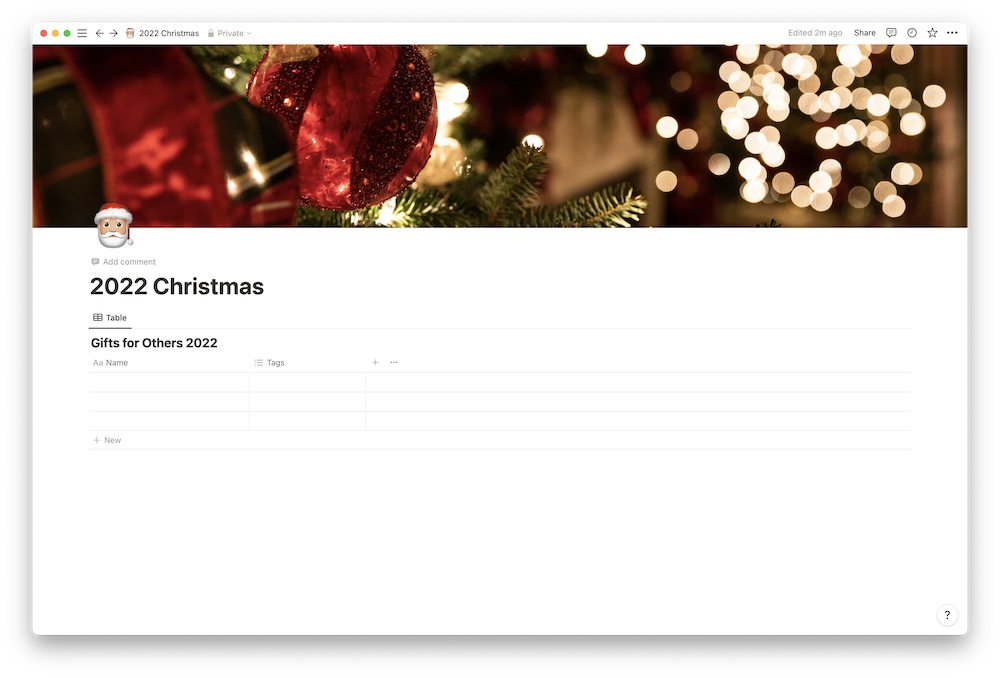
I just called this page Christmas 2022. I also added a cute Christmas icon and emoji to make it festive.
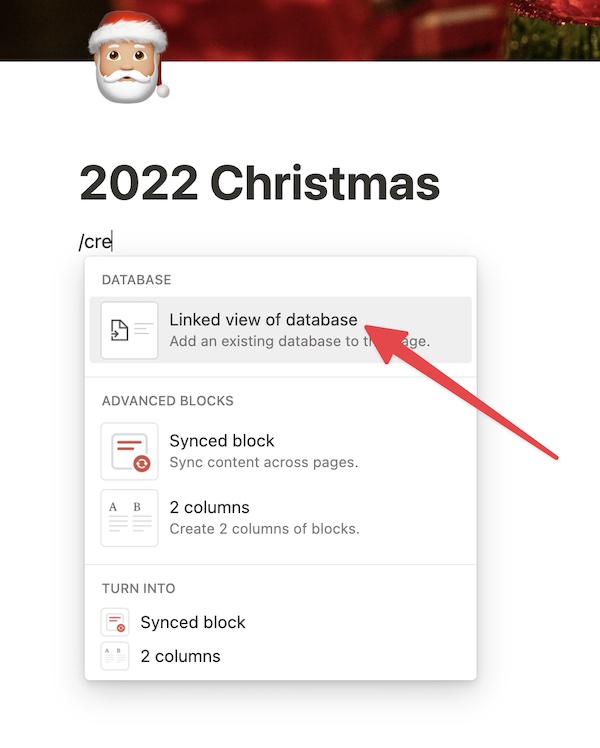
Next, I created a new database. As a reminder, to create a new database type /cre and then choose Linked view of Database and then choose + New Database.
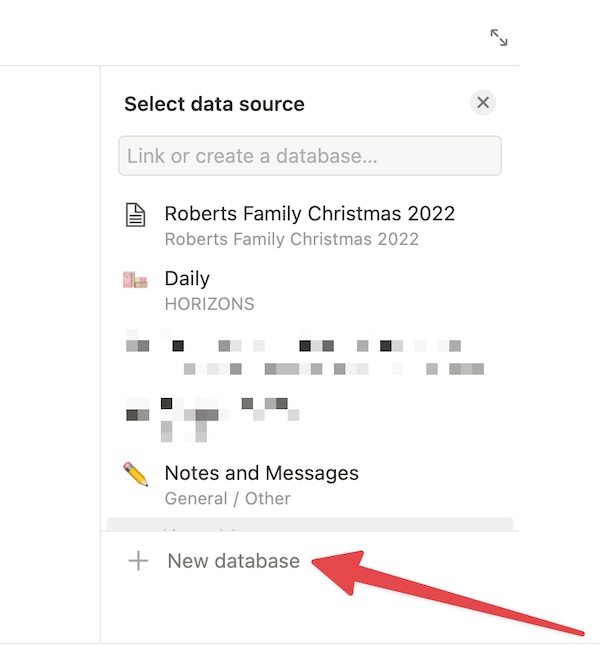
This is where I am going to create the database where I will keep track of what I am going to buy for other people. There isn’t a way for me to mark items as “purchased” from The Family Christmas list without other people seeing it. I also can’t add items to that list that they didn’t necessarily ask for, but that I still want to buy for them without them seeing it. So that is why I am creating a new, separate database.
I am calling this database Gifts for Others 2022.
Now it’s time to add the properties. Here are the main properties:
- Gift/item
- Link
- Person
- Notes
- Price
- Status
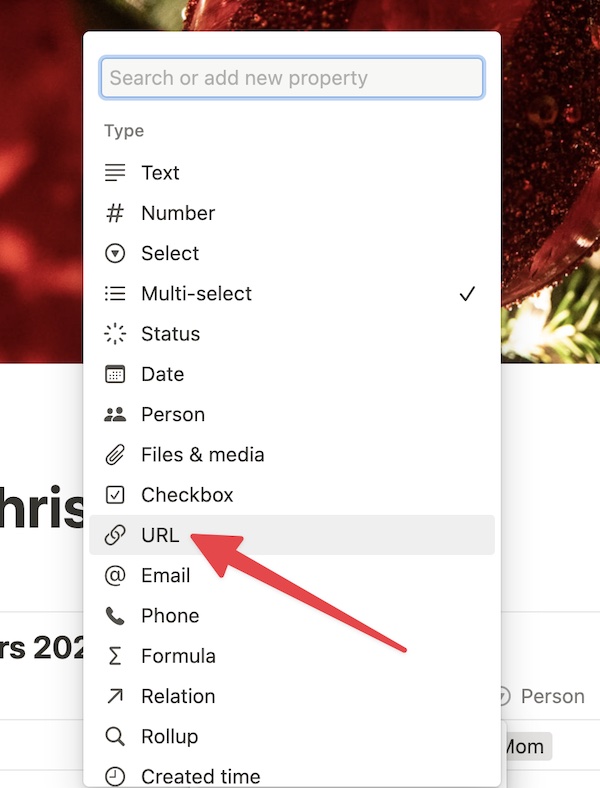
To add the Link Property, just click on the + property next to the Table View, then choose URL and change the name to Link.

To add the Note property, just follow the same steps as the Link property, except choose Text and change the name of the property to Notes.
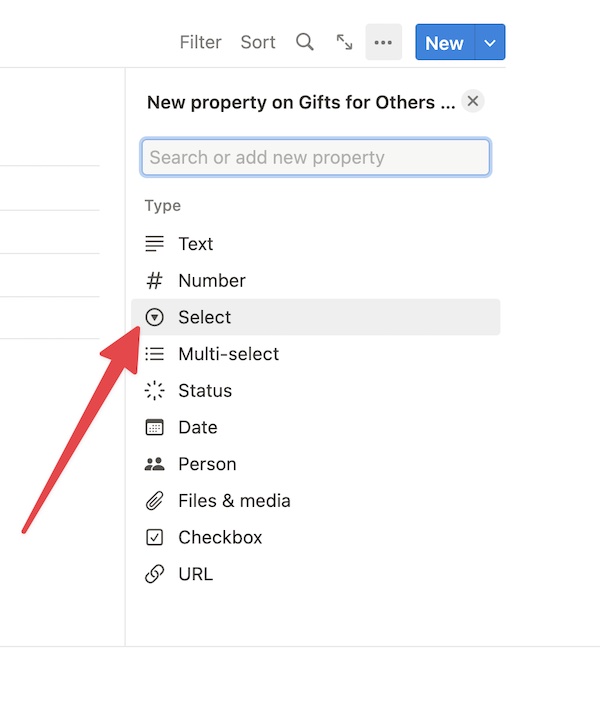
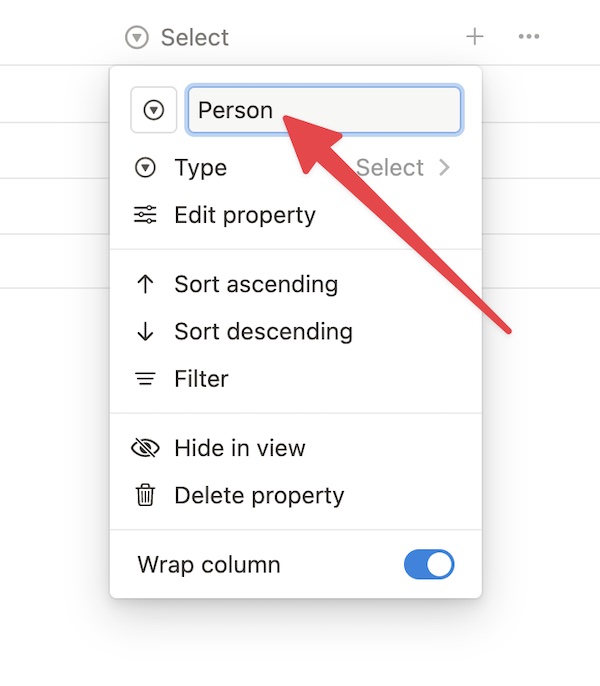
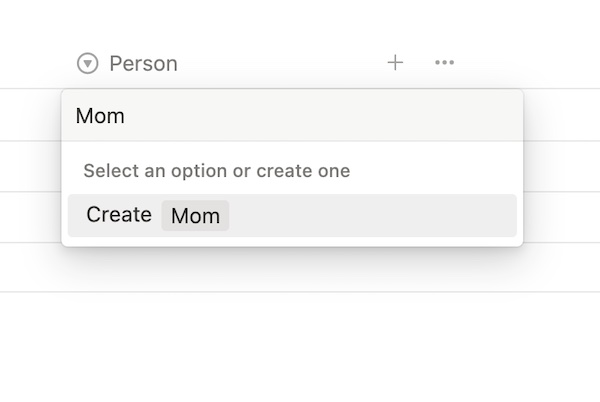
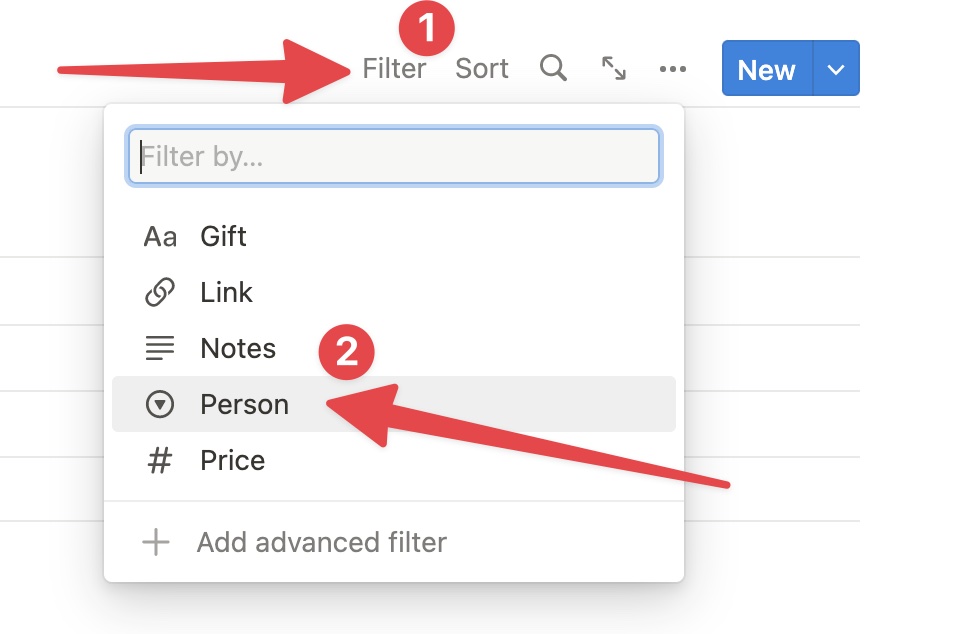
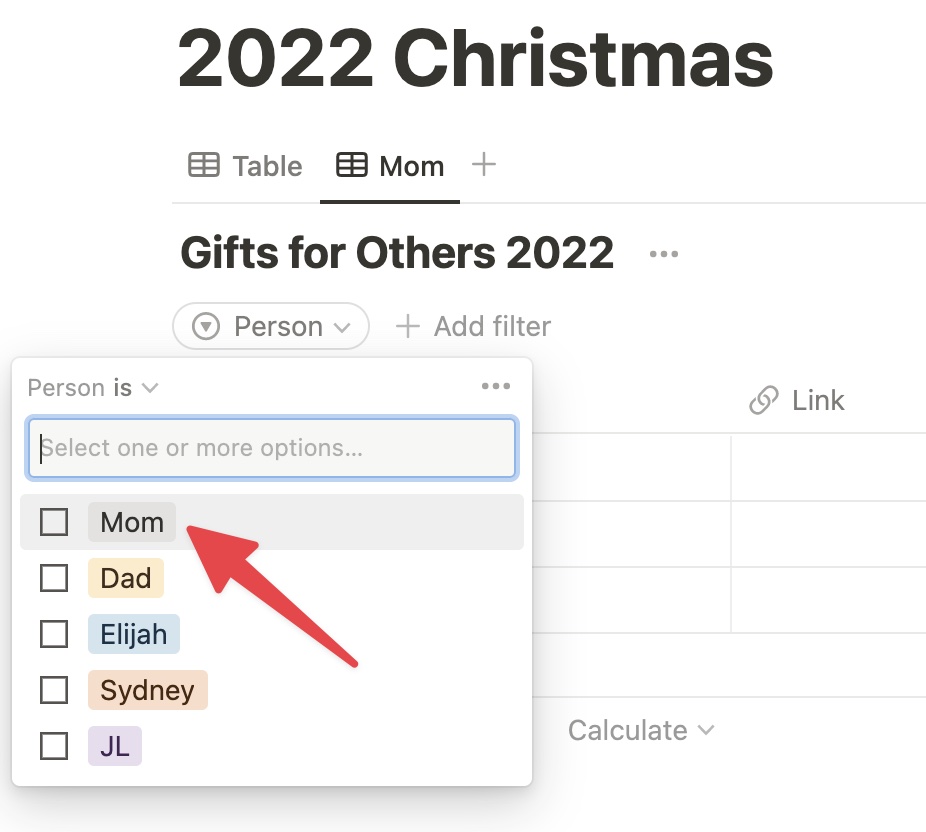
Adding the Person property is a similar process. Click the + property next to the Table View. Then choose Select and type Person. Then from the main page, add the names of the different people you want as options. Type their names and then hit enter to save them.
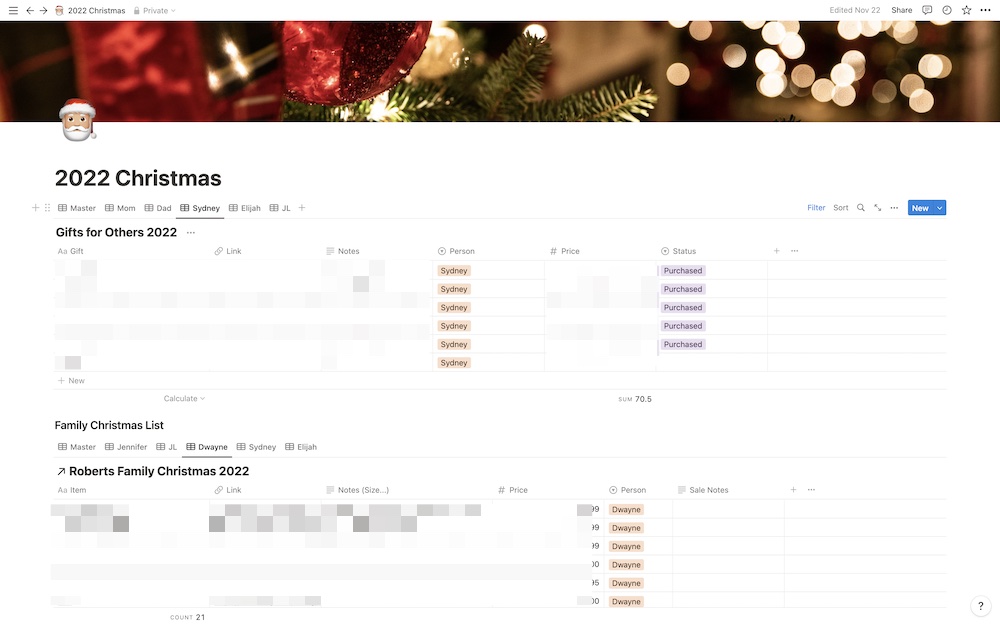
The Price Property
This property took a bit of work. I wanted to know each item cost, how much I had spent in total on that person, and how close I was to my total budget. That’s a tall order for a single property, but I sort of figured it out.
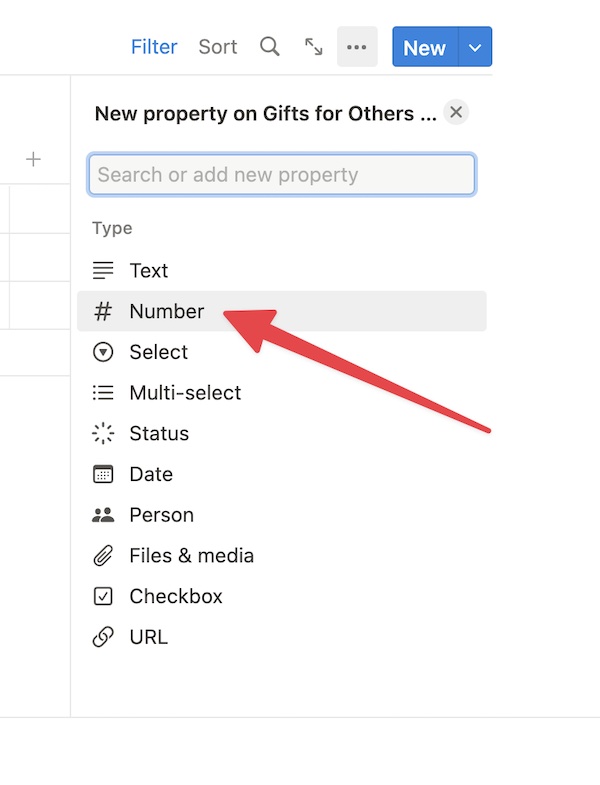
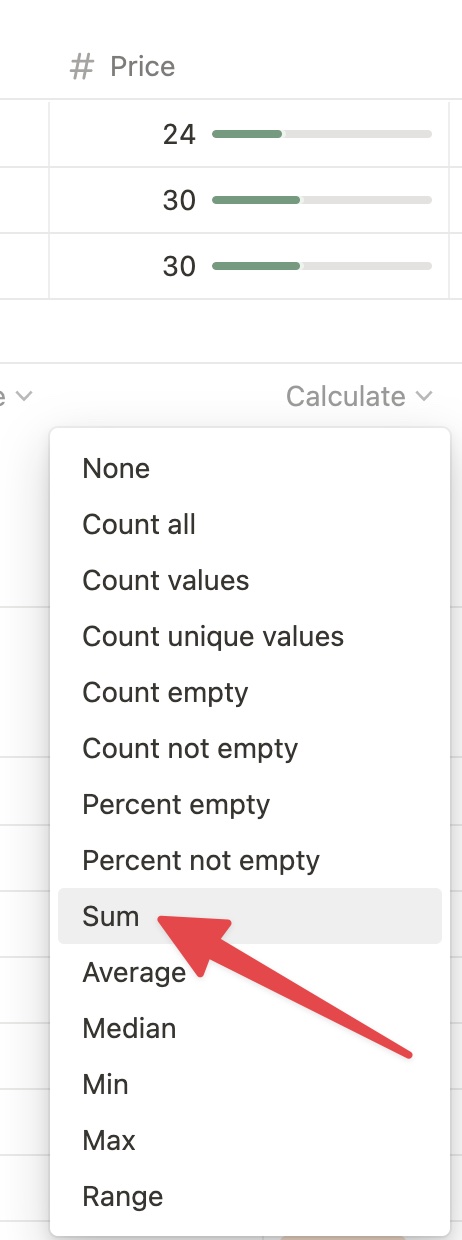
Start by adding a new property by clicking the + property next to the Table View, then choose Number and edit the property.
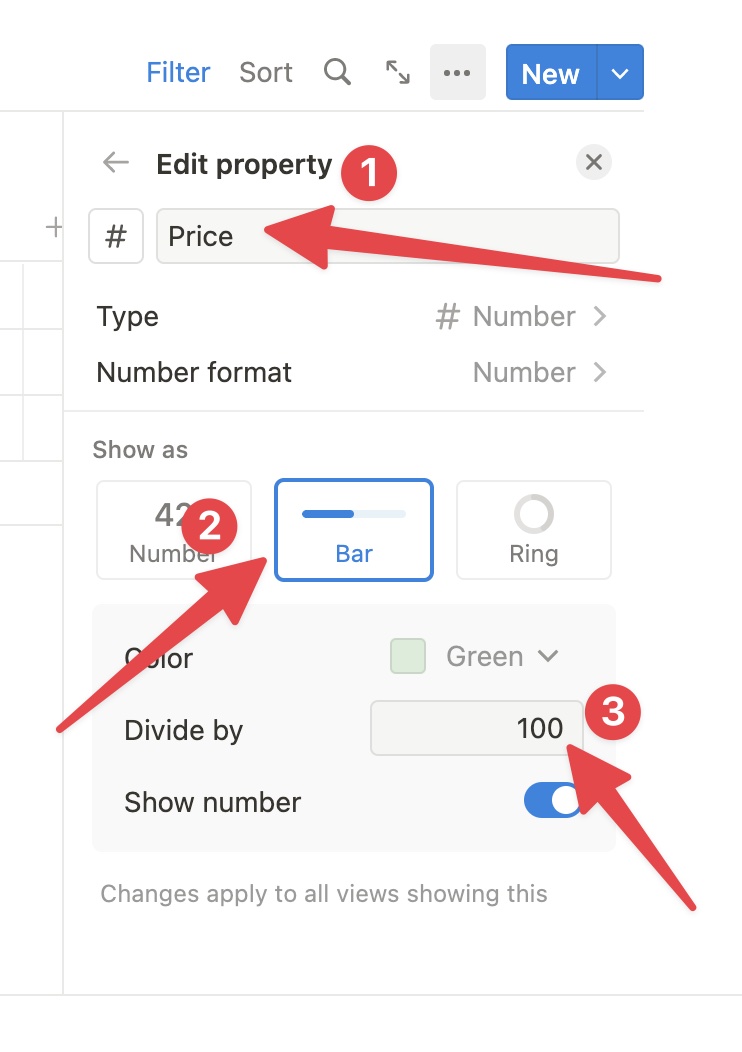
Now is when the magic comes in. First, change the name of the property to Price. Second, click show as bar, and then for divide by, put your budget for each person. So if you want to spend $100 per person, put 100. If you want to spend $75 per person, put 75.
Once you return to the main page, under the price column, hover at the bottom and click Calculate → Sum.
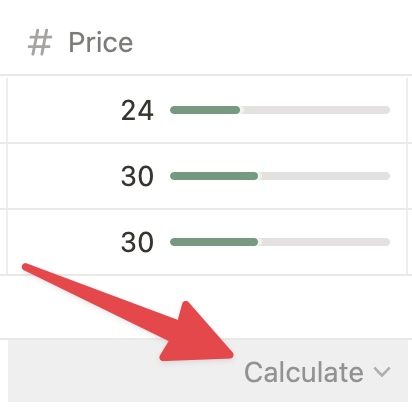
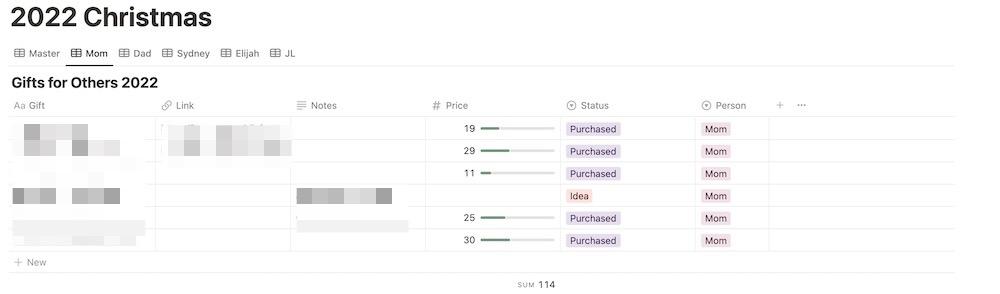
This is what the final product looks like in action.
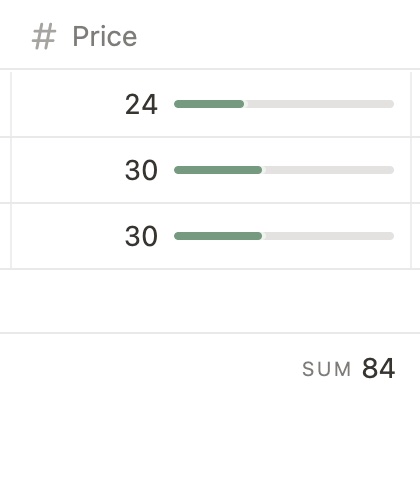
The green bar tells you how much you’ve spent out of your total budget. So, say your budget is $75 and you bought something for $24, the green bar shows you that that item is about 1/3 of your budget. The sum at the bottom tells you how much you’ve spent in total. The green bar is not totally necessary, but it’s fun.
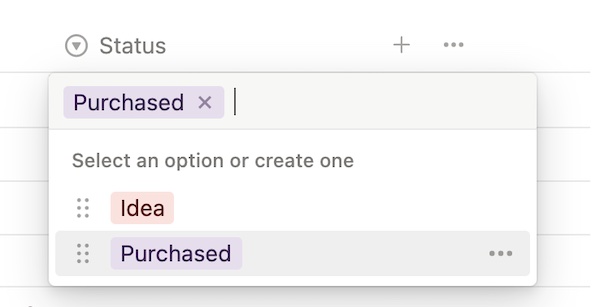
Status Property
Finally, there’s the Status Property. It’s similar to the Person property. Click the + property next to the Table View and click Select. Then from the main page, add the different status options you want to use. I just did Purchased and Idea. You could take this a step further and do Shipped, Arrived, Wrapped etc. You can make this as customized and specific as you want. Just type the different status options you want and hit the enter or return key to save them.
Filters
I added filtered views the same way I did for the Family Christmas list. First, I added a new view by clicking the + next to the current table view and titled it Mom. Then I filtered it to only show the gifts that I wanted to buy my mom.
I did this for each member of my family, so I ended up with six views.
Bringing it all together
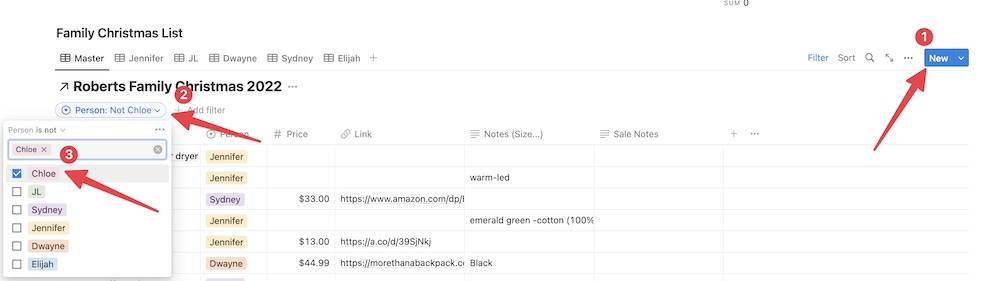
I also wanted to easily see what my family members wanted for Christmas without having to jump back and forth between the two pages, so I brought The Family Christmas List into the page so I could quickly refer to their lists if needed.
I brought in this database by typing /cre and then chose Linked view of Database and then chose Roberts Family Christmas 2022. Then, I just filtered myself out so I wouldn’t see the stuff I added.
Wrap Up
As I said before, Christmas is the most wonderful time of year and I love buying and receiving gifts. And since it’s a completive sport to me I am going to figure out the best way to do it, and this Notion Christmas list is my latest attempt at perfection.
Some of the features might be a tad bit unnecessary, but I really enjoyed creating it and it’s been really useful so far. My family members have (mostly) found it helpful and user friendly so far as well, which is a success in my book.
Here is the final version:
I am a big fan of Notion and use it all the time, and we use it at Blanc Media almost every day. It didn’t take long to create these Christmas Lists, and it’s easy to share with my family!
Have a wonderful Christmas!