Creating a Home Note Dashboard in Obsidian (VIDEO)
Obsidian is a great place to take and keep your notes, but by adding a Home note that acts as a dashboard, you can really transform it into a productivity hub. And in this video, that’s what I’m going to show you how to do.
I first came across the idea of an Obsidian dashboard in this article right here. The key to achieving a dashboard layout, like you see in this article, is a CSS snippet that creates a new class for the view of your home note. Here’s CSS code that we’re going to use as the basis for our dashboard layout:
.dashboard {
    padding-left: 25px !important;
    padding-right: 25px !important;
    padding-top: 20px !important;
}

.dashboard .markdown-preview-section {
    max-width: 100%;
}

.dashboard .markdown-preview-section .title {
    top: 60px;
    position: absolute;
    font-size: 26pt !important;
    font-weight: bolder;
    letter-spacing: 8px;
}

.dashboard h1 {
    border-bottom-style: dotted !important;
    border-width: 1px !important;
    padding-bottom: 3px !important;
}

.dashboard div > ul {
    list-style: none;
    display: flex;
    column-gap: 50px;
    row-gap: 30px;
    flex-flow: row wrap;
}

.dashboard div > ul > li {
    min-width: 250px;
    width: 15%;
}

.dashboard .task-list-item {
    width: 100% !important;
}

ul.contains-task-list.plugin-tasks-query-result {
    row-gap: normal;
}
You can copy this code and just paste it into a CSS snippet inside of Obsidian if you’d like, but I’ll walk you through what this is going to do in just a second.
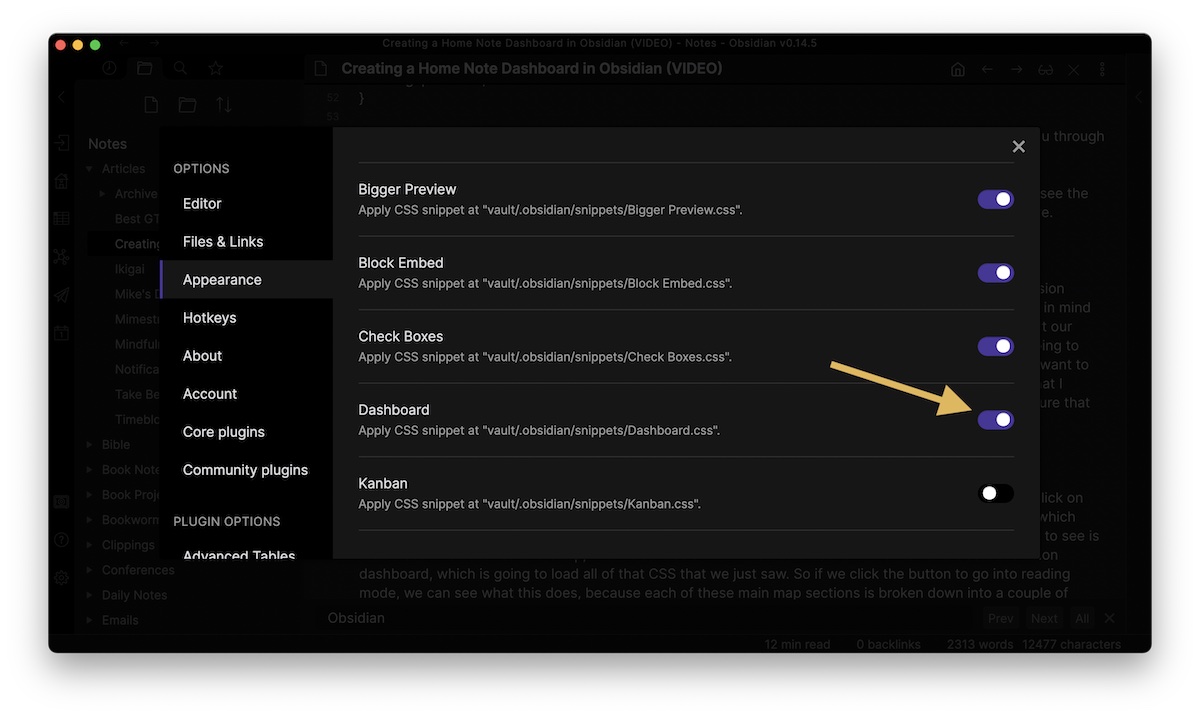
First, let’s switch over to Obsidian. Go to the gear icon, click Appearance, and scroll down until you see the CSS snippets section. You can access the location of these files by clicking the folder icon.
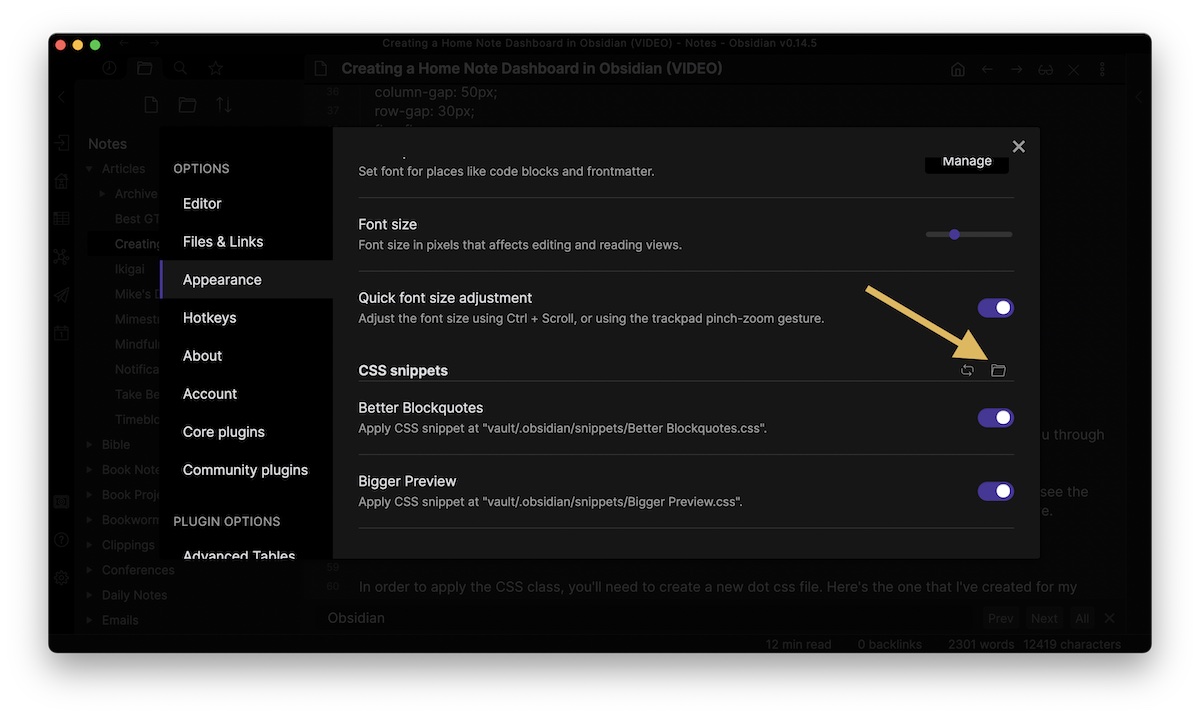
In order to apply the CSS class, you’ll need to create a new CSS file. This is just a text file with the extension changed to .css. Here’s the one that I’ve created for my Dashboard. I’ve added a few extra CSS snippets in mind for specific things that I want my dashboard to do, but the basic idea here is that it’s going to break apart our dashboard page into a couple of different columns. When the Obsidian window is wide enough, we can see the layout that is going to function as our dashboard for everything that we might want to do when we open the application. So once you have this dialed in, and you can just paste the example that I shared with you to get started, then you can close your text editor, close this Finder window and make sure that your CSS snippet is toggled on.
Okay, so let’s close our settings and go to our home note. Alright, so here’s the code. I’m going to click on preview to show you what the finished product is going to look like.
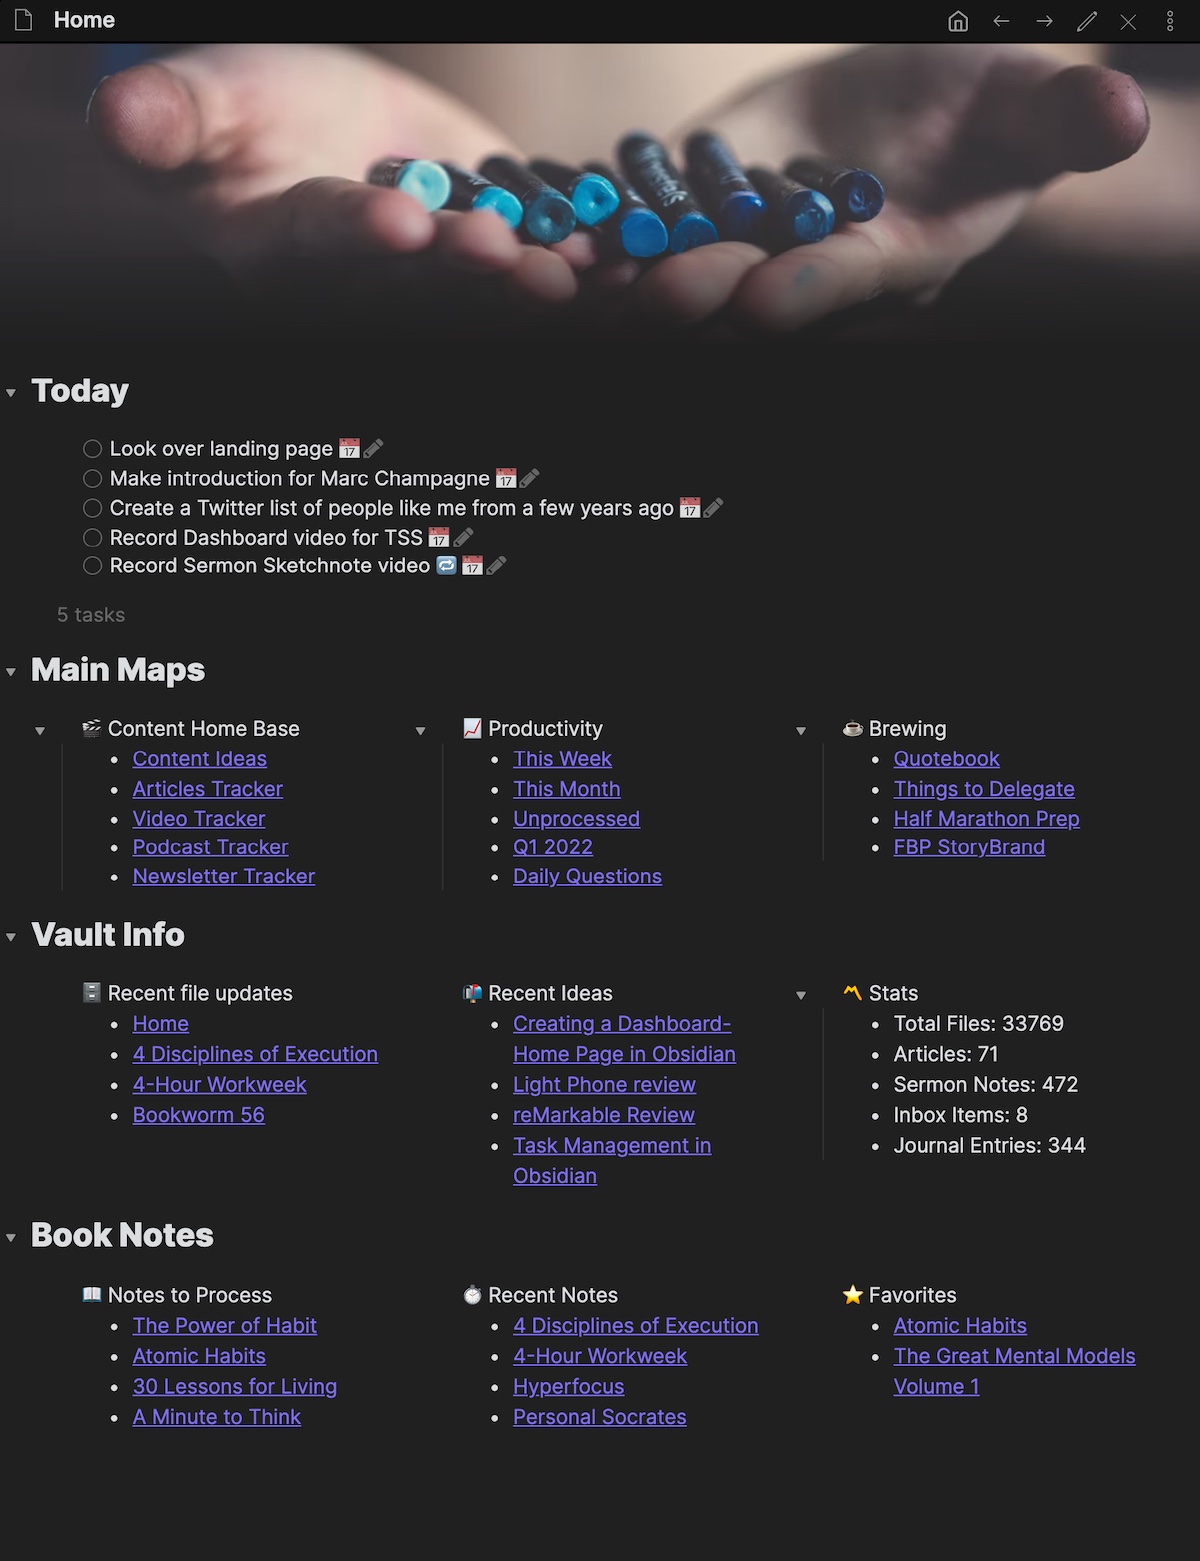
The first line is an image, which we’re going to add using another plugin called banner in just a second. But the important part I want you to see is that these three dashes at the top introduces a YAML metadata section. And we have CSS class colon dashboard, which is going to load all of that CSS that we just saw. So if we click the button to go into reading mode, we can see what this does because each of these main map sections is broken down into a couple of different columns. And again, we’ll look at the specifics here later. Just understand for now, this is what that CSS code is doing. If we go back into edit mode, and we remove that CSS class, this is going to end up looking a lot different.
Alright, so let’s go back, and now let’s add a banner at the top which has this image here. This is an image that I found on Unsplash. I like this image of someone holding some crayons because for a long time, I dealt with feeling like I wasn’t creative, and I heard somebody say one time that when you are a little kid, you have no trouble being creative. You give a kid a box of crayons, and they know exactly what to do with them. Rediscovering your creativity as you get older is simply asking for your crayons back. So this speaks to me every time I open this Home note, but I’ll walk you through how you can create your own banner and add your own images.
First, let’s go back to the Settings by clicking on the gear icon. We’re looking for a community plugin called Banners. You can search for the community plugin in the community plugins section by clicking the Browse button and searching for banner. This is the one that we’re looking for.
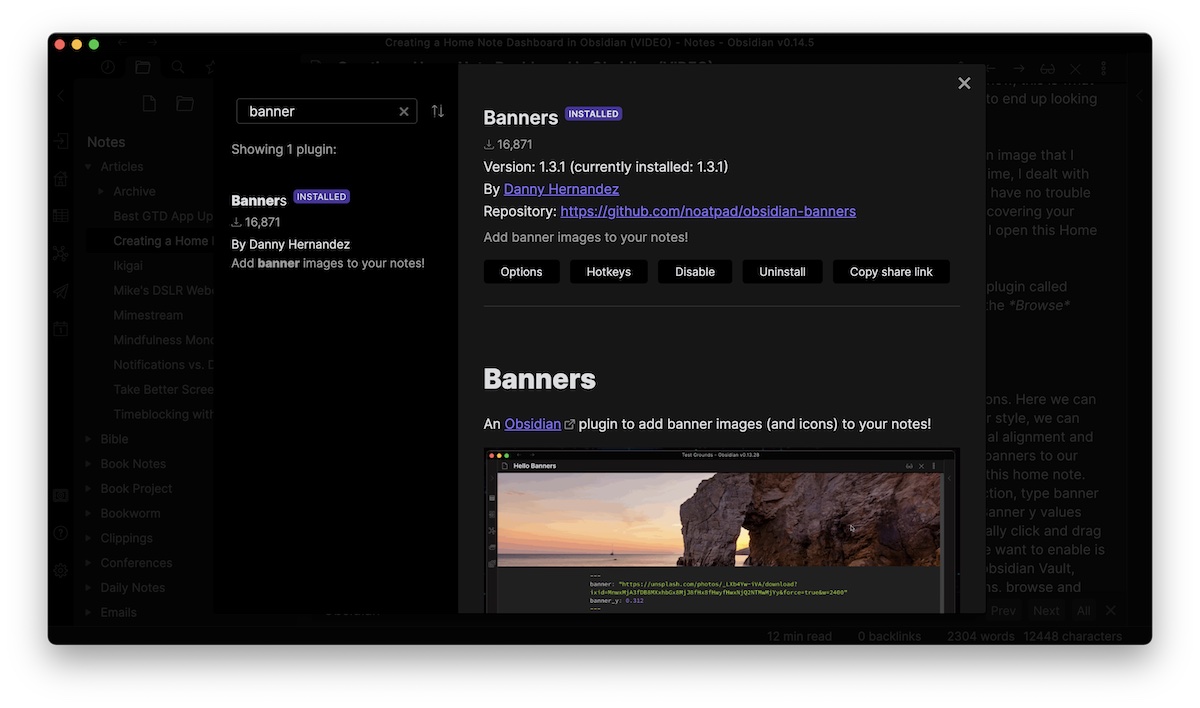
I already have this installed. So I’m going to close the Settings and go down here to the Plugin options. Here we can configure the settings for the banner, like the height (which is at the moment 250 pixels), the banner style, we can choose whether we want this to be scrollable on a mobile device, choose the horizontal and vertical alignment, and much more. The basic thing we want to be able to do though, is enable this plugin so we can add banners to our files.
Okay, so now that we have the Banners plugin enabled, let’s go back and look at the code for this home note. And you can see to apply an image for a banner all we need to do is go into that YAML metadata section, type banner:, and then inside of quotation marks paste the image that we want to use.
cssclass: dashboard
banner: "https://images.unsplash.com/photo-1461173890990-f128607276ff?ixlib=rb-1.2.1&ixid=MnwxMjA3fDB8MHxwaG90by1wYWdlfHx8fGVufDB8fHx8&auto=format&fit=crop&w=1169&q=80"
banner_x: 0.5
banner_y: 0.479
The banner X and banner Y values control the specific location of the image, which if we go back into the reading mode, we can actually click and drag on this if we have that setting enabled in the Banners plugin settings.
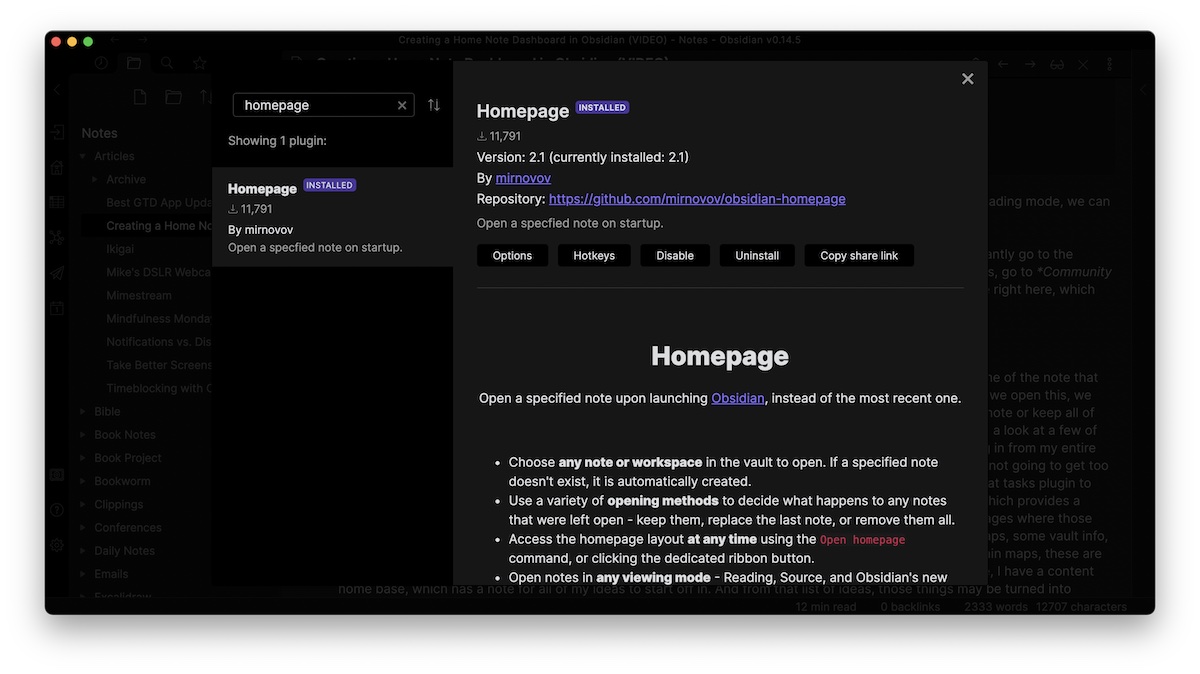
Another plugin that we want to enable is the Homepage plugin. This allows us to click on an icon and instantly go to the homepage for our Obsidian vault, which in this case is our Home note right here. So again, go to the Settings, go to Community plugins, and browse and search for the Homepage plugin if you don’t have it installed yet. This is the one right here, which allows us to choose any note or workspace in our vault to open whenever we open the application.
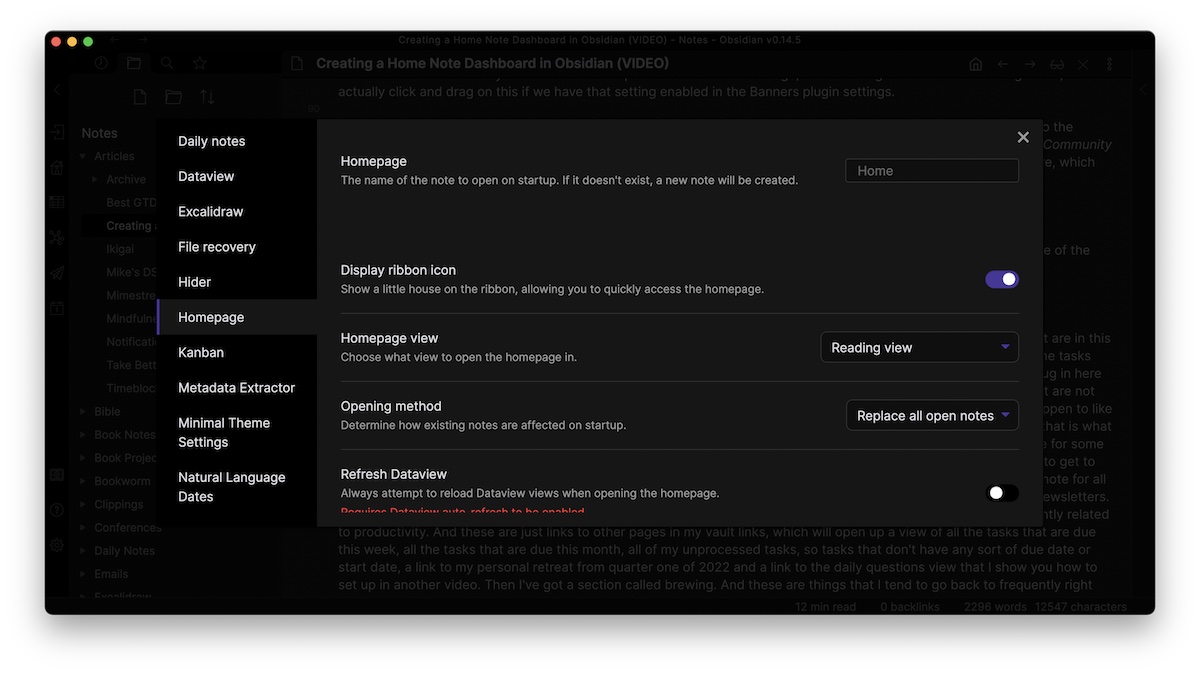
Alright, so let’s close the description, go to the Plugin options for Homepage, and make sure you type in the name of the note that you want to use as home. Next, choose the default homepage view (which we want to be reading view).
Alright, let’s close our Settings and go back to our dashboard one more time to look at a few of the elements that are in this dashboard page.
Now the first section here, this is a task query which is pulling in from my entire vault in Obsidian the tasks that are due today. This is using another plugin called Obsidian Tasks. We’re not going to get too deep into this plugin here today, just know that this is simply a section with a shortcode:
tasks
not done
due before tomorrow
short mode
hide backlinks
This is telling that tasks plugin to look for things that are not done that are due before tomorrow, and display those tasks in the short mode which provides a cleaner list view I happen to like that better. It’s also going to hide the backlinks which are the links to the pages where those tasks actually exist. So that is what is rendering our tasks.
Then, we’ve got some lists here for some main maps, some vault info, and I have a section here for some book notes. Now let me explain what these are. This first section called Main Maps, these are just the ones that I want to get to frequently, and I’ve broken them down based on category. So for example, I have a content home base, which has a note for all of my ideas to start off in. And from that list of ideas, those things may be turned into articles, videos, podcasts, or newsletters. I have separate Kanban boards for each of those media types.
The next section is some pages that I use frequently related to productivity. And these are just links to other pages in my vault links, which will open up a view of all the tasks that are due this week, all the tasks that are due this month, all of my unprocessed tasks (tasks that don’t have any sort of due date or start date), a link to my personal retreat from quarter one of 2022, and a link to the Daily Questions view that I show you how to set up in another video. Then I’ve got a section called brewing. These are things that I tend to go back to frequently right now or I’m trying to develop. So I have one here for a Quotebook, which I’m trying to build out, and I have been thinking a lot about things that I want to delegate, so I’ve got a quick link there to that note. I’m also in the process of training to run a half marathon, so I have my whole prep plan linked here too.
Then we get into some of the really cool stuff. The next section here is Vault Info. And some of this stuff is taken straight from that article that I showed you earlier, like the recent file updates, but some of it I’ve modified for the stuff I want to see. Here’s the code behind this whole section:
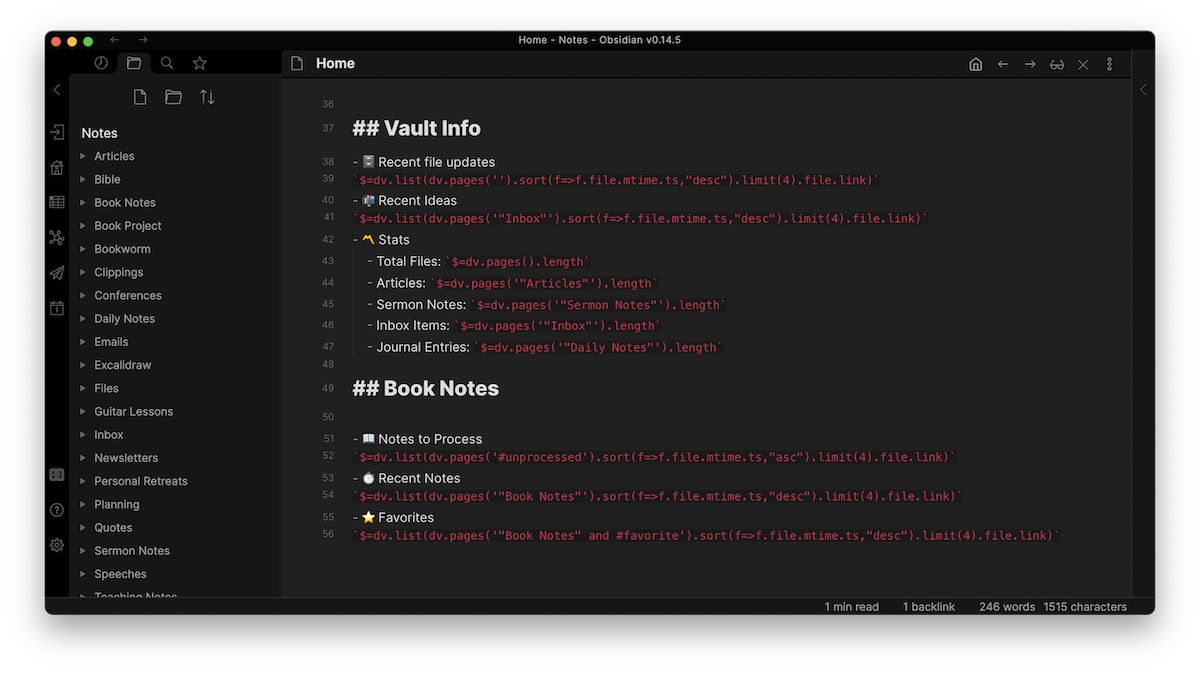
All of this is using the Dataview plugin. For the Recent Files, this code is going to find a list of all pages that have been updated recently and it’s going to sort those in descending order of the time that they were updated, but it’s going to limit the links to the files to only four. Here’s the code for this:
$=dv.list(dv.pages('').sort(f=>f.file.mtime.ts,"desc").limit(4).file.link)
Alright, so when we click on the reading view, let’s take a look at what this looks like. Here’s our recent file updates, and if I click on another page, like the Half Marathon Prep note, and I edit this page by adding another line, then go back to Home, the list of recent file updates gets modified accordingly.
Next is a section that is going to pull in a bunch of ideas that I have added inside of my Inbox folder and list them in descending order by time. If I go over to the Inbox folder over here on the side, you can see all of the things that I have sent to Obsidian, which are ideas that I capture in drafts and then send to my Obsidian vault, using a Drafts export action. Again, there’s another video that shows you how to do that.
The last section is Stats, which shows that I have 33,781 total files in my vault, I have 71 articles that I’ve written, 472 sermon notes, 8 inbox items that I need to process, and 357 journal entries. And the code for this, if we go back to the edit view, looks something like this.
- Total Files:
$=dv.pages().length- Articles:
$=dv.pages('"Articles"').length- Sermon Notes:
$=dv.pages('"Sermon Notes"').length- Inbox Items:
$=dv.pages('"Inbox"').length- Journal Entries:
$=dv.pages('"Daily Notes"').length
Okay, now Dataview gets a little bit tricky, but there are a couple of things you should know to get started.
You can query things in a specific location by putting the location between the quotation marks. And you can also query tags by using the pound sign or hashtag followed by the tag name. You can even combine those things like I’ve done here in the Book Notes section. For example, my Favorites is searching all of the files that are in the Book Notes folder, and have a tag of favorite. And all of this requires the Dataview plugin in order to be parsed inline like this. So again, let’s go back to the settings. Go to community plugins, and search for and install Dataview. Once you have it installed, make sure that it is toggled on, then go to the Plugin options for Dataview by clicking on the gear icon or selecting it in the sidebar here. And you need to make sure that Enable JavaScript queries and Enable inline JavaScript queries are both toggled on:
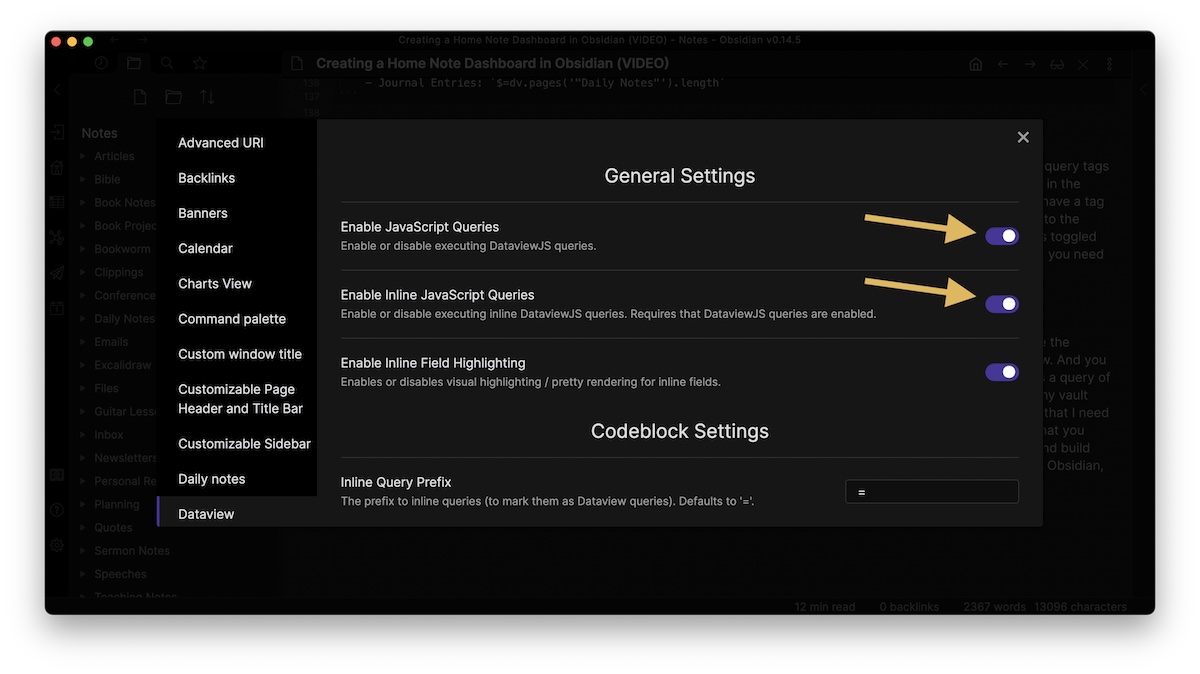
Those are the things that are going to allow the home note to parse that code that you just saw. Alright, so let’s close the settings. Now that we know how these different sections are built, let’s go back and take a look at this in reading view. And you can see I now have a well-laid-out Home note that functions as my dashboard. It has a banner image at the top, has a query of the tasks that are due for me today, has links to some of the pages that I go to frequently, has some information on my vault with links to some recent files, and has links to some of my favorite book notes, my recent book notes, and the notes that I need to process.
This is just my example and you can customize your own homepage dashboard to reflect the things that you want to use Obsidian for. Spend a little bit of time thinking about what things you need quick access to and build your own Home note to allow you to get there quickly. It’ll make working in Obsidian a lot easier. And if you do a lot in Obsidian, it will make you much more productive.