Combining Things and Ulysses to Manage and Automate Your Writing Tasks
Pre-S: This video and transcript is an excerpt from our new Learn Ulysses (Pro) course. This is just one of several advanced workflow lessons in the course. You can see the full list of all lessons right here.
While Ulysses is a great place to do your writing, it’s not necessarily great for managing your writing tasks. For that, we recommend a dedicated task manager. Our favorite of which is Things 3.
What is ‘Things’?
Things 3 is the best task manager for Mac, iPad, and iPhone. And thus, it is the ideal place to track your writing projects and tasks.
Using a task manager like Things allows you to get everything you need to do into a system so you don’t have to worry about what you should be doing at any given time.
If you put tasks into Things with the right criteria, like associated projects and due dates, then your task manager can do the heavy lifting for you and sort through everything — even if you have thousands of tasks — and show you only the ones that you should be thinking about right now. This reduces the stress that comes from trying to keep track of everything in your head, freeing you to focus on the task on hand.
As Getting Things Done author David Allen says: “Your mind is for having ideas, not holding them.” A task manager gives you the freedom to do just that.

Using Things to Manage Writing Tasks
If you’re going to manage your Ulysses writing tasks in Things, there’s a specific way we recommend you do so:
-
Create a new task for each piece of writing you want to do — each sheet in Ulysses.
-
Include the link to that specific sheet in the notes for the task in Things.
This way, you can click the link in the task and go straight to the sheet in Ulysses.
The recommended workflow looks something like this:
-
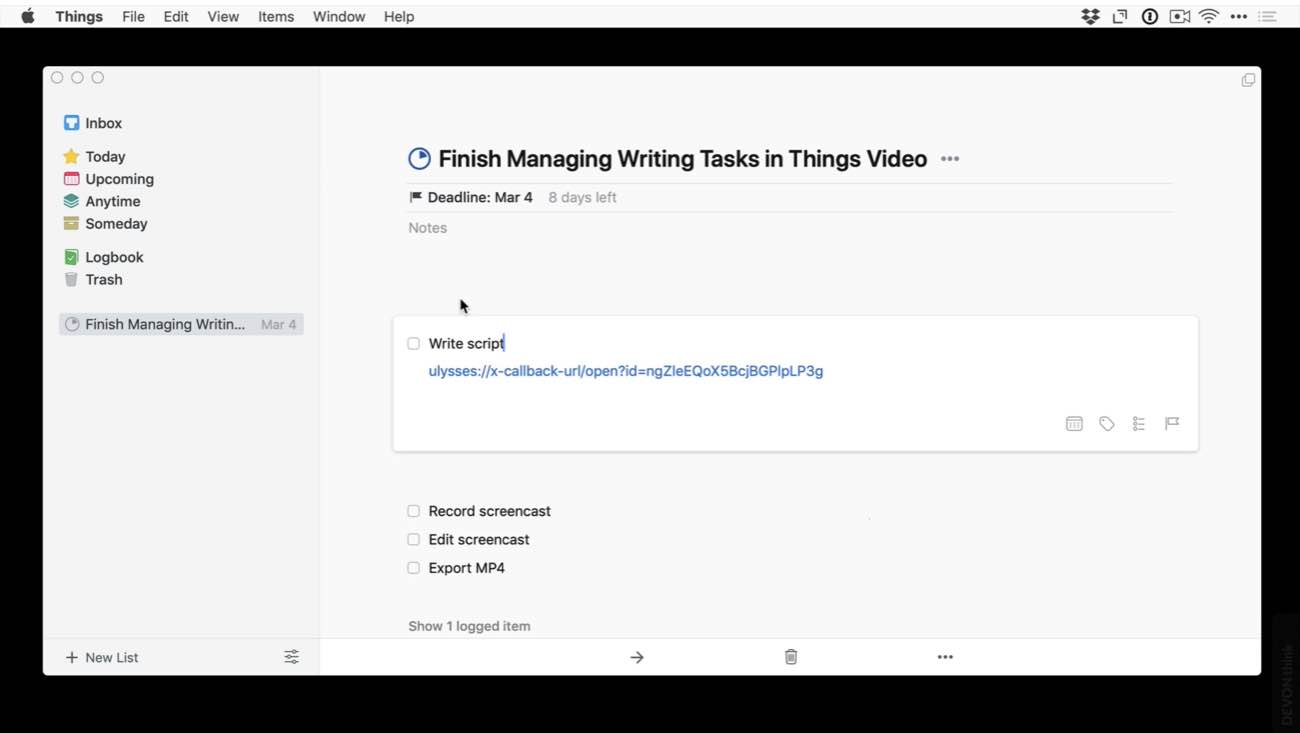
First, select the task you want to work on in Things and double-click it, like this one I’ve got for Writing the Script for “Managing Your Writing Tasks in Things.”
-
Next, click the link in the notes to open that specific sheet, eliminating the need to search for it in Ulysses.
-
Then do the actual work, and when you’re finished, go back to Things and check the task as complete.
This workflow is built on the x-callback-url scheme, which we explain a bit more in the iOS automation lesson. Don’t worry, you don’t need to know how to program in order to use this functionality.
Let’s walk through how to set this up on your Mac first.
How To Set Up Your Ulysses Writing Tasks in Things for Mac


To start, you need the URL of the specific sheet you want to work on.
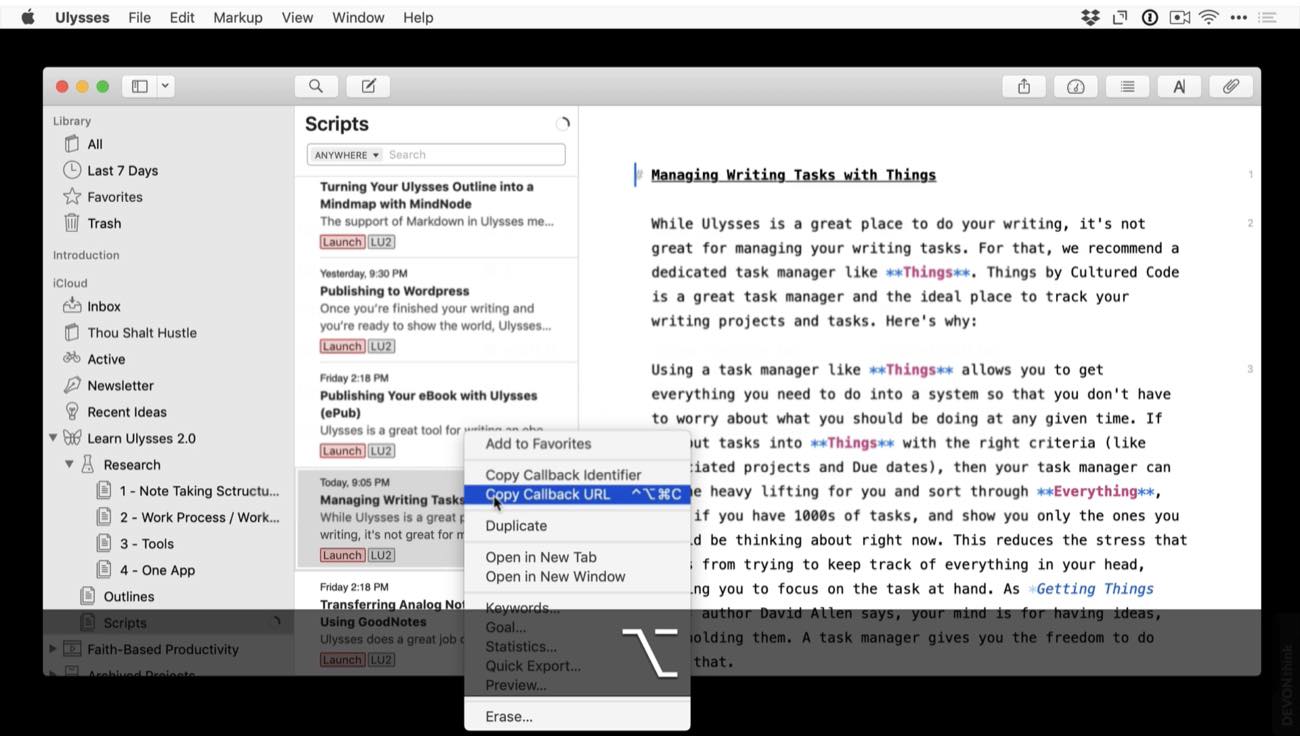
To get this on the Mac, hold the Option key and right-click on the sheet you want to link to, then select Copy Callback URL.
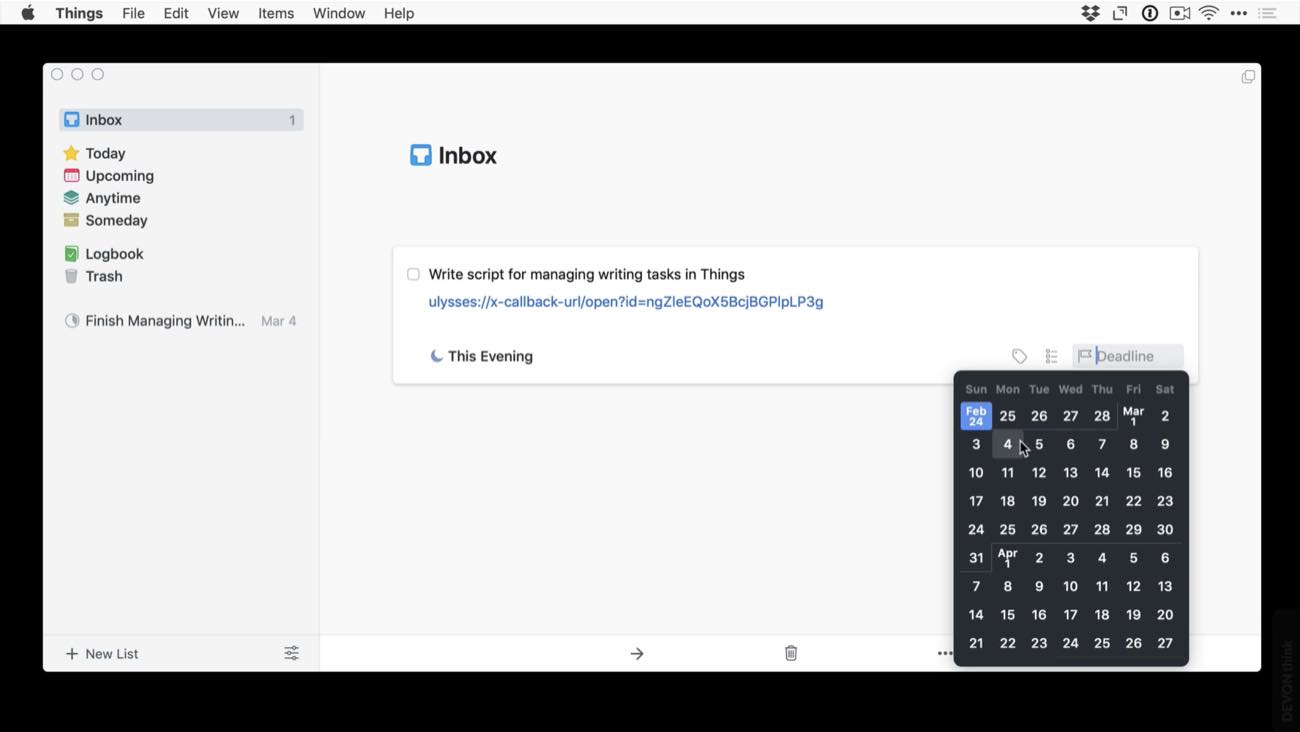
Next, go to Things and create a new task.
For this example, we’ll call this task “Write Script for ‘Managing Writing Tasks with Things'” and then click in the notes field. This is where the link to the sheet will go, so hit Command-V to paste it here. You can add any additional information you might want to the task, like a due date or reminder tags. This is all information Things can use to show you the right task at the right time.
We have a whole course on task management philosophy, so for now, we just want to show you how to link these tasks to Ulysses. To do this, just save the task to Things. Now we can use Things to figure out what we want to work on and when. When it’s time to work on this writing task, we can select the task. Click the link in the notes, and we’ll go straight to our sheet in Ulysses. From here, we can work on our writing, then when we’re finished, go back to Things and mark the task as complete.
Setting Up Tasks in Things for iOS

Next, let’s look at how to do this on iOS.
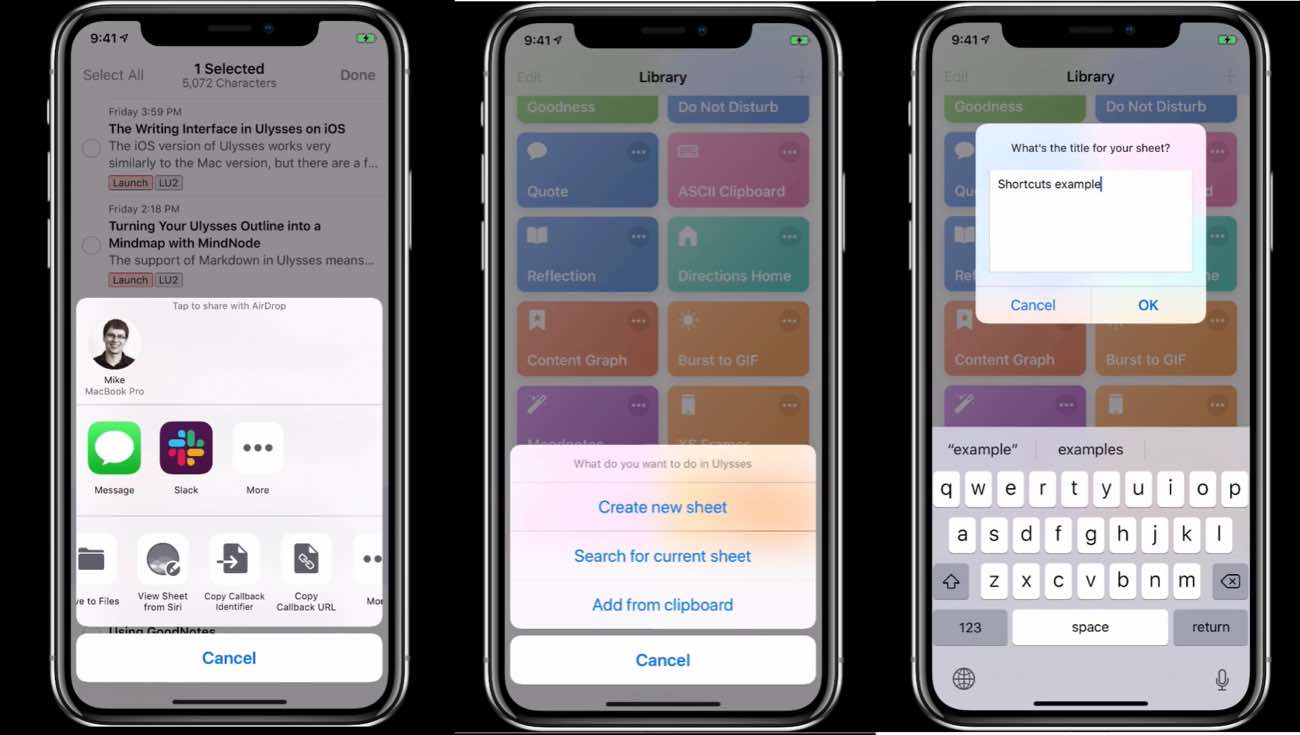
First, go to the sheet list and tap the Select button in the upper right. Next, tap the sheet you want to link to, and tap the More button on the bottom. Next, select the share option to open the iOS share sheet, and then select Copy Callback URL just like on the Mac.
This will copy the link to the sheet, and now we can go into Things on iOS and paste this URL into the notes field just like we did on the Mac. The rest of the workflow is the same. Now we can open the task, tap the link, and go straight to the sheet we want. Finish our writing, then go mark the task as complete back in Things.
Shortcuts Integration on iOS
This is just scratching the surface of what’s possible with the Things-to-Ulysses integration on iOS. Since both apps integrate with the iOS Shortcuts app, you can automate the linking of these sheets as you create them.
As an example, we have a Shortcut that was originally created by our own Josh Ginter. Once you have the shortcut installed, tap the shortcut to run it on your iOS device.
Note: You can download this shortcut for yourself within this lesson on the Learn Ulysses (Pro) course.
When run, the first prompt is to choose whether you want to create a new sheet, select one from the library, or you can use the sheet ID if you have it already copied to your clipboard.
Let’s select New Sheet. Now we need to give our sheet a title.
Next, the shortcut will ask us what group we want to store the sheet in within our Ulysses Library. I’ll select Inbox, and then the automation will kick in: first creating the sheet with the title in the Inbox and then switching over to Things to add a new task for me, which already has the Ulysses sheet’s x-callback-URL pasted in the notes.
Now all that’s left for me to do is add any additional details I want to the task, save it to Things, and continue with my writing workflow.
For more on how to capture your ideas and organize your writing, check out our brand new course, Learn Ulysses:
Stop losing your ideas and notes to multiple apps…
An online course to help you save time, organize your notes, and master the best writing app for Mac and iOS: Ulysses.

