CropSize Review: Bulk Photo Processing and Resizing App for iPad
Readers of this site — and its gear-focused sister, Tools & Toys — may or may not be aware how much behind-the-scenes work we put into making your reading experience a delightful one. We know your time and attention are precious, so we put a lot of care into the flow of our articles and reviews, into the photography we take, and even into the screenshots we capture.
Another way we try to respect readers is by not destroying their data usage merely by visiting us. Those gorgeous hero shots we put into every app review? Any one of those images could easily clock in at 10–50MB a pop if left untouched. Screenshots fall on the lower end at ~7 MB or less, but even that still starts to add up fast, not to mention how long page loading times become.
Instead of subjecting you to all that, we rely on batch-resizing tools to optimize images so they leave a much smaller data footprint without sacrificing much quality.
We’ve already discussed ImageOptim for Mac, and now we’d like to point your attention to our favorite iPad app for bulk photo processing and resizing: CropSize for iOS. ($5)
Get Our Best Photography Tips & Workflows
Transform your photos and edits from average to awesome with our in-depth, mobile photography course. It’s jam-packed with training, ideas, and lessons that can literally transform your photography overnight.
Why We Love CropSize as a Bulk Photo Processing App
For our uses, CropSize serves two main purposes:
-
Reduce the pixel width of images. Over at Tools & Toys, for instance, the general rule is that images should be no wider than 1920px. Here on The Sweet Setup we keep them at 1300px.
-
Keep image file sizes to a minimum. We try to keep the upper limit somewhere in the ballpark of 150 KB per image. If we can go lower without an image looking terrible, all the better.
CropSize enables us to accomplish both of those jobs, and with numerous photos at once. It’s an excellent app for resizing and saving your photos for web, and the fact it can also do bulk photo processing makes it all the more useful.
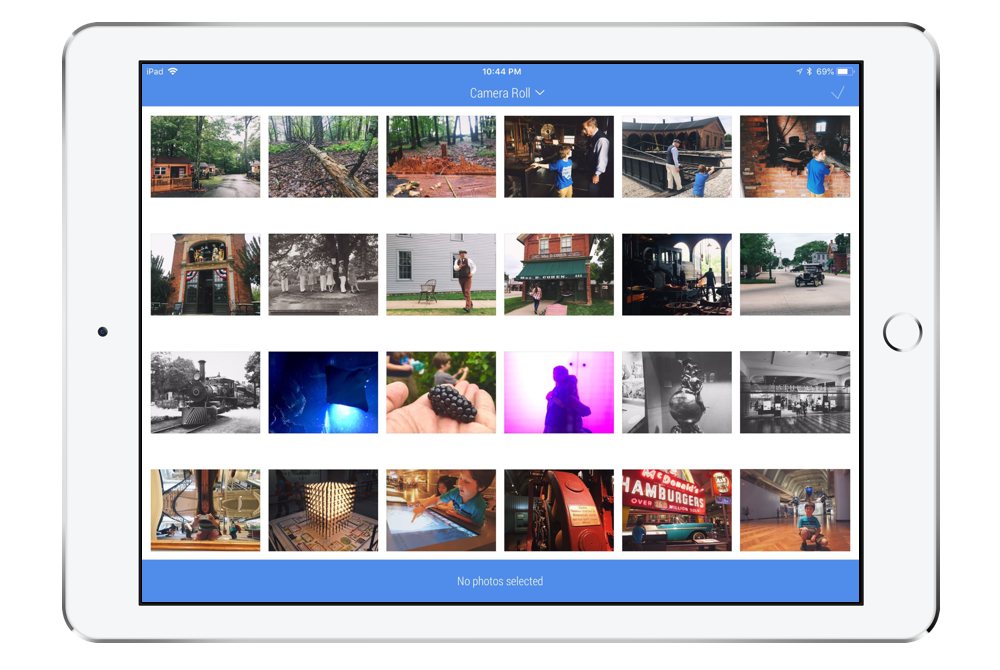
When you first load the app, you’re presented with the images in your camera roll, from newest to oldest:
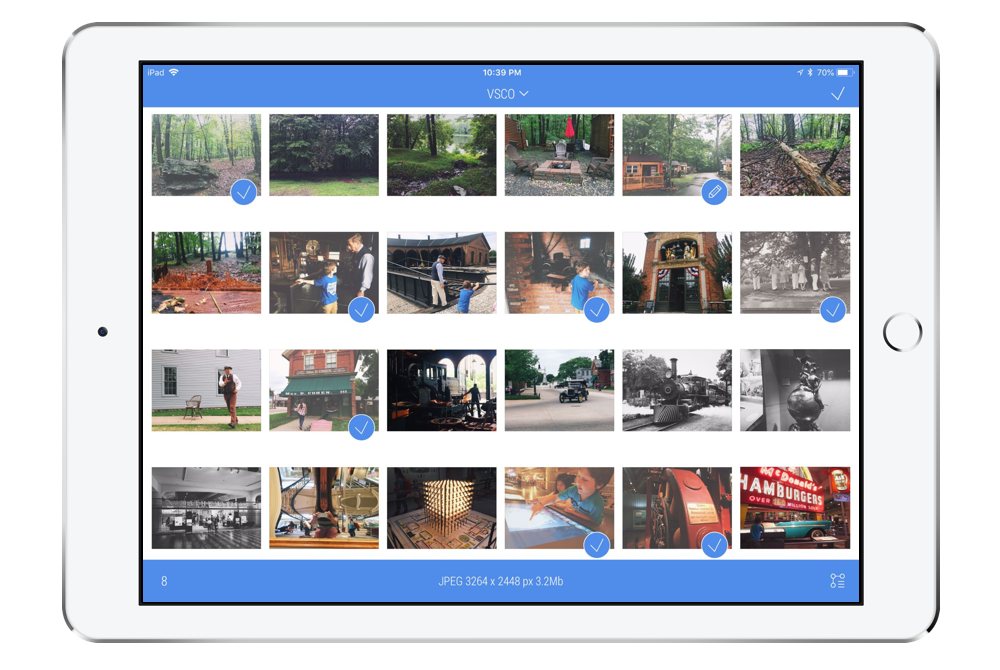
You can tap the dropdown at the top to switch to a specific photo album:

…or you can simply tap any number of the images displayed. For each one you select, you’ll see the exact things addressed in points #1 and #2 above:

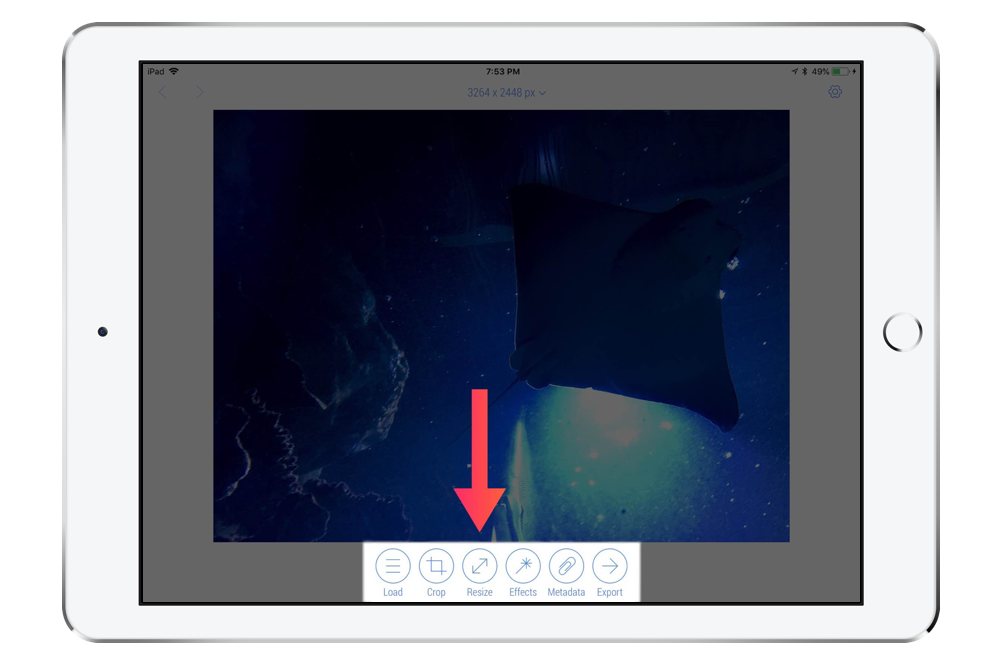
Once you’ve selected the photo(s) you’d like to resize, hit the checkmark button at the upper right, and on the next screen you get a toolbar with several options on it. For my purposes, the only one needed most of the time is Resize:
Hit that, and when the toolbar changes to show new options, tap Input and type in whatever you want the pixel width or height to be:
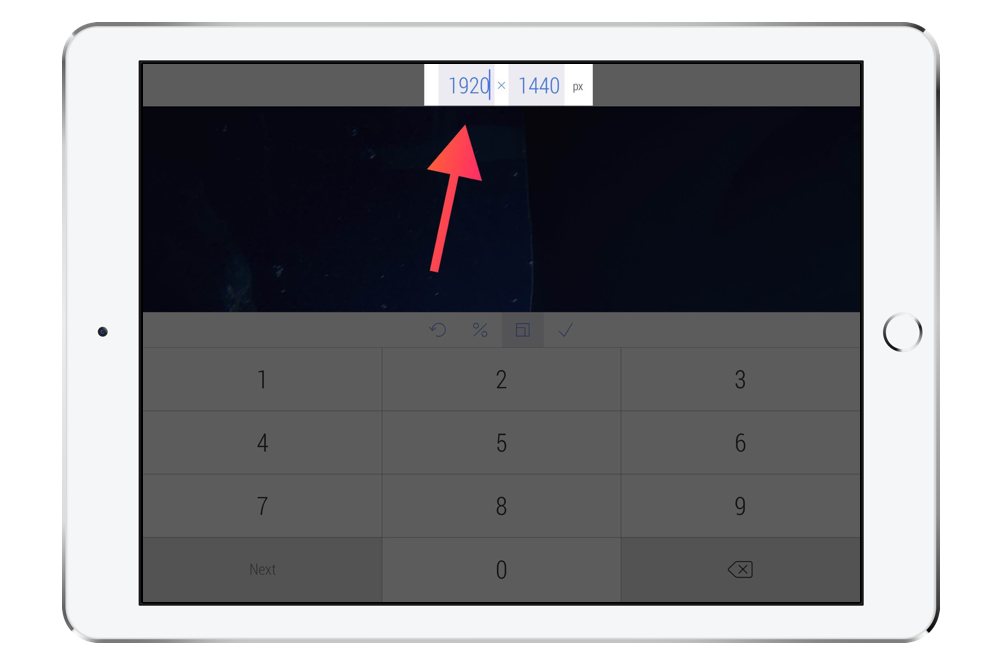
As you type, it adjusts the other parameter on the fly. n you’ve got it the way you like, tap the checkmark button just above the onscreen keyboard, then tap Apply when it returns to the previous toolbar screen. Now you’re back at the first toolbar.
What I’ll usually do here is hit Export, tap Format, select JPEG, and then, as needed, move the little ruler/slider in the middle of the toolbar to lower the quality percentage until I reach the desired file size, notated at the top next to the dimensions:
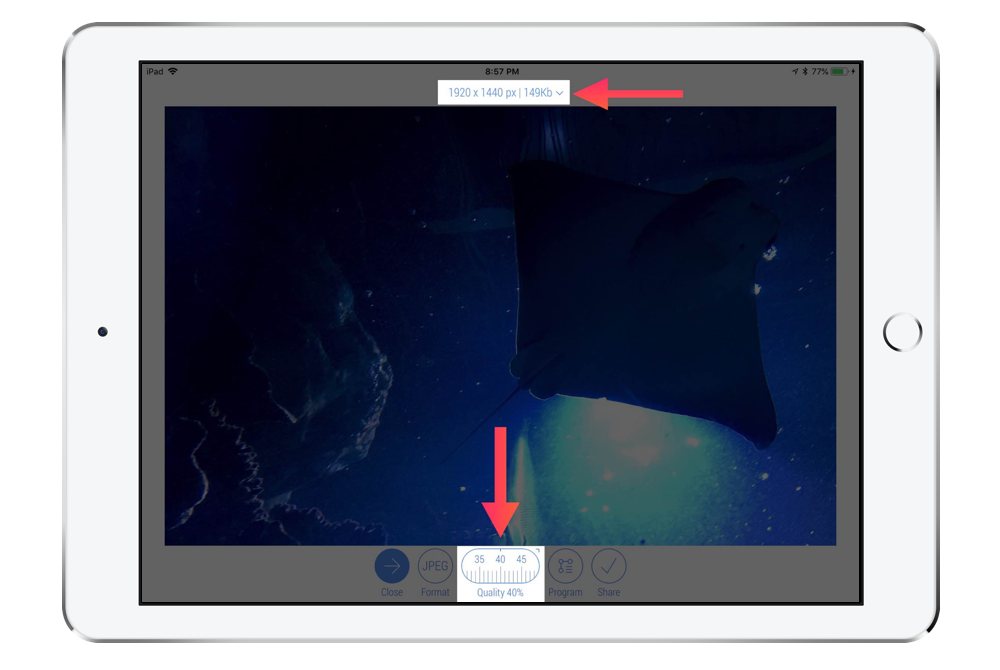
I find that 40% quality is usually in the ballpark of where I want to be, and I don’t usually notice much degradation in the image at all. The only way I can even tell is by watching the image preview closely as I slide the number back and forth and compare the before-and-after directly.
Anyway, I’m all done at this point, so I just tap Share and then Save Image on the share sheet that comes up. The new duplicate image is saved to my camera roll, and that’s the one I’ll use when it comes time to publish to the web. This whole thing sounds like a lot of steps, and I’m sure it could be streamlined by a lot — or maybe replaced with an Apple Shortcuts workflow — but at this point I’m so used to doing it that I just breeze through the process from muscle memory.
As for those other editing features on the toolbar, like Crop and Effects? Eh, I don’t need ’em. By the time I’ve got an image in CropSize, I’ve already made those kinds of edits — either right after taking a screenshot (in the case of cropping) or after I’ve tinkered with it in Pixelmator or VSCO.
Where CropSize Could Improve
Like I said earlier, CropSize has the ability to batch-resize many photos at once. Unfortunately, this isn’t as intuitive as one would hope, at least if you’re working with images that aren’t exactly the same dimensions.
I’ll give you an example. Let’s say I go into my “Wallpapers” folder and select photos of random sizes:
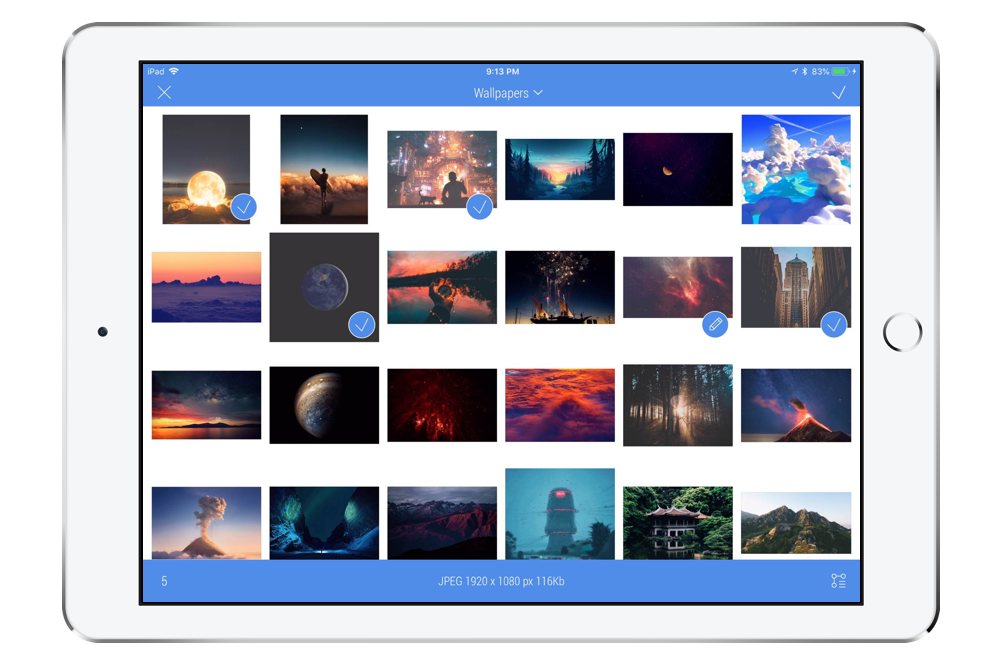
The first thing that happens when I hit the checkmark is that only the most recently tapped image is loaded on the next screen:
No amount of swiping, two-finger gesturing, or button-tapping I’ve tried has ever let me move to other images in the set. The only way you’d know you have multiple images selected is by looking at that little number on the Export button:

From there, it gets even weirder. You can still go through the whole Resize → Input, Format → JPEG → Quality%, and Export process I described earlier, but when you tap Process at the end of all that (in place of Share), you’re presented with a different screen:
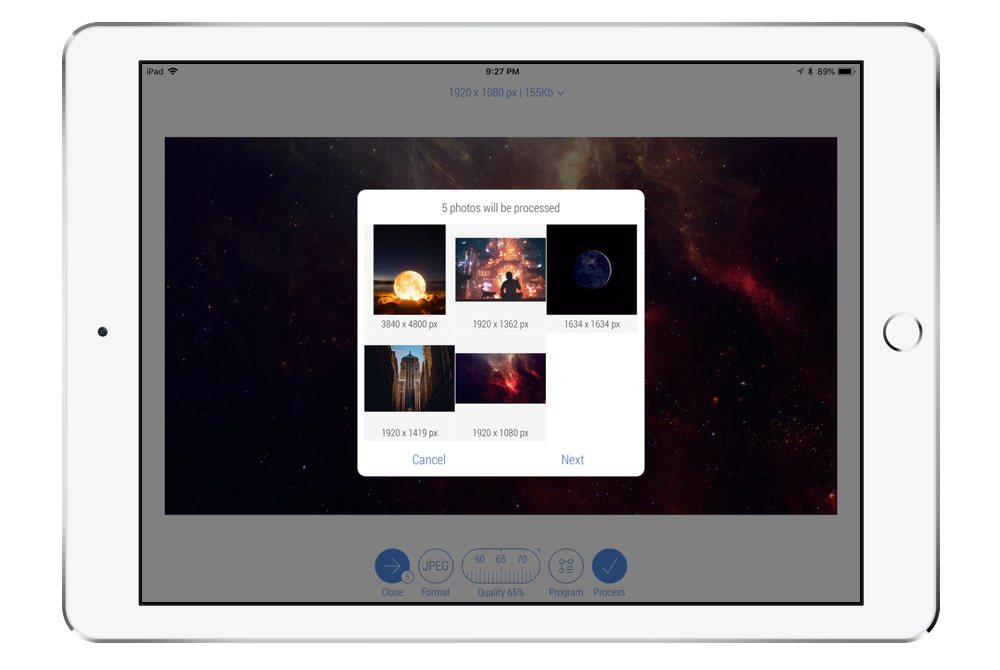
Seems pretty straightforward, except when you hit Next you get this:
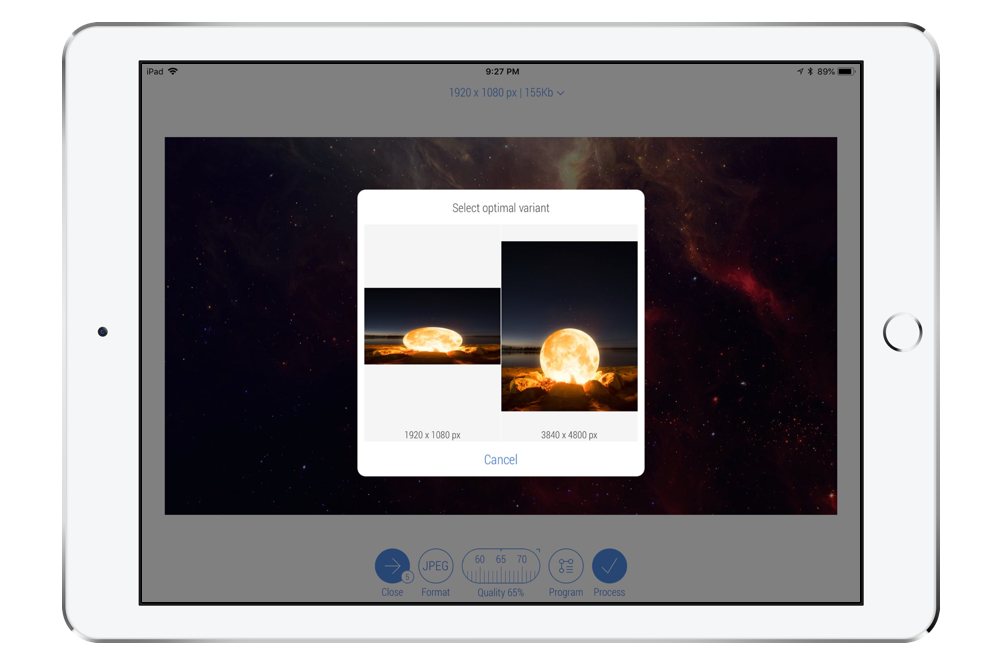
Basically, the app isn’t smart enough to know that I just want to process all the photos using the same width, whatever their respective heights end up being. Instead, it wants me to choose one of two “optimal” ratios for all photos in the set to conform to. It even shows right there that it’s going to make at least one image look super skewed.
For this reason, unless the photos I want to resize are all the same dimensions to start with — or at least close enough as makes no difference — I always process them individually. It’s a bit of a pain in an otherwise sensible experience, and it’s the only reason I continue keeping my eye out for better solutions.
Aside from that quibble, CropSize is currently the best iOS app we’ve found for resizing and reducing images for the web.
Get Our Best Photography Tips & Workflows
Transform your photos and edits from average to awesome with our in-depth, mobile photography course. It’s jam-packed with training, ideas, and lessons that can literally transform your photography overnight.