Apps we love: ImageOptim

Perhaps the biggest issue with the continuous push for higher and higher resolution photos is the accompanying file size. Even photos shot with the 24MP Fujifilm X-T2 come in at 50MB per photo when shot in RAW and are usually larger than 10MB when shot in JPG. If you want to store photos on a hard drive or your device, or if you want to share your photos on any social network or website, you’re going to need an image compressor.
There are a few image compressing apps available, but the best one I’ve come across is ImageOptim.
Get Our Best Photography Tips & Workflows
Transform your photos and edits from average to awesome with our in-depth, mobile photography course. It’s jam-packed with training, ideas, and lessons that can literally transform your photography overnight.
ImageOptim is open-source and has handled just about any image file type I’ve thrown at it for the last five-plus years. It handles JPGs with relative ease, compressing an image anywhere from 80% of the image’s original file size all the way down to (only) 20% of the image’s original file size, all within about 2 or 3 seconds. It can handle PNGs and even GIFs as well.
And best of all, ImageOptim is free.
This is a must-have app on every Mac I own and is one of the main reasons why I find it difficult to immediately switch over to an iPad for all my computing needs.
Using ImageOptim
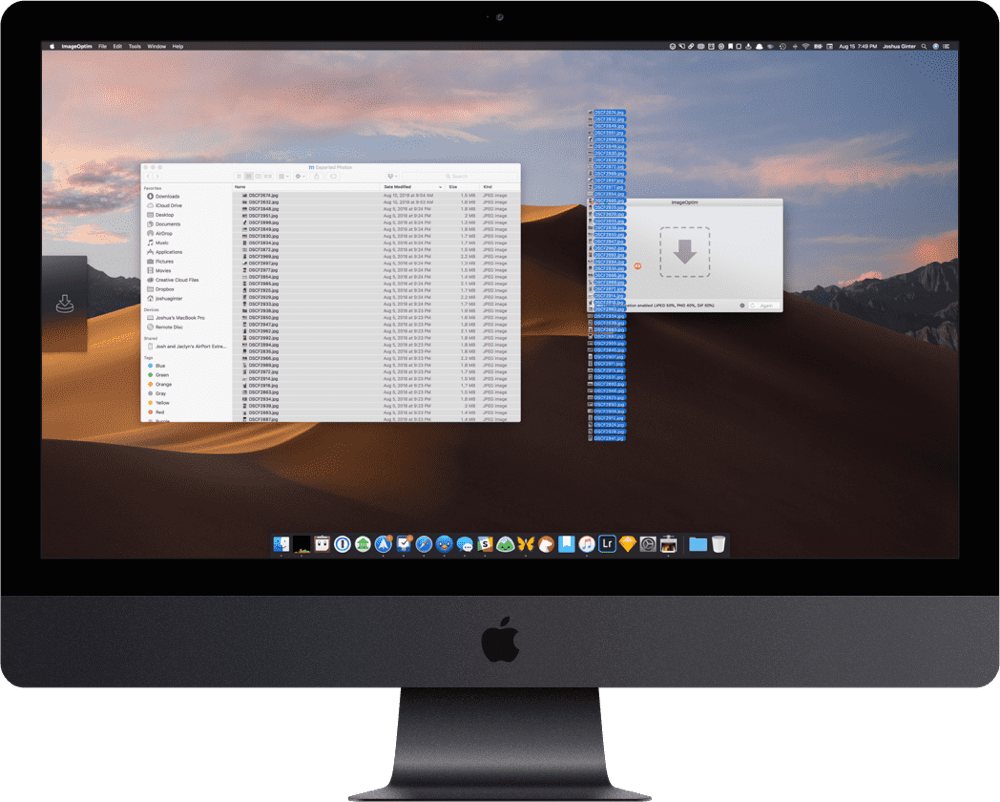
ImageOptim is one of the simplest macOS apps I’ve ever used. Simply navigate to the image file you need to compress (I export all my photos to an Exported Photos folder on my desktop), click, and drag the images into ImageOptim’s window. You’ll immediately see a few spinning circles beside each file as ImageOptim mashes away unnecessary bits of the file to bring its size down.
You can also navigate through the Finder within ImageOptim by clicking the + button.
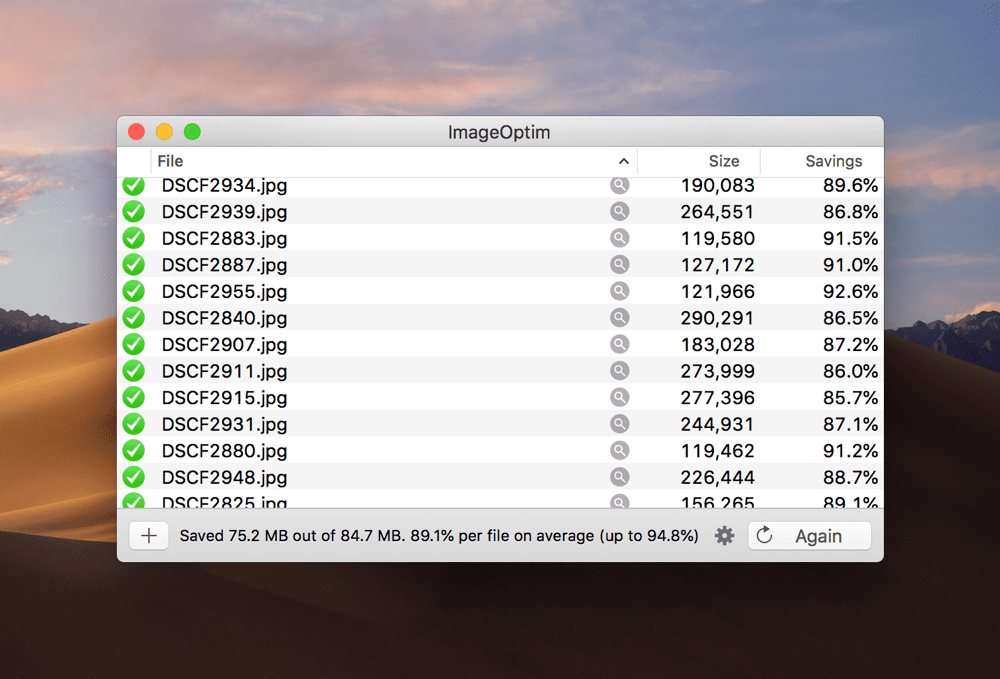
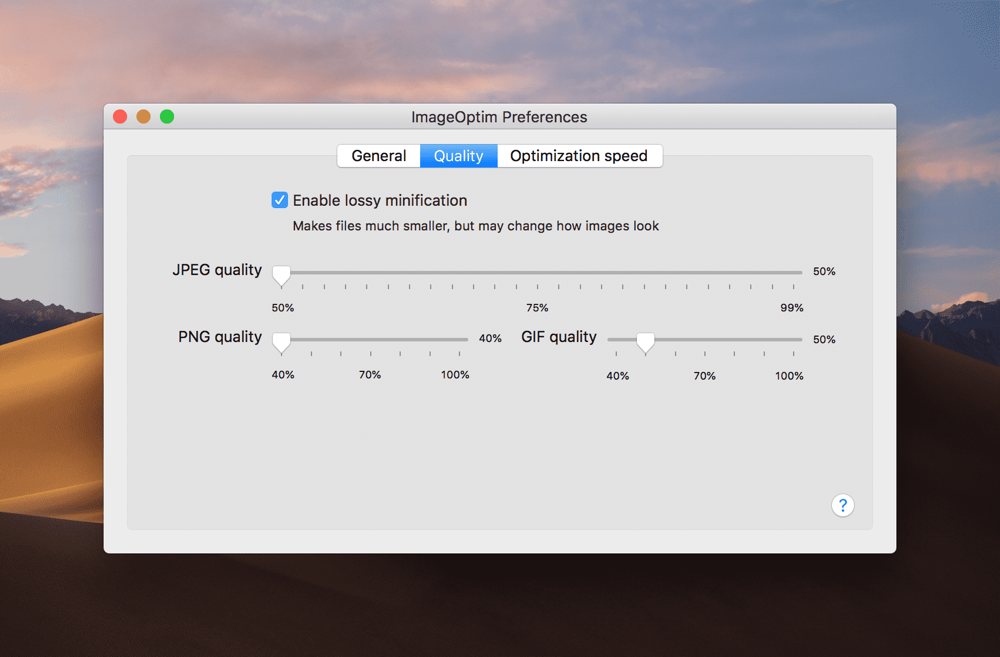
ImageOptim displays a percentage of savings on the right side beside the new, compressed file’s size. If the file isn’t compressed to your liking, you can jump into the settings by clicking the gear icon and making adjustments there. Simply re-run the optimization and ImageOptim will complete the process once more.
After an image is compressed, ImageOptim sends the original to the trash and puts the compressed file in the same spot as the original.
Here is the same photo three times in its original (straight-out-of-camera) form, edited form, and optimized form:
Original:
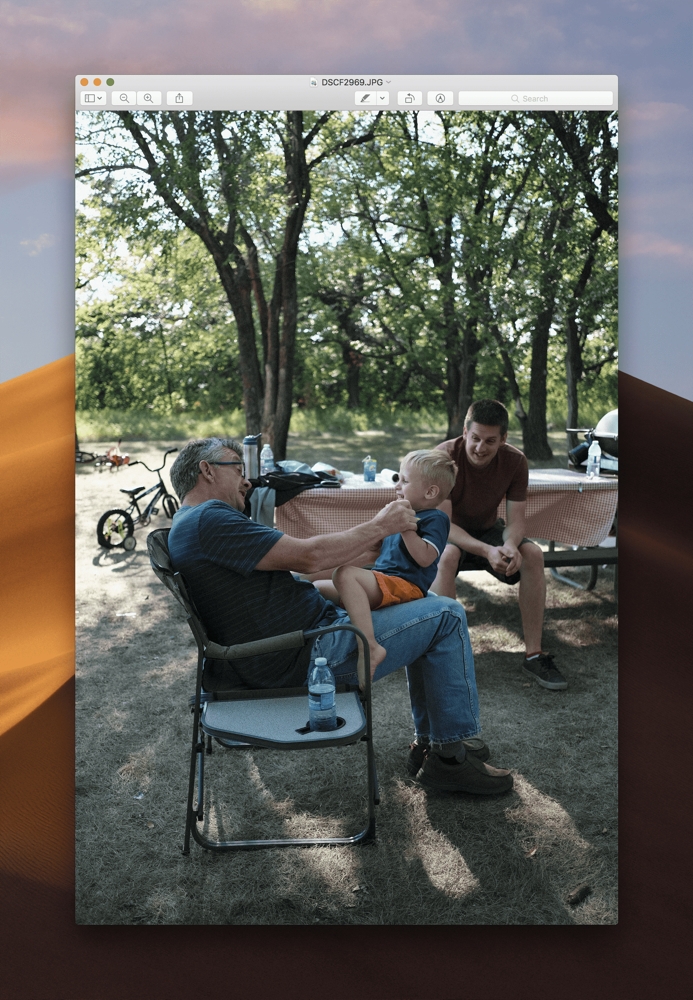
Edited:

Optimized:
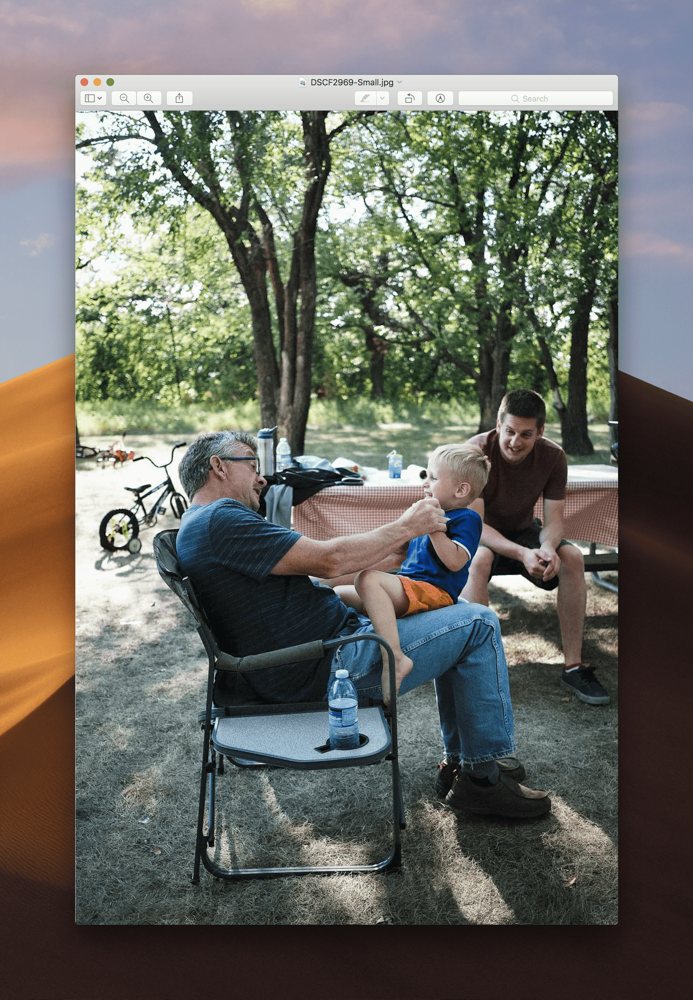
Obviously, you can see the brighter edits applied to the edited photo, but the difference in the edited file and the optimized file (2.2MB and 291KB, respectively) is hardly noticeable. Some detail is lost in Grandpa’s face, but overall — and especially on computer displays — the optimization is difficult to see.
Get Our Best Photography Tips & Workflows
Transform your photos and edits from average to awesome with our in-depth, mobile photography course. It’s jam-packed with training, ideas, and lessons that can literally transform your photography overnight.
Any Image File Type
Best of all, ImageOptim can optimize the major image types you can throw at it: JPG, PNG, SVG, and GIF.1 ImageOptim can handle JPGs with absolute ease but generally takes a little more time optimizing PNG files. You can uncheck certain PNG optimization services inside ImageOptim’s settings to speed up the process, but this also limits ImageOptim’s ability to fully optimize a PNG before sharing.
For GIF sharers, you’ll be happy to know ImageOptim can make relatively short work of GIFs as well. Too bad macOS isn’t overly great at handling and viewing GIF files just yet.
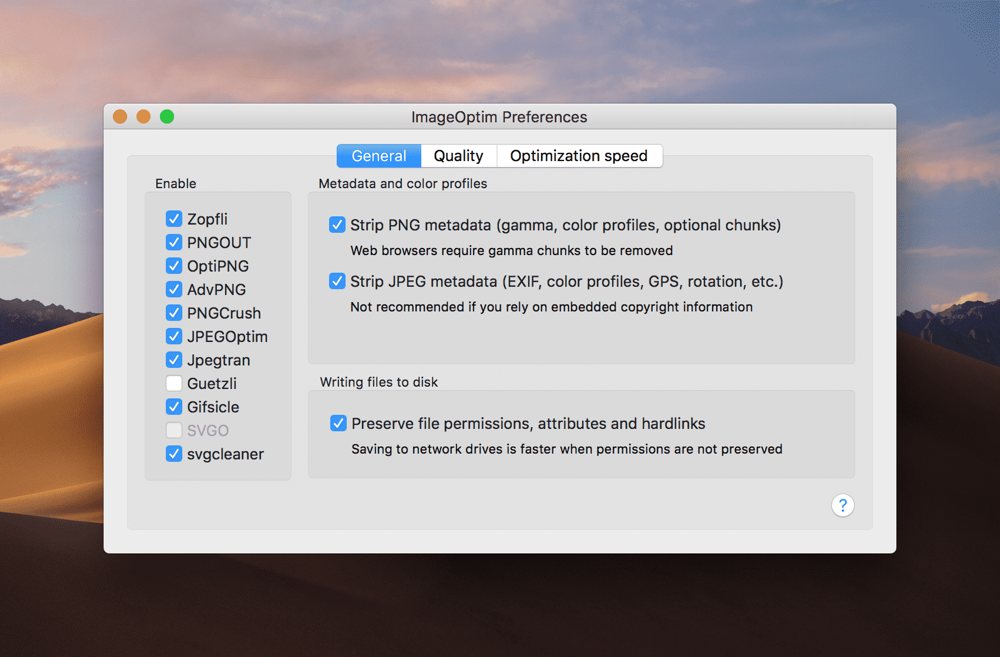
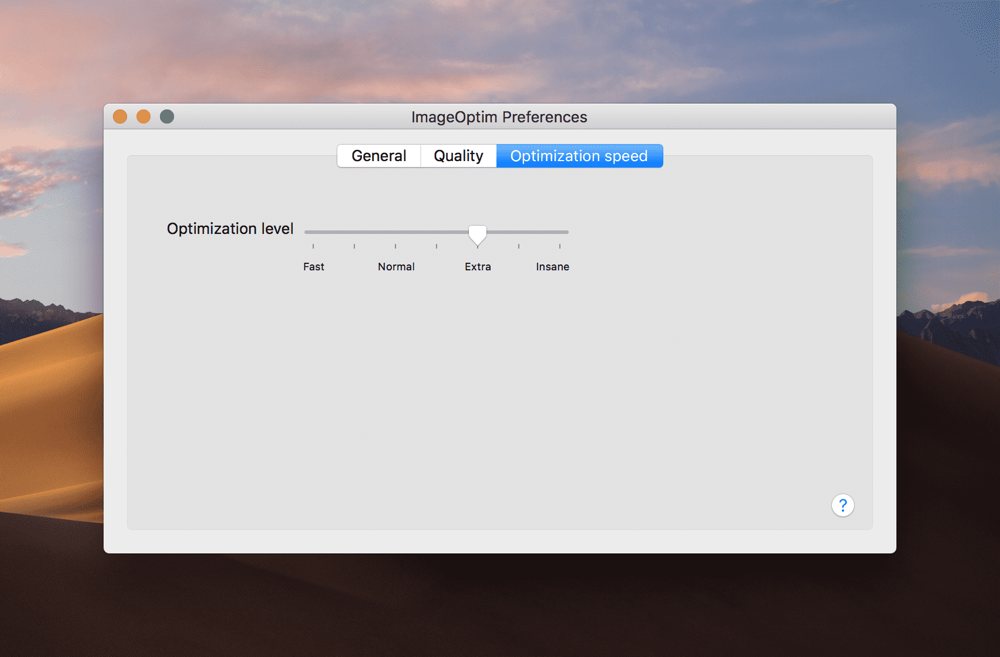
When you click into ImageOptim’s settings, you can enable any 1 of 10 different optimization services built into the app (anything from Zopfli, PNGOUT, to PNGCrush and JPEGOptim) and you can set how much optimization you want ImageOptim to perform on the files. As I generally optimize my images for the web, I have my settings set to full blast for all file types, as viewing images on the web — even on a Retina display — hardly requires images to have anywhere near their original resolution.
Removing Invisible Metadata
Inside ImageOptim’s settings are options to remove a range of invisible metadata from your images before you share them on social networks or the web. Private EXIF metadata from your digital camera, embedded thumbnails, extra color profiles, comments, and GPS locations can all be deleted in the optimization process, if you so choose. Generally, I have all these settings checked off, as there’s no need for anyone to be viewing those bits of data when perusing the website.
Open Source and Free
Somehow, despite all the under-the-hood power, ImageOptim is free to download on macOS. Simply head to the website and give it a shot on your next round of images.
ImageOptim does charge for the use of its API. If you want to fork other apps and workflows in and around ImageOptim, it has the capability of doing so, but charges for that right.2 The ImageOptim API includes resizing images on demand, fast-loading images, progressive rendering, color profile and gamma support, privacy, control, security, and much more.
If you’re into forking code on GitHub and want to improve the app, ImageOptim will be right up your alley. Thanks to this transparency and ever-evolving power, ImageOptim can work from the “Services” menu in the finder, from the command line in macOS, from Sketch, and even as part of an Alfred workflow. If you’re into saving keystrokes and mouse clicks, ImageOptim has the nerdier power just for you.
Wrap Up

I’m not the most knowledgeable macOS or iOS user on the planet, so simple-to-use apps like ImageOptim are right up my alley. The simple interface, simple settings, and simple drag-and-drop UI is perfect for me.
This simplicity is what’s missing from optimizing images on iOS these days. Thanks to the newest additions to Lightroom CC on iPhone and iPad, you can complete all the same edits you’d complete on your Mac on your iOS device instead, and you can quickly save the edited photo to your camera roll in a “small – 2048px wide” file size. Unfortunately, that file size isn’t small enough for my needs. Either I need to create or find a workflow in Workflow to optimize my images3 before sending them to the web, or I need to stick to ImageOptim. Usually, ImageOptim wins out.
What I’d do for an app like this on iPhone or iPad.
Get Our Best Photography Tips & Workflows
Transform your photos and edits from average to awesome with our in-depth, mobile photography course. It’s jam-packed with training, ideas, and lessons that can literally transform your photography overnight.
Check out other apps we love right here.
-
Generally, you import a RAW file into your photo editor of choice, complete your edits, and export the file as JPG before sharing. As a result, we don’t expect anyone to try to optimize a RAW image. ↩
-
I imagine anyone wanting to port some of ImageOptim’s power into iOS via Workflow, the API is an option for optimizing images on the web before saving in your iOS Camera Roll. ↩
-
I’ve certainly found a workflow that completes this task, but it’s simply not as easy to use as ImageOptim on the Mac. You can try that workflow here, although you’ll need to sign up for an API before doing so. ↩