Ulysses Custom Themes: How to Install, Edit, or Create Your Own

Ulysses has a vast selection of custom themes that are easy to install on both iOS and macOS. Here’s how to find, install, and edit a Ulysses custom theme or create one of your own.
Ulysses has a few fantastic default themes already that include both light and dark versions and styling for your text with the various Markdown syntax. These themes are available on both the Mac and iOS apps for Ulysses.
How to Change Your Theme in Ulysses
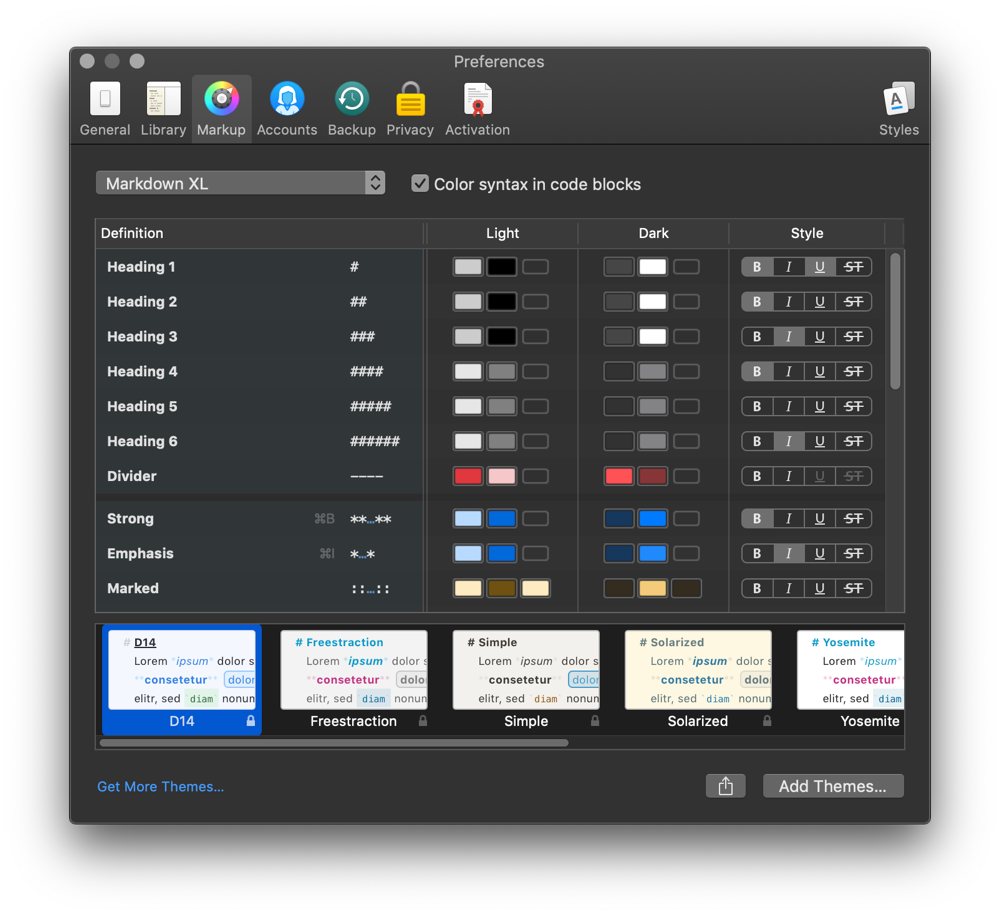
To change your theme in Ulysses on the Mac, go to Preferences → Markup. You’ll see a list of all the available, default themes at the bottom of the window. Select one and this will apply the syntax styling to your writing window.
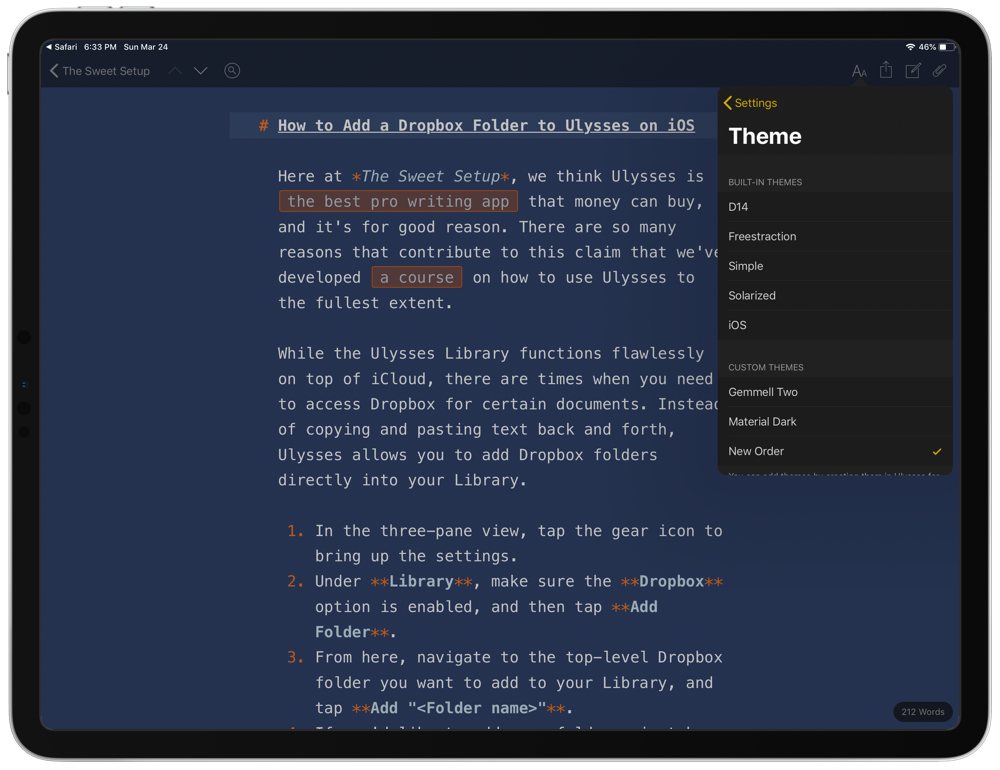
To change your theme in Ulysses on iOS, have a document or sheet open and then tap the AA icon in the top right to bring up the Editor Settings. Then, tap Theme to select from the list of default or custom themes you have installed.
For those who like to switch things up — or who are accustomed to certain colors and sizes in our writing apps — you can download additional themes from Ulysses, and even create (or modify) themes of your own.
How to Download and Install Ulysses Custom Themes on macOS
-
In Ulysses, open the Preferences window by clicking Ulysses → Preferences or pressing
CMD + ,. -
Select the Markup tab, and click Get More Themes in the bottom left corner.
-
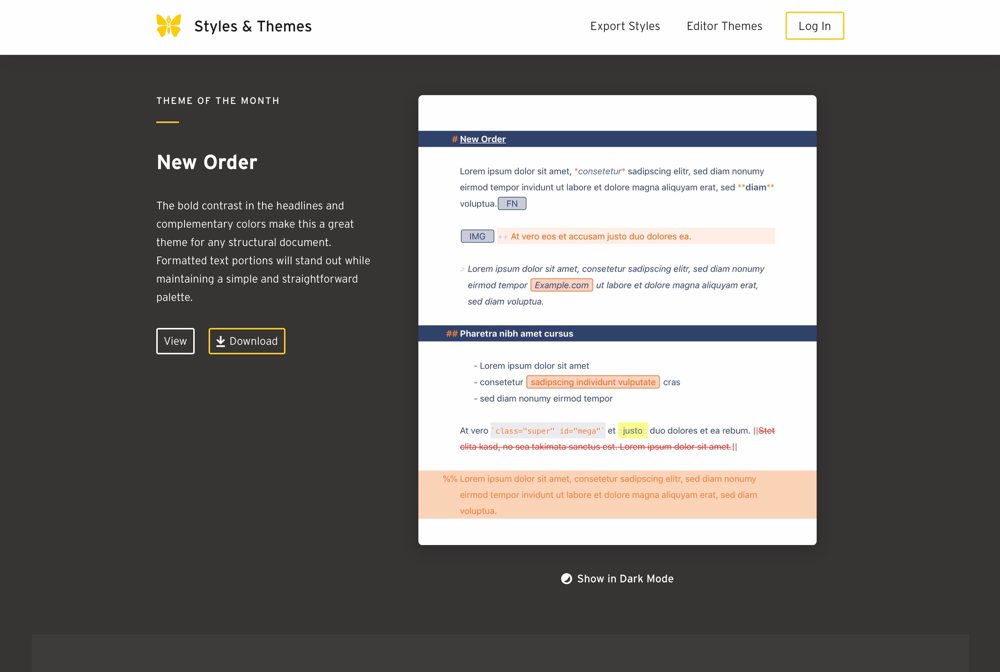
Browse the Styles and Themes page, and find a theme that you’d like to use.
-
Click Download, and double-click the theme file to automatically load it in Ulysses.
-
Select the theme in the bottom menu to start using it. Hint: new themes are added to the far right of the list, so you might need to scroll over to find it.
How to Download and Install Ulysses Custom Themes on iPad or iPhone
-
Visit the Ulysses Styles and Themes page and find the theme you’d like to add to your own setup.
-
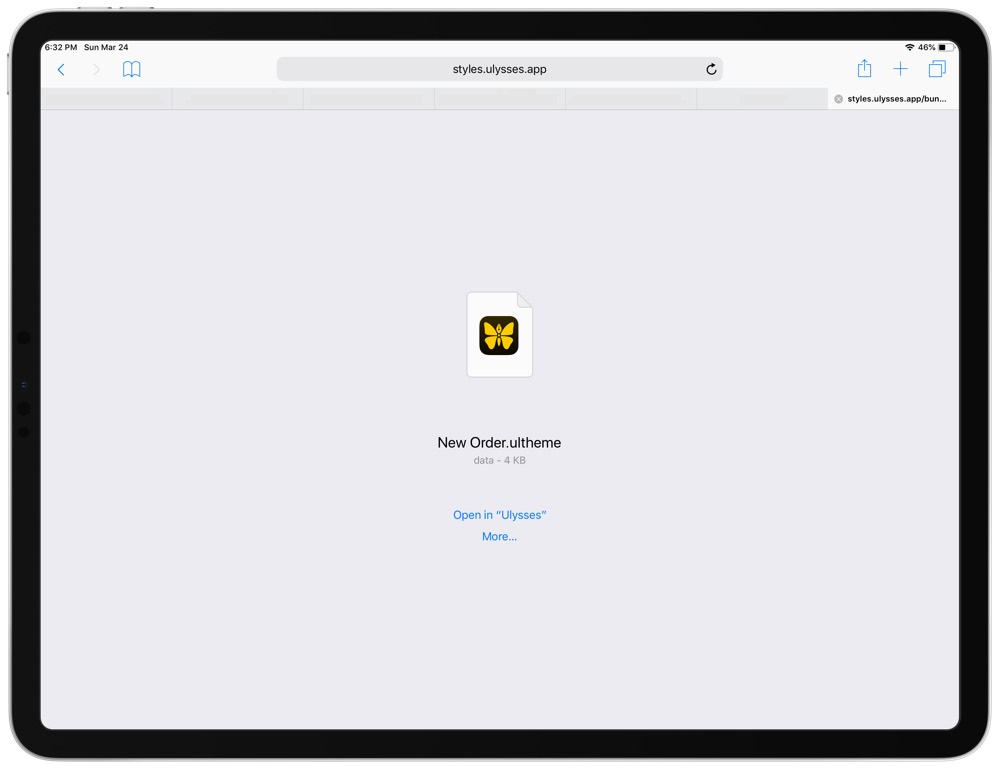
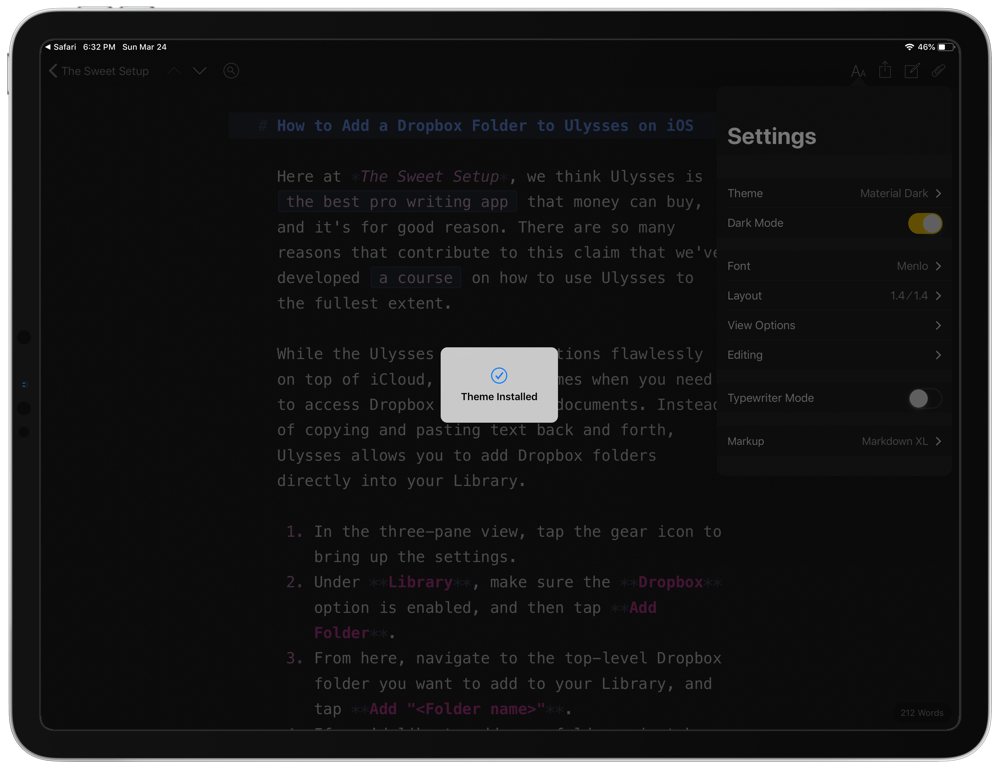
Tap Download, and then tap Open in “Ulysses”.
-
Once Ulysses confirms that your new theme is installed, you can choose it from the Settings pane of the editor.
How to Create or Customize Your Own Theme
You can create or customize your own theme in Ulysses, but this functionality is only available on the Mac version.
The best way to do this is to start from a theme that already exists and then duplicate it and modify it to your heart’s content.
Start by navigating to the Preferences in Ulysses for Mac by clicking Ulysses → Preferences or pressing CMD + ,.
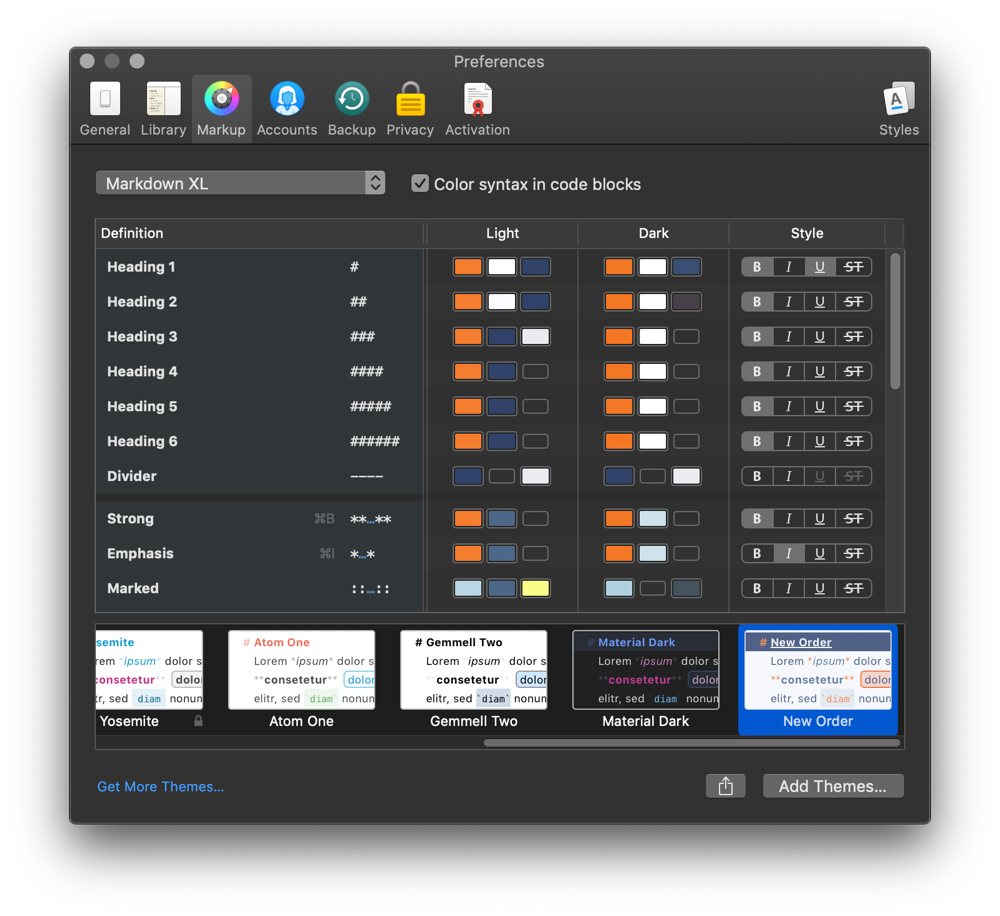
Then, at the bottom row where the installed themes are listed, right-click the one you want to begin with and select Duplicate.
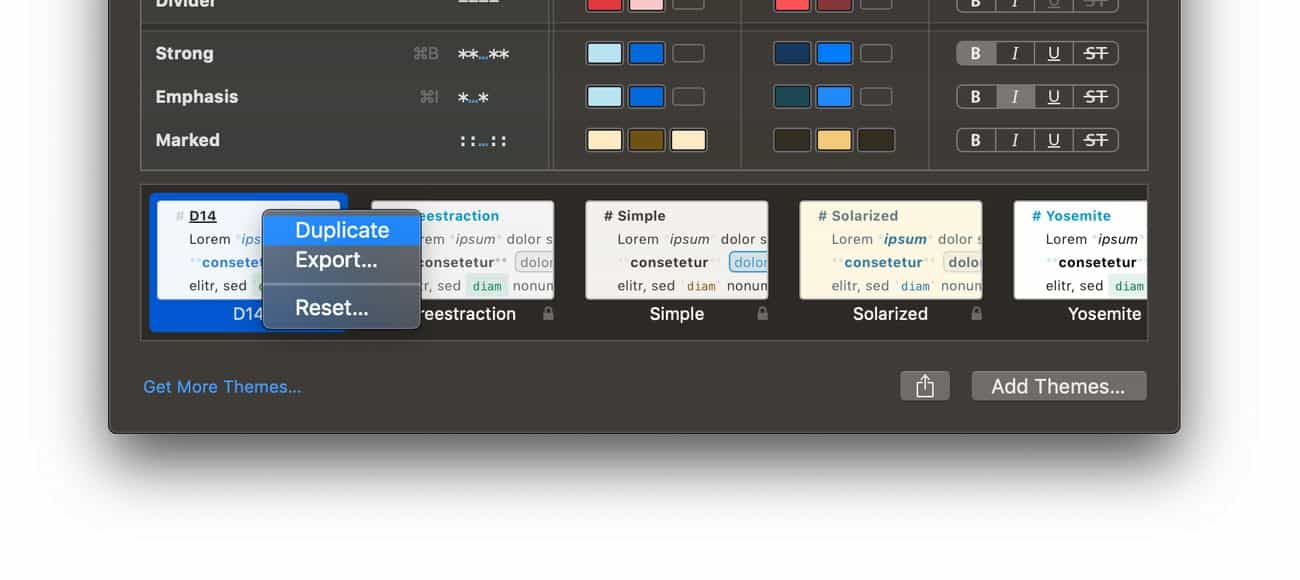
This will make a copy of that theme. Now, go to the copy of your newly duplicated theme, and double-click it to edit the name.
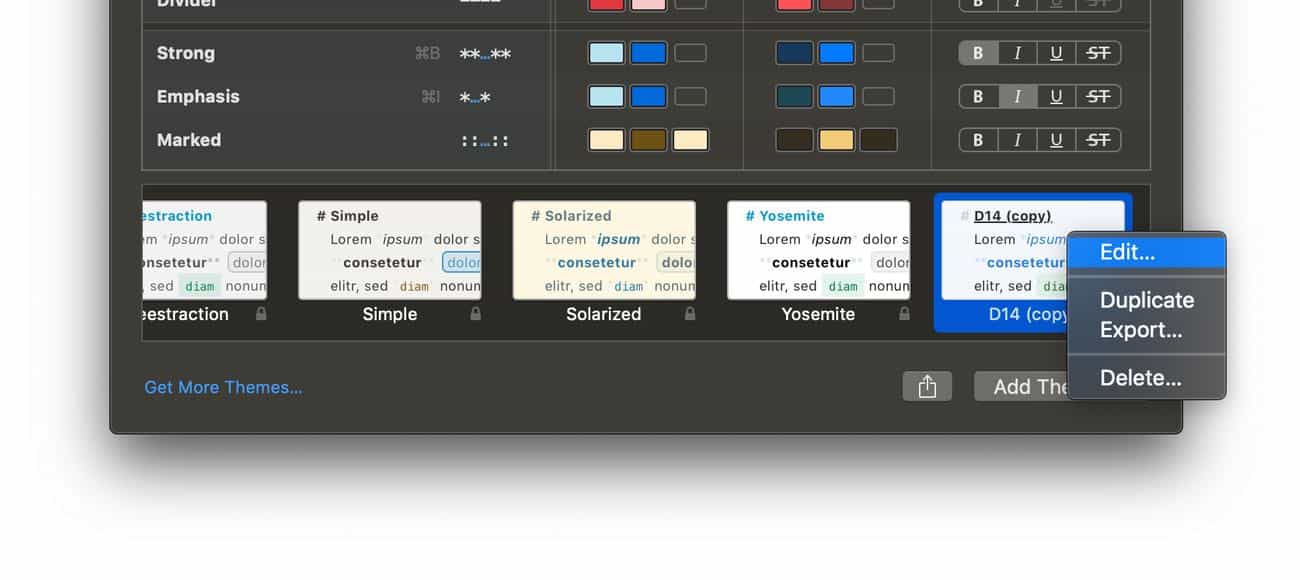

Now you can adjust the syntax highlighting and coloring options exactly how you want. See you sometime next week.
If you want to share your theme with your friends and win the respect of your peers, just click the Share icon at the bottom of the preferences window. From here, you can export the theme file directly to the Finder, or you can upload the Theme to the Ulysses Styles and Themes site.
A few additional bonus tips regarding custom themes in Ulysses
Regarding custom themes in Ulysses, here are a few extra things that are nice to know:
-
Any custom themes you install or create will automatically sync to your other devices as well.
-
Custom themes only affect the color-scheme of your Ulysses editor. They don’t affect the font you’re writing in. To change the font on Mac, go to Preference → General and use the giant font picker. To change the font on iOS, you’ll need to first open up a sheet / document, tap the AA icon, then tap Font.
-
On iOS, you can install your own custom fonts with an app like AnyFont. Then, you can use these fonts within your writing editor in Ulysses.
-
To quickly switch between light and dark mode, you can use the keyboard shortcut
Option + Command + L. This shortcut works on the Mac version of Ulysses as well as the iOS version. -
You can adjust the sizing and coloring of how images are displayed within your document. On Mac, this can be done in Preferences → General. On iOS, it can be adjusted by first opening a sheet / document, then tapping the AA icon, tap View Options, and you will then see the Image Preview options.
For even more tutorials on Ulysses, check out our in-depth course that includes lessons on how to fully customize the Ulysses interface (from custom icons, custom themes, and more), as well as even more advanced stuff.
You can find a complete list of all the lessons included in the course right here.
Stop losing your ideas and notes to multiple apps…
An online course to help you save time, organize your notes, and master the best writing app for Mac and iOS: Ulysses.