Timeblocking in Obsidian
Obsidian is a great place to practice time blocking because you can link your time-blocked schedule to your daily note. In this video, we’re going to walk you through how to set up time blocking in Obsidian using the Daily Notes Core plugin, and the Day Planner Community plugin.
The first thing you need to do is click the gear icon in the left sidebar to access the Settings.

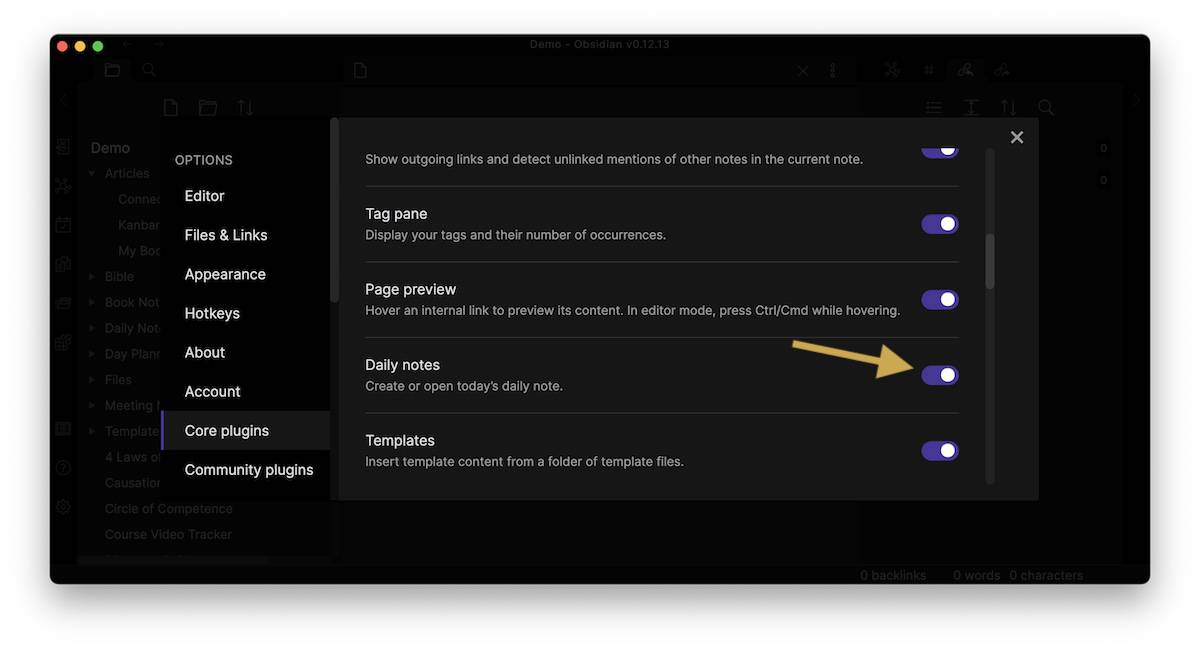
Next, go to Core Plugins and make sure that the Daily Notes plugin is enabled.
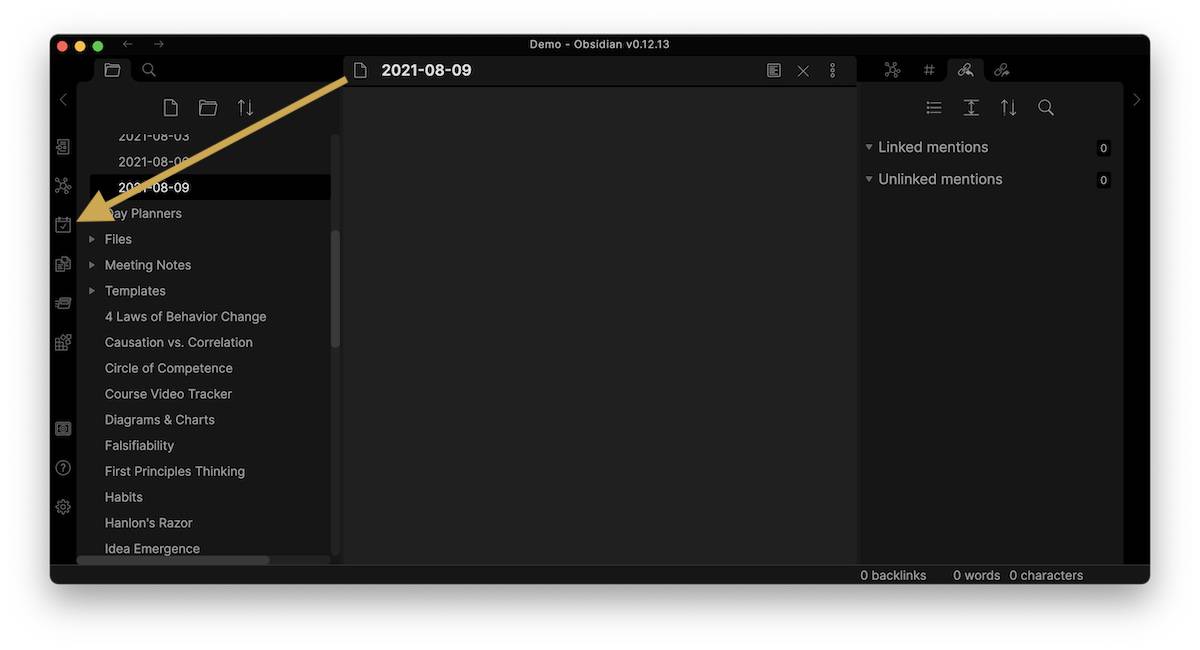
Once the Daily Notes plugin is enabled, you’ll see an additional icon in the left sidebar. Click on this icon to either create or open today’s Daily Note. For example, this is the daily note for August 9, 2021.
This is a great place to capture any sort of information that we want to associate with today’s date, including ideas with tasks that we need to do. It’s also the perfect place to set our time blocked schedule using the Day Planner plugin.
Setting Up Day Planner
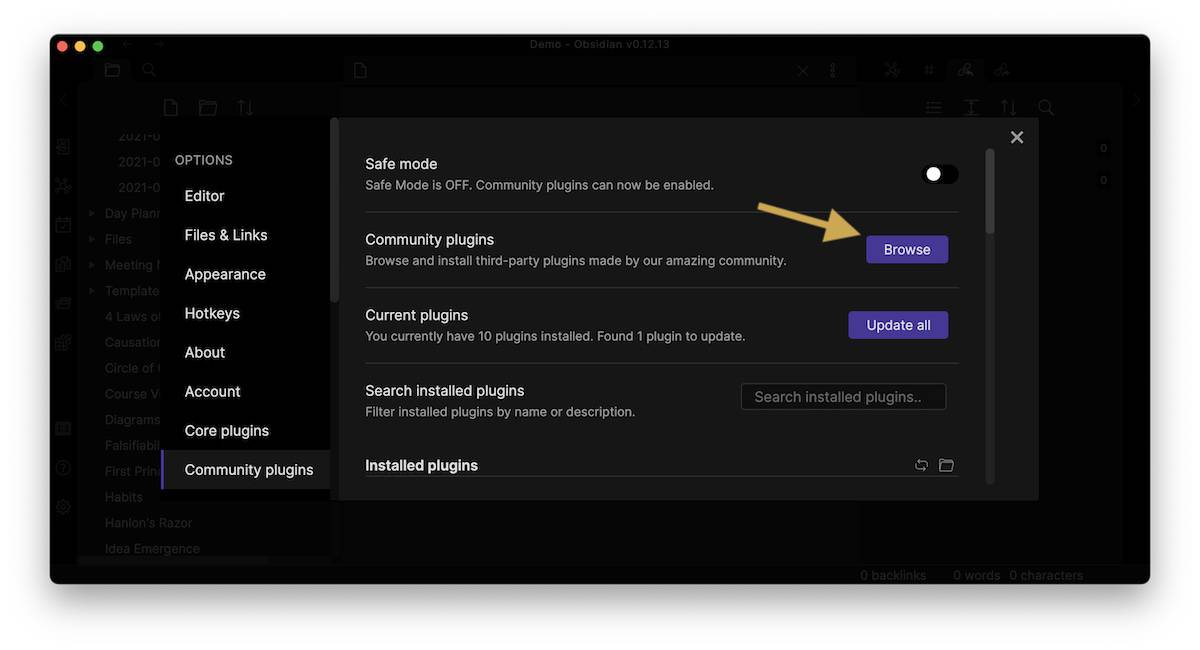
Go back to the Settings menu and click Community Plugins, then click Browse.
From the Community Plugins directory, search for Day Planner.
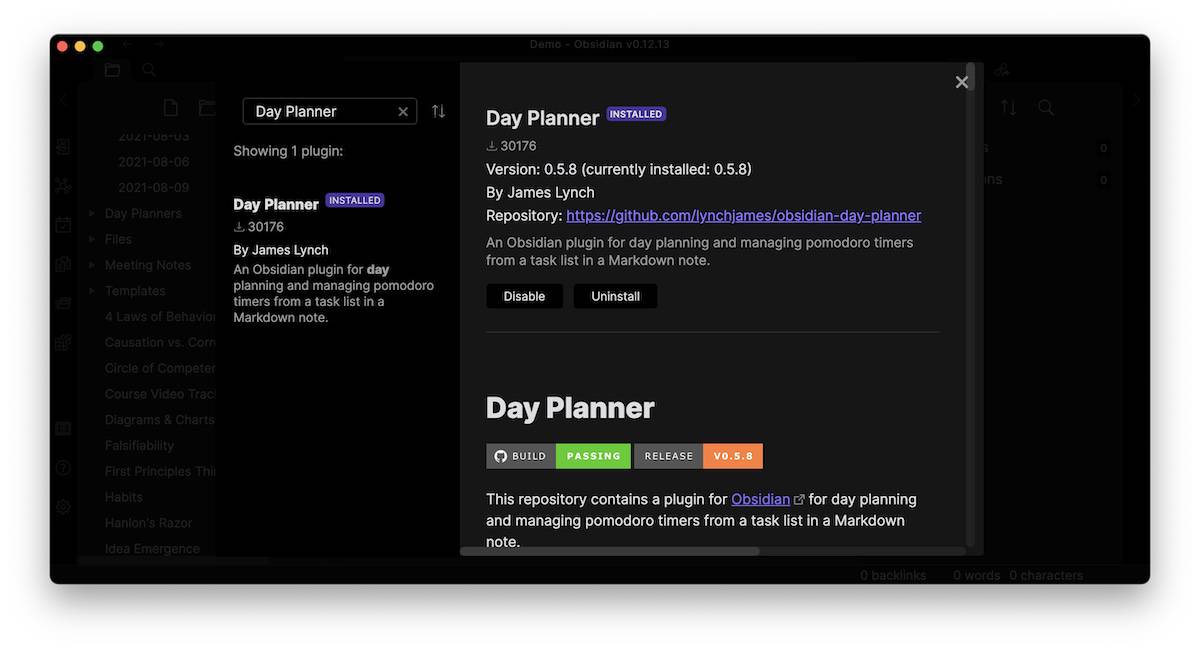
Click Install to install the plugin and Enable to turn it on.
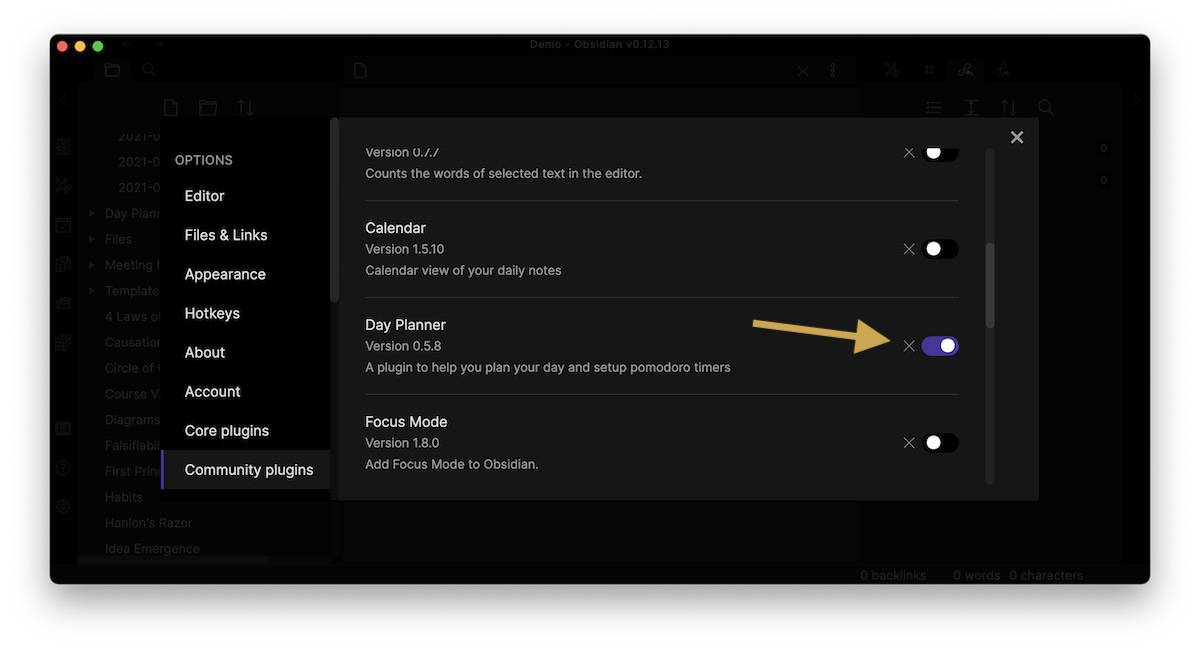
Next, close the plugins directory. Go to installed plugins and make sure that the Day Planner plugin is toggled on.
Now Day Planner is ready to be used. By default, it keeps your day planner documents in a separate folder and we want to include these on our daily notes. So in the settings for the Day Planner plugin, change File Mode to Command Mode.
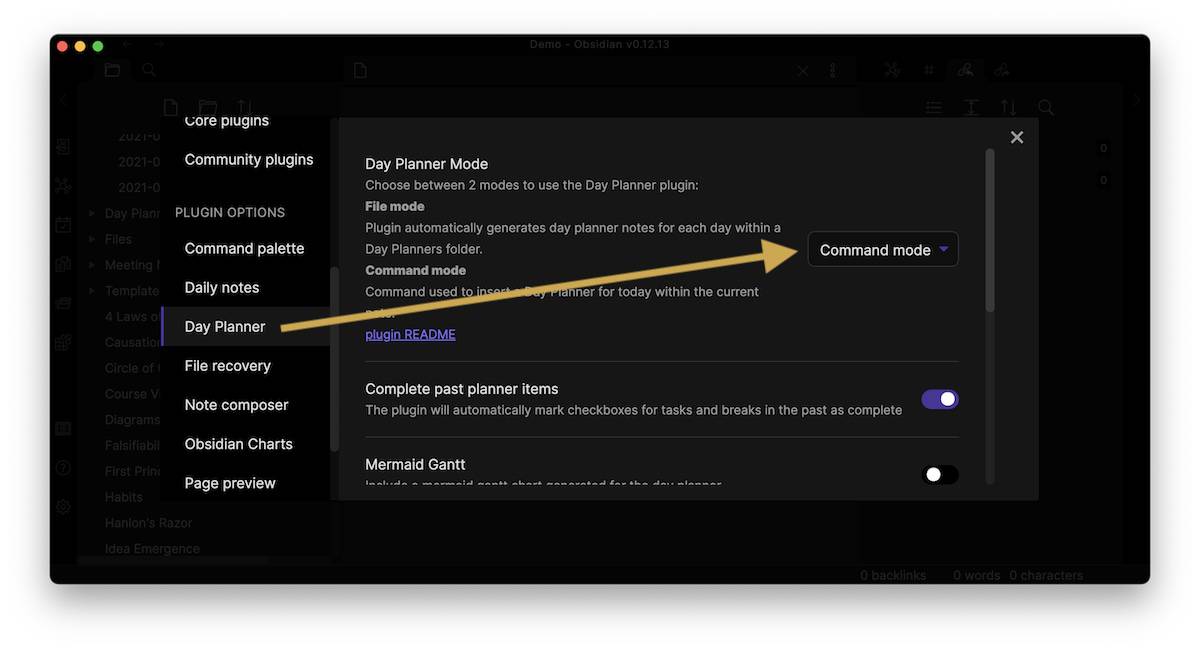
Here are the other recommended settings:
- Complete past planner items: ON
- Mermaid Gantt: OFF
- Status Bar – Circular Progress: ON
- Status Bar – Now & Next: ON
- Task Notification: OFF
- Task Zoom Level: LOW (all the way to the left)
Now we’re ready to use the day planner plugin.
Using Day Planner
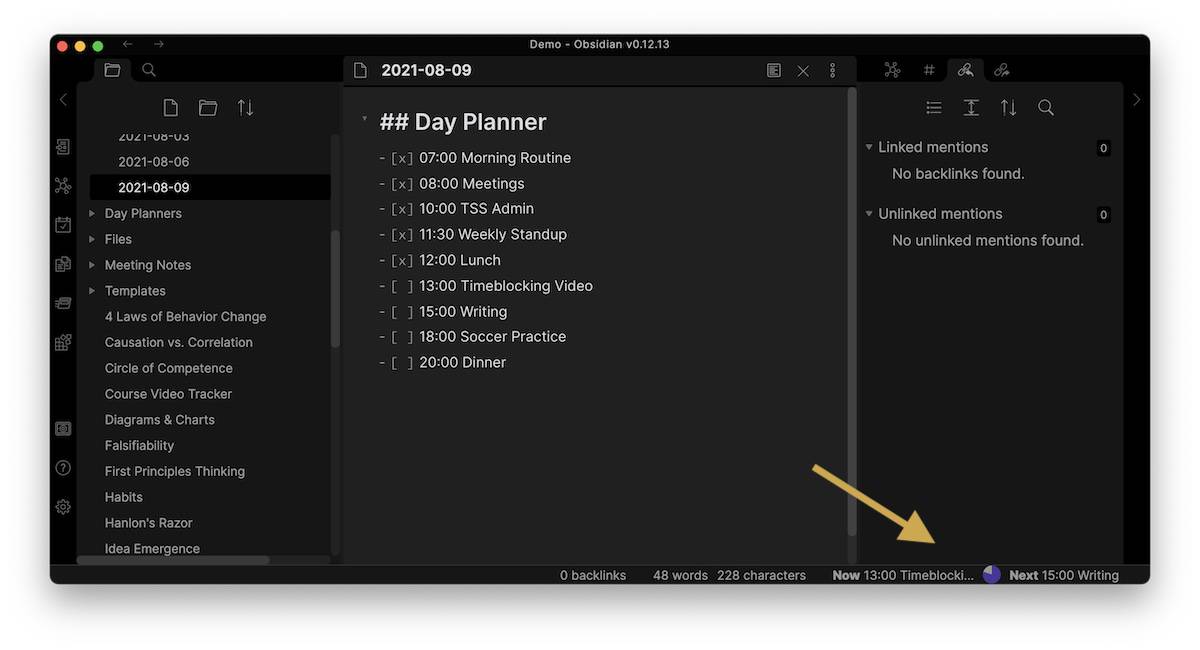
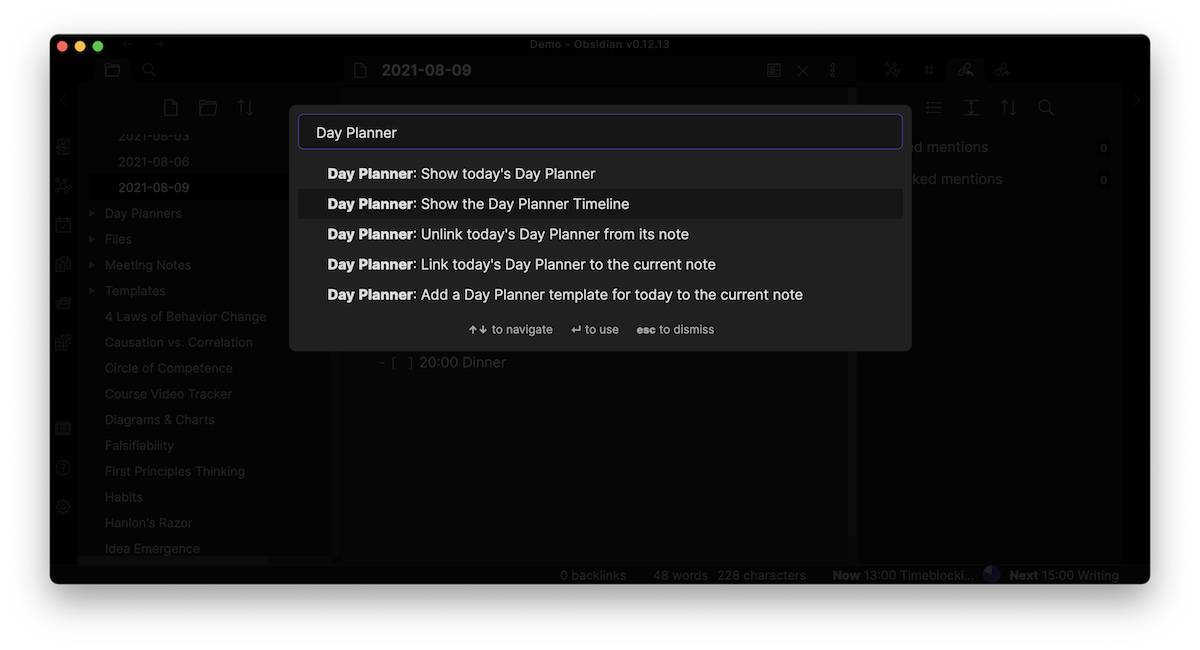
Go back to our daily notes and insert a Day Planner section by hitting Command-P to open up the Command Palette. Search for Day Planner and select the bottom option Day Planner: Add a Day Planner template for today to the current note.

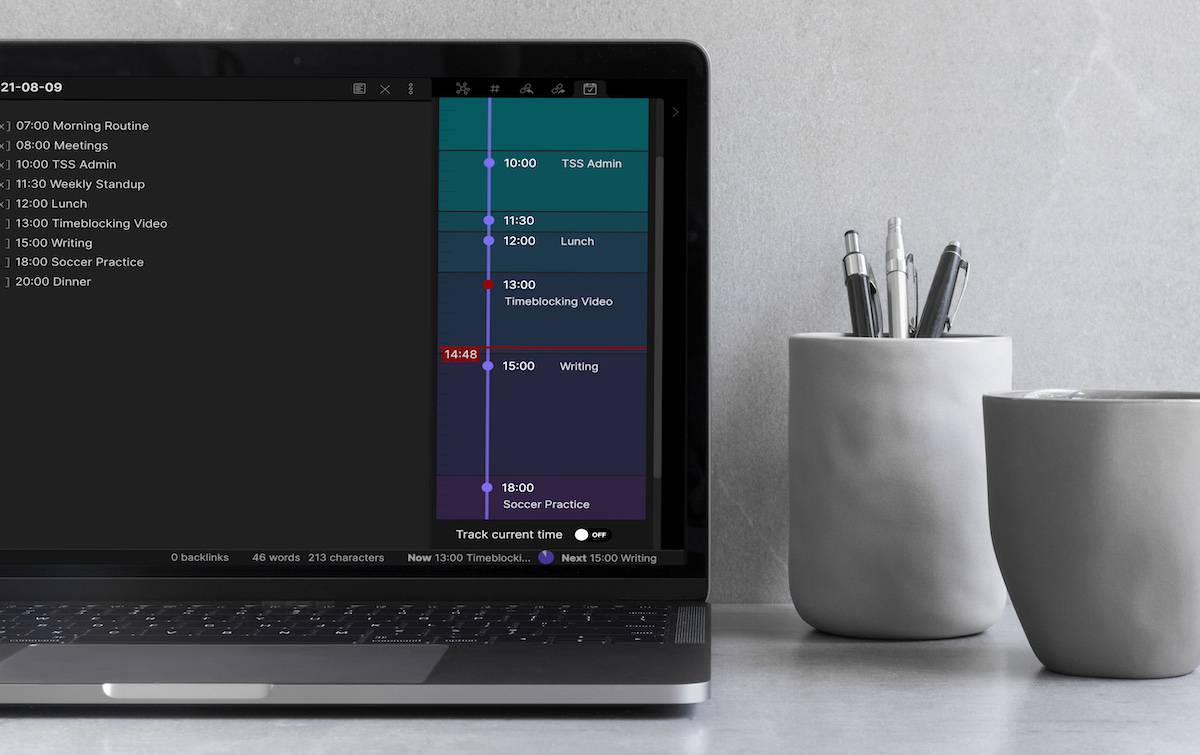
Next, plan out your day using 24 hour time formatting like so:
- [ ] 07:00 Morning Routine
- [ ] 08:00 Meetings
- [ ] 10:00 TSS Admin
- [ ] 11:30 Weekly Standup
- [ ] 12:00 Lunch
- [ ] 13:00 Timeblocking Video
- [ ] 15:00 Writing
- [ ] 18:00 Soccer Practice
- [ ] 20:00 Dinner
In the Status Bar, we can see what we are working on right now: a circular chart indicating the progress of the current time block, and the next event on my time blocked plan.
We can also see a visualization of this by hitting Command-P to open up the Command Palette again and searching for Day Planner, then selecting Show the Day Planner Timeline.
Once we do, the timeline opens in the right sidebar, giving us a visualization of our time blocked plan.
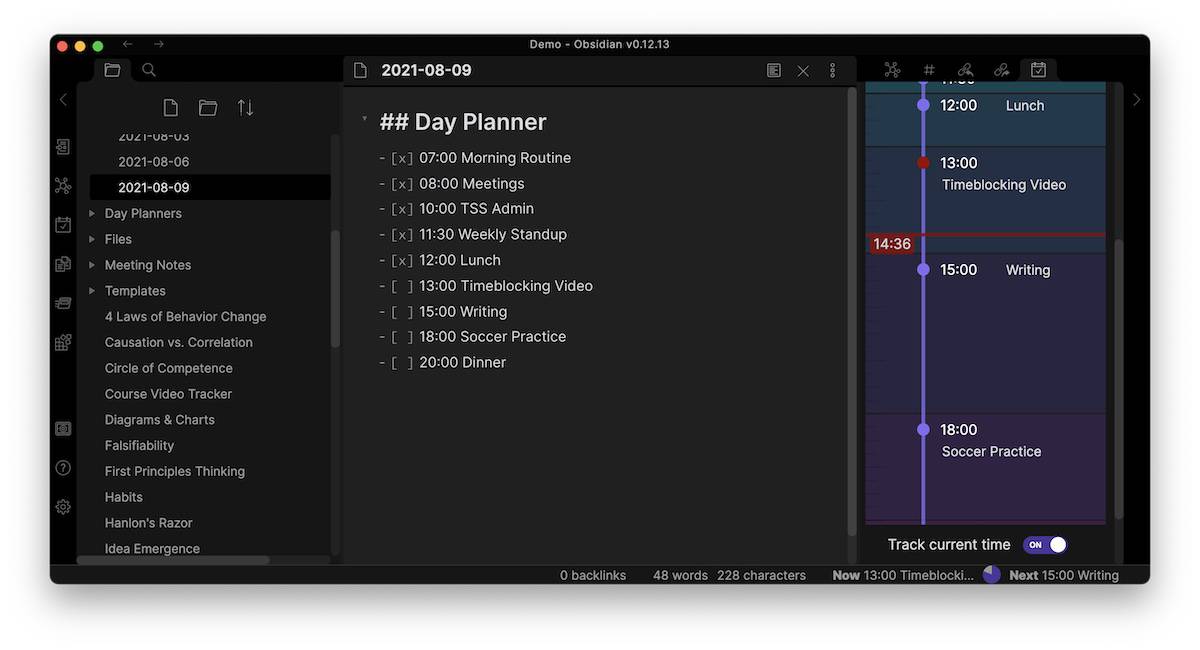
When we have Track Current Time toggled on, the red bar will automatically adjust to the current time showing me only the appropriate information as we go about our day.