Taking, Annotating, and Sharing Screenshots in iPadOS
In my piece earlier this week discussing some initial thoughts of the iPadOS public beta, I had this to say about taking screenshots:
Did anyone ever think screenshots would become such an extraordinary feature used by so many? I often receive screenshots of emails or links in Safari rather than the actual email or link itself. To me, taking and sharing screenshots is somewhat of a “hack” feature that has turned mainstream, and Apple is fully embracing the hack by making it a feature.
I’m not sure if screenshots are a “hack” per se, but I doubt Apple ever saw screenshots becoming such an ingrained way of sharing content with another person.
In iPadOS, Apple is taking its support of screenshots to a whole new level. Let’s dig into the ins and outs of how to take, annotate, and share a screenshot in the new iPadOS public beta.
Taking Screenshots
The old way of pressing the Sleep + Volume Up buttons at the same time still exists for taking screenshots in iPadOS. This behavior is very much engrained at this point, so there’s no sense in changing a good thing.
However, there is one new way to snap a screenshot in iPadOS: you can take your Apple Pencil and drag up from the bottom left corner to the right into the screenshot markup screen. The behavior of the Apple Pencil gesture is the same as the Command + Shift + 4 keyboard shortcut — instead of moving the screenshot into the bottom left corner awaiting your action, you move straight into markup mode.
Annotating Screenshots
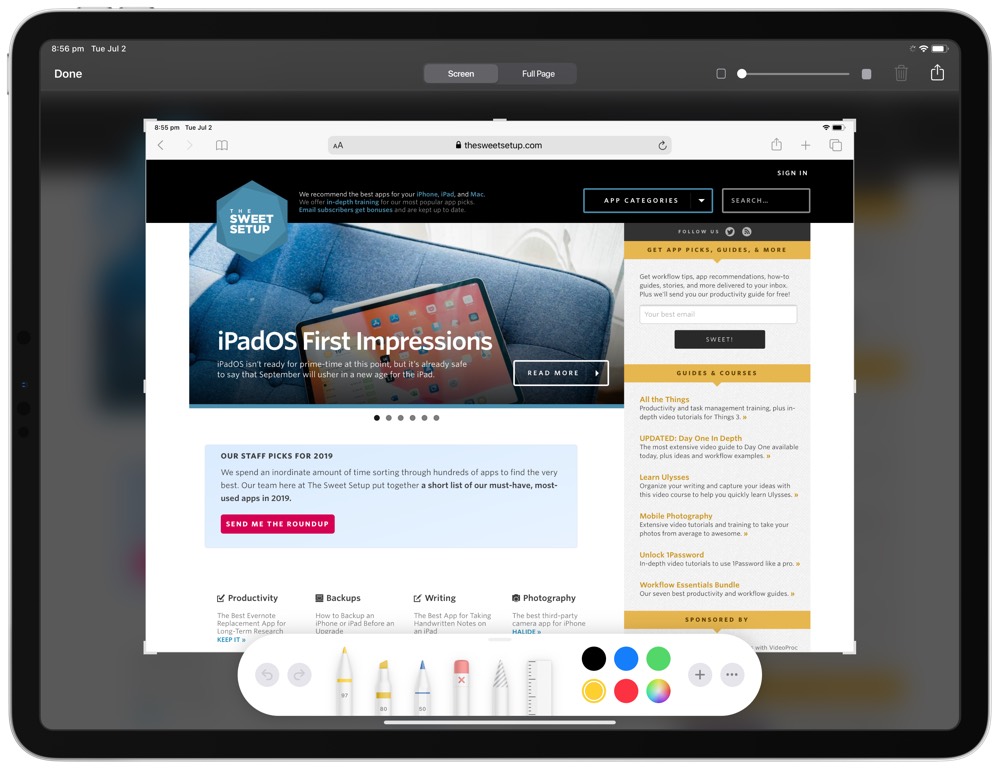
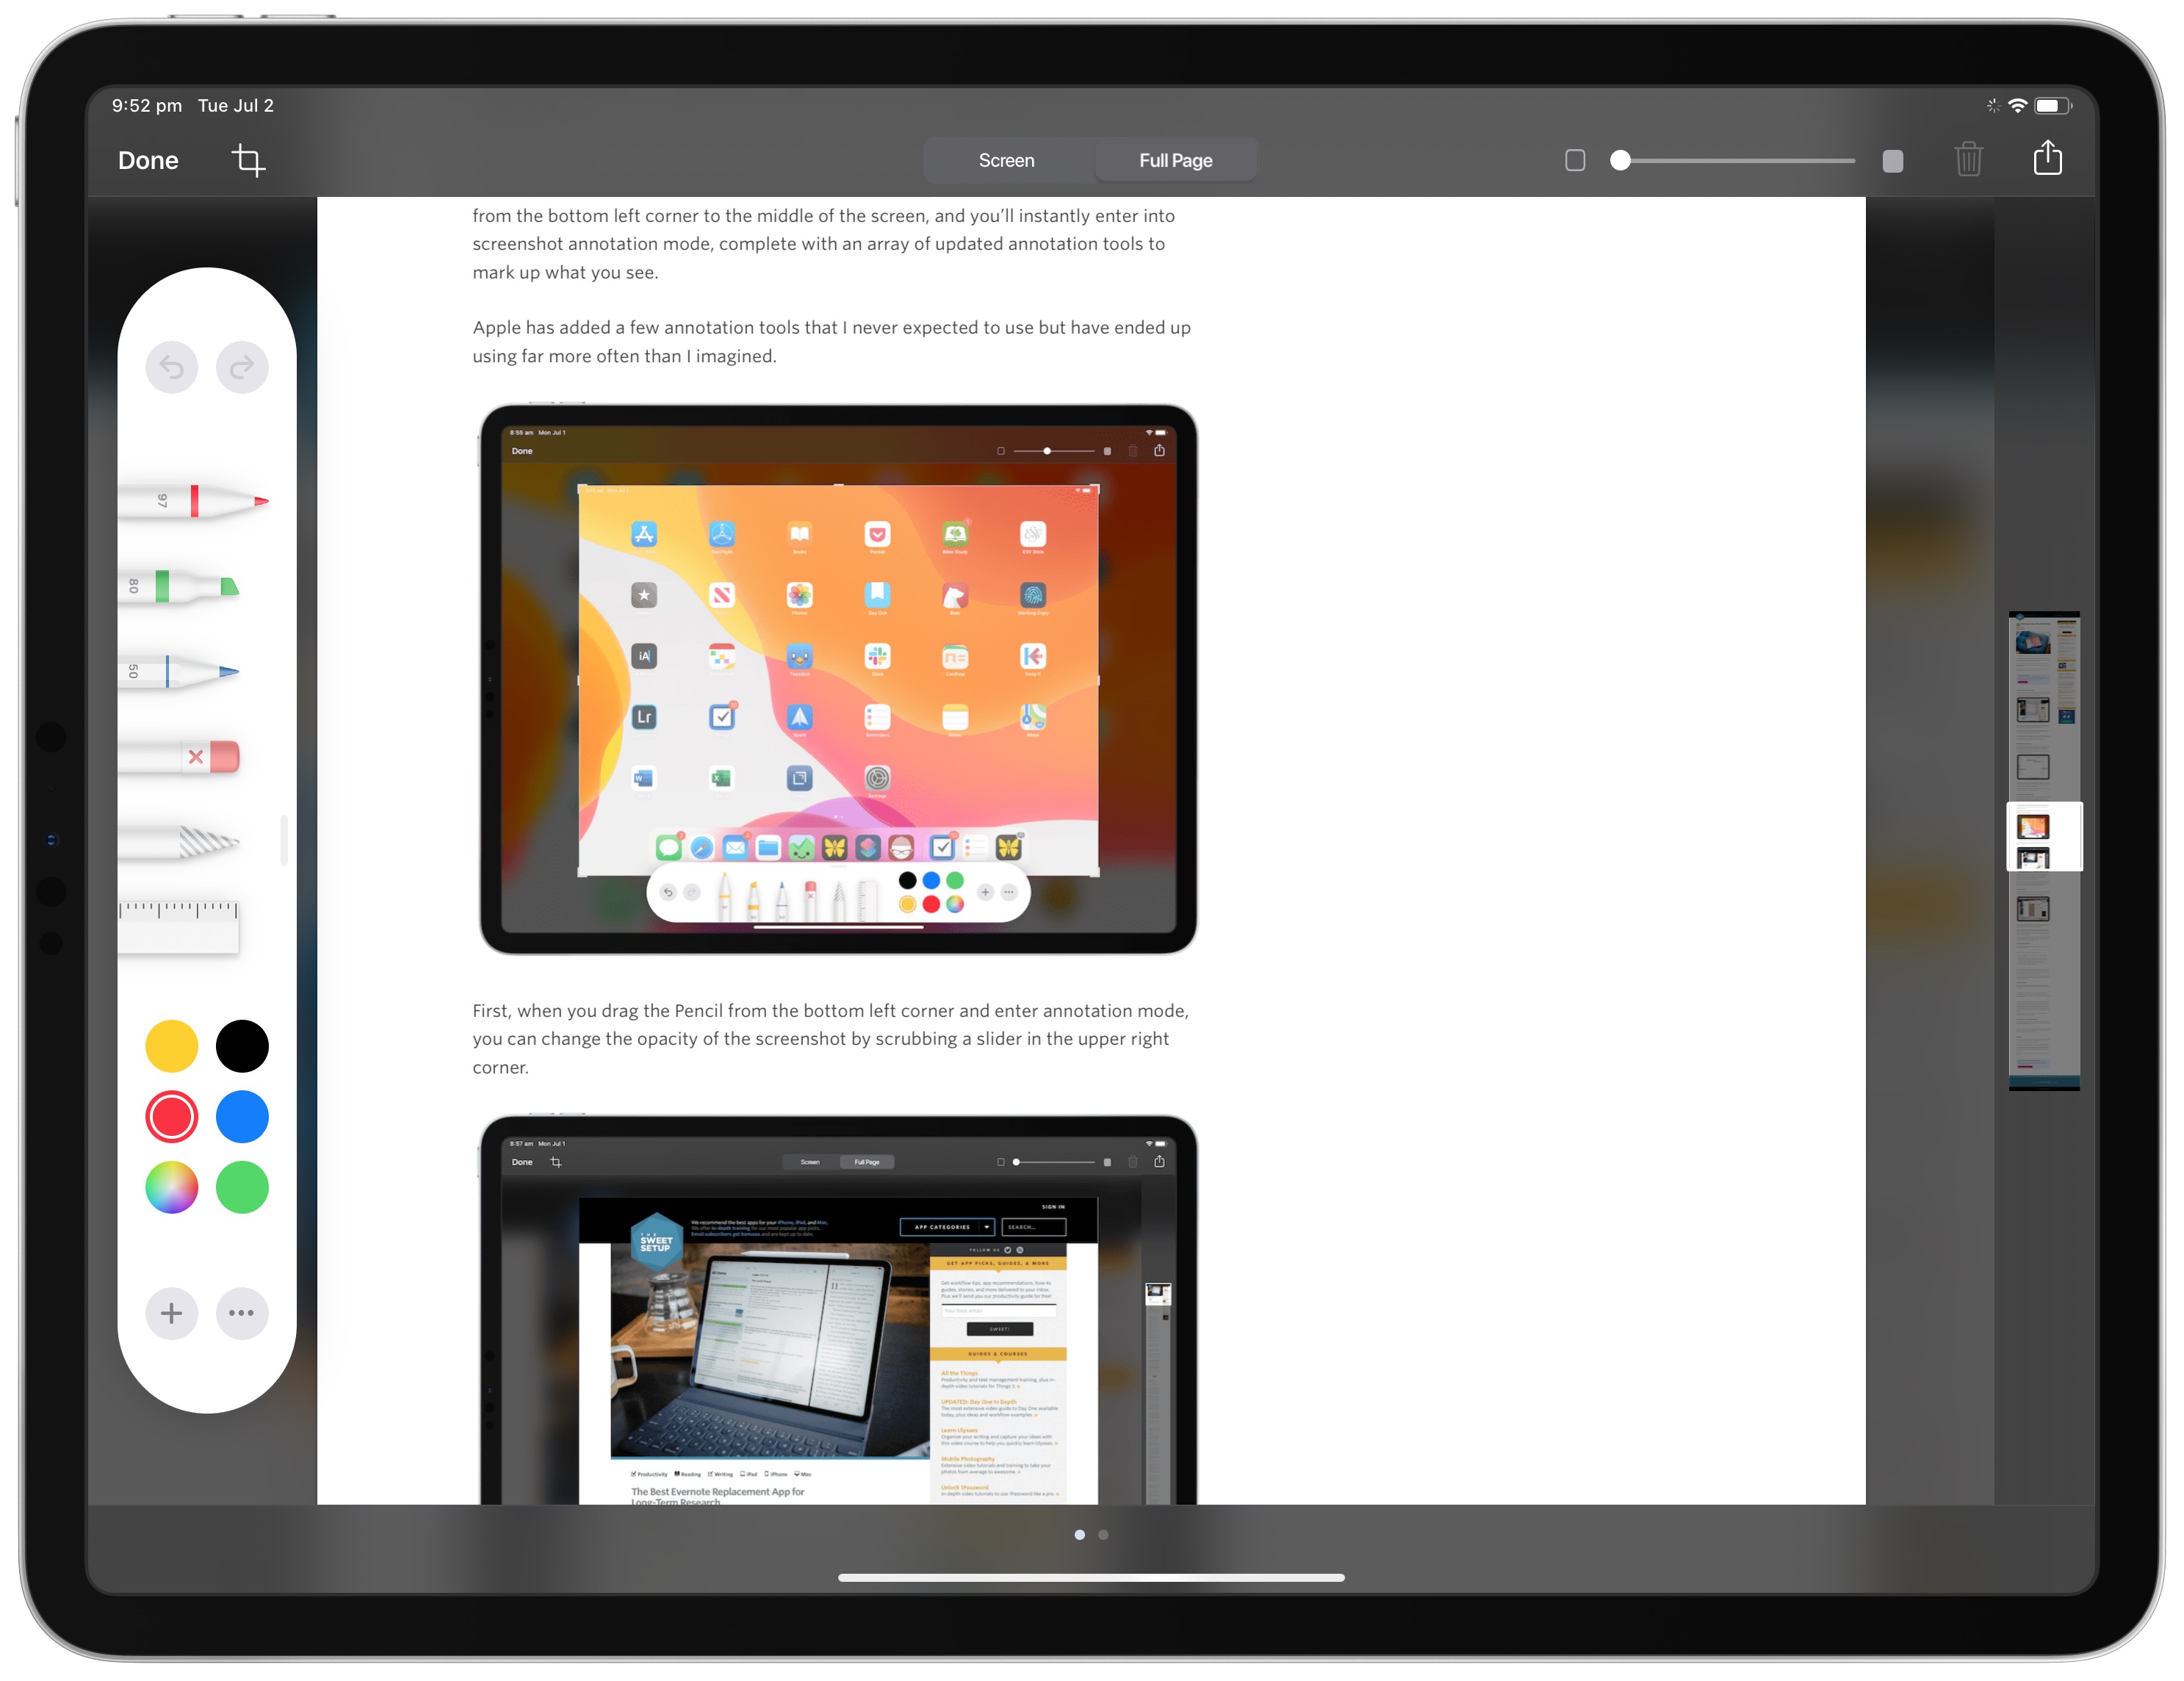
There are a range of new ways to annotate screenshots in iPadOS.
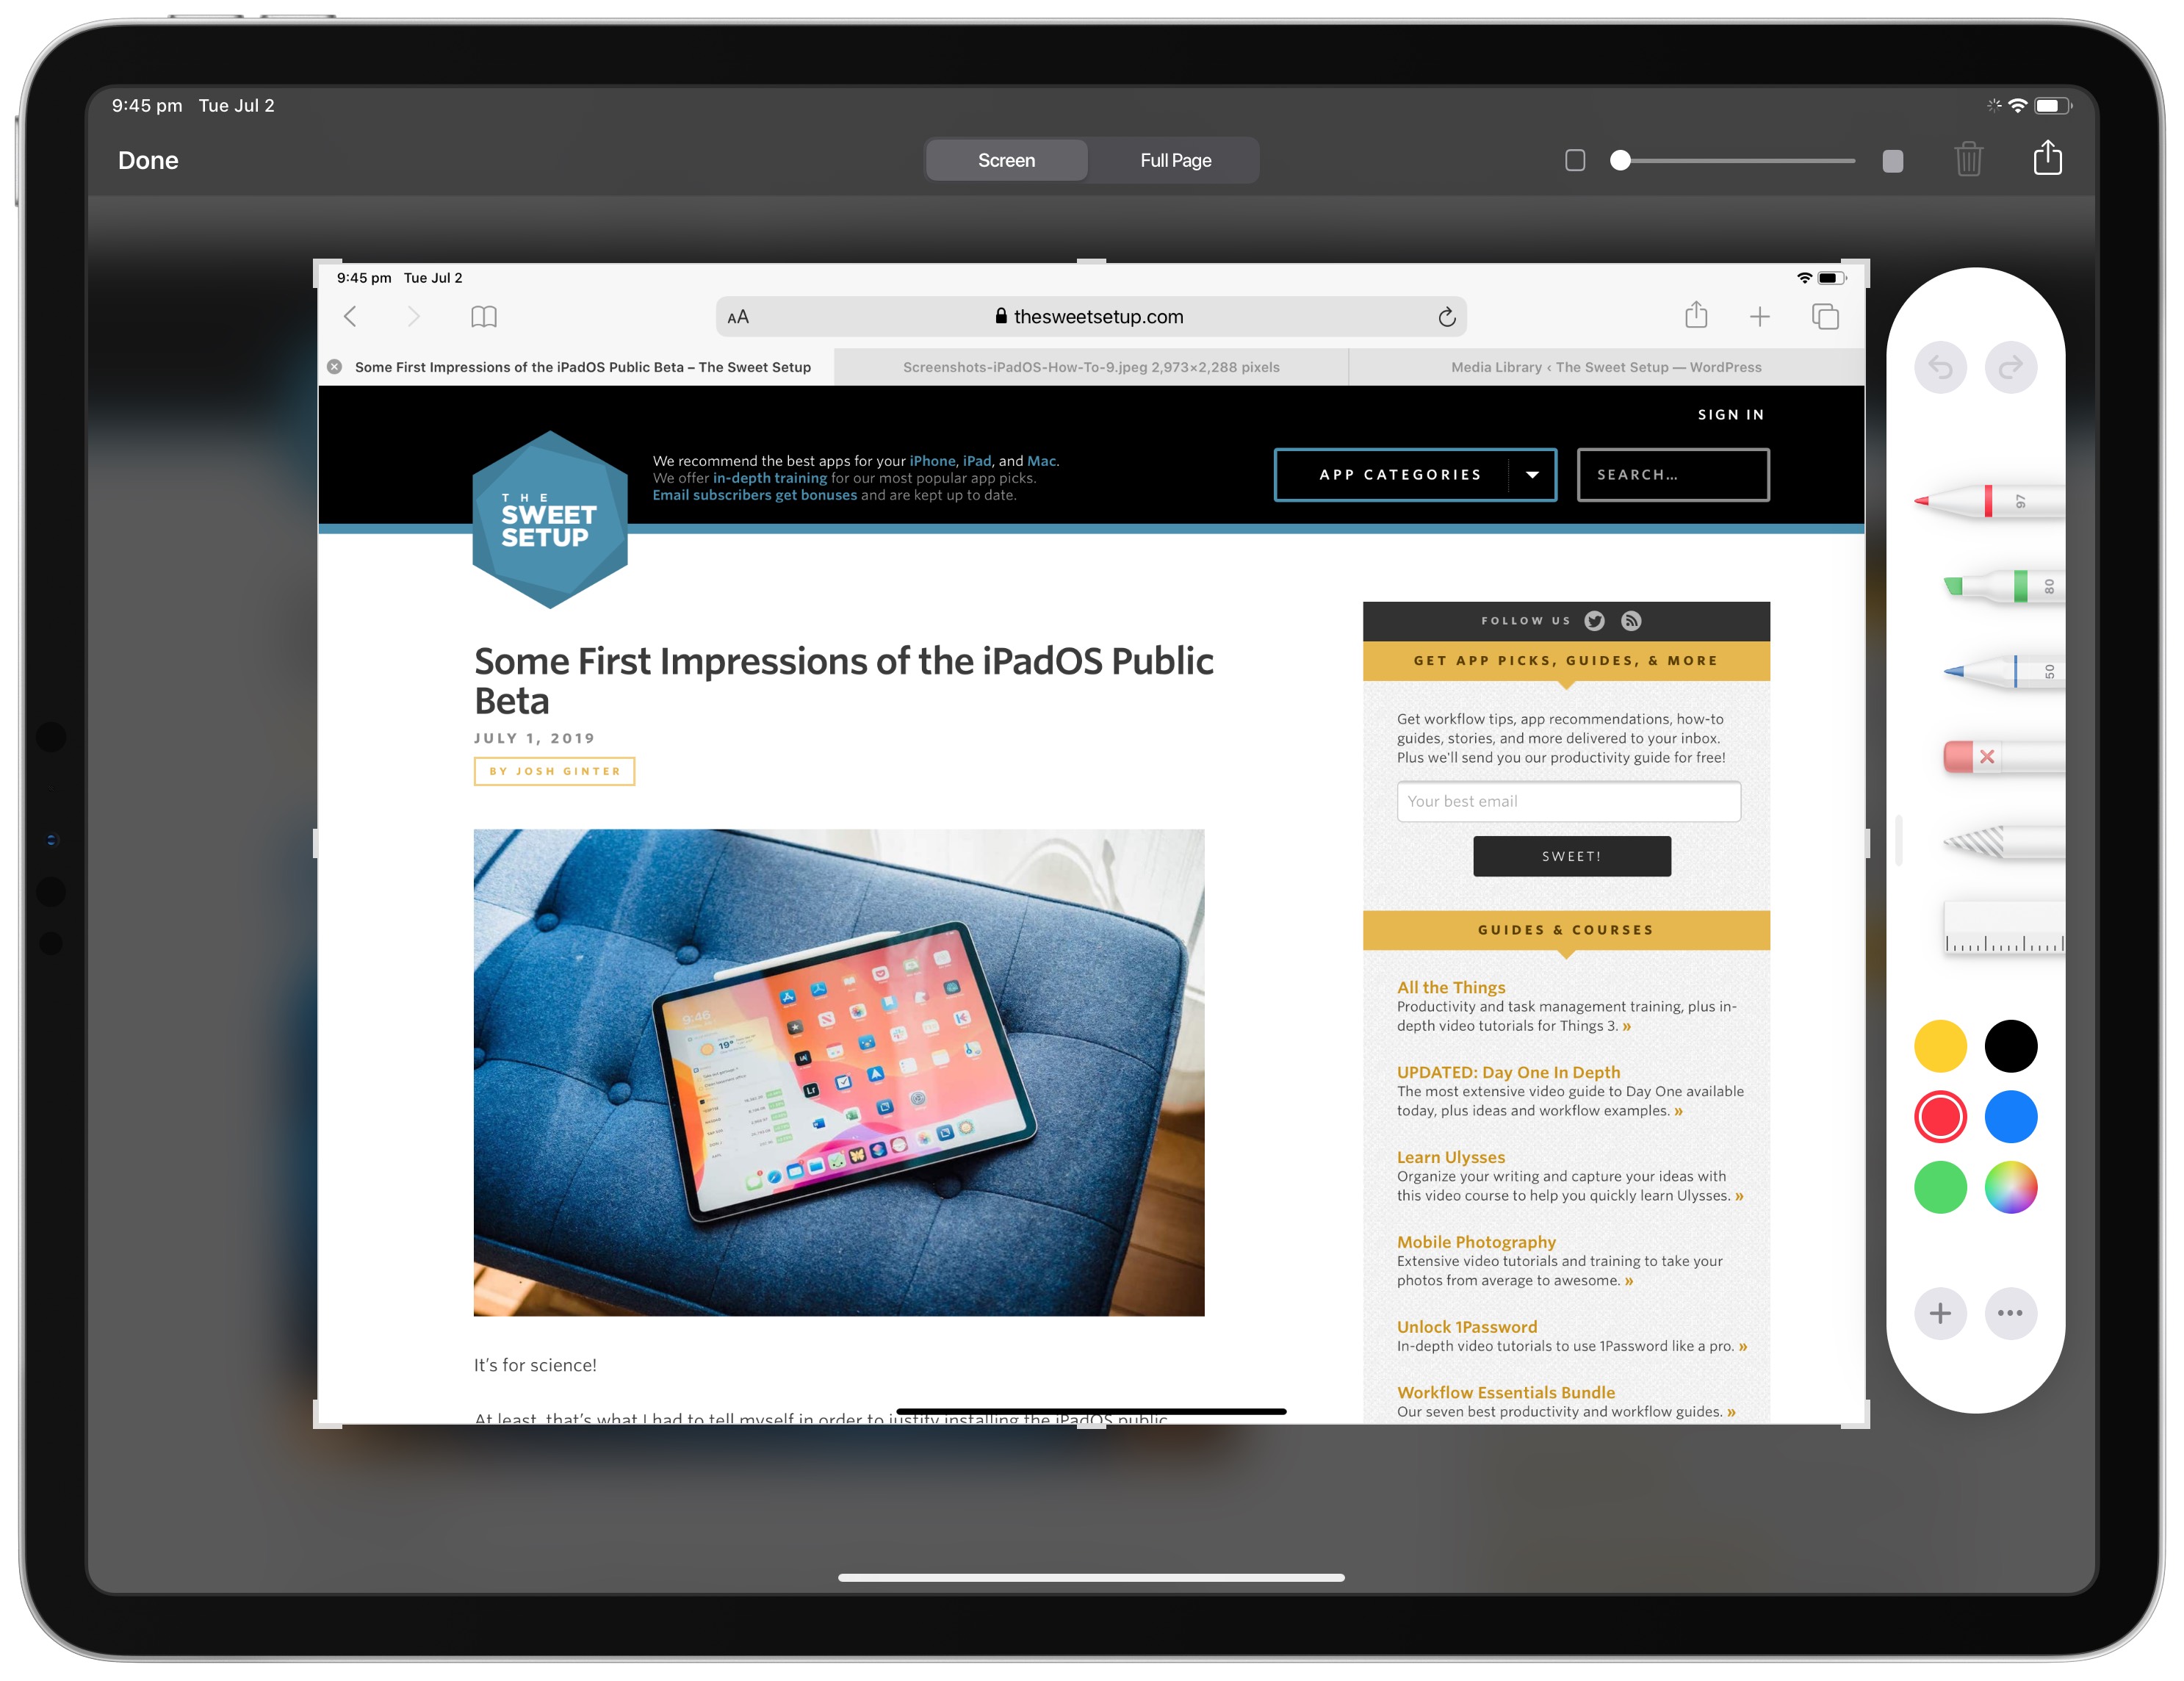
The first area you’ll notice is the updated tool palette for directly marking up your screenshot. Double-tap any of the tools to bring up a quick contextual menu to change the thickness of your pen/marker/highlighter, the opacity of your tool, and more. There’s also a great multi-color wheel picker to go beyond the five generic pen colors provided.
Second, you’ll notice an opacity slider in the upper right corner. Slide right to decrease the opacity of your screenshot and slide left to move back towards full opacity.
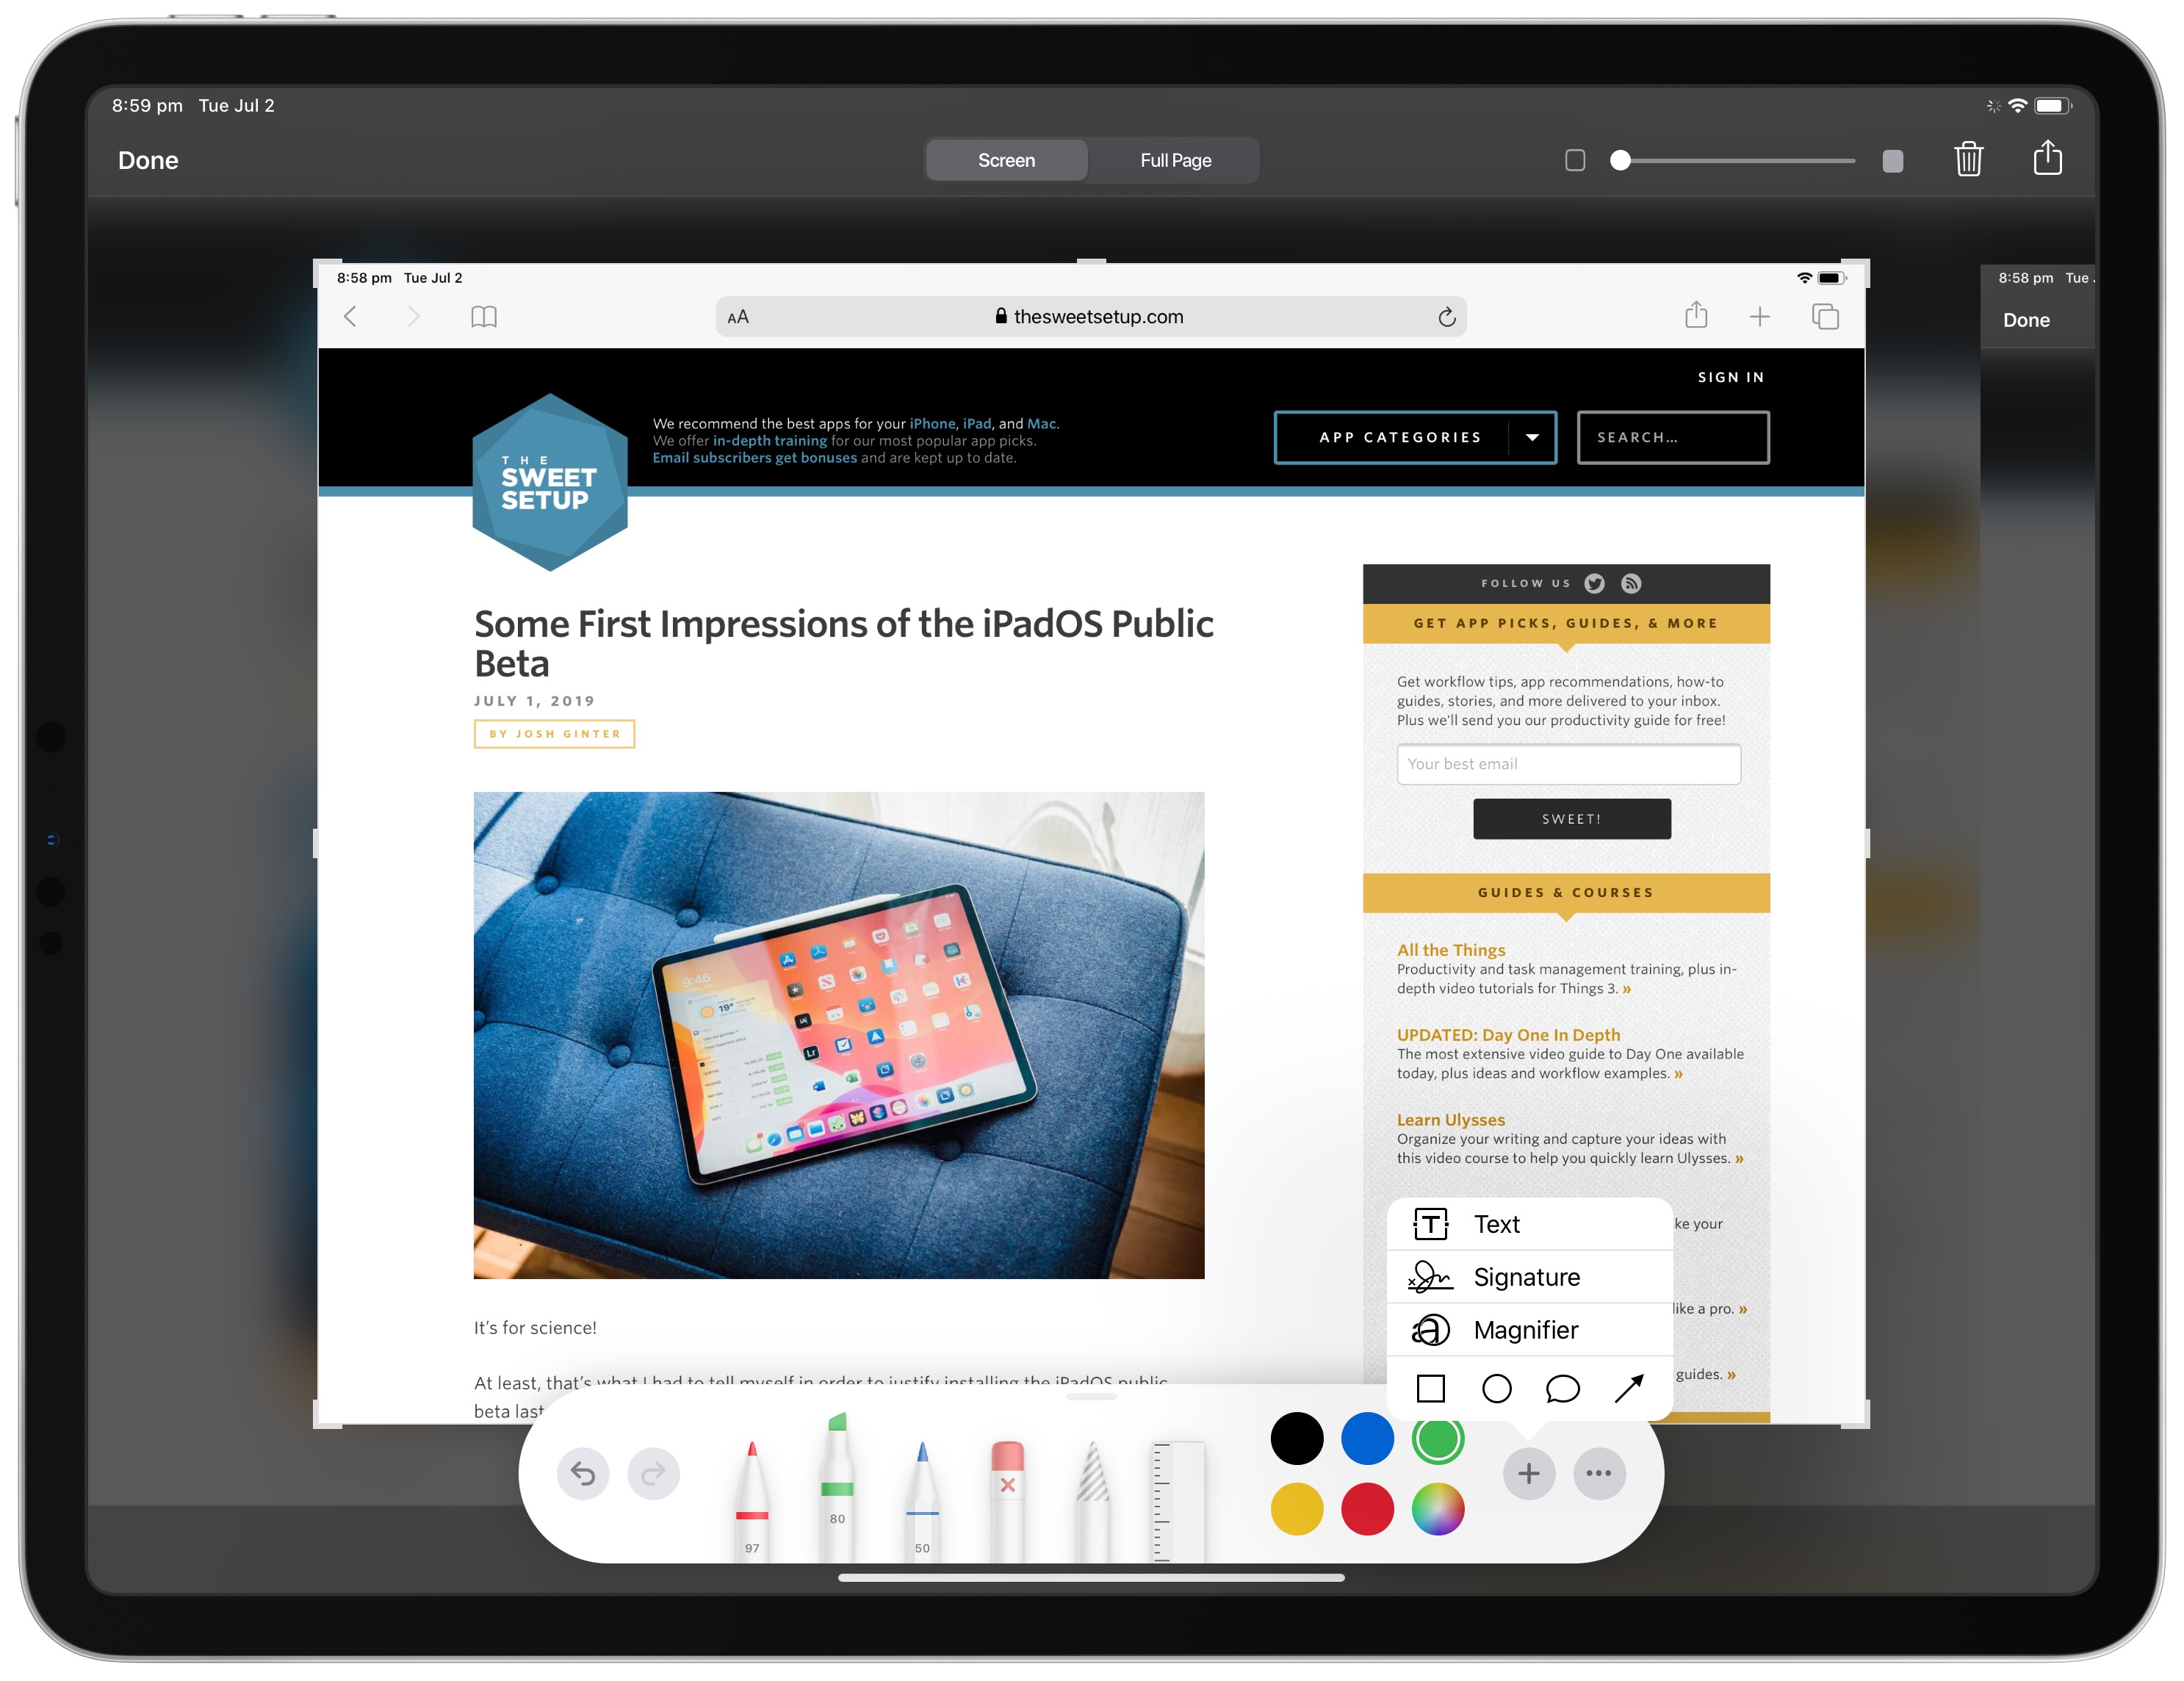
Beside the pen color swatches, you’ll see a new “+” button to add some new elements to your screenshots. Tap this button and you can quickly add:
- A text box
- Any of your saved signatures
- A magnifier to bring attention to a small area of the screenshot
- Any of the predefined shapes
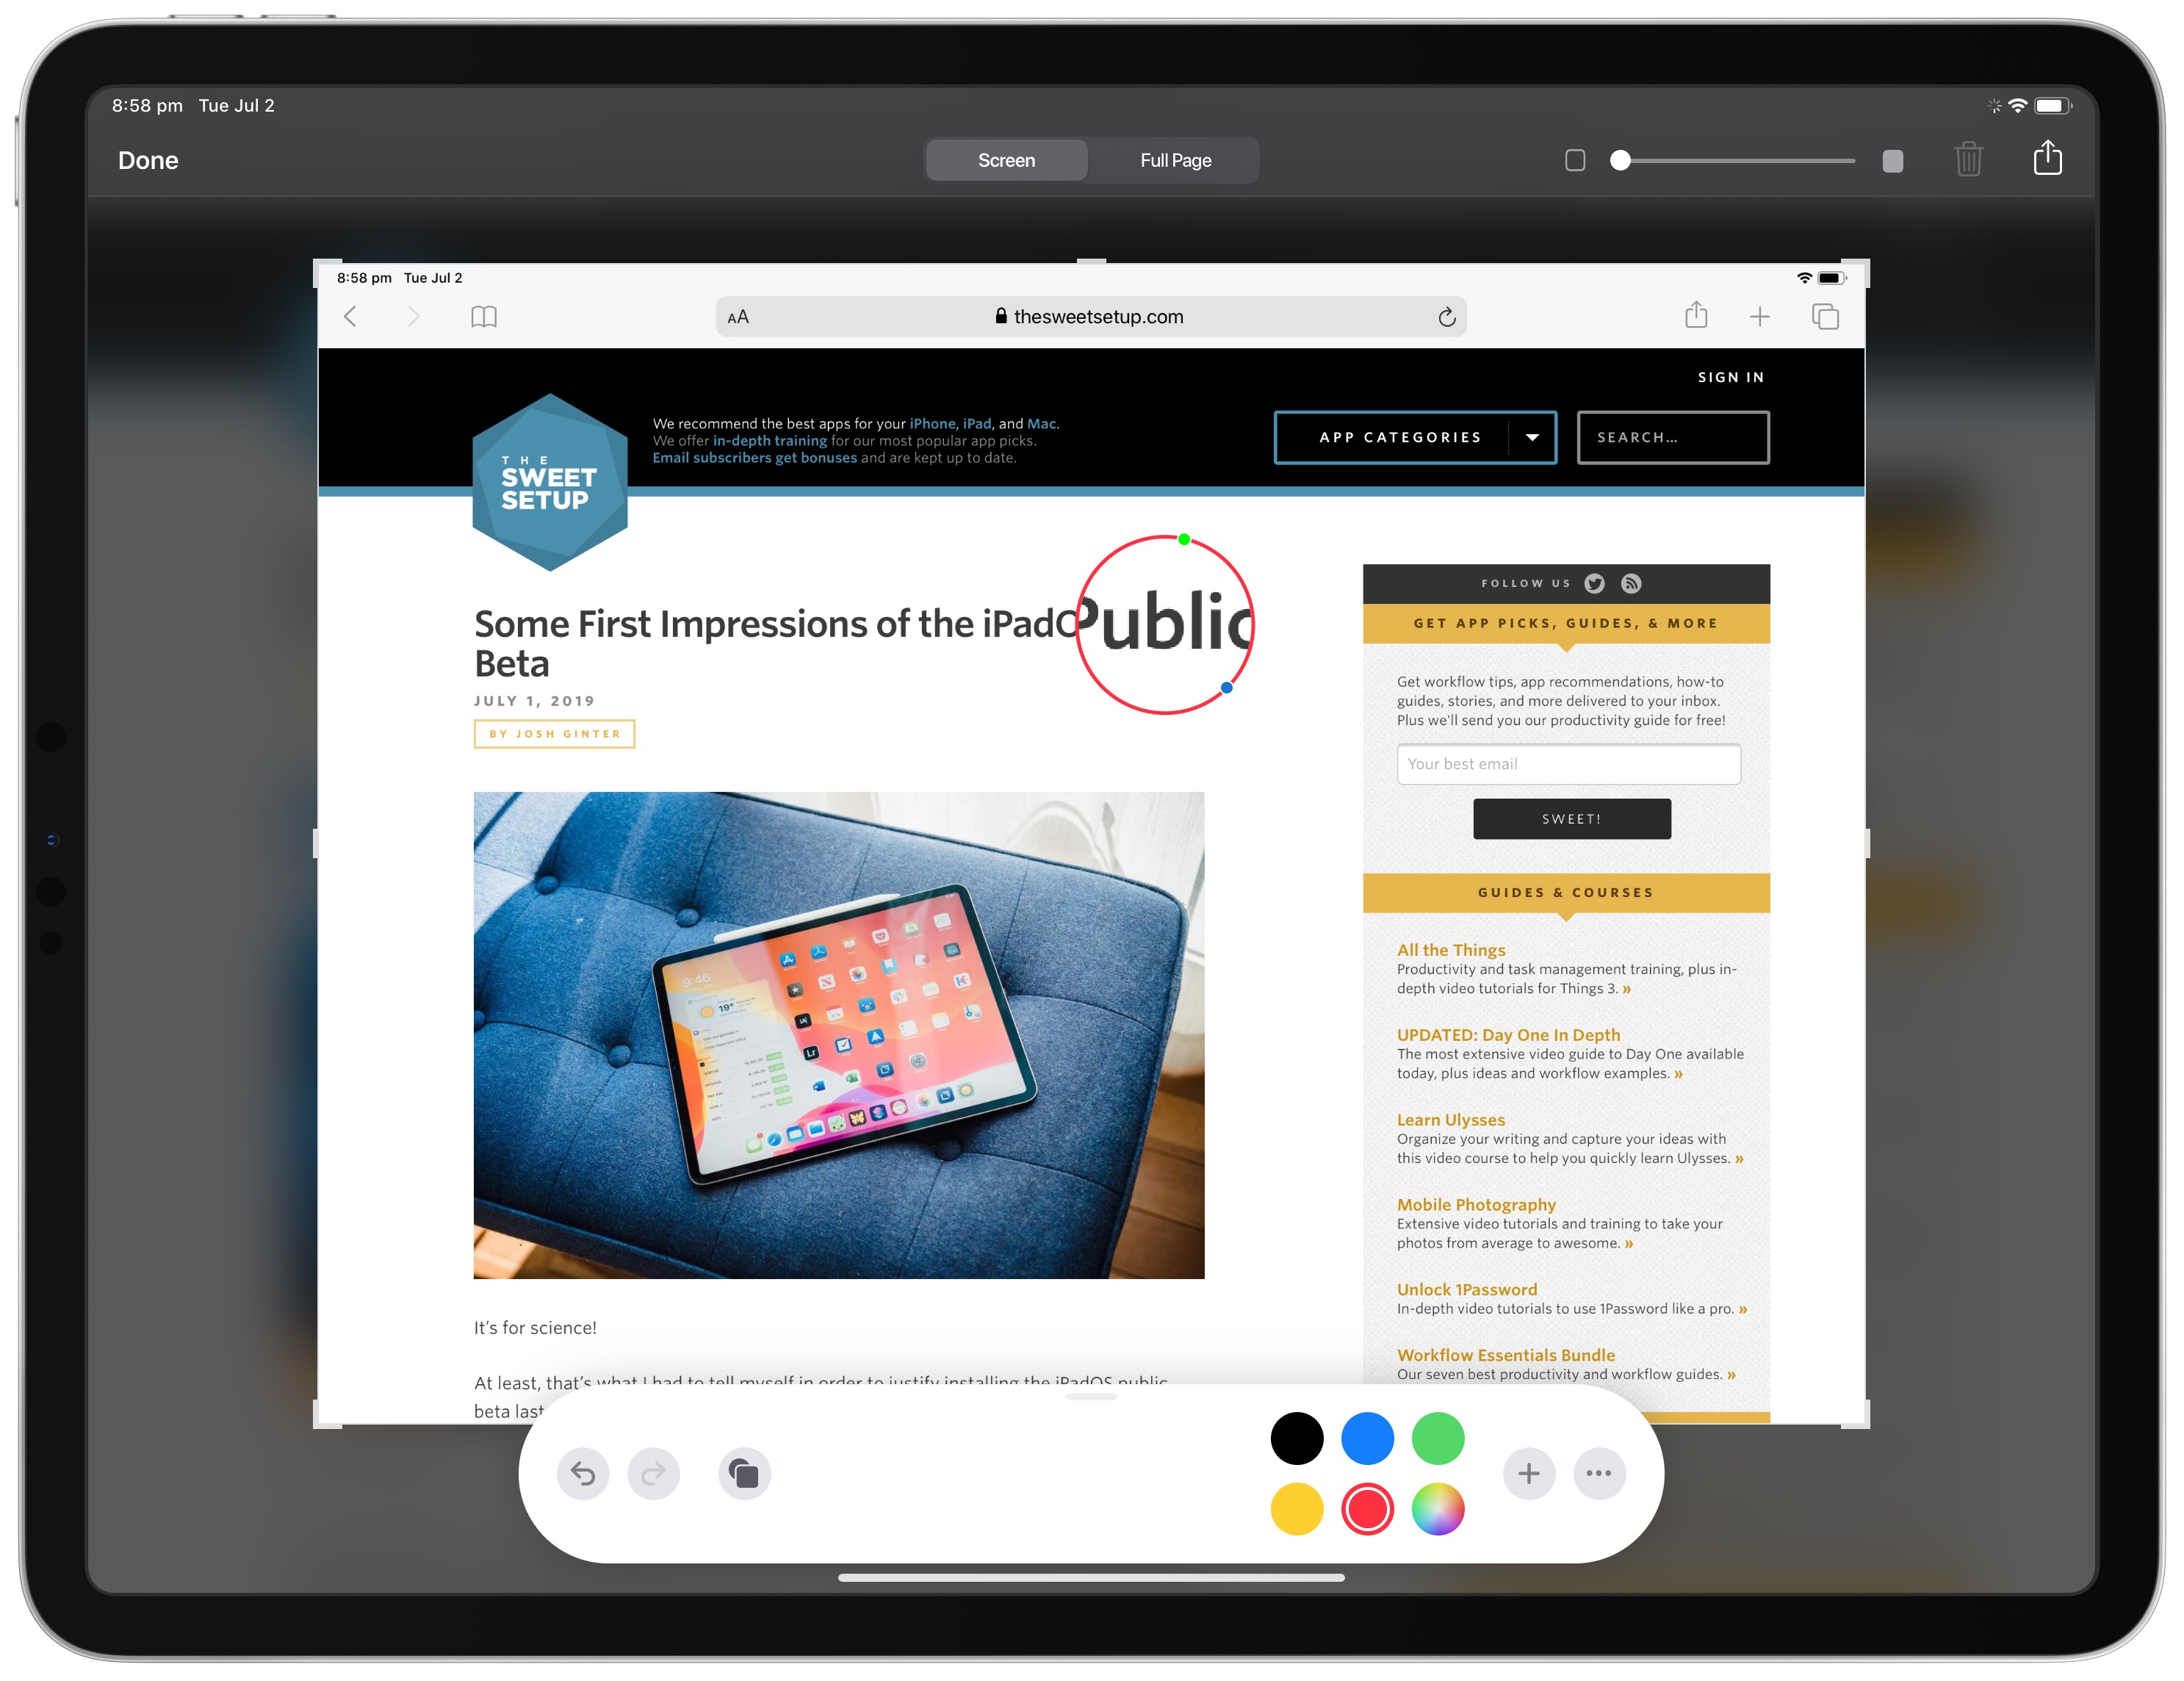
These predefined tools highlight how the majority of people use screenshots. Generally a screenshot is taken to call attention to a specific element on the screen, so tools like the magnifier, predefined shapes and arrows, and text boxes are going to be heavily used by many people.
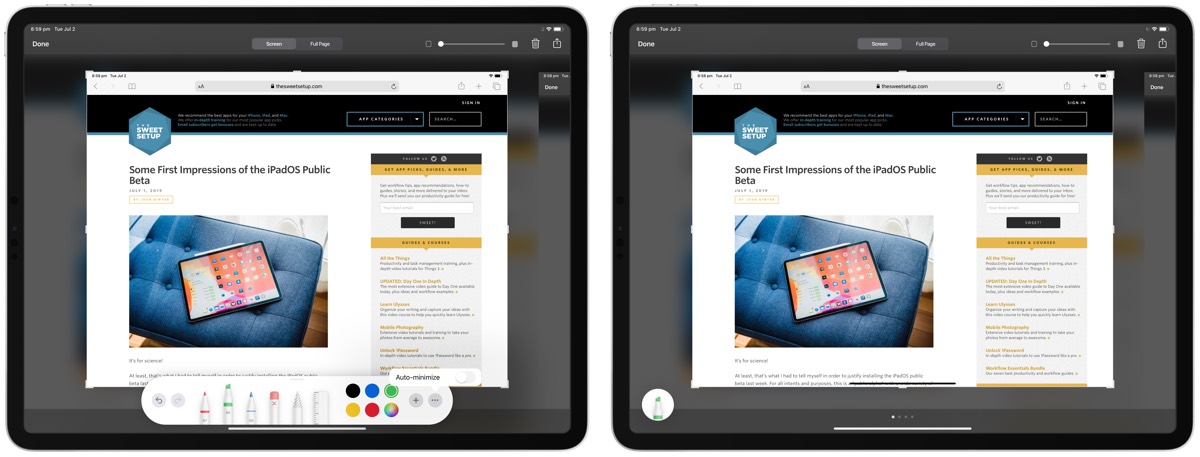
The tool palette at the bottom has a new option in the “…” menu to auto-minimize — once you have chosen a tool to use, the palette shrinks itself into a small round button in the bottom-left corner of the screen.
Both the expanded tool palette and minimized tool palette can now be moved to any outer edge of the screen, allowing both left-handed and right-handed Apple Pencil users to move the palette wherever they find it most comfortable.
Taking Full-Page Screenshots
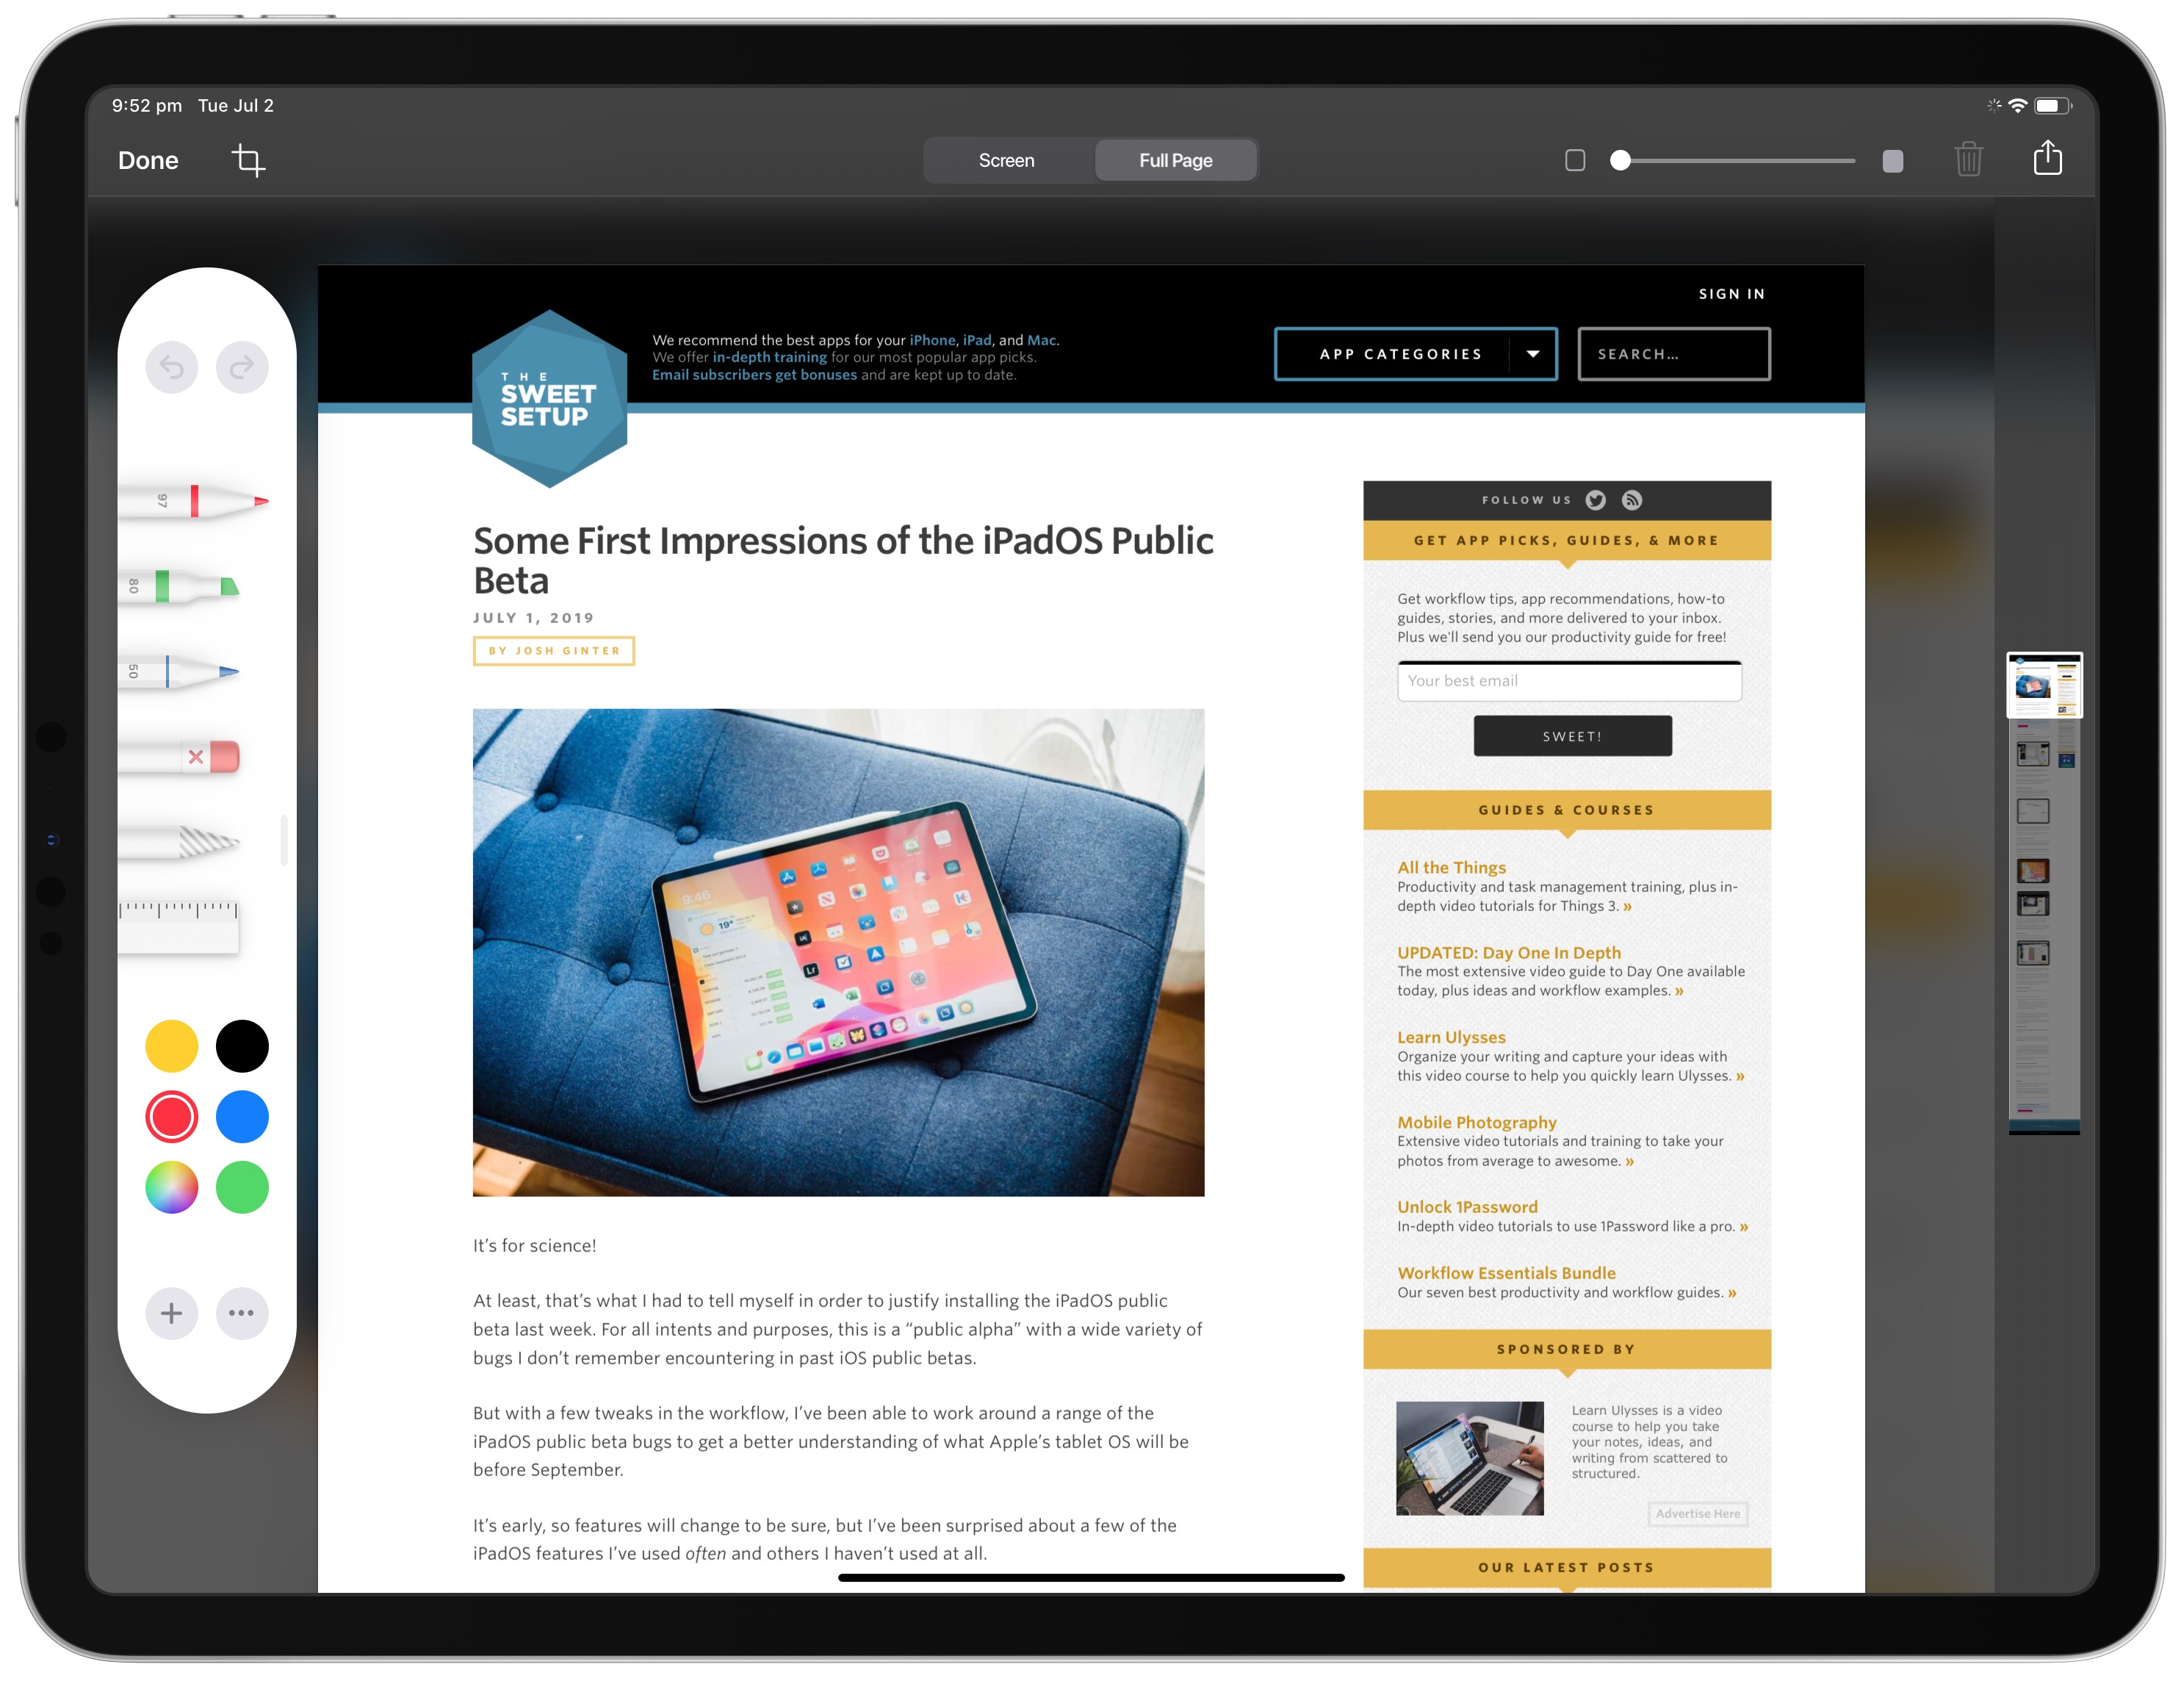
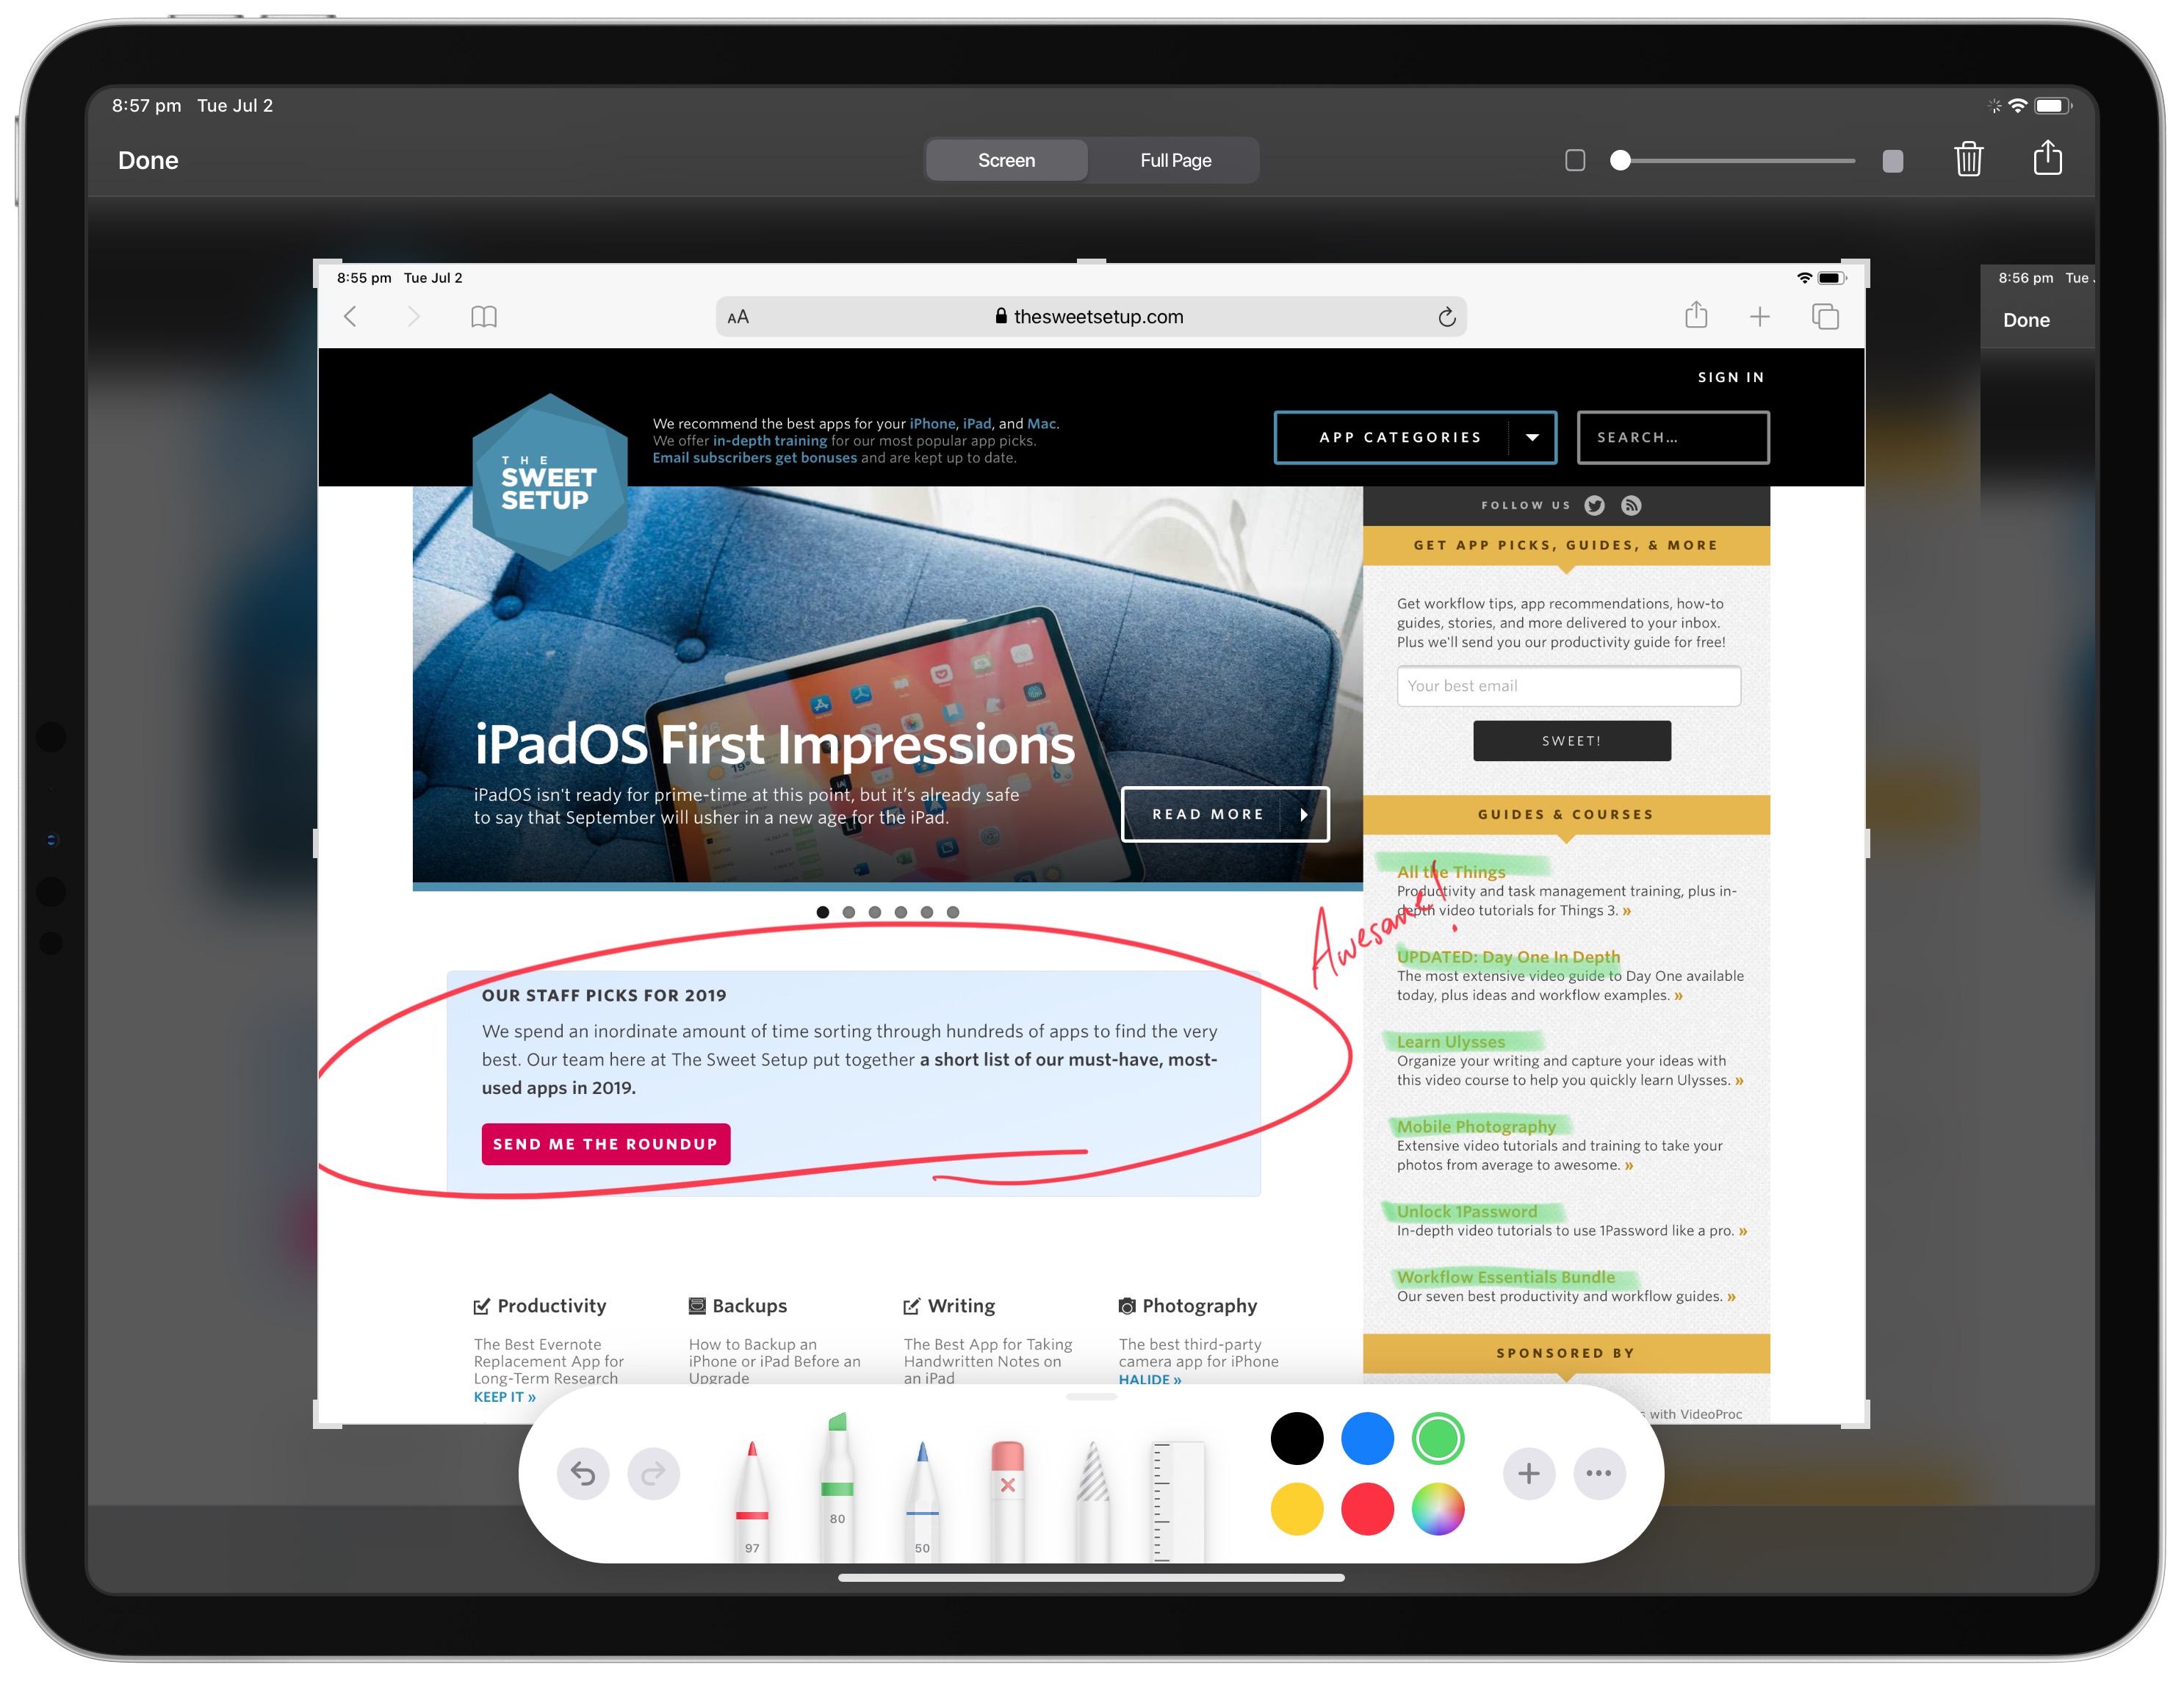
New in iPadOS, and specific to Safari, the new screenshot features provide the ability to save an entire webpage as a PDF document. Once the iPad has determined you’ve snapped a screenshot of a webpage in Safari, the option to save the full page appears.
Once you’ve selected Full Page at the top, a document scrubber appears on the right side. You can use this scrubber to move quickly to a different part of the full webpage.
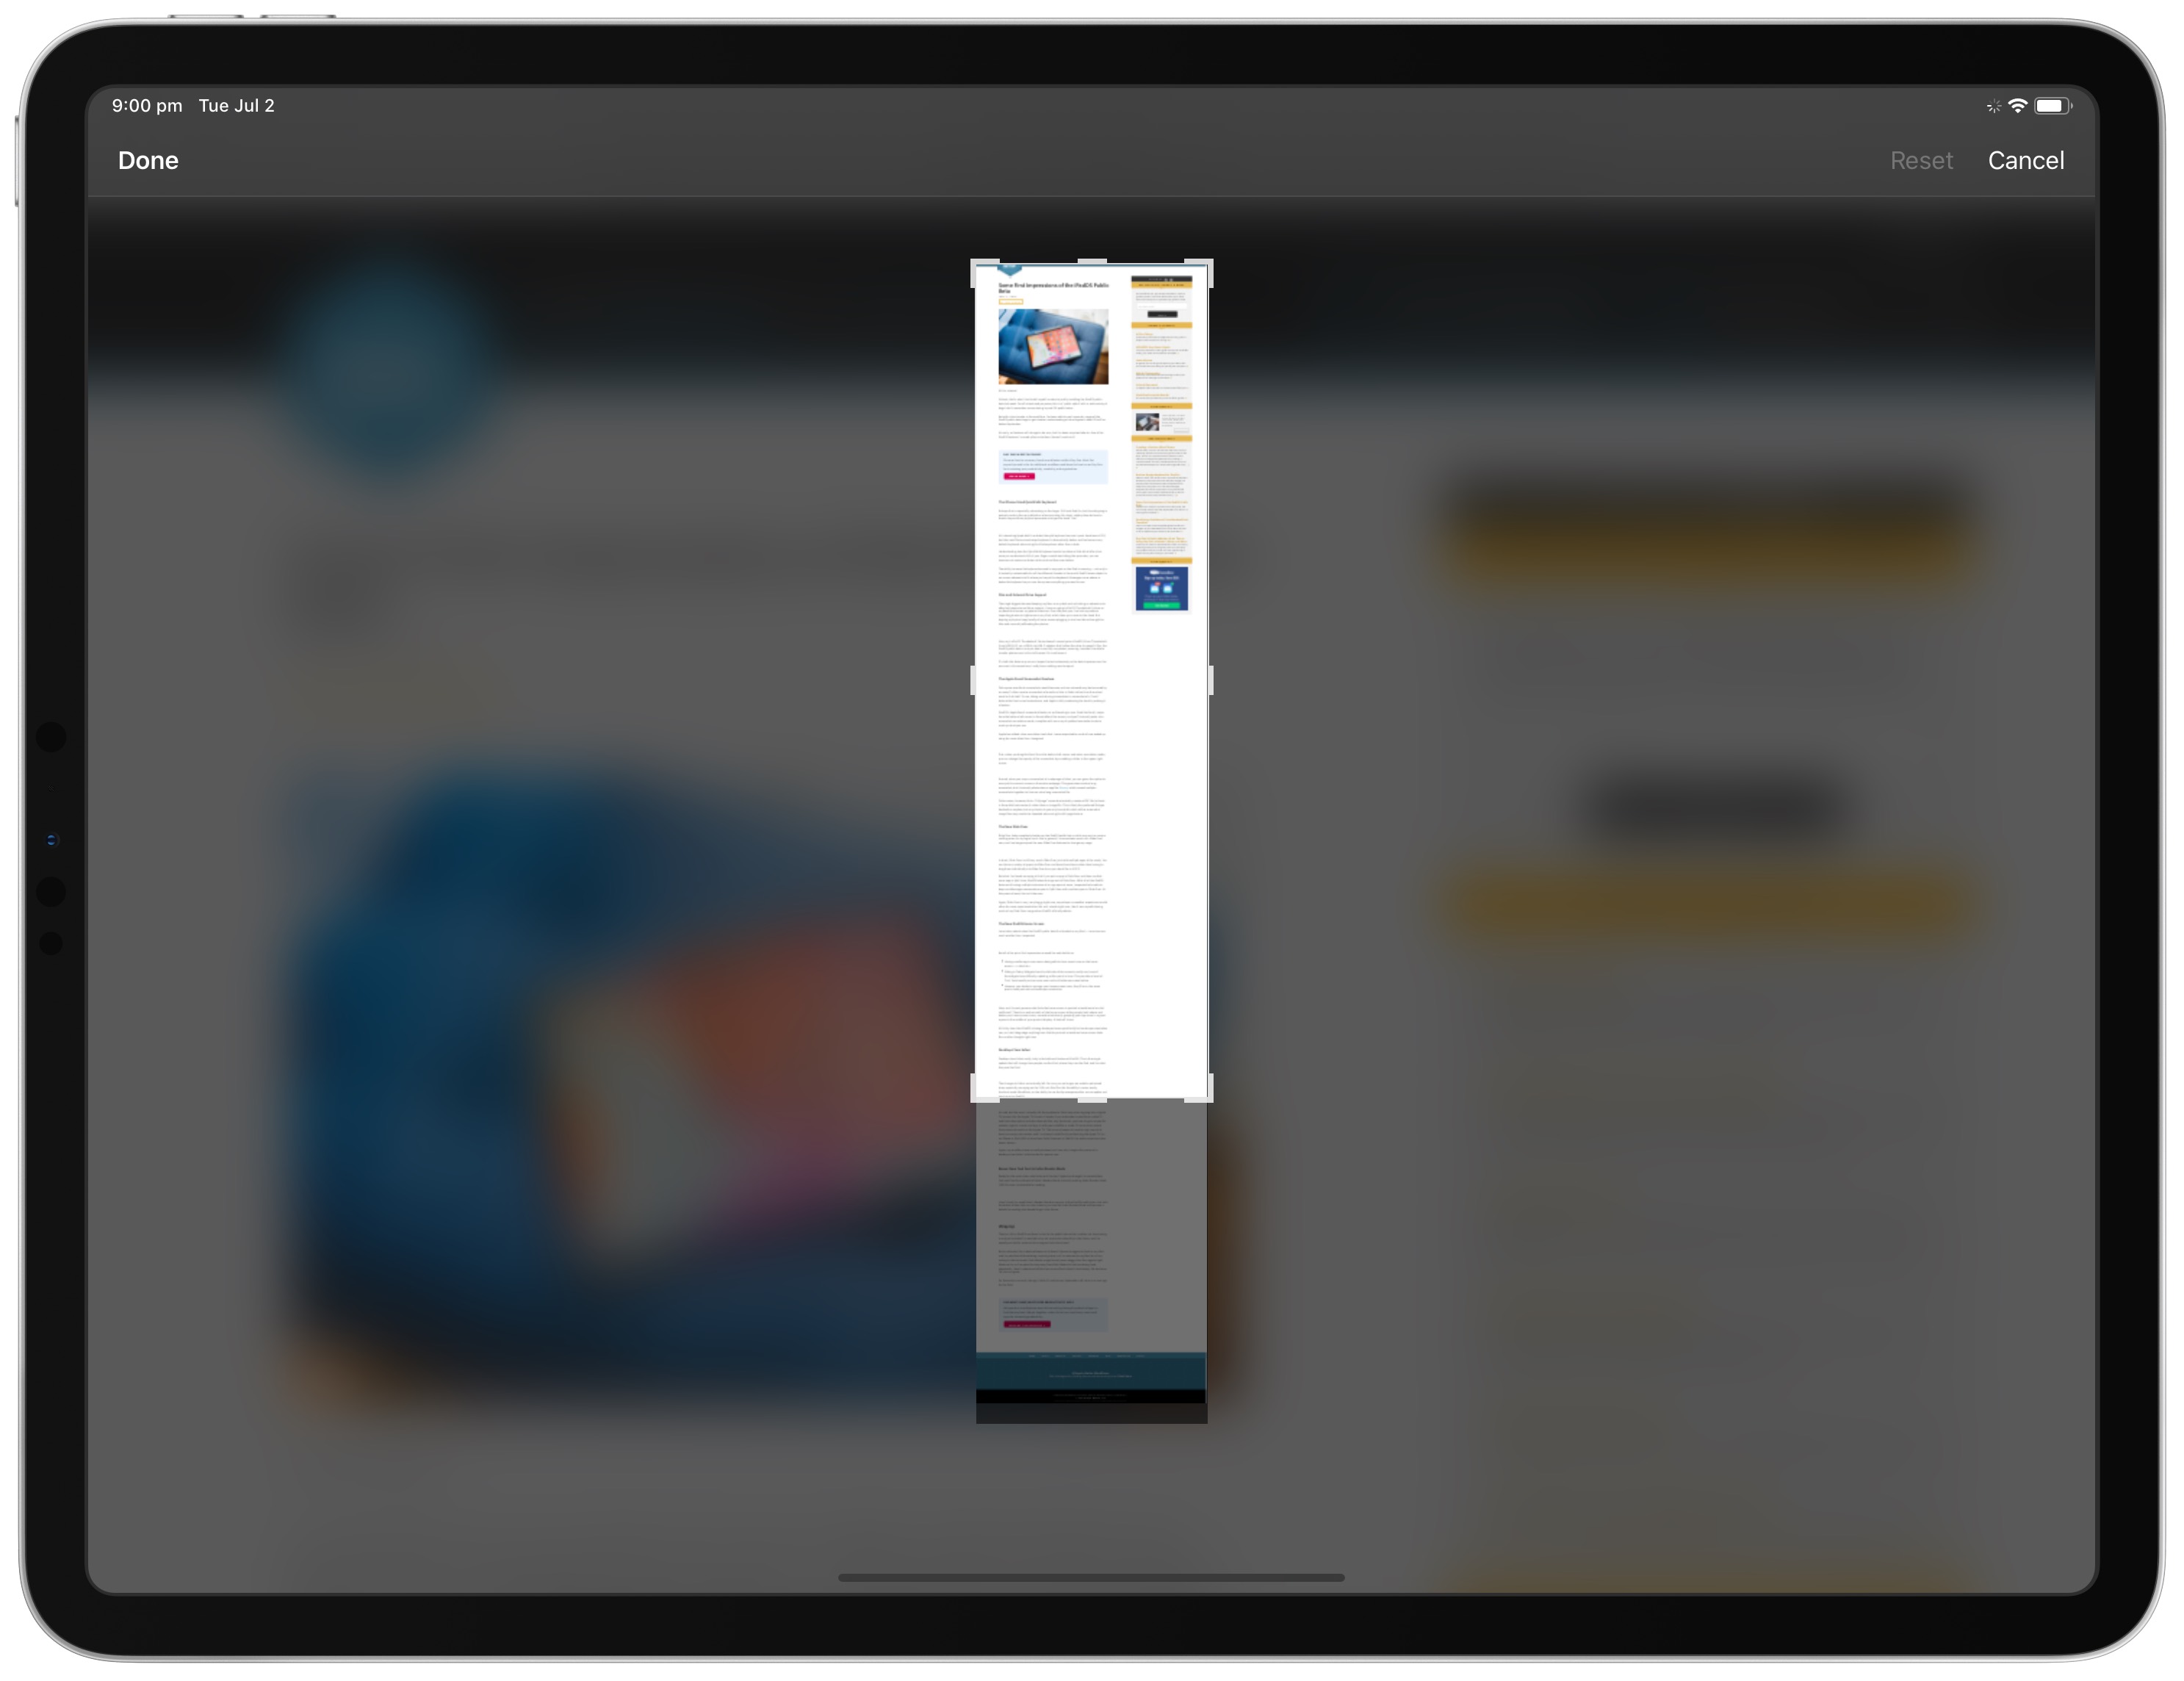
A crop tool also appears in the upper left corner of the screen once you’ve chosen the Full Page option. If you tap the crop tool, you are provided a full-length view of the webpage where you can crop out unwanted parts.
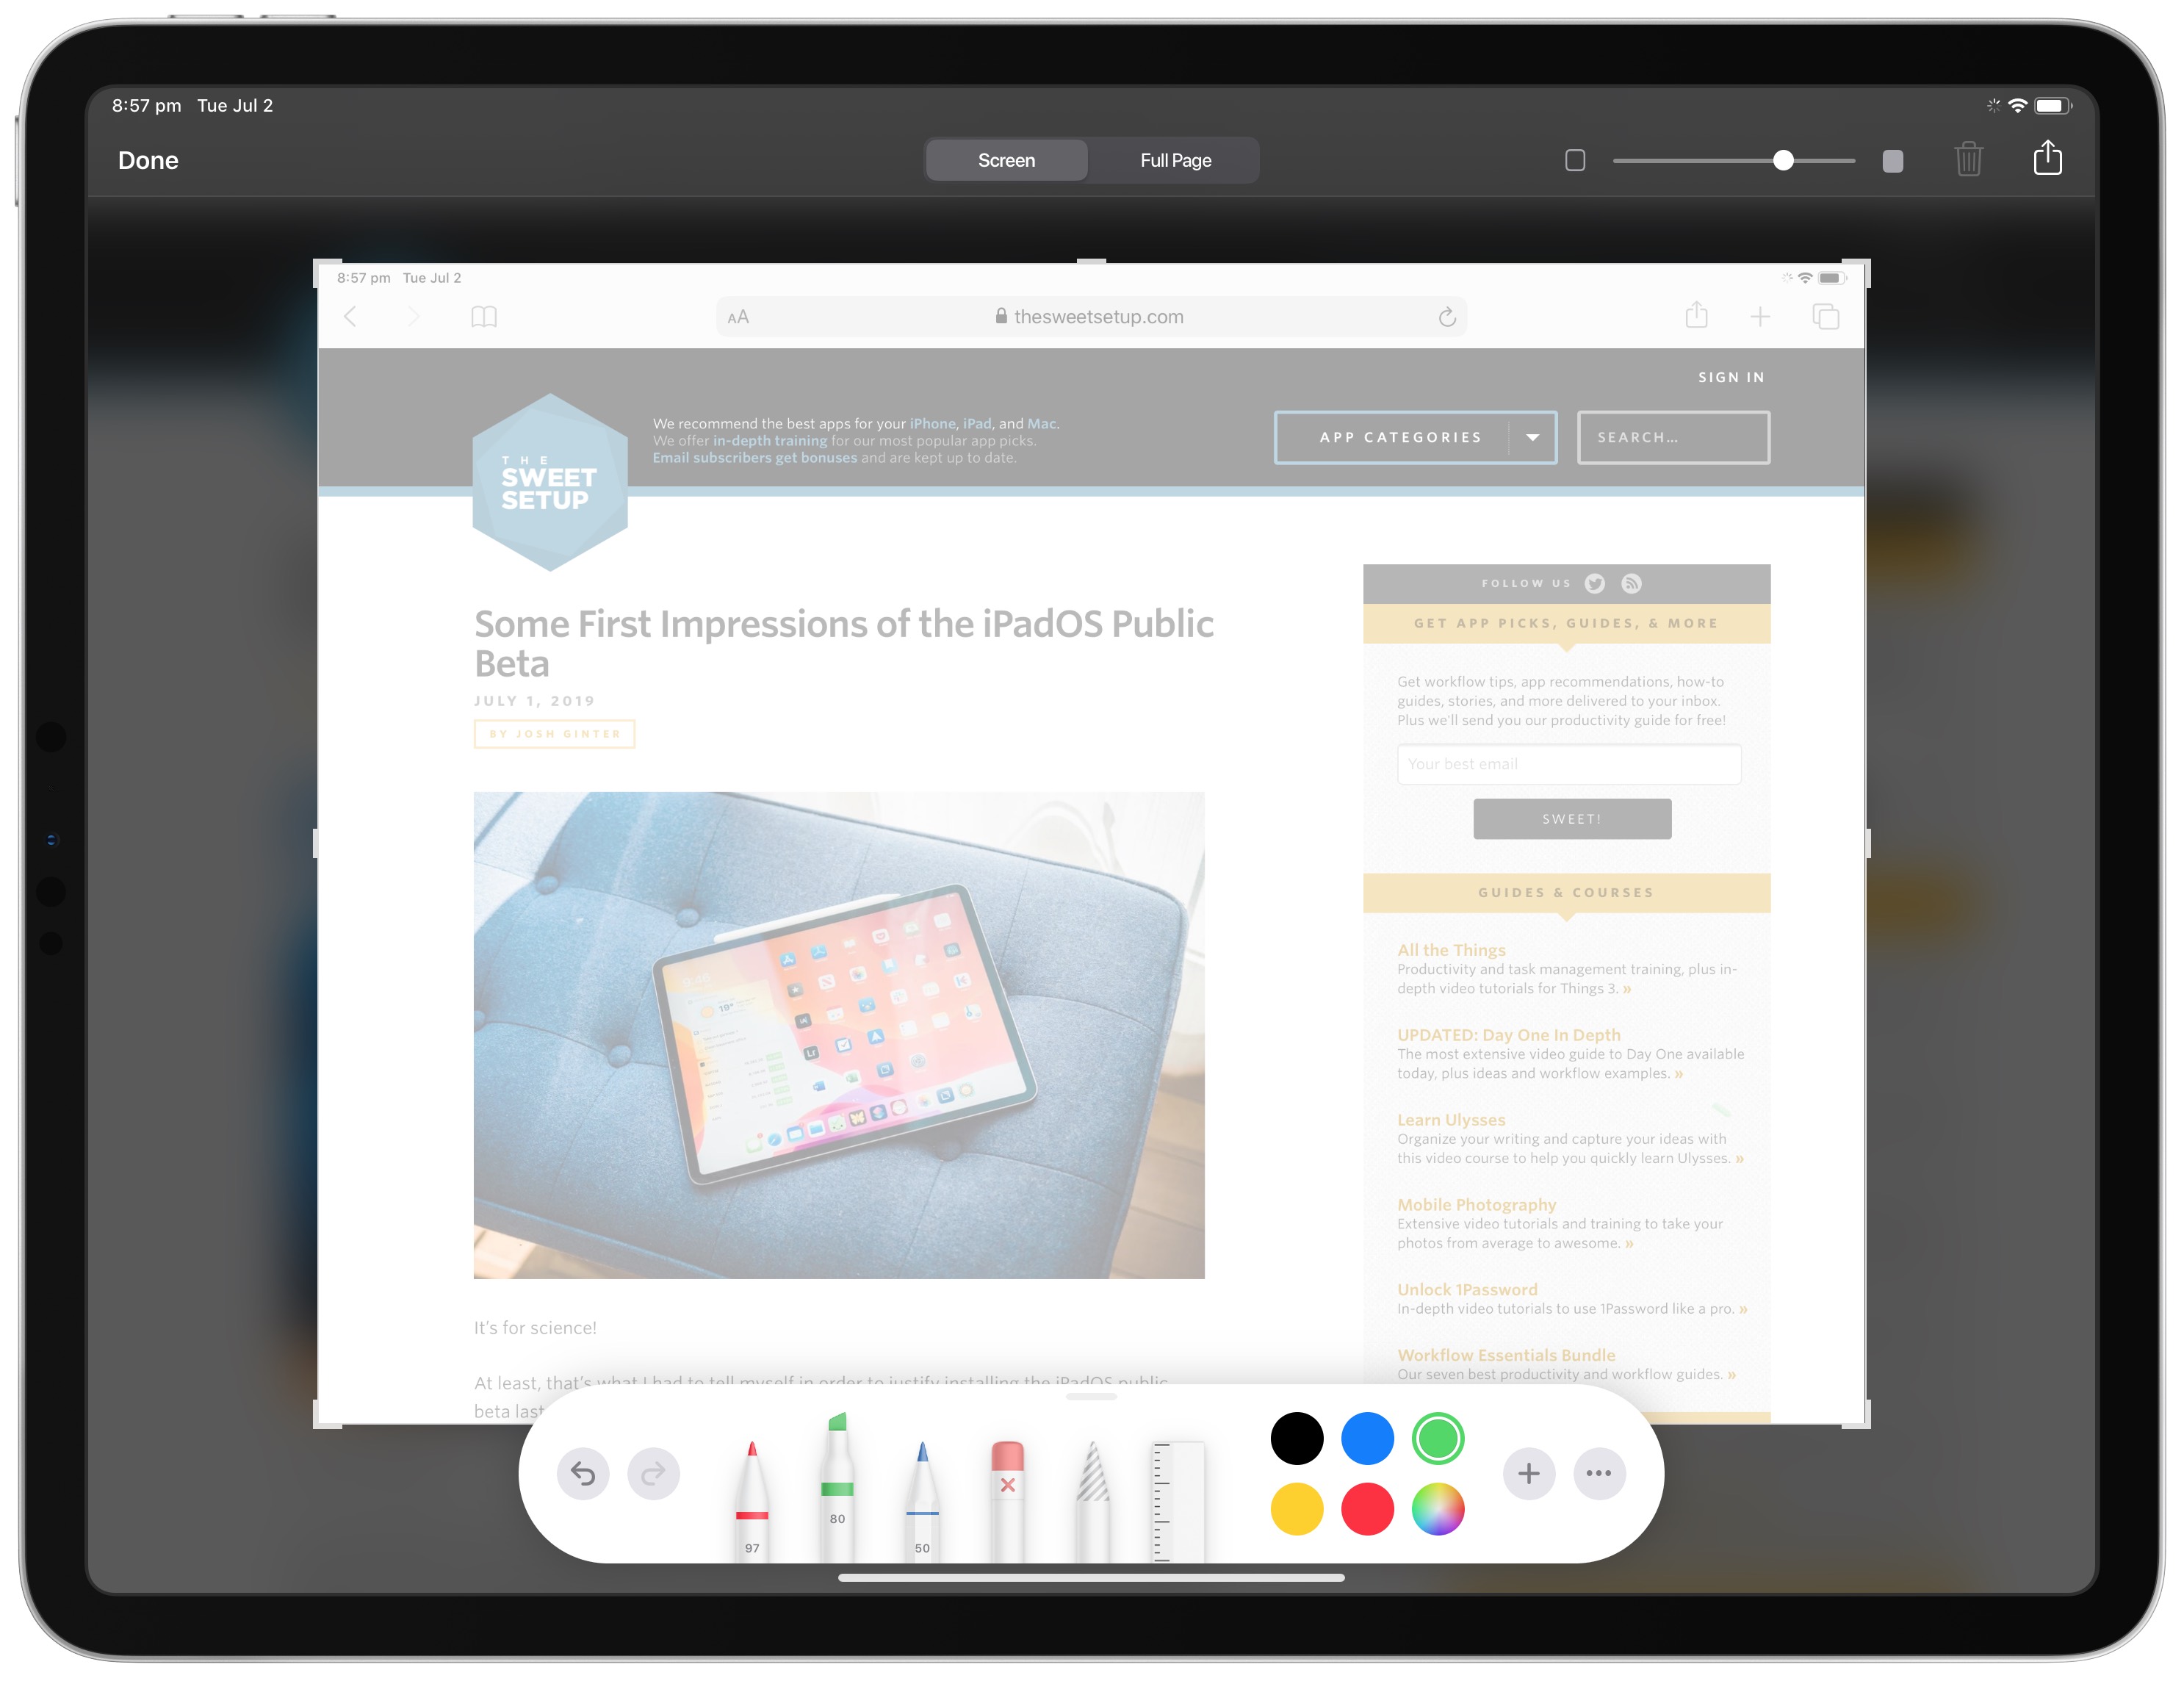
Once you’ve dragged the crop to your preferred spot, iPadOS takes a half second to preview the part you’re cutting away and then shrinks the document to your crop selection. This is the same animation as the screenshot-only crop — drag in from the side of the image and the feature delays a half second to preview your crop as a piece of the whole, and then cuts away the part you don’t want.
The reason for this animation is important: On a screenshot-only crop, this animation feels well timed. But on a full-page screenshot, where elements of the webpage are very, very tiny in the image preview, it takes an extra second or two to ensure you’ve cropped the correct part of your full-page screenshot. Fortunately, there’s a Reset button if you don’t crop your full-page screenshot correctly the first time.
Sharing Screenshots and Full-Page Screenshots
Once you’ve snapped, annotated, and cropped your screenshots (both full-page and screen-only screenshots), it’s time to share your capture.
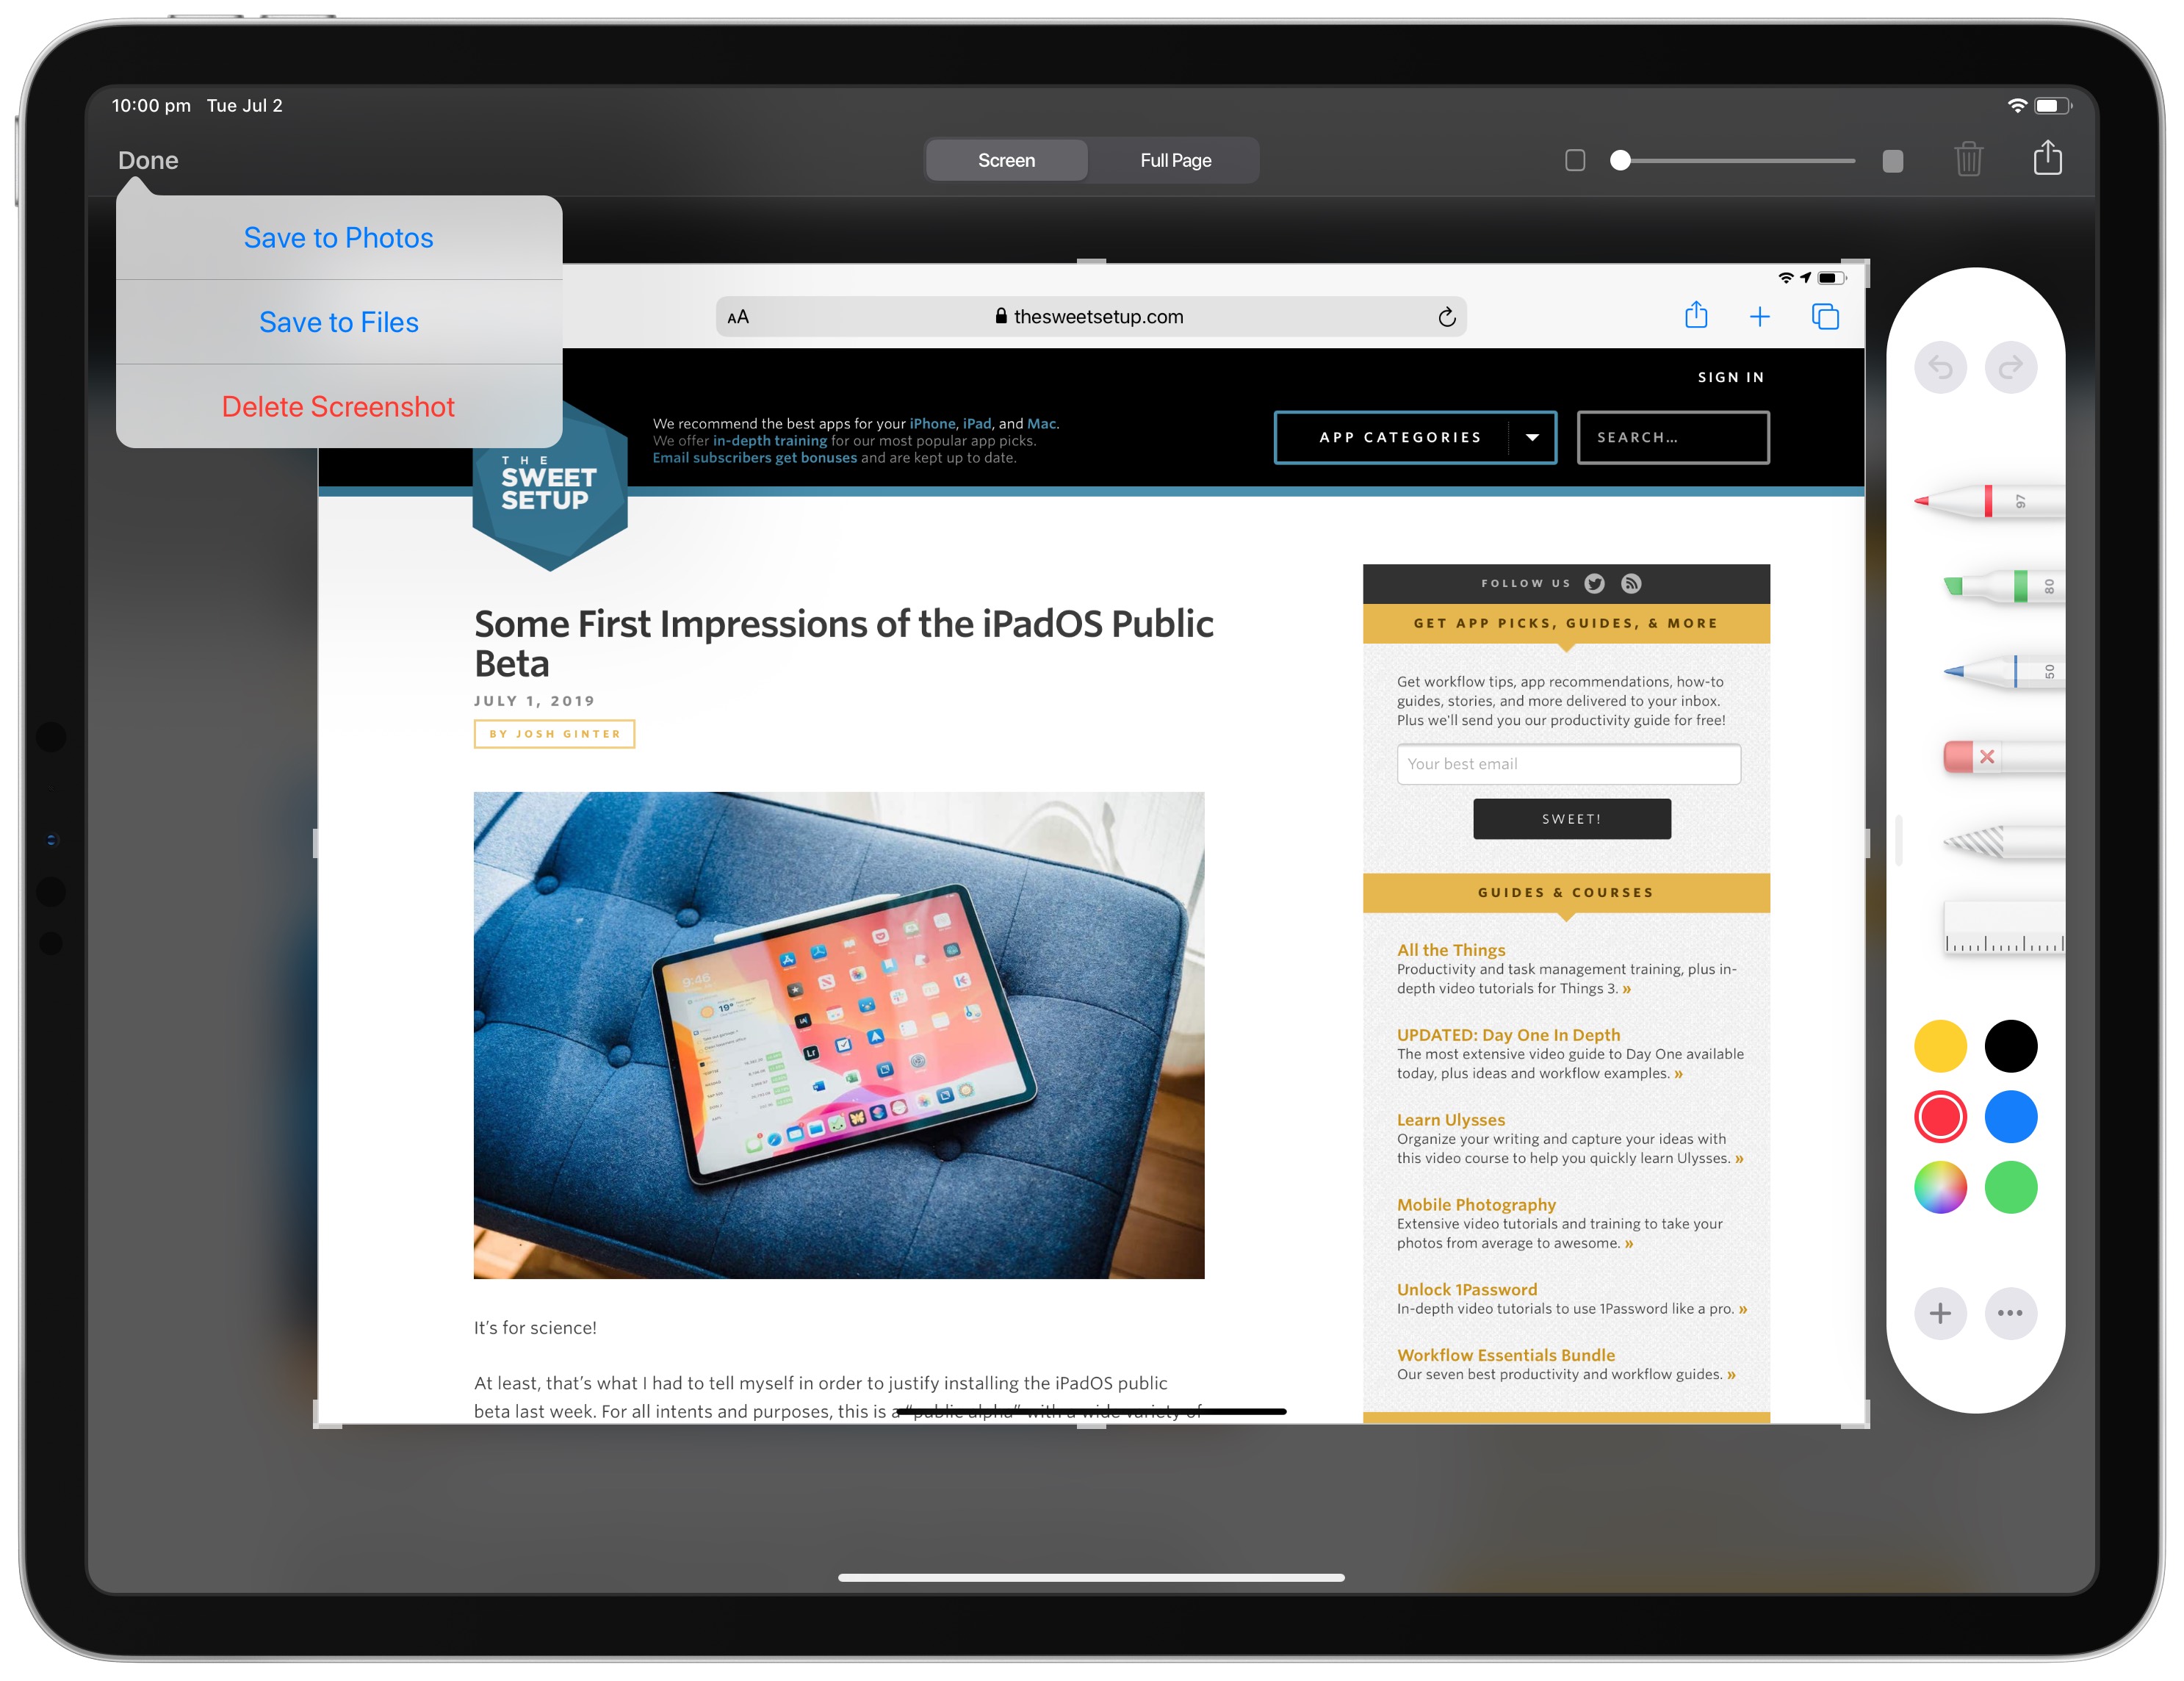
In iOS 12, the Done button provided the option to save the screenshot to Photos.app or delete the screenshot entirely. In iPadOS and iOS 13, this screenshot screen provides three options: Save to Photos, Save to Files, and Delete Screenshot. Across iPadOS, Files has become a central player, and this is a great example in the screenshot process.
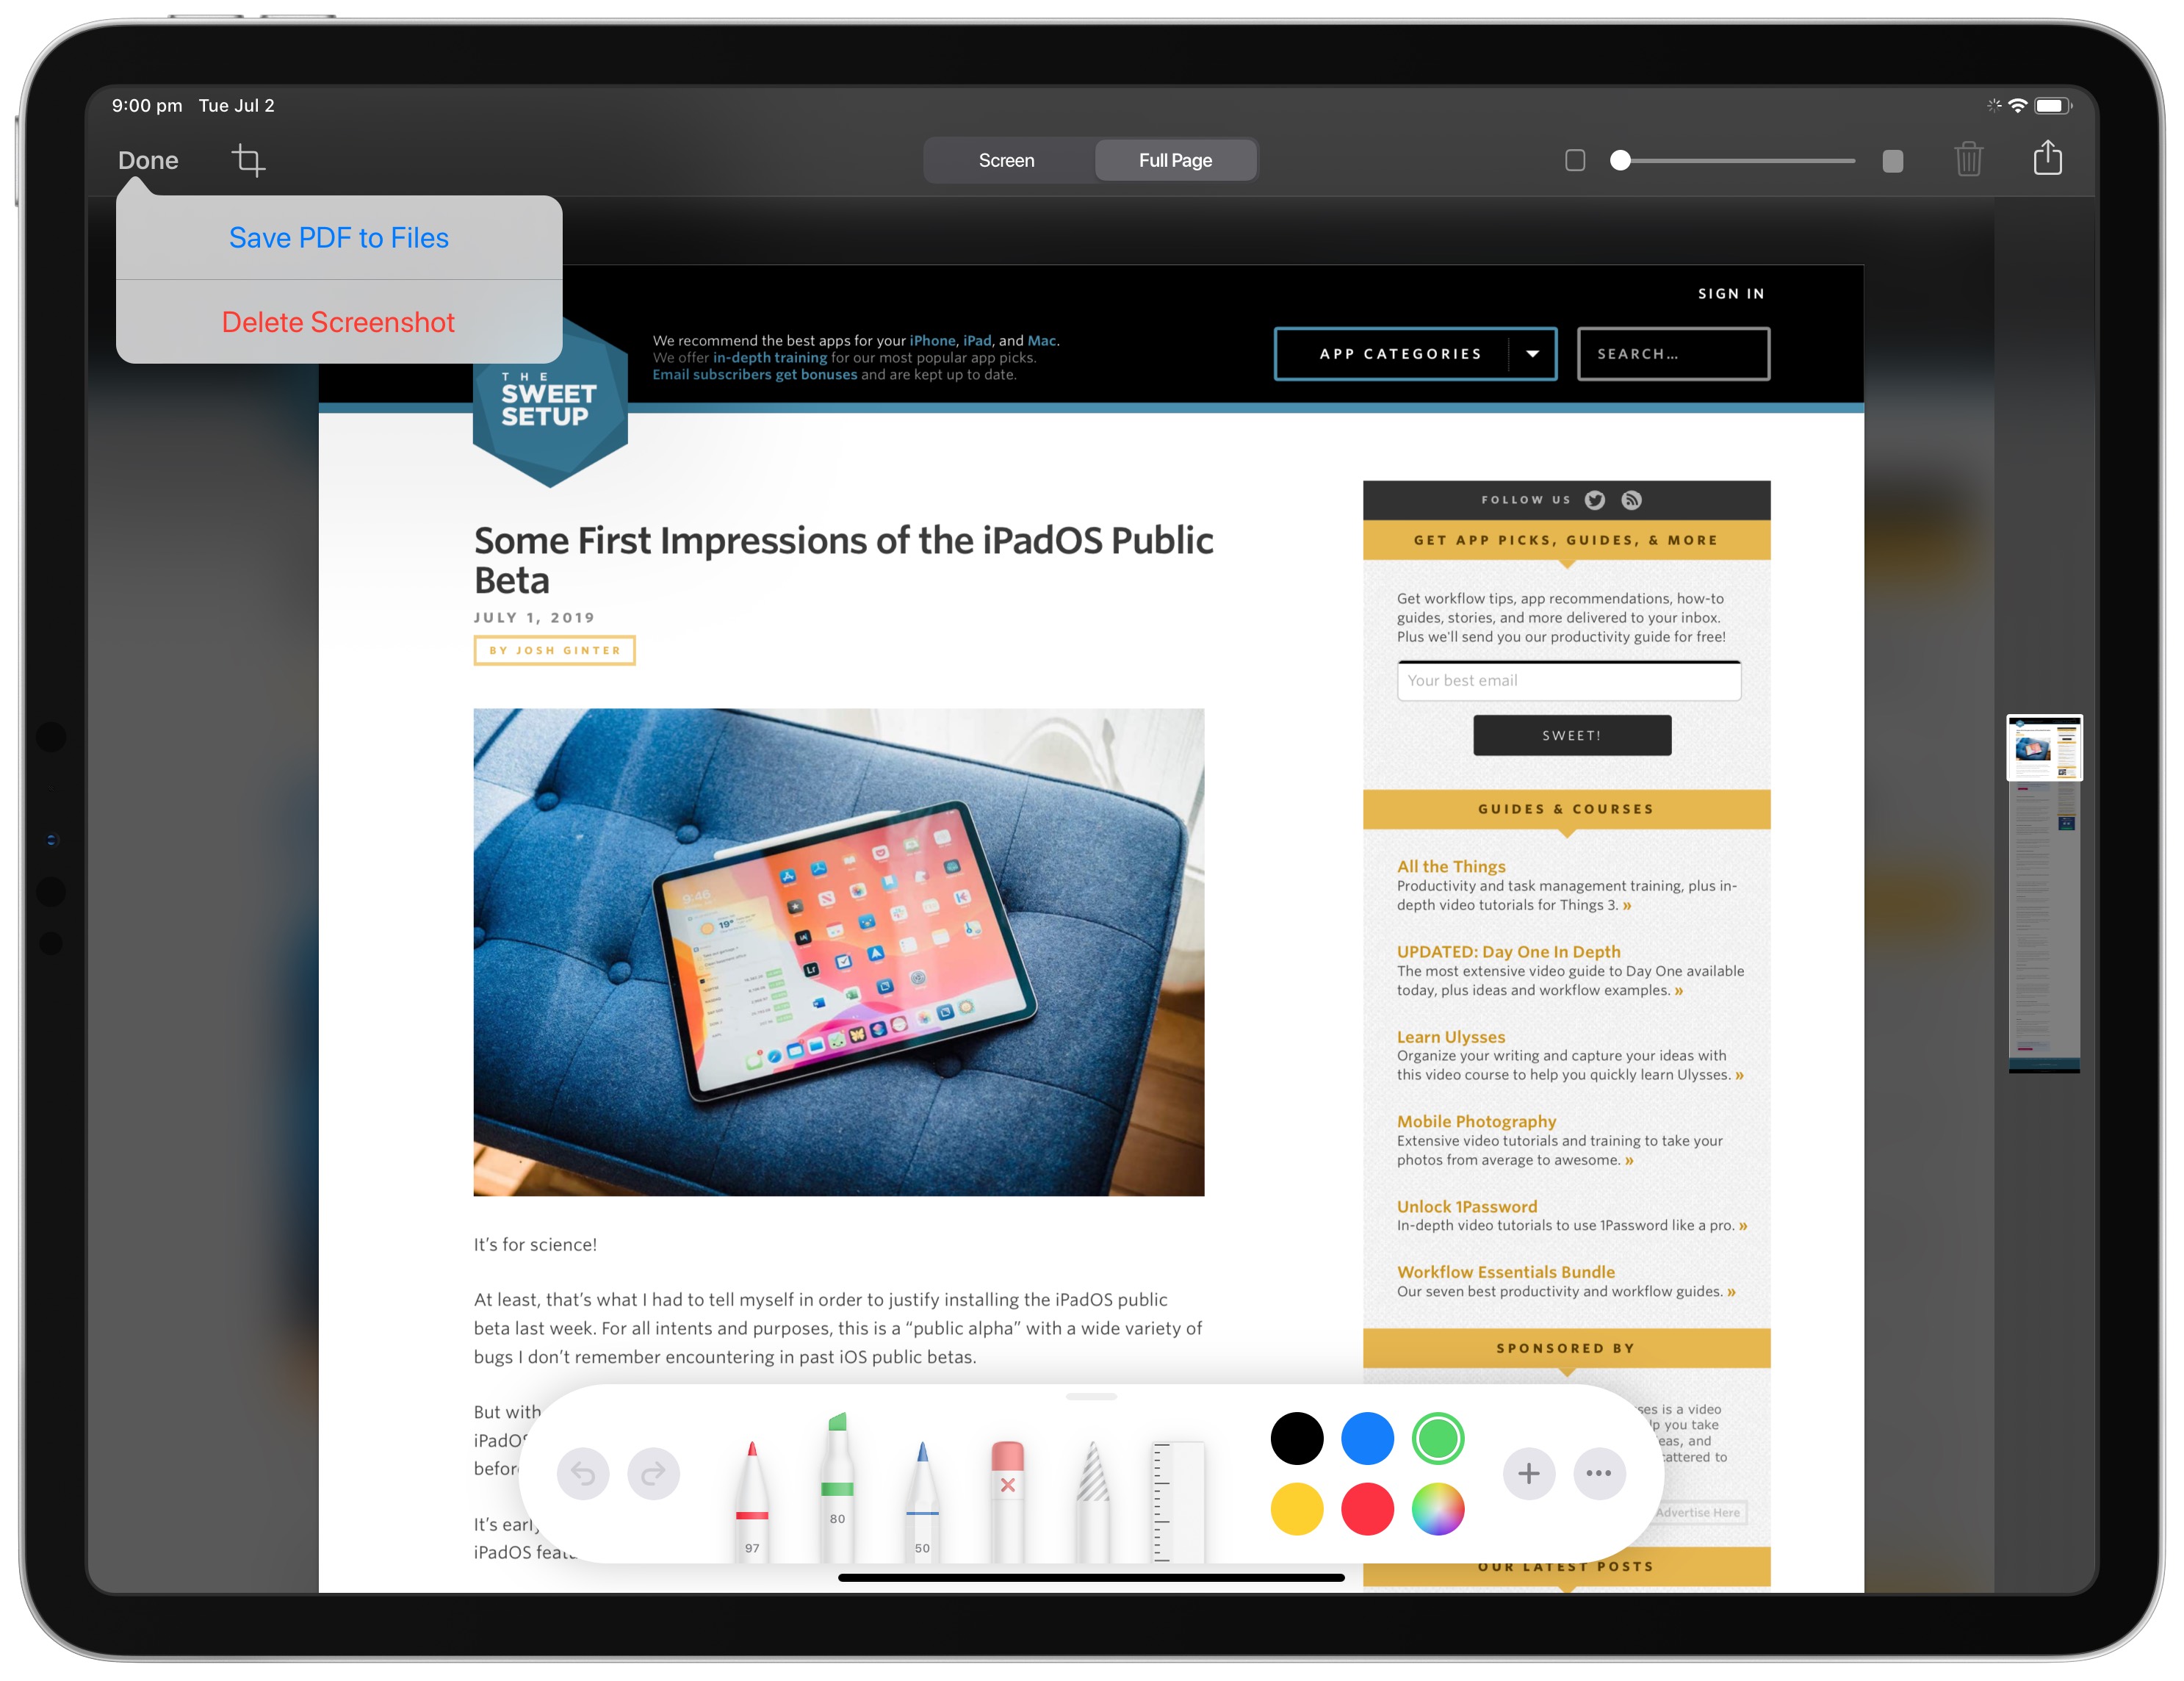
Full-page screenshots can only be saved as a PDF to the Files app. There are no options to save full-page screenshots as images, as Word documents, web-archives, or any other file other than a PDF at this point.
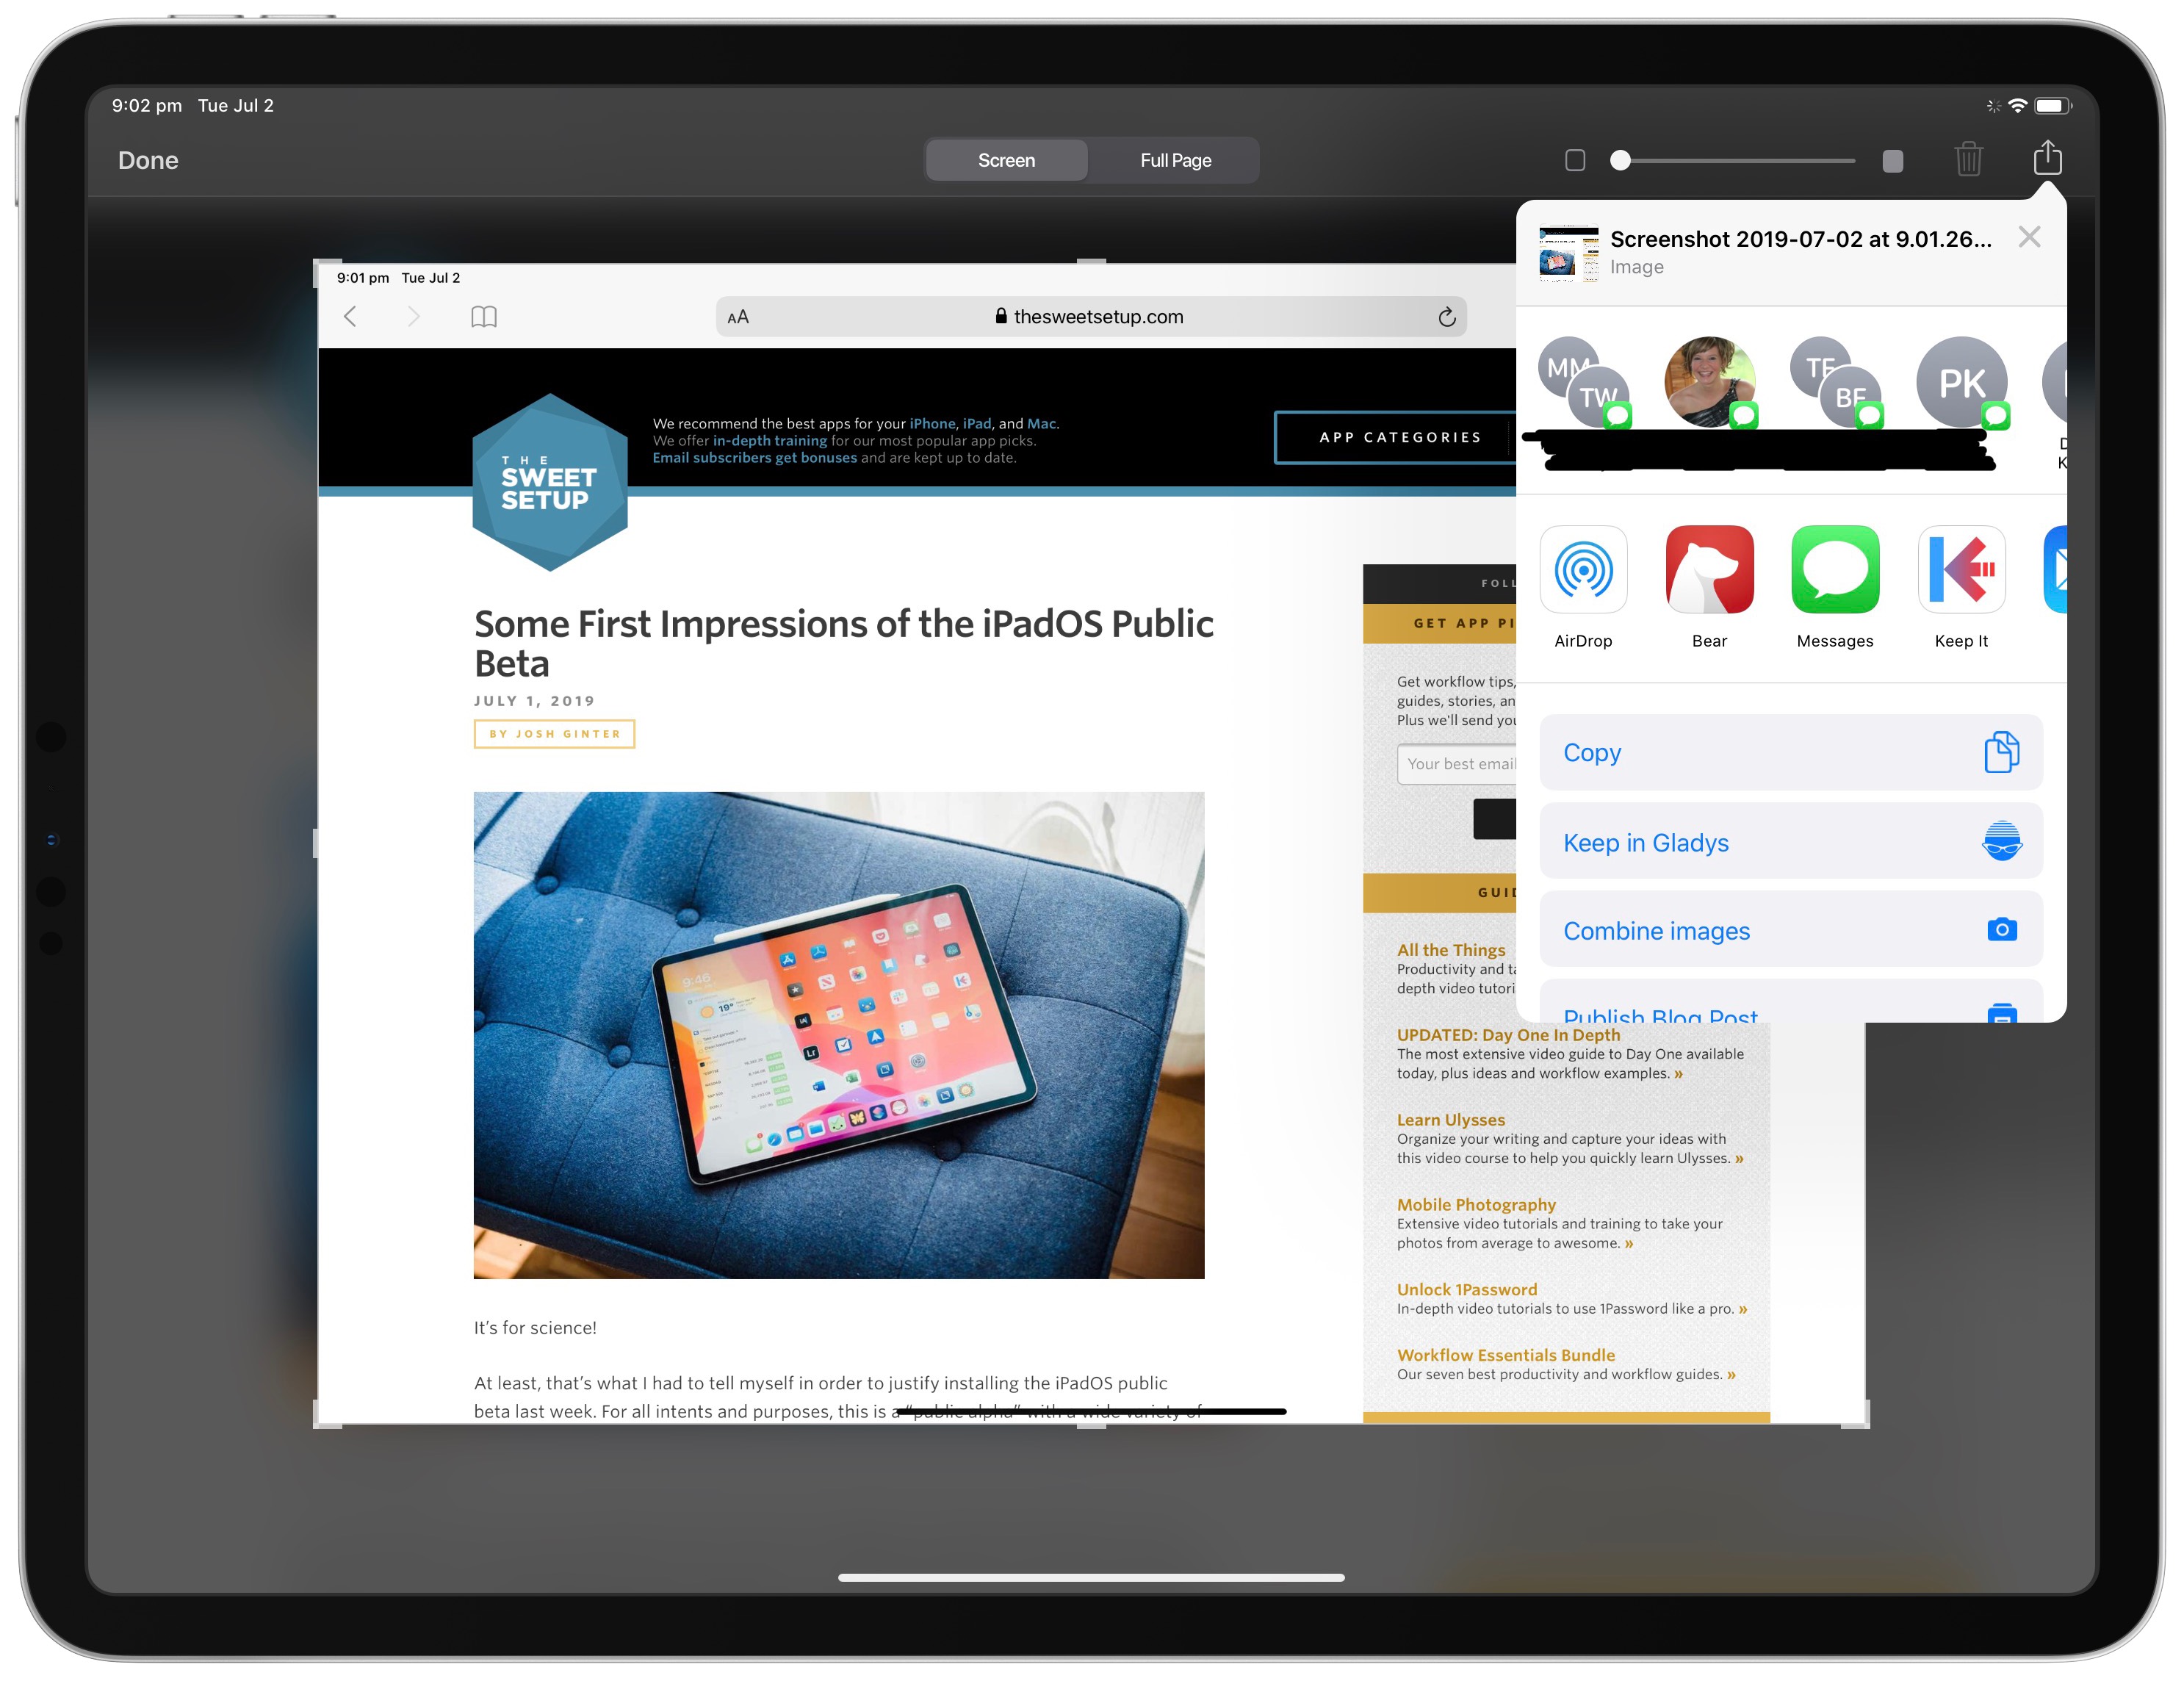
Of course, you can also share your screenshot through the new and improved iPadOS and iOS 13 share sheet. A discussion of this new share sheet deserves its own article, but the ability to directly send to your most recent conversations, directly to your most used apps, or directly to any of your chosen shortcuts is superbly powerful.
As this is still the iPadOS public beta, we could very well see elements of these new screenshot features continue to change. For instance, I wouldn’t be surprised to see refinements to the ability to crop a full-page screenshot, as the animation feels too quick to properly assess your crop selection.
But if these screenshot features make their way into the final version of iPadOS, I won’t be disappointed — there’s suddenly a lot of power in sharing a simple screenshot.
Wait. There’s a Bonus…
Curated List of Must-Have Apps
We spend an inordinate amount of time sorting through hundreds of apps to find the very best. And based on our own usage, plus the feedback of our readers, we have put together a short list of our must-have, most-used apps in 2022.
You will get…
- The current list of The Sweet Setup’s top 8, must-have apps.
- A special, pro tip for each app to help you save time and become more of a power user.
- A hidden feature of each app that you may not have known about.
These apps work on iPad, iPhone, and Mac. And they range across several different categories but are mostly focused on productivity. We hope this will help you get the most out of your devices and your day.
This guide is available for FREE to our email subscriber community. And you can get it right now. By joining the Sweet Setup community you’ll also get access to our other guides, early previews to big new reviews and workflow articles we are working on, weekly roundups of our best content, and more.