Syncing & Embedding Tasks from Todoist in Obsidian
Obsidian has some basic support for tasks built in. But if you rely on notifications for when to do what, then you’re going to need a dedicated task manager. Fortunately, there’s a Todoist plugin for Obsidian that allows you to have the best of both worlds — you can capture tasks into Todoist directly and get notified on your devices when it’s time to do a task, but you can also embed those tasks into an Obsidian document so you can associate them with a particular project. In this video, I’m going to show you how to use the Todoist Sync community plugin to embed tasks using Todoist’s filters in Obsidian.
Setting up the Todoist Sync Plugin
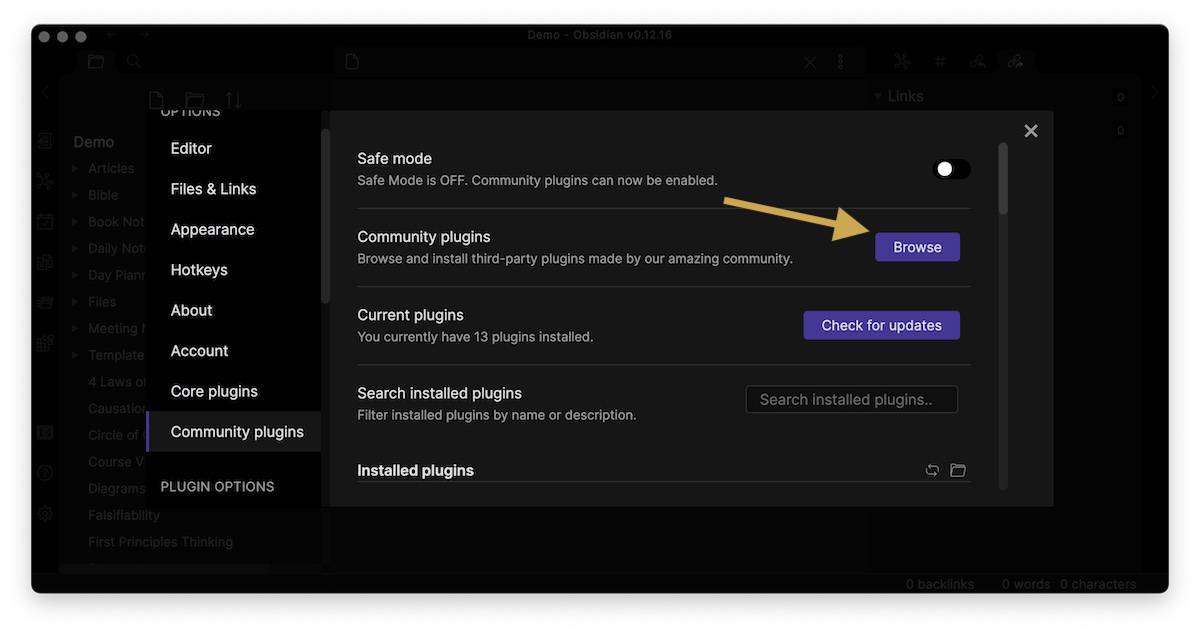
First, click on the gear icon in the lower left to access the Obsidian Settings:

Next, go to Community plugins and click Browse.
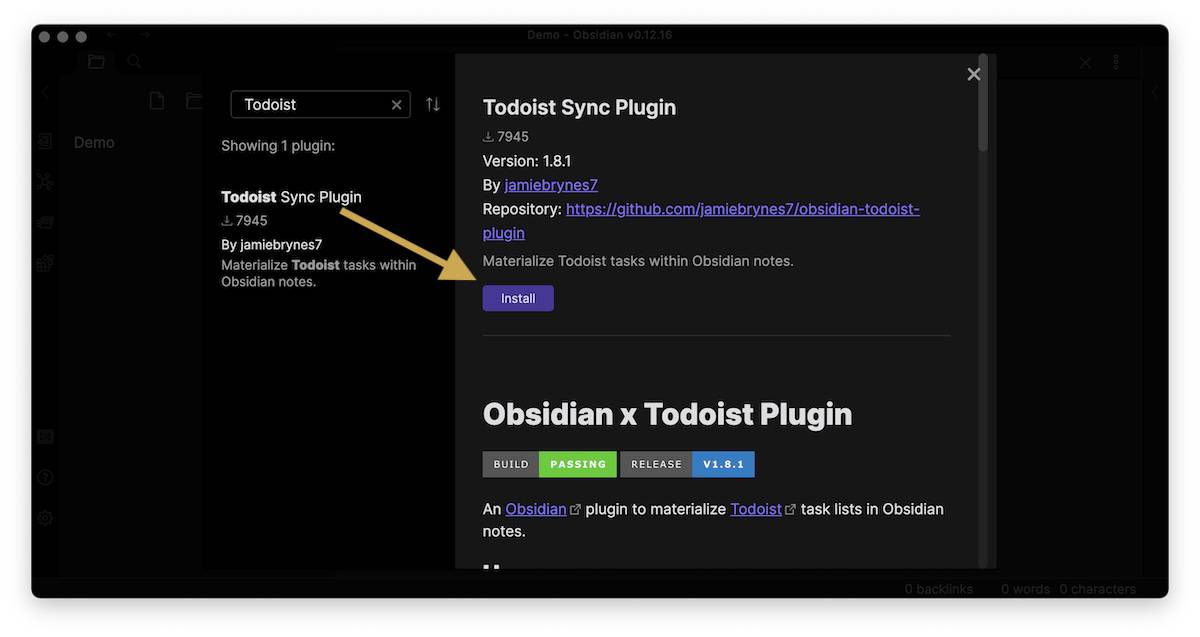
Search for Todoist, and select the Todoist Sync plugin. Click on the plugin, then click Install and then Enable.
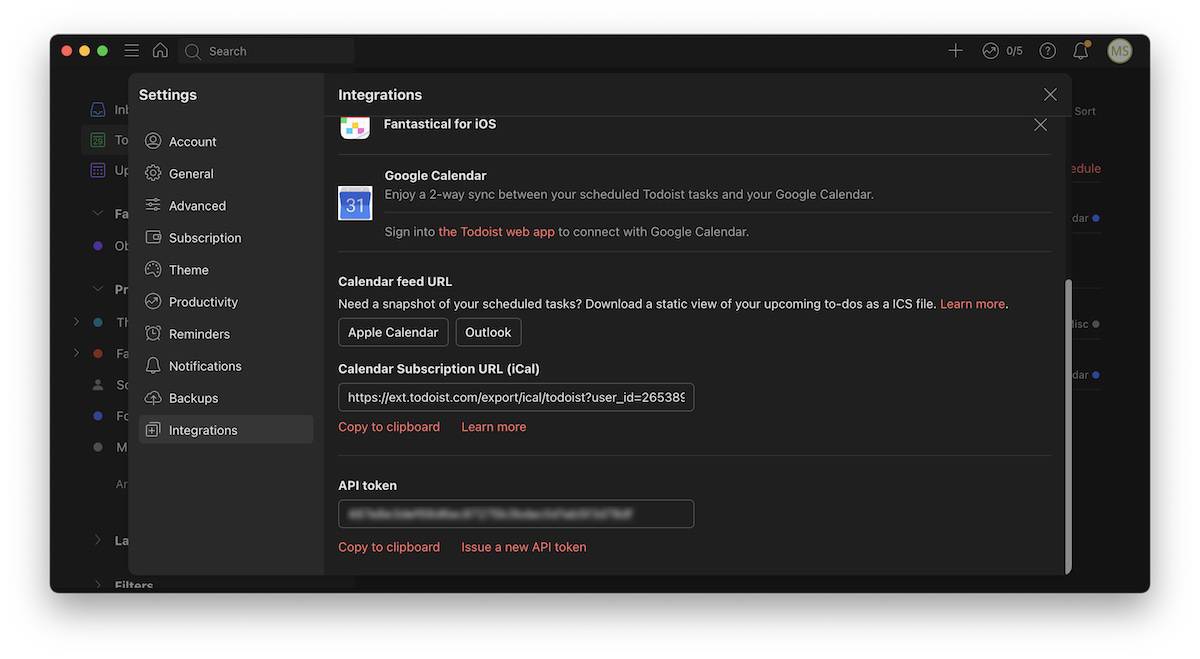
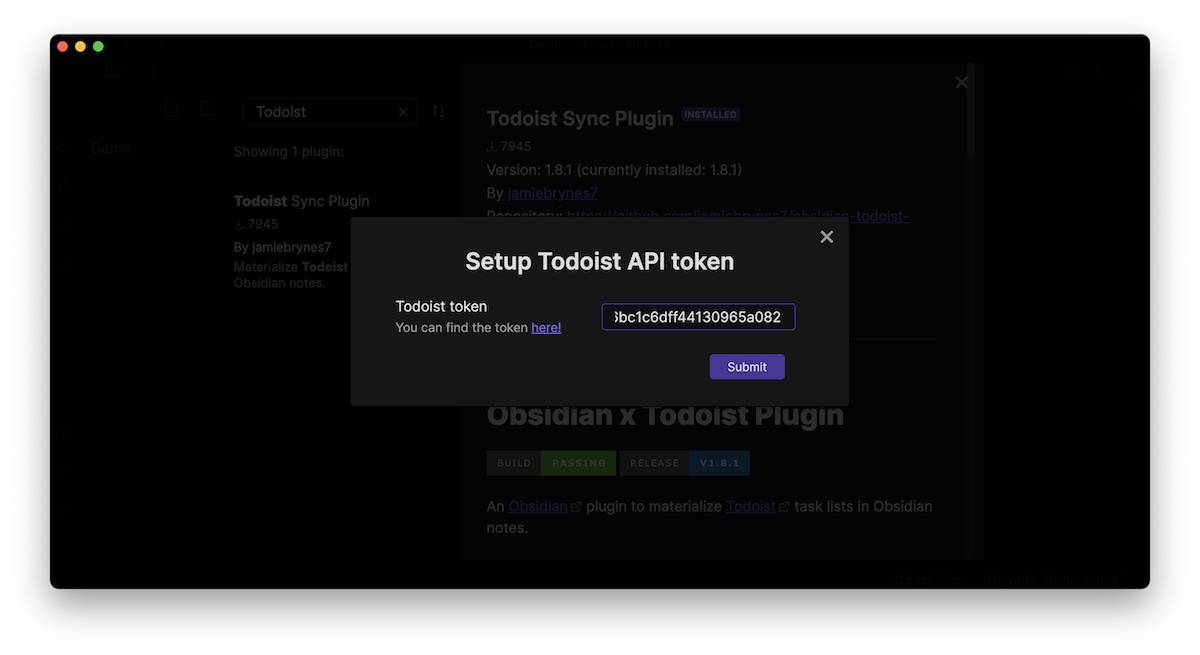
For the plugin to sync with the Todoist app, you’re going to need your Todoist API token. You can click the link access your API token on the web, or you can open the Todoist app and go to Settings → Integrations and scroll down to the bottom.
Once you find your API token, copy it to your clipboard and go back into Obsidian. Paste the API token into the field and then click Submit.
Once you have your API token set, you’re ready to start using the plugin.
Embedding Todoist Tasks in a Note
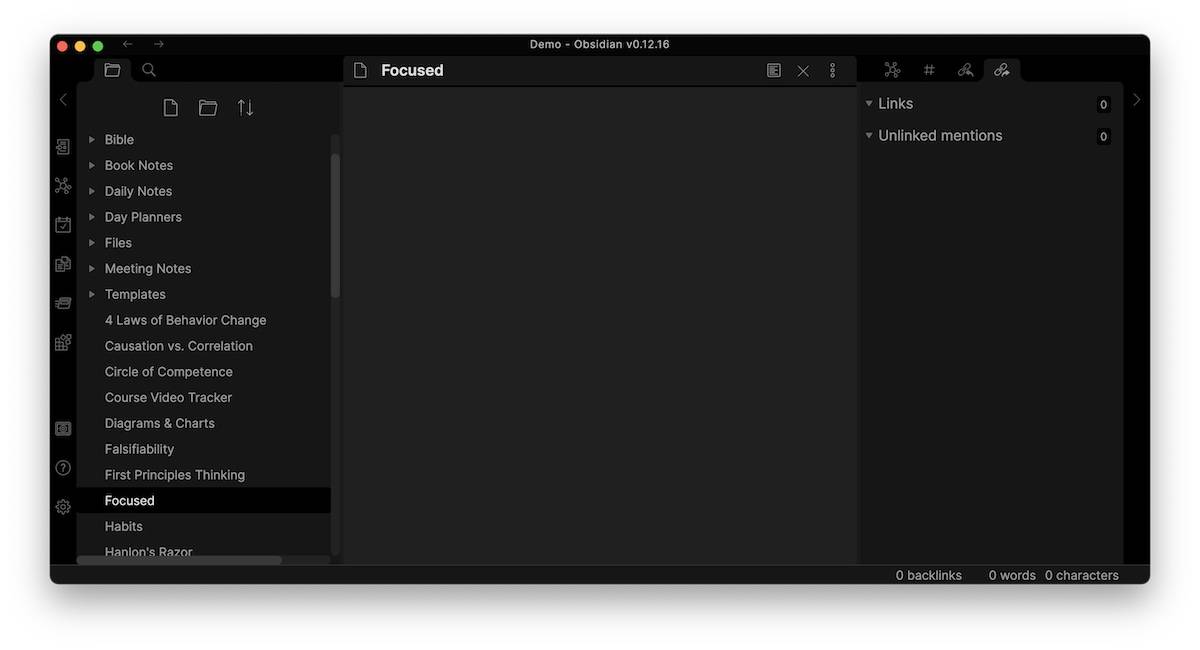
You can embed Todoist tasks inside any note file, like this blank one I have for the Focused podcast that I do with David Sparks.
To embed Todoist tasks into a note, we use the following code:
```todoist

{

"name": "(NAME)"

"filter":  "(FILTER)"

}

```
The variables we can change here are name and filter. The name is simply the title that will be displayed at the top of the section once we embed the tasks. The filter is any valid Todoist filter. If you’re new to Todoist filters, check out this article by Jeff Abbott as an introduction or the official documentation on the Todoist website.
Here’s a couple of examples:
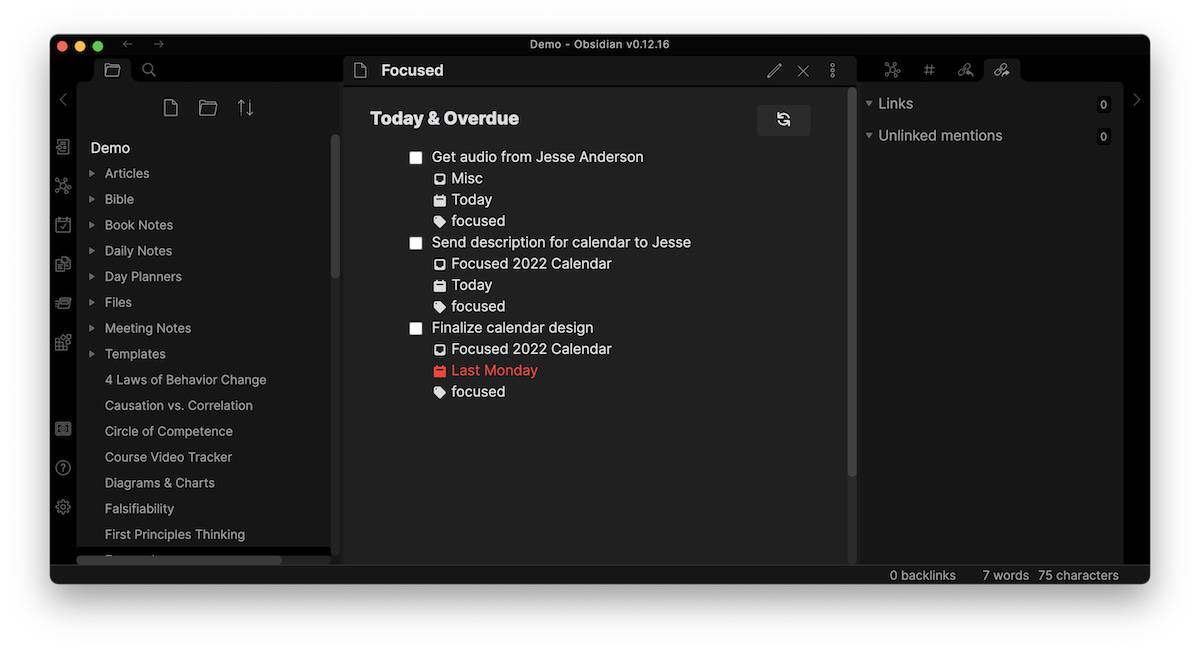
If I wanted to show all tasks that were either due today or overdue, I would use this code:
```todoist

{

"name": "Today & Overdue"

"filter":  "(today | overdue)"

}

```
Once I switch to Preview mode, the embedded tasks look something like this:
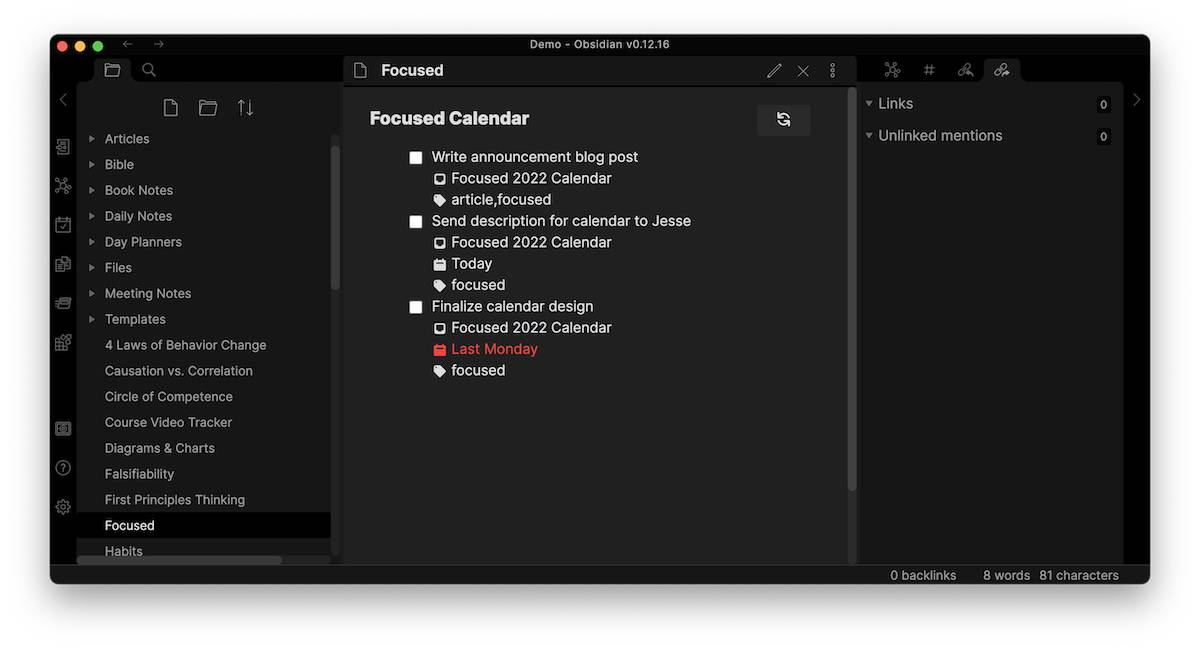
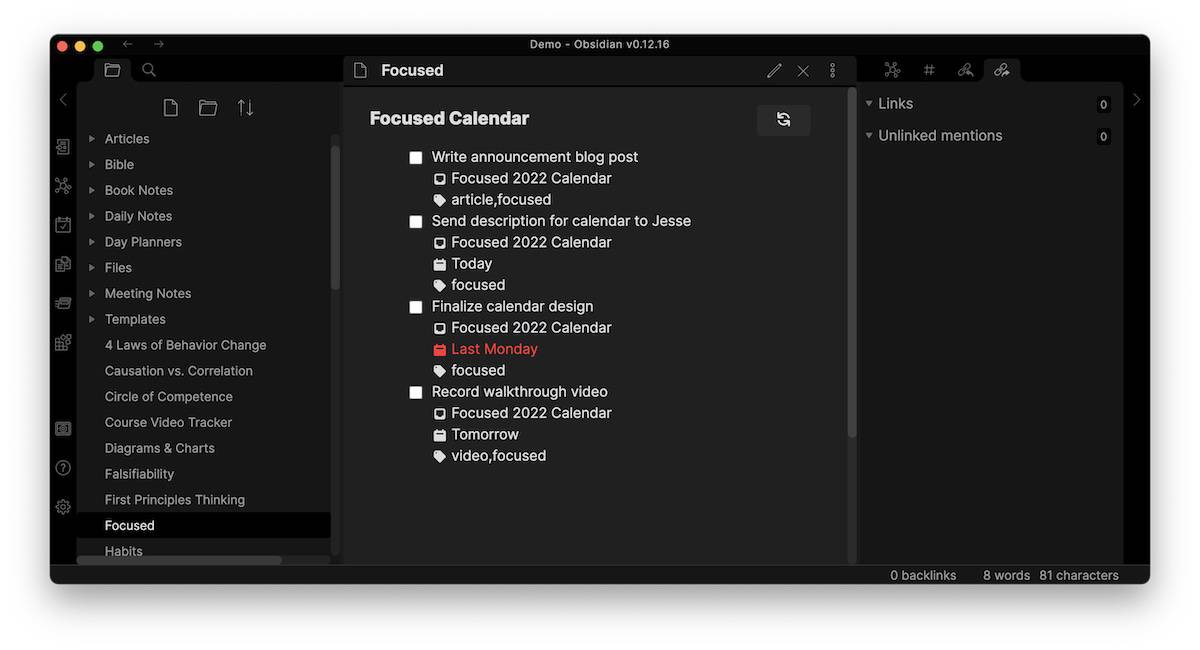
If you want to filter by project, you can do that by using # and then the project name. So if I wanted to show all tasks associated with the NeuYear Focused calendar project, I would use this code:
```todoist

{

"name": "Focused Calendar"

"filter":  "#Focused 2022 Calendar"

}

```
This code would render in Preview mode like this:
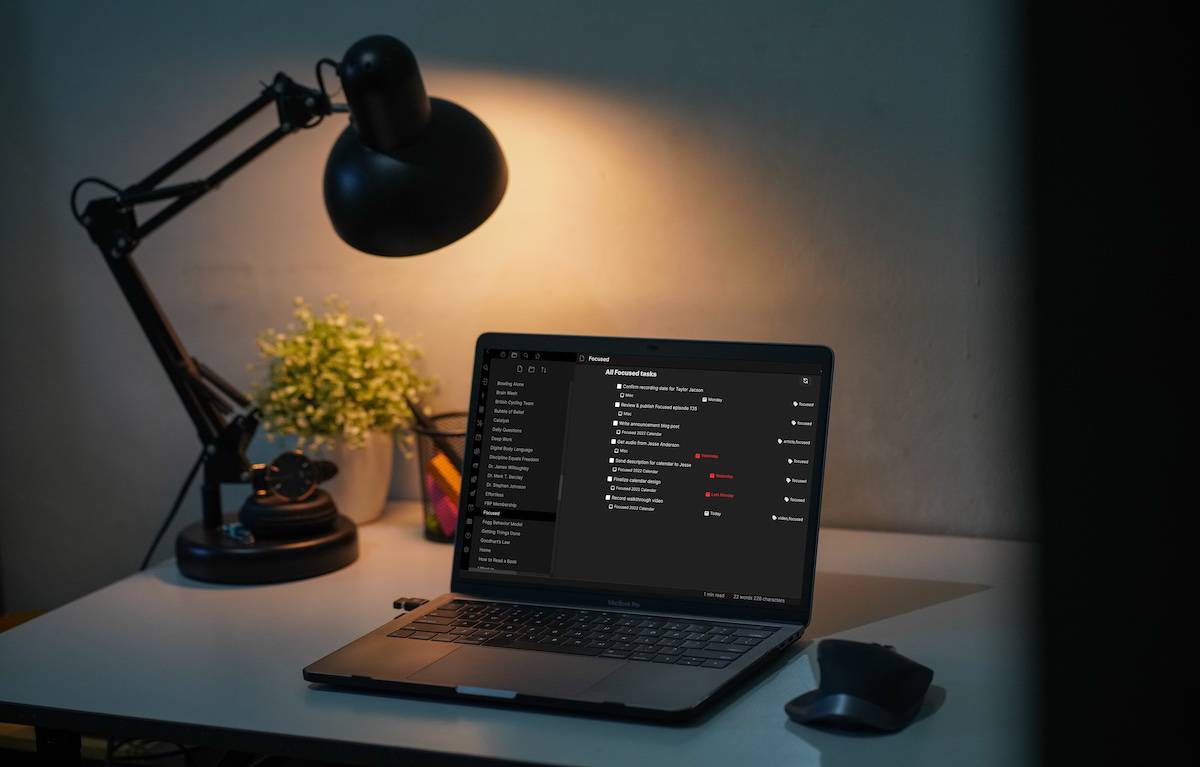
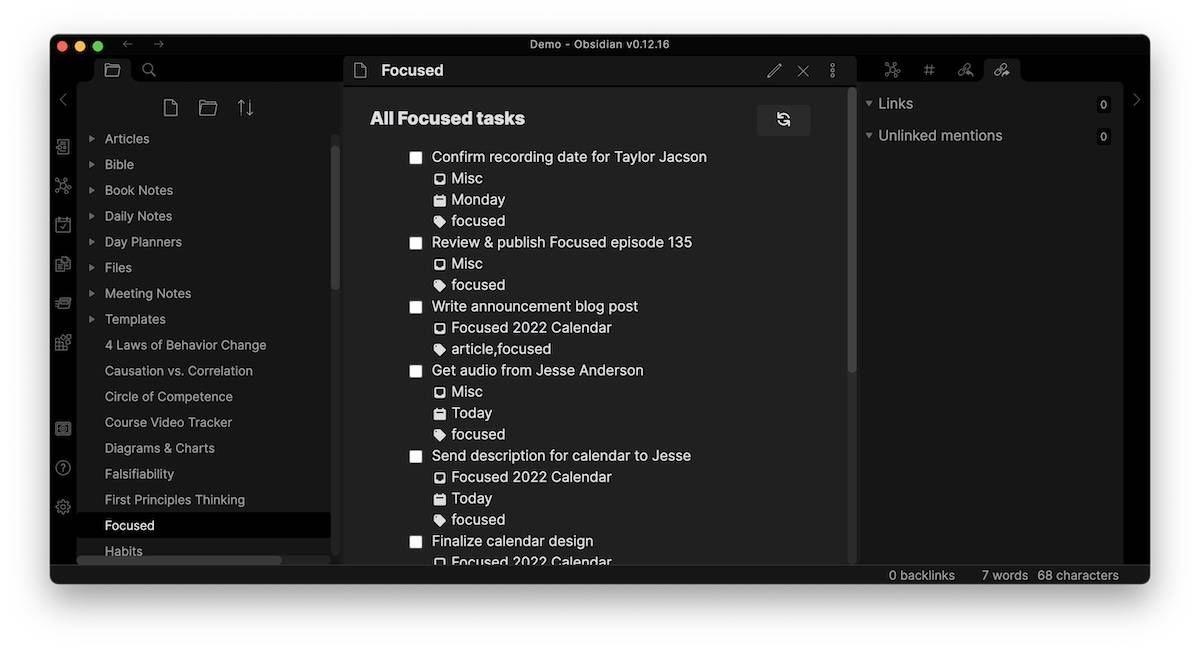
If you want to filter by tag you can do that using @ and then the tag name. So if I wanted to show all tasks associated with the focused tag, I would use this code:
```todoist

{

"name": "All Focused tasks"

"filter":  "@focused"

}

```
This code would render in Preview mode like this:
What’s great about these embedded tasks is that you can check the boxes to complete the tasks and the status instantly syncs back to Todoist.
Adding Tasks from the Command Palette
You can also add tasks to Todoist straight from Obsidian by using the Command Palette. Just hit Command - P to open the Command Palette and type Todoist. What you’ll see is a complete list of the commands enabled by the Todoist Sync plugin:
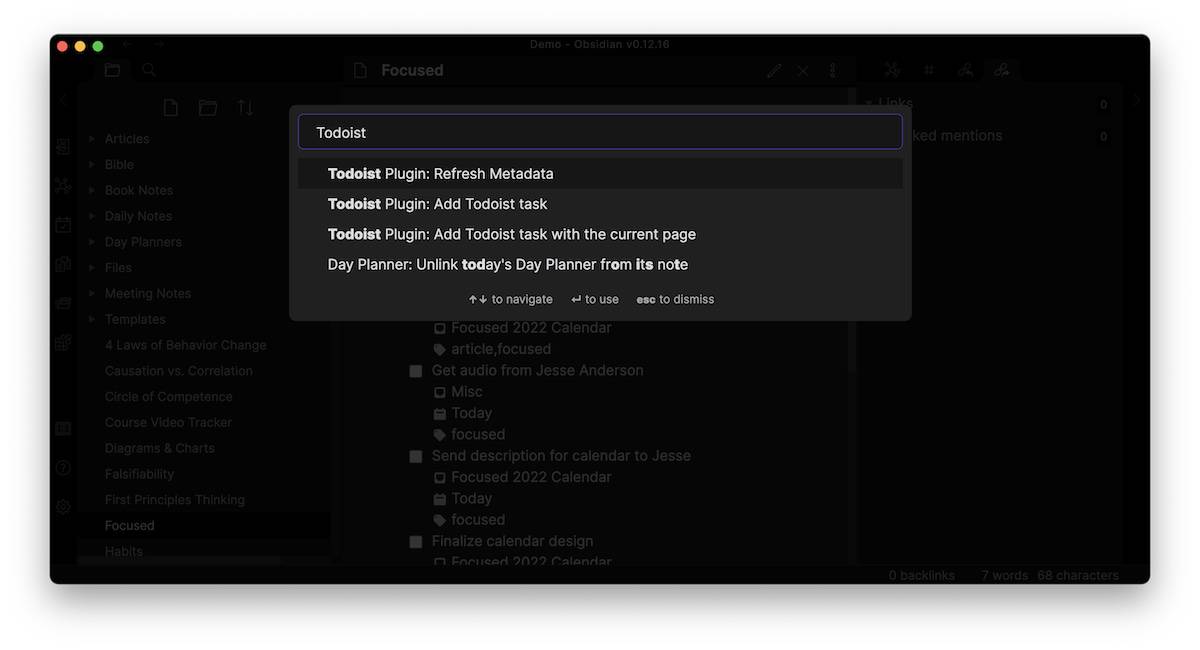
From here, we can:
- Refresh the metadata (pull in any changes from Todoist that isn’t syncing)
- Add a Todoist task
- Add a Todoist task with a callback URL link to the current Obsidian note
Select Add a Todoist task and you’ll get a popup window that you can use to add the task name and any additional metadata. Here’s an example:
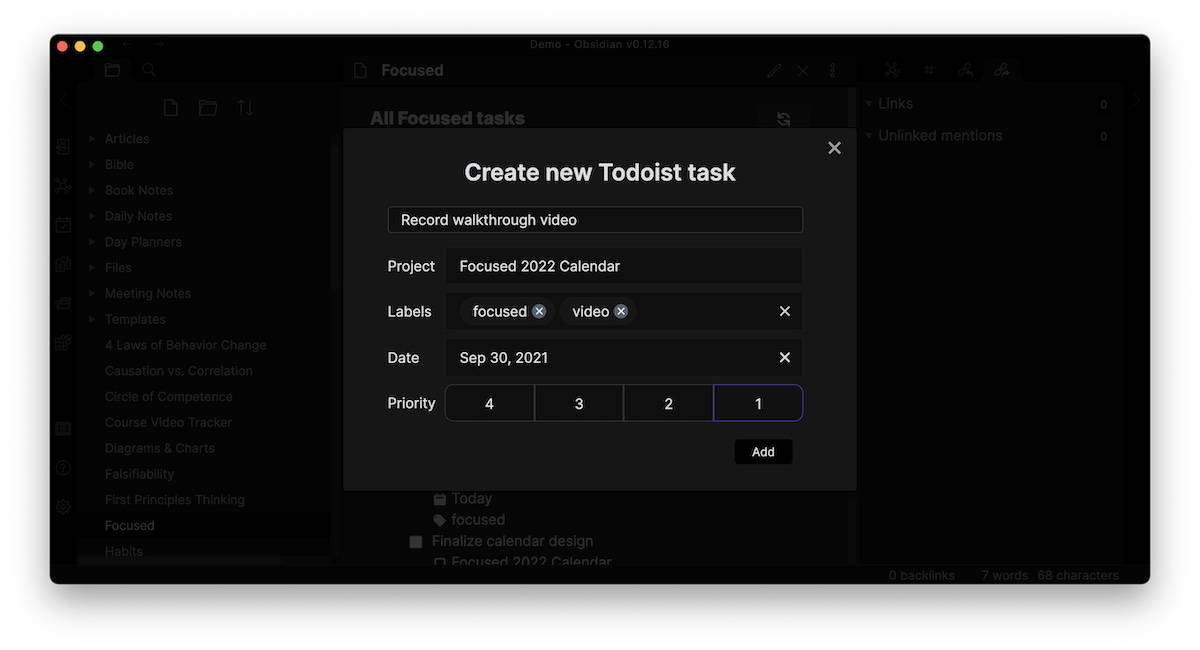
Once you add the information you want, click Add.
You may notice that the task doesn’t immediately show up in your embedded Todoist task list, even if it falls into the requirements for the active filter. To get it to show up, simply click the Refresh button of the embedded Todoist task list in Preview mode.
You can also set the plugin to automatically refresh and customize the time interval in the Todoist Sync plugin settings.