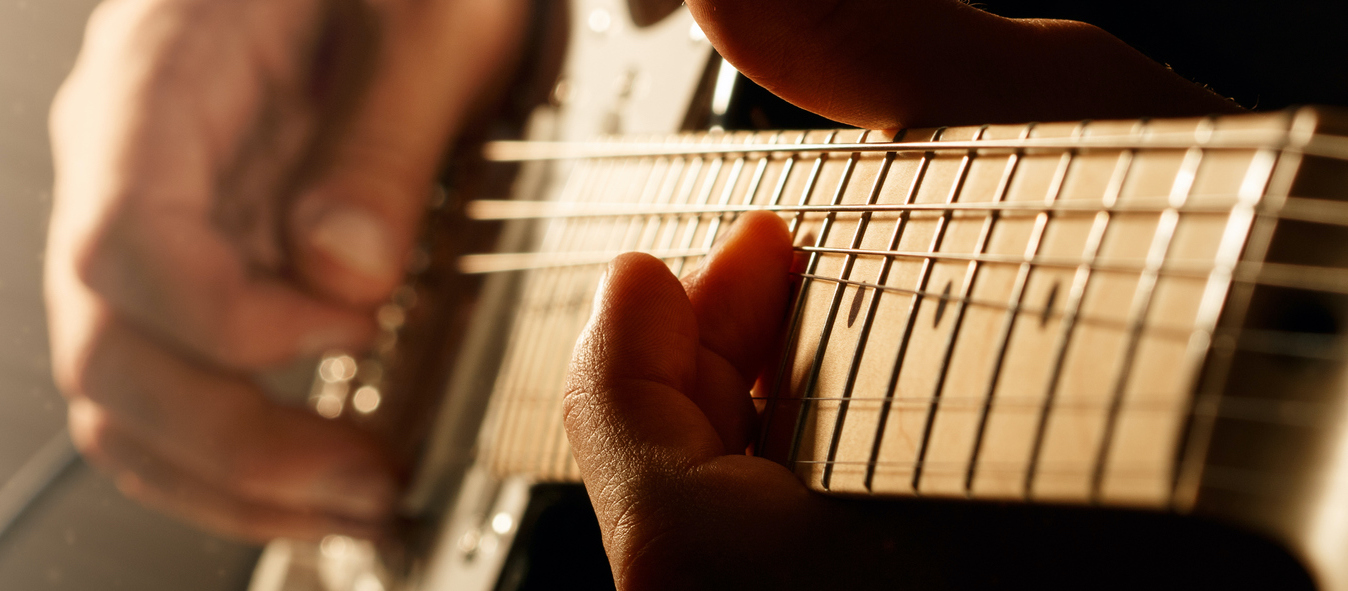
How I Play Guitar Live From My iPad
Last week, Shawn and I co-hosted a webinar on iPad productivity. The majority of the webinar was about our own personal iPad productivity workflows, many of which center around GoodNotes (the replay is actually available to anyone who has purchased our GoodNotes course), but I did mention briefly that I played guitar through my iPad live with the worship team at my church.
There were a couple questions asking me to dive a little deeper on how I do this, so here is a complete walkthrough of how I make it work.
The Dream
One of the unique things about my situation is that I need to limit my “stage volume.” Our church is pretty small but we have a fairly large worship team, so if everyone has their amps up on stage everything can quickly start to sound like a sonic mess. So several years ago, I started looking for alternatives that would allow me to get as close to the thick analog tone of my tube amp without having the physical amp on stage.
Guitar players are probably already starting to cringe because good tube tone comes from pushing the tubes hard (i.e. higher volume). So even though I’m a tone snob myself, the thought of replacing my tube amp on stage was a little disheartening. And truth be told, I’ve yet to see anything that can fully replicate the warmth of analog tone on a digital device.
But I decided to see just how close I could get, and I got a lot closer than I thought I’d be able to. I also gained a couple added benefits along the way — including the ability to control my sound completely from my iPad Pro.
There are two pieces that really make this work for me: the hardware and software. In my opinion, it’s extremely important that these are separated. I learned this lesson the hard way a while back when I purchased a Line 6 AMPLIFi FX100 floorboard:
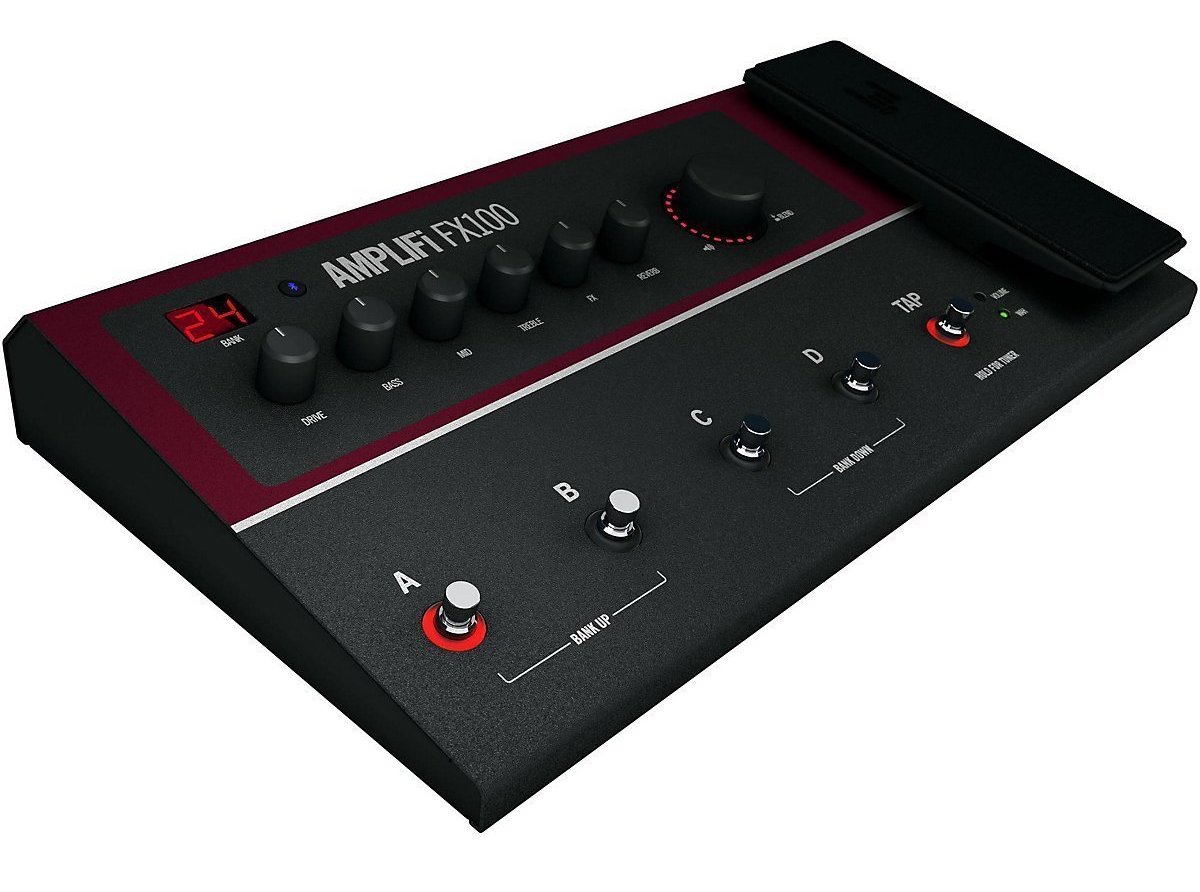
Unfortunately, about a week after my return window closed the AMPLIFi Remote app that I had to use to control it started crashing as soon as I opened it. This effectively rendered my new hardware completely useless. It was extremely frustrating, and still hasn’t been fixed (the app currently has an average rating of 1.8 starts and hasn’t been updated in over a year and a half).
Paying a lot of money for hardware that was quickly rendered useless taught me an expensive lesson: make sure that the hardware and software can operate independently if you want your system to work for any length of time.
Let’s start with the more difficult problem to solve: the hardware.
The Hardware
When it comes to hardware, there are two things that are extremely important:
- How it feels
- How it works
In the past, I’ve had issues with both. I’ve tried many different hardware devices that were made of plastic and felt like they were going to break when I stepped on them. And there were others that were made to replicate real guitar effect stomp boxes, but nothing could keep up in live performance because the latency was too great (the amount of time between hitting the string on the guitar and hearing the sound out of the PA).
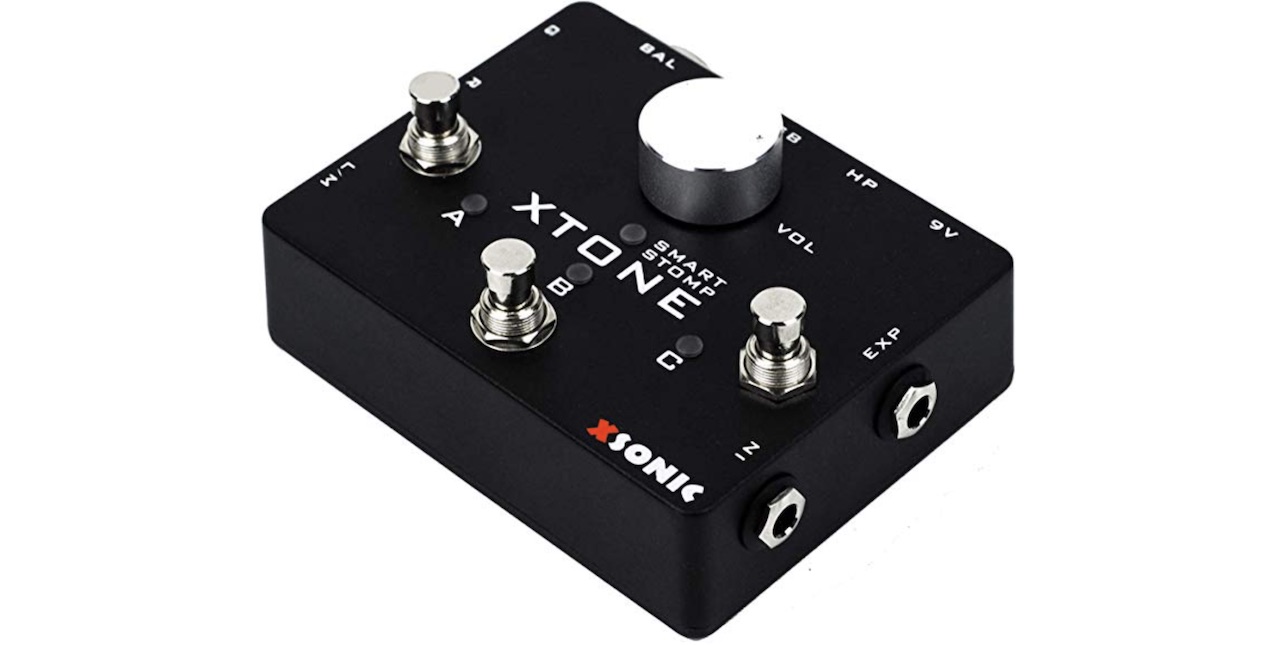
Until I cam across the Xsonic Xtone, a USB guitar interface and MIDI controller disguised as a regular stomp box.
Here’s a picture of my current pedalboard setup (the Xsonic Xtone is in the middle on the bottom):
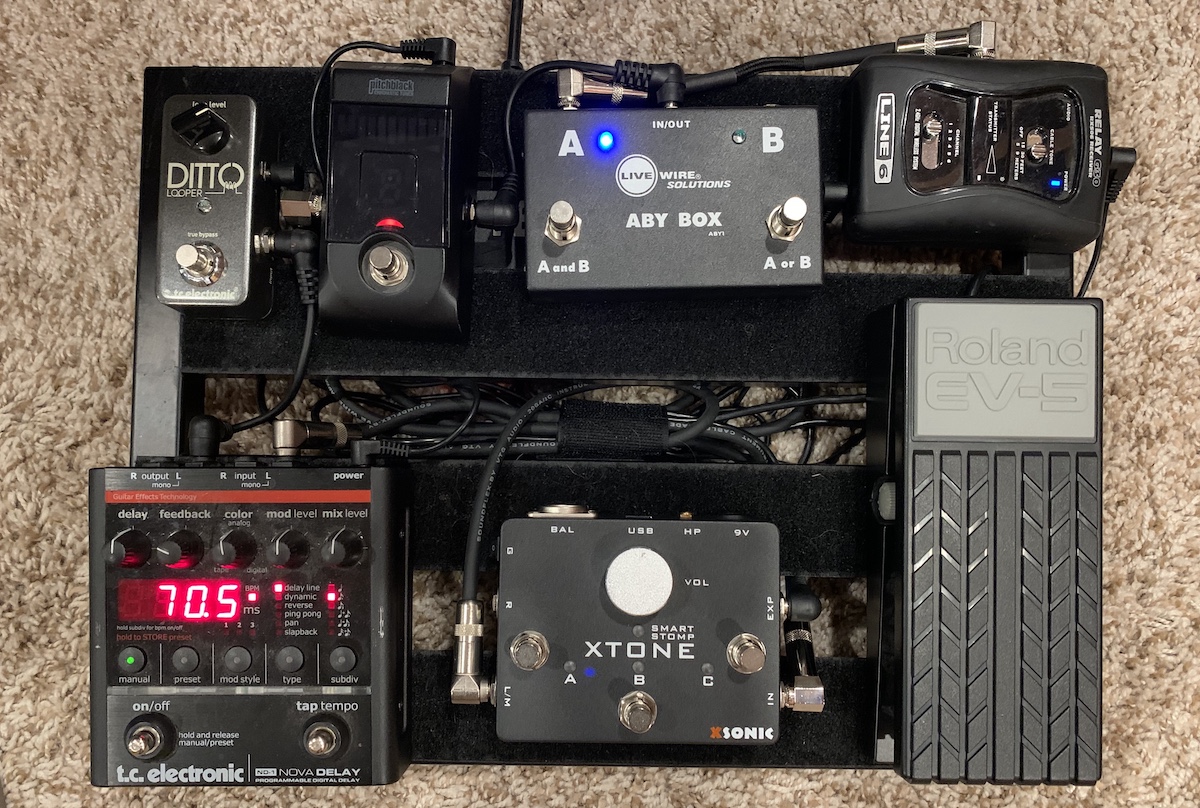
A brief description of what all this does and the order that everything is connected:
- In the upper-right is a Line 6 Relay G30 receiver that I use for playing wirelessly (there’s a transmitter that plugs into my guitar, a Gibson standard Les Paul).
- From there, it connects to a LiveWire A/B box. I use this to combine two signals into one by plugging my electric violin into the B port when I’m at church. (This also allows me to apply effects and delay to my violin, which is pretty fun!)
- The A/B box connects to a Korg Pitch Black tuner, which allows me to keep my instruments in tune and mute the signal while doing so.
- The tuner connects to the Xsonic Xtone on the bottom, allowing me to apply effects to my clean guitar tone (the expression pedal is also connected to the Xtone, so I can control volume swells and also use it as a wah pedal).
- The Xtone is connected to the TC Electronic Nova Delay. This is my favorite delay pedal ever, and while I can control delay from my iPad, I keep this around because it allows me to apply multiple delays at once (i.e. a quarter delay combined with a dotted-eighth).
- The delay is connected to a TC Electronic Ditto looper. I don’t use this a ton, but it’s fun when I’m jamming by myself and I want to experiment with multiple parts.
- The looper connects straight to the snake on the stage (or my Mac at home if I want to play along with songs from the Music app).
All of this breaks though if the Xsonic Xtone isn’t able to drive all of the digital signal processing for my guitar tone.
Fortunately, it’s up to the task. Even for a tone snob like myself.
Two things that are easily overlooked but very important for making this work:
- A 108dB dynamic range, which allows for a full range of sounds to be taken in as input through the interface.
- An insane 192kHz sampling rate, which the Xtone website describes as “ultra-HD audio.”
But the most impressive thing is that it brings in this high-quality audio from my guitar, applies effects processing from the iPad, and sends it out to the PA with zero noticeable latency.
The hardware features of the pedal itself include:
- An input jack for connecting your instrument.
- An expression pedal input that allows you to control your software with an external expression pedal.
- A volume knob for controlling the level of the output.
- 3 foot switches that can be programmed via software w/ multi-color LEDs to show which options are currently selected.
- A USB interface for connecting to a computer or iOS device (can also be powered via the USB interface, BTW).
- A 9V connector (if you don’t want to drain the power of your connected device).
- A headphone output.
- A balanced XLR output.
- A ground switch.
- Stereo 1/4” output (you can use just the L channel if you don’t need stereo).
The stomp box itself feels solid. The box is metal and the foot switches feel like any other quality stomp box I’ve used. I have no concerns about this thing being reliable even as I bring it back and forth from home to church on a regular basis.
The pedal also comes with a USB cable, a Lightning to USB 3 camera adaptor, and a code for the $20 JamUp Pro Pack, so you have some software out of the box to use with it.
The Software
The JamUp software that comes with the pedal is made by Positive Grid. While everyone has their personal preferences, I really like the sound of the Positive Grid software and think they do a great job with their effect and amp modeling. That said, I personally don’t use JamUp but use another Positive Grid product called BIAS FX.
Don’t get me wrong, JamUp is a great app. In my opinion, BIAS FX just sounds a little better and gives MUCH greater control over the tone that you produce. There’s a section on the Positive Grid website that explains the difference in detail, but the TL;DR is that BIAS FX is newer. Here’s an excerpt from the developer’s website:
It comes with all the greatest and latest algorithms from our audio signal processing research and development, and it provides significantly detailed and authentic emulation of analog pedals and studio racks.
The main BIAS FX interface has a couple different areas: the toolbar at the top with presets and settings that you can recall quickly, and below that is the signal chain, which shows the effects that you have connected. The active effects are solid, and the ones that are currently off are raised slightly and grayed out. Below the signal chain is a close up view of the selected effect. You can tap and drag any of these controls to get it sounding just the way you like it. You can add new effects by tapping the plus icon on the right and selecting from any of the effects that you have unlocked inside the app via in-app purchase.
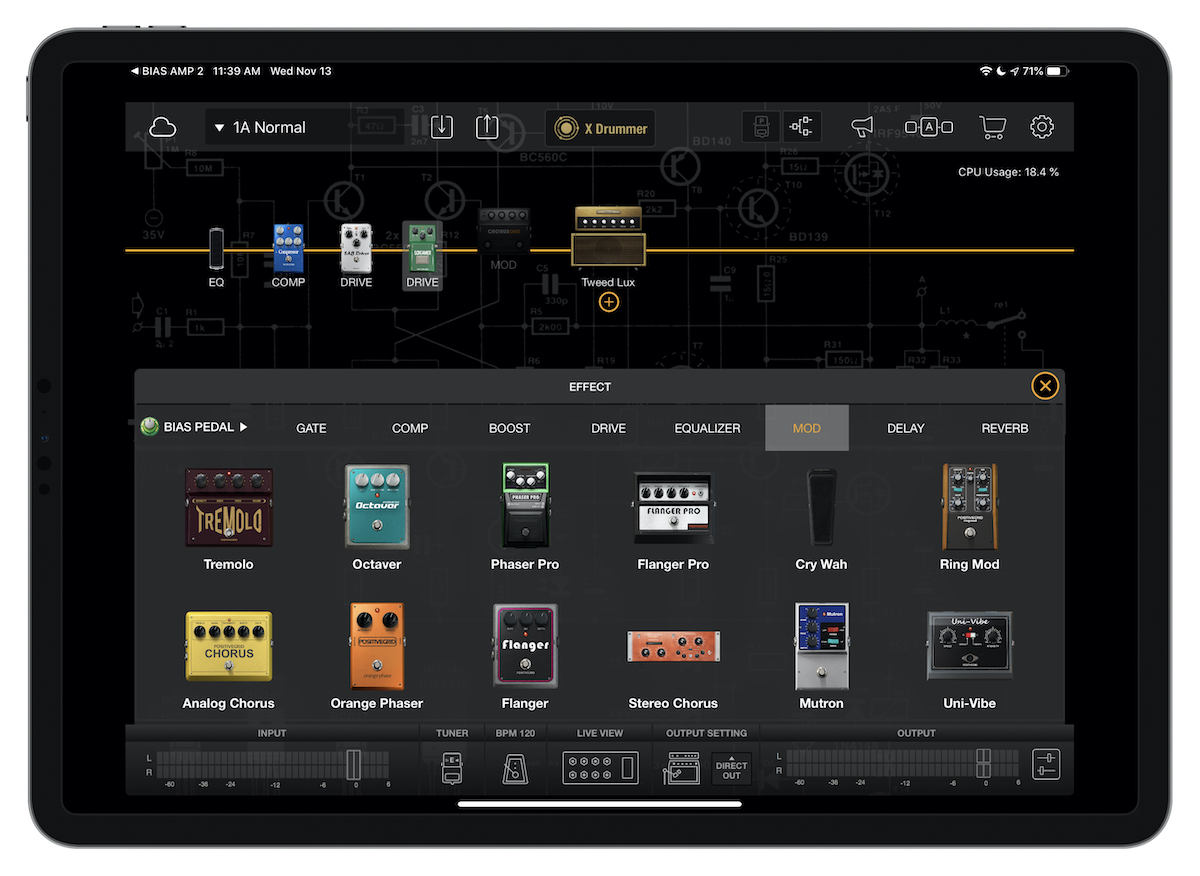
There a ton of effects you can choose from, and if you don’t need all of them you can purchase just the ones that are relevant to your style of play. For example, you can buy just the analog effects or the metal effects if you don’t want to purchase everything. (For those curious, I did end up purchasing everything via a special discount offer inside the app because I knew I would want to play with everything).
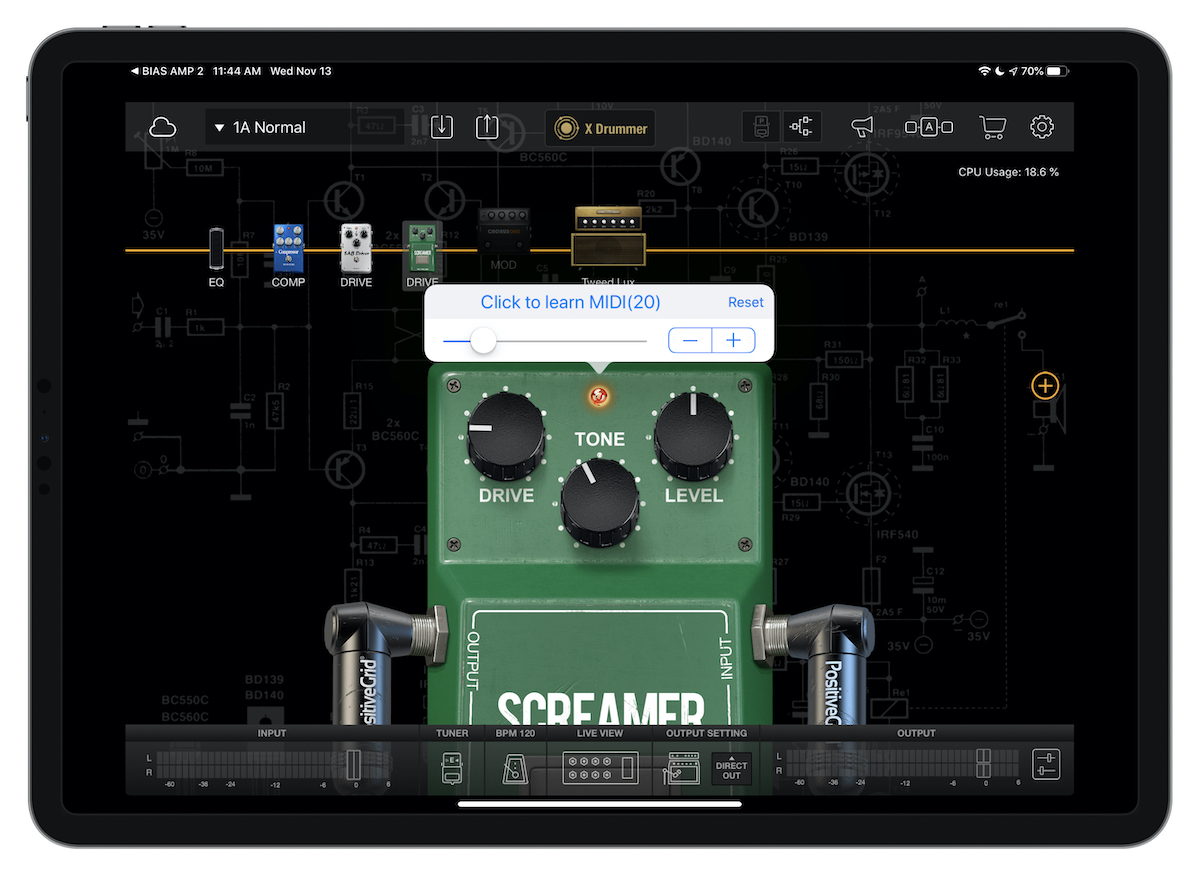
There’s a Live View inside the app that makes it easy to turn things on and off by giving you huge buttons for certain effects and presets, but you can also switch presets and control presets using the programmable Xtone pedal. Just tap and hold on the control you want to map to the Xtone, tap the Click to Learn MIDI button, and press the foot switch you want to map it to.
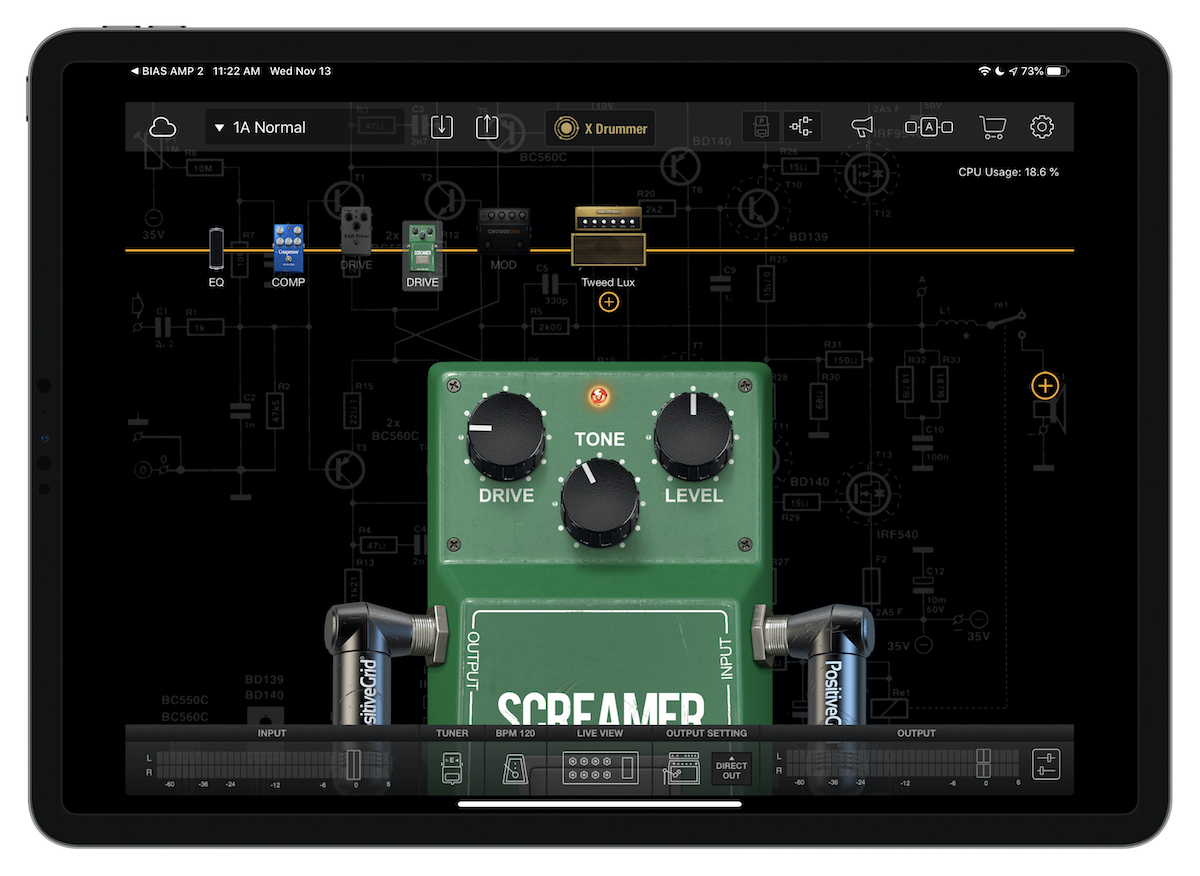
In this example, I have the drive pedal (which does a remarkably good job simulating a vintage Ibanez Tube Screamer) set to turn on or off when I press the selected foot switch.
Even though the Xtone only has three switches, you can actually store up to 9 actions this way because there are three different banks you can store them in. Press and hold on any of the foot switches to activate that bank. The LED below the volume button will show green, blue, or red to indicate which bank is selected, and each switch can be programmed for separate functions inside of each bank. You can also program the expression pedal this way to control a volume pedal or inside the BIAS FX app.
Where things really get interesting (at least for a tone snob like me) is in the companion app, BIAS AMP 2. You can purchase amp simulators inside the BIAS FX app and just use those, but BIAS AMP 2 allows you to control everything about the amp models you use in BIAS FX. You can even choose from different tube types to craft the perfect sound you’re looking for.
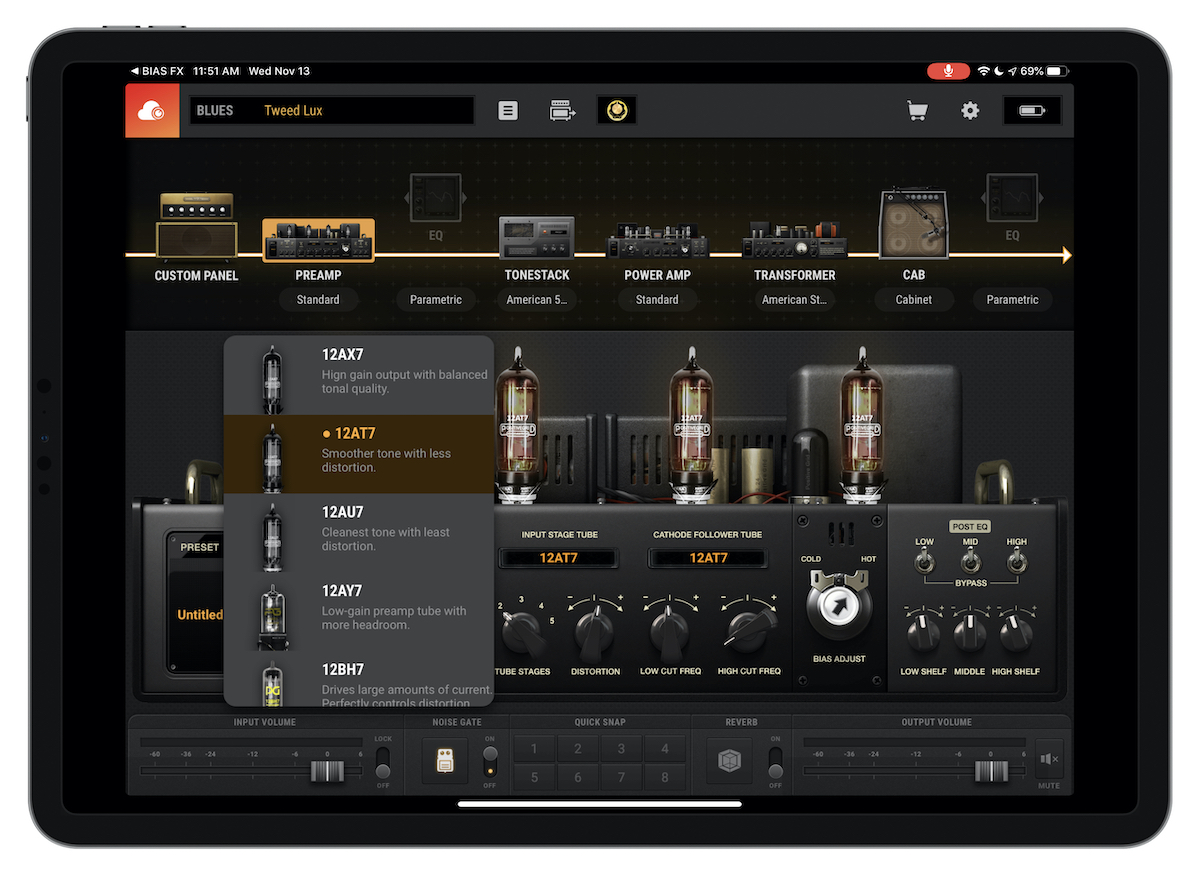
I won’t get too into the weeds here, but any guitar player that has spent hours trying to get their sound just right will love the control that is available inside of BIAS AMP 2. You can even control the look of the cab as you craft it, the type of cabinet you use, the type of microphone you want to simulate playing into, and even choose the positioning of the mic (or mics).
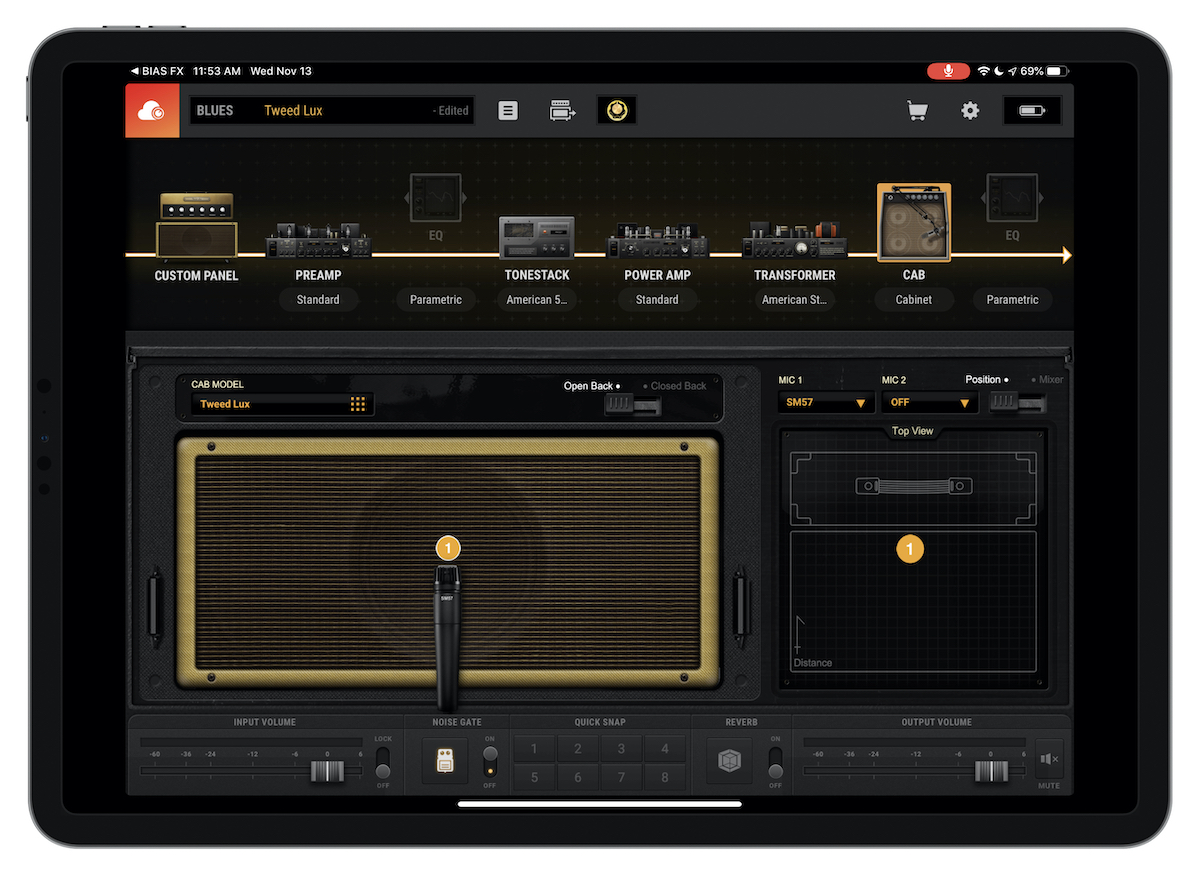
Once you get everything just the way you like it, you can tap the BIAS FX button in the toolbar at the top to bring your new amp model into BIAS FX for live performance.
What I Wish Was Better
It’s not all sunshine and rainbows. There are a few small annoyances that I’ve had to work around. Here are a couple of things that could make playing guitar from my iPad even better.
- The app interface isn’t great. Even though BIAS FX and BIAS AMP 2 look considerably better than many other apps that offer comparable functionality, it still pales in comparison to the best interface designs on iOS. For example, the resolution doesn’t match the full size of the 11″ iPad Pro I run them on. Almost every music app I’ve tried falls short in this regard. This doesn’t bother me when I’m playing, but it’d be nice if I could find a pro music app that supports the full resolution of the iPad hardware I’m running it on.
- Dongletown: Population, You. Most hardware (the Xtone included) include a cable to USB-A, which means you need a dongle if you’re going to connect it to your iPhone or iPad. Fortunately, it comes with an adapter so you’re not stuck until you get one, but I have a USB-A to USB-C dongle that I have to remember to bring back and forth with me now. If I don’t have it with me, I can’t play!
- Software bugs can (quite literally) be showstoppers. This is probably the thing I miss the most from my analog effects — the peace of mind of knowing that they just worked. All the time. No updates, no variables — just plug them in and use them. To be honest, I haven’t encountered any serious bugs yet, but I know I could. It is kind of nerve-racking to know that any minor iOS update could potentially break my rig. So if you’re going to play through your iOS device, make sure you do it frequently. Test everything before you show up and try to play, just to make sure.
Conclusion
Effect and amp modeling has come a very long way in the last several years. If (like me) you’ve been holding off because the hardware wasn’t quite there, I highly recommend you check out the Xsonic Xtone pedal. It’s a quality audio interface that’s built like a tank and can withstand live gigging. It also gives you the flexibility to use whatever software you want, which is a huge plus when proprietary apps are neglected (I’m looking at you, Line 6). I do recommend that you spend a bit of time figuring everything out before you try it live. I love the control and the flexibility that playing live music through my iPad gives me. While the tone still doesn’t quite replicate the warmth of a real tube amp, it gets me pretty darn close with a lot more flexibility. I am extremely happy with my current setup, and plan to use it for the foreseeable future.
Our Must-Have, Most Used Productivity Apps
We spend an inordinate amount of time sorting through hundreds of apps to find the very best. We put together a short list of our must-have, most-used apps for increasing productivity.