A Guide to Sketchnoting on iPad (using GoodNotes)
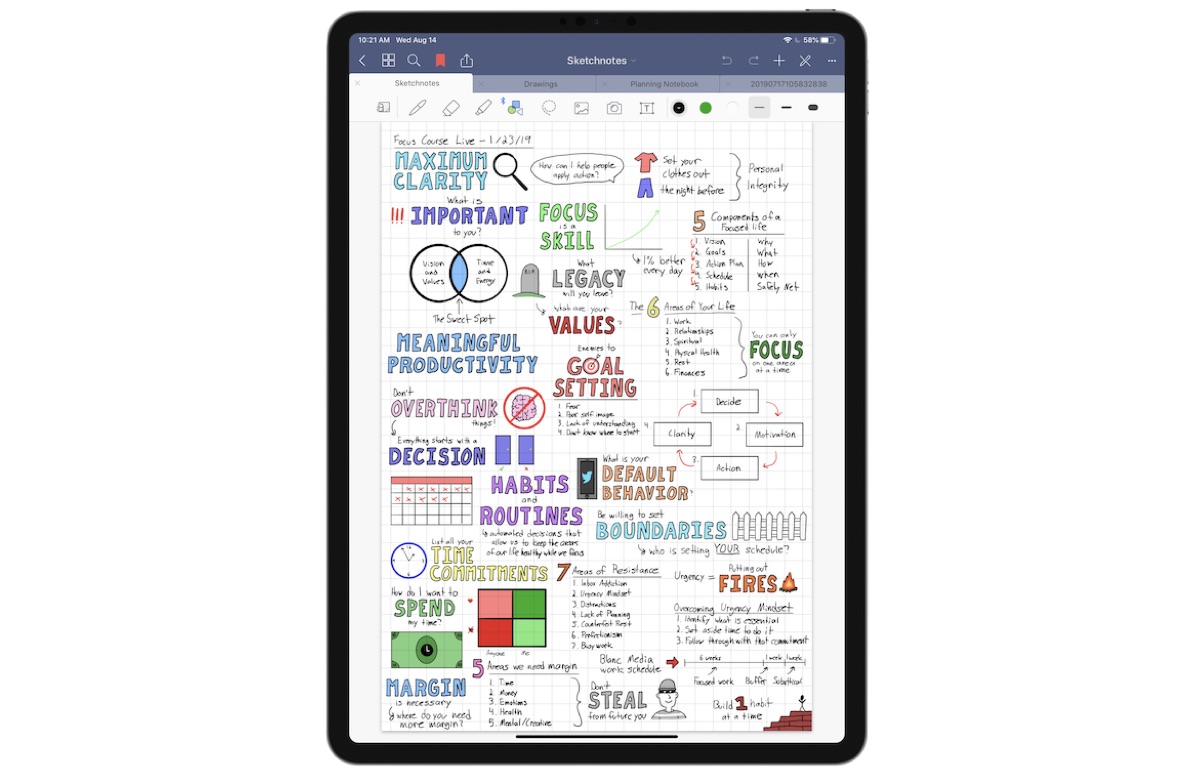
Sketchnoting is a powerful way to take visual notes that help you retain more of the information you hear. You’ve probably seen sketchnotes before, like this one I did during a Focus Course live event:

But if you’re like me, you might have thought to yourself, “there’s no way I can create something like that.” I understand — sketchnoting can be pretty intimidating when you’re just getting started.
But I’m living proof that anybody can do it.
My sketchnoting journey
A while back, I came across a study that showed that students who took longhand (analog) notes using pen and paper retained more information than those who typed (digital) notes using a laptop. The study found that laptop (digital) note-takers ended up transcribing the lectures they attended verbatim rather than putting it into their own words, causing them to process the information at a much shallower level that was ultimately detrimental to long-term learning.
I’d never really been much of an analog fan, but I did find myself wanting to retain more information from the talks and lectures I was attending. The tipping point for me came when I was trying to reflect on what my pastor had preached the previous Sunday and I couldn’t remember what it was! I knew I had copious notes in my digital notebook, but it obviously wasn’t helping me live my day-to-day life like I wanted it to.
At that exact moment, I decided I needed to give sketchnoting a try – even though there were several things that terrified me about it.
#1: “I’m not an artist!”
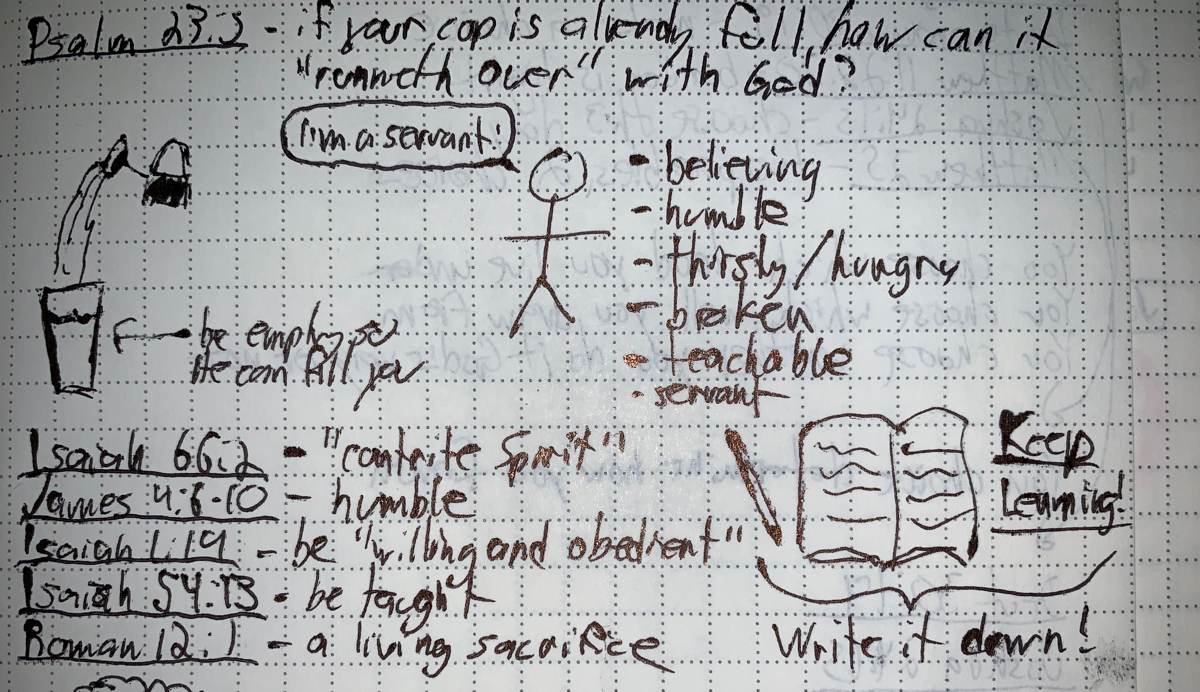
This isn’t false humility; it’s a fact. My first sketch note was a bunch of words and a couple of stick figures:

But shortly after I started the experiment, I read The Sketchnote Handbook by Mike Rohde. I would argue that Mike is an artist (so on the surface we don’t have a lot in common), but I was impacted by an idea that he shared in the book that gave me permission in my own head to try (and fail) with sketchnoting:
Ideas, not art.
The point being that your sketchnotes are intended for an audience of one. The point of the sketchnote is to help you retain the information, not be put on display in a museum or shared via social media. Don’t fall into the trap of comparing your notes with others. The goal is not to make something beautiful — the goal is to capture the ideas as they come to you.
It doesn’t matter what your sketchnote looks like. What matters is that you made it.
#2: “I can’t keep up!”
Even though I was trying out sketchnotes as an alternative to verbatim notetaking, I was still worried that I wouldn’t be able to keep up with what the other person was saying.
What I found was that while I didn’t record every thought or idea, I did naturally attach to some over others. I focused on capturing those ideas that jumped out at me, forcing myself to create an image associated to the idea and then capture it on paper. Yes, I didn’t get everything, but that was okay. I found that the images and ideas I did capture stuck with me for a much longer period of time, which is exactly what I was hoping for when I started.
The Transition to GoodNotes
I took sketchnotes with a Rhodia Webnotebook and Pilot G-2 gel pens for several years. Honestly, I had no intention of switching to digital. I enjoyed the feel of pen on paper, and my notebooks never ran out of battery.
But I was intrigued by the 10.5” iPad Pro and the increased refresh rate. I had used an Apple Pencil on an iPad Pro previously, and while the lag was significantly better than other digital systems, it still wasn’t where I wanted it to be for sketchnoting.
But the shiny new iPad changed all of that.
Around the same time, GoodNotes had undergone a pretty substantial update and I decided to give sketchnoting on the iPad one more try.
Immediately, I was hooked.
GoodNotes instantly felt familiar to me. It gave me all the tools I needed to not only make sketchnotes, but take them to the next level. Here’s a couple of examples:
-
The Pen tool gave me an almost infinite number of styles and colors to choose from, resulting in much more colorful sketchnotes than I had ever created previously. (And as an added bonus, they weren’t going to explode in my backpack like my gel pens did on a flight once.)
-
The Shapes tool helped me bring much more consistency to my sketchnotes. By being able able to draw basic geometric shapes and have them snap into place, my sketchnotes all of a sudden looked a lot more professional.
-
Even though I had gotten used to using pens and embracing the flow of the message instead of obsessing about how perfect my marks were, the Undo feature saved my bacon whenever I really made something ridiculous by allowing me to quickly try again.
-
In addition to using multiple pen colors, I started coloring in my sketches using the Highlighter tool. I started using this all the time for lettering, drawing the block letter outline of important words and then shading them with the highlighter after.
In addition to feeling like the right tool for the job for me, I also found a couple additional benefits of keeping my sketchnote library inside of GoodNotes:
-
I never run out of notebooks or pages. If I needed a new page, I could just swipe from right-to-left in GoodNotes to create a new one.
-
My entire library is on my device. I didn’t need to look through all my old notebooks on my bookshelf, and I always had everything with me on my iPad.
-
I can search my notes to find something specific. GoodNotes automatically applies Optical Character Recognition (OCR) to my documents, which means I can search my entire library for a specific word and instantly find it.
Some Tips to Get You Started Sketchnoting on iPad
Here are some additional tips if you’re going to give sketchnoting on iPad in GoodNotes a shot.
-
Use basic shapes to compose your sketch note. Most sketch notes are comprised of just a few simple shapes: circles, squares, triangles, lines, and dots. Use these basic elements and building blocks when composing your sketchnote and it’ll make the process much easier – especially at the beginning.
-
Use dot grid paper. Dot grid gives you enough reference to help you in using the basic shapes that comprise a sketchnote, but don’t force you to be as rigid as solid lines.
-
Don’t go nuts with detail. Try to find the flow with what the speaker is saying. You can always come back and add more detail and color later if you want.
-
Stick with it! Your beginning sketchnotes might just look as bad as mine. That’s okay. Remember, you’re creating ideas, not art. Keep with it. Before long, your sketchnotes will evolve and you’ll find your style.
If you want to learn how to utilize GoodNotes to its full potential, we’ve got a new course coming that has two parts:
- In-dept screencasts to master all the tips, tricks, ins, and outs of GoodNotes.
- Our in-house library of custom digital templates that you can import and use on your iPad.
Punch in your email below and we will: (a) send you two of our custom productivity templates right now to get started, and (b) let you know as soon as our GoodNotes course launches.
Wait. There’s a Bonus….
Custom Productivity Templates for Your iPad
If you want to use custom productivity templates on your iPad, we’ve put together a free, walkthrough guide along with two of our in-house templates that can help you get started.
We’ll show you…
- How to create and save custom page templates.
- How to use those page templates to transform GoodNotes into your own productivity notebook (or any other type of notebook replacement).
Plus, we also have included two of our custom productivity templates for you to get started with.

This guide is available for FREE to our email subscriber community. And you can get it right now.
By joining the Sweet Setup community you’ll also get access to our other guides, early previews to big new reviews and workflow articles we are working on, weekly roundups of our best content, and more.
