Exporting 101: How to Export Your Sheets from Ulysses on Mac, iPhone, and iPad
Once you’ve finished writing, Ulysses lets you export your text easily to a variety of standard formats using the Quick Export feature. Initially, this Quick Export feature feels anything but quick, as there are multiple taps or clicks needed before your text is ready to be sent somewhere else on your device.
However, with the wide variety of export options available in Ulysses, a middle step is needed. Despite requiring an extra tap or two, Quick Export is indeed quick, especially if you know how to use it.
In this tutorial, we’ll walk through all the different ways you can export your text from Ulysses on the iPhone, iPad, and Mac.
Note: This is an excerpt from our in-depth Learn Ulysses course. For the entire lesson, along with 13 other lessons, check out Learn Ulysses.
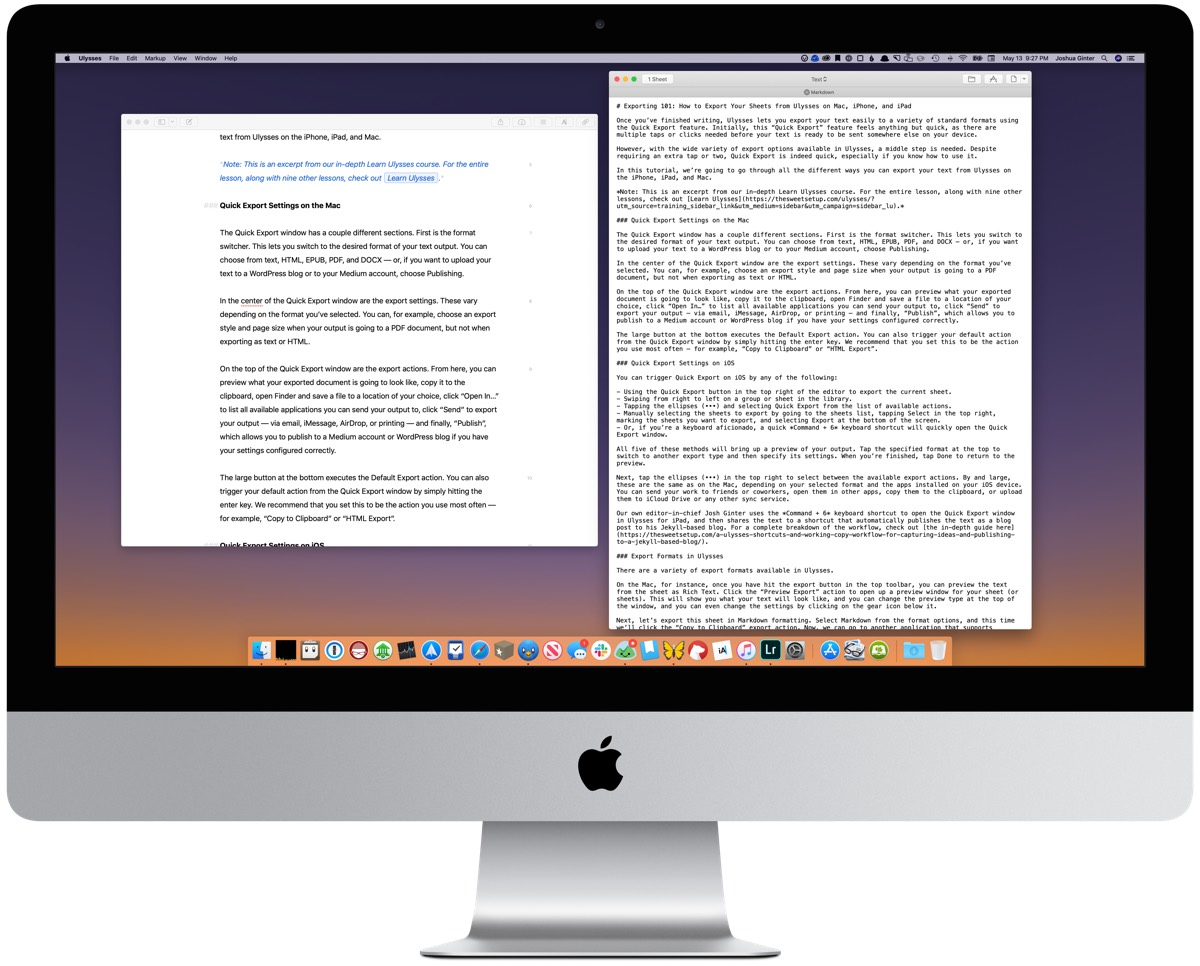
Quick Export Settings on the Mac
The Quick Export window has a couple different sections. First is the format switcher. This lets you switch to the desired format of your text output. You can choose from Text, HTML, EPUB, PDF, and DOCX. Or, if you want to upload your text to a WordPress blog or to your Medium account, choose Publishing.

In the center of the Quick Export window are the export settings. These vary depending on the format you’ve selected. You can, for example, choose an export style and page size when your output is going to a PDF document, but not when exporting as text or HTML.
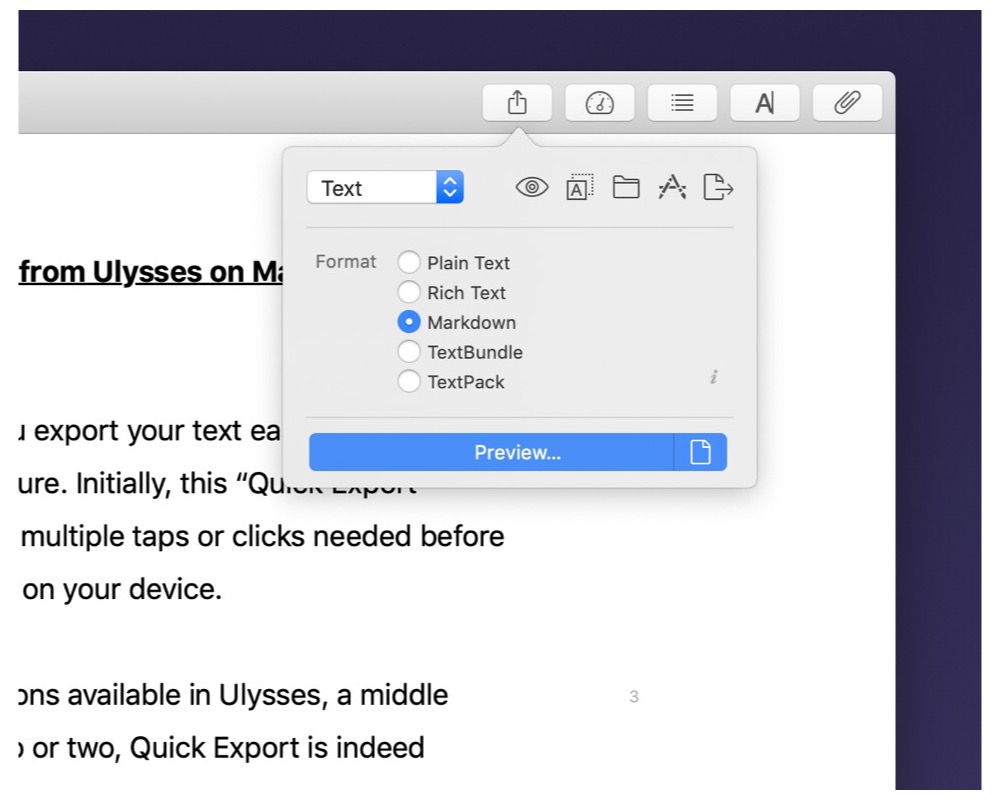
On the top of the Quick Export window are the export actions. From here, you can preview what your exported document will look like, copy it to the clipboard, open Finder and save a file to a location of your choice, click Open In to list all available applications you can send your output to, click Send to export your output — via email, iMessage, AirDrop, or printing — and finally, Publish, which allows you to publish to a Medium account or WordPress blog if you have your settings configured correctly.
The large button at the bottom executes the Default Export action. You can also trigger your default action from the Quick Export window by simply hitting the enter key. We recommend that you set this to be the action you use most often — for example, Copy to Clipboard or HTML Export.
Quick Export Settings on iOS
You can trigger Quick Export on iOS with any of the following actions:
- Use the Quick Export button in the top right of the editor to export the current sheet.
- Swipe from right to left on a group or sheet in the library.
- Tap the ellipses (•••) and select Quick Export from the list of available actions.
- Manually select the sheets to export by going to the sheets list, tapping Select in the top right, marking the sheets you want to export, and selecting Export at the bottom of the screen.
- Or, if you’re a keyboard aficionado, a quick
Command + 6keyboard shortcut will quickly open the Quick Export window.
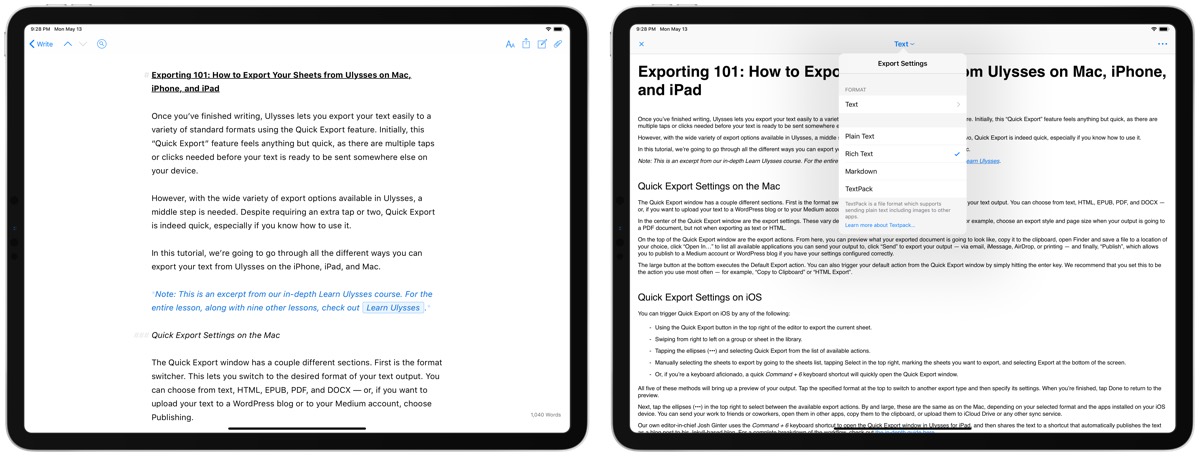
All five of these methods will bring up a preview of your output. Tap the specified format at the top to switch to another export type and then specify its settings. When you’re finished, tap Done to return to the preview.
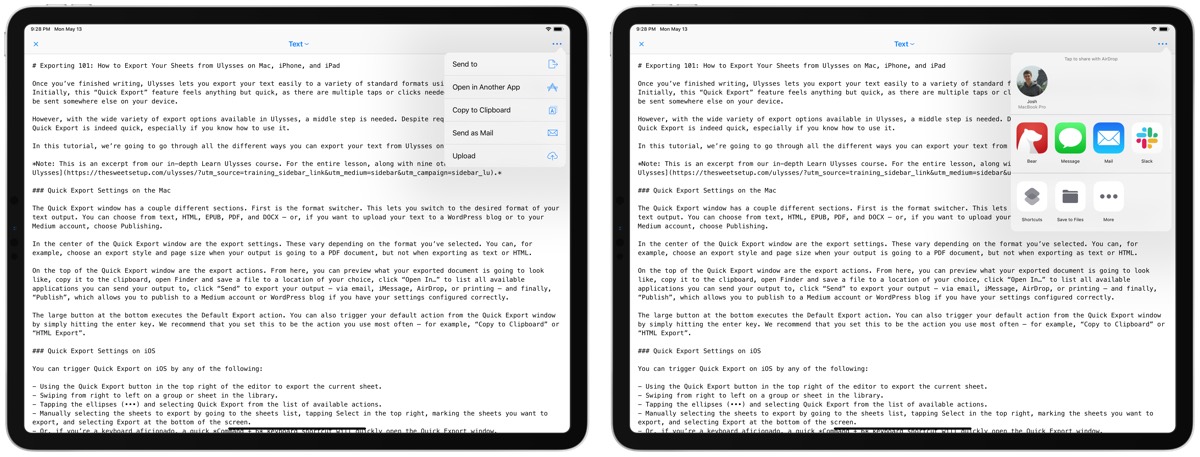
Next, tap the ellipses (•••) in the top right to select between the available export actions. By and large, these are the same as on the Mac, depending on your selected format and the apps installed on your iOS device. You can send your work to friends or coworkers, open them in other apps, copy them to the clipboard, or upload them to iCloud Drive or any other sync service.
Our own editor-in-chief, Josh Ginter, uses the Command + 6 keyboard shortcut to open the Quick Export window in Ulysses for iPad, and then shares the text to a shortcut that automatically publishes the text as a blog post to his Jekyll-based blog. For a complete breakdown of the workflow, check out the in-depth guide here.
Export Formats in Ulysses
There are a variety of export formats available in Ulysses.
On the Mac, for instance, once you hit the export button in the top toolbar, you can preview the text from the sheet as Rich Text. Click the Preview Export action to open up a preview window for your sheet (or sheets). This will show you what your text will look like, and you can even change the preview type at the top of the window and modify the settings by clicking the gear icon below it.
Next, let’s export this sheet in Markdown formatting. Select Markdown from the format options, and this time we’ll click the Copy to Clipboard export action. Now, we can go to another application that supports Markdown.
Next, let’s save this sheet to our desktop using the TextBundle format. This will attach all of the images in the sheet, as well as the text, into a TextBundle file, so users don’t have to explicitly permit access to every single image file.
Next, let’s open the file in another application, like a code editor, where we can tweak the exported HTML code. First, let’s change the type to HTML, then click the Open in export action and select our code editor from the list.
Lastly, let’s export Rich Text and send this sheet as an email message. Select Rich Text as the format, click the Send Export action, then select Send as Mail. Our default email client opens and the content of the sheet is automatically included in the body of the email as Rich Text.
Initially, once I put text into Ulysses (which isn’t as easy as a Command + V in some circumstances), it was somewhat difficult to get it out of Ulysses with the correct type of formatting. Plus, without an understanding of everything that happens behind the scenes of the Ulysses Quick Export feature, one could easily mistake it for a “Quite Slow Export” feature.
With a little bit of grease and better understanding of all of Ulysses’s exporting superpowers, you can get your text out of Ulysses in a beautiful format with relative ease.
Stop losing your ideas and notes to multiple apps…
An online course to help you save time, organize your notes, and master the best writing app for Mac and iOS: Ulysses.