A Ulysses, Shortcuts, and Working Copy Workflow for Capturing Ideas and Publishing to a Jekyll-Based Blog
Before I ever got my start writing for The Sweet Setup — and even before coming as the Reviews Editor for Tools & Toys — I was writing at my own personal column, The Newsprint. My personal blog is humble and secondary, but I do my best to publish something fresh from time to time.
The Newsprint has gone through many forms — the blog originally started at Squarespace, moved to Ghost, and then moved back to Squarespace. After the second go around with Squarespace, I had my friend Josiah Wiebe move everything over to a static, Jekyll-based site. For all intents and purposes, The Newsprint has been a Jekyll-based blog ever since, with changes coming in the methods of publishing (and the devices from which I could publish) rather than back-end based stuff.
It’s all kind of meta, for sure. But it’s also somewhat unique. For a little over a year, my only method for publishing a blog post was done through Editorial on the iPad. I’d write the blog post in any text editor, then paste the final copy into Editorial before running one of Josiah’s Editorial workflows to publish. I had quick snippets that helped format the header information required for each blog post, but for the most part, 99% of everything happened in Editorial.
Editorial has slowly gone by the way side in recent years, and I became tired of being able to publish from only an iPad. Josiah implemented the Siteleaf CMS for the blog, which allowed me to publish from an iPhone, iPad, or the Mac, and which gave at least some form of CMS for editing old posts. The Newsprint has run on Siteleaf ever since.
I’d venture to say the majority of The Newsprint is Josiah’s work — I only publish content, while every pixel, font, and functional process has been created by Josiah. Any time I have a curiosity or an itch, Josiah seems to use the opportunity to test the waters on a new idea. This is how, in the end, I’ve moved to a Shortcuts-based workflow for publishing.

I’ve ranted and raved about Shortcuts a lot over the last few months. I’m not technically-savvy enough to create an RSS feed for my own blog, but I’ve been able to create some shortcuts to maximize efficiency in capturing ideas and publishing. Shortcuts is only going to become more powerful over time, and I expect the app to be a major factor for why people move toward an iOS-focused life rather than a macOS-focused life.
So, here’s my workflow for capturing ideas, building out those ideas, and publishing to a Jekyll-based blog. Fortunately for everyone, Josiah has added in the technical details for the publishing shortcut, so I’ll step out of the way for him to get geeky for a bit.
1. Capture Idea Shortcut
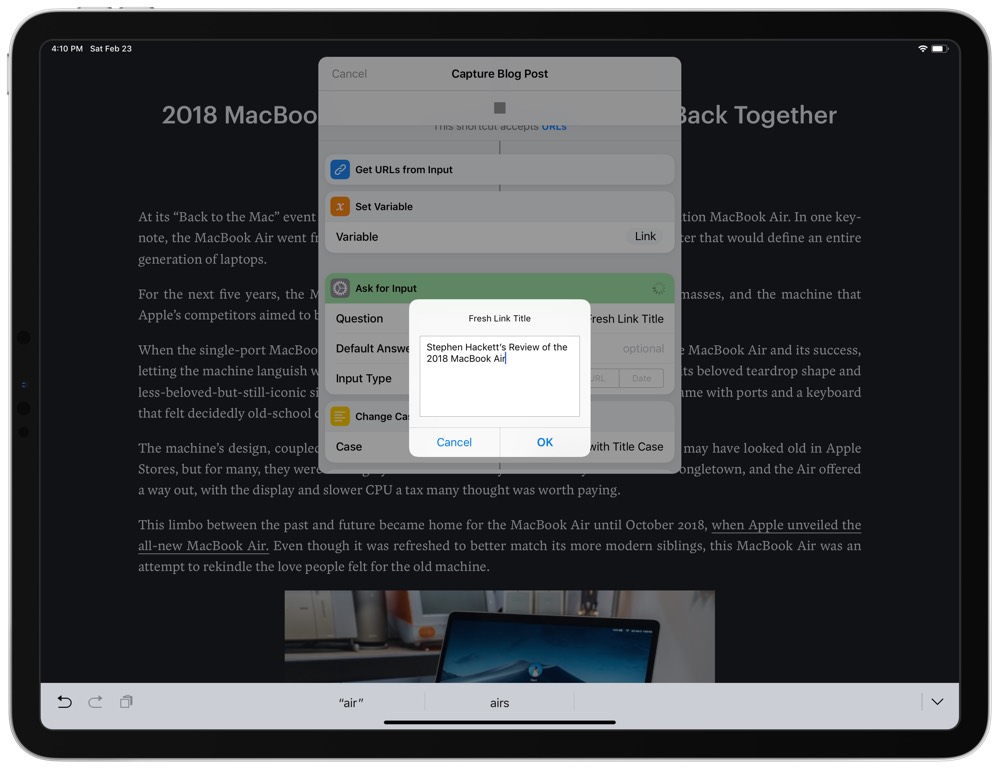
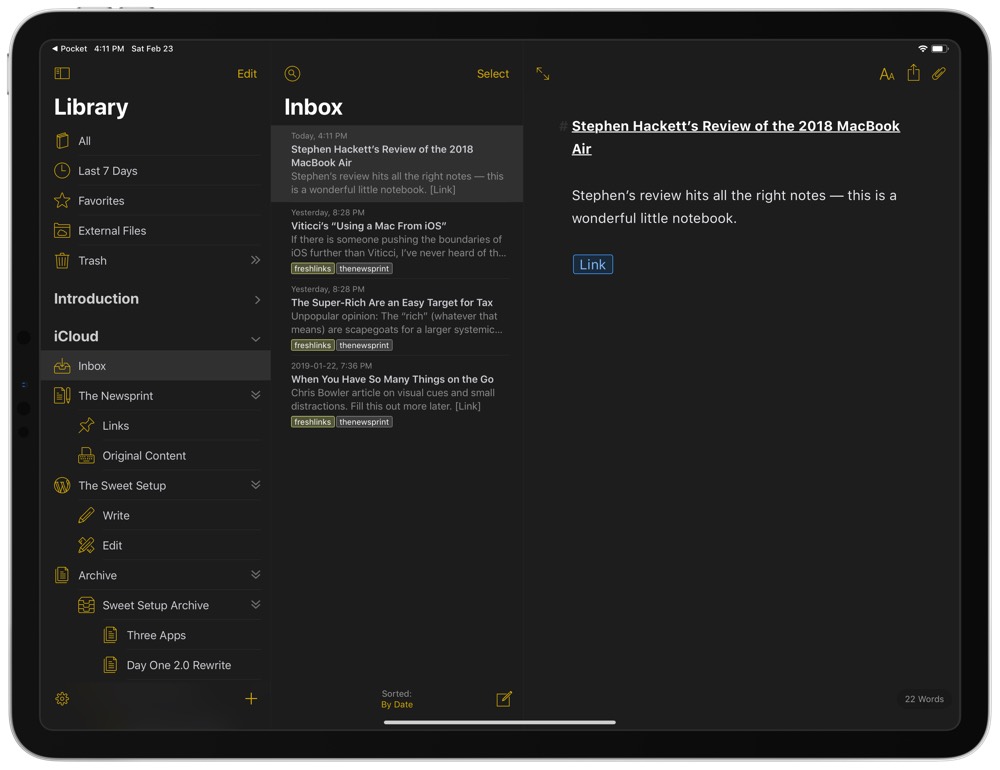
If I come across a link anywhere on iOS, be it Twitter, Safari, an email, or in Pocket, I use the “Capture Blog Post” shortcut for throwing essential information into a sheet in Ulysses.
The shortcut is pretty simple: it’s accessed through the share sheet, accepts URLs specifically (the majority of my work on my personal blog is linking to cool things I find throughout the day), provides an input dialogue box for titling the sheet, provides an input dialogue box for typing in a brief thought, and then creates a new sheet inside the Ulysses inbox with the data formatted nicely. The title is formatted as a H1 header, the brief text is nestled in the body, and the attached URL is hidden behind a Markdown link simply titled “Link” at the bottom.
I added in a quick “Change Case” part to the shortcut to ensure all titles are properly capitalized with title case, which also saves time when typing out the title inside the shortcut.

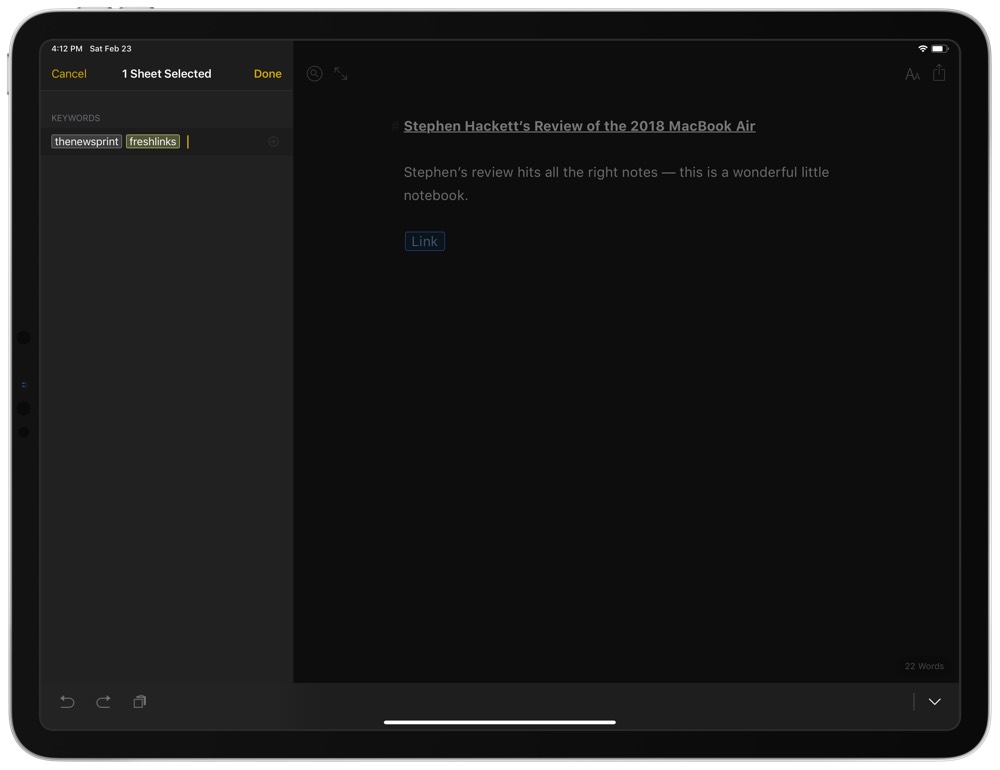
Once the sheet is in Ulysses’ inbox, it’s just a matter of moving it where it needs to go inside Ulysses, keywording the sheet appropriately, and publishing the sheet using Shortcuts.
If I were to change one aspect of this shortcut, it would be the ability to specify keywords within the shortcut rather than having to complete this task inside Ulysses. As it stands, everything is created as a generic, unlabelled sheet inside the inbox. I suppose this is a good way to ensure everything is processed properly in Ulysses, but it’d be great to be able to skip this step entirely.
2. Edit the Sheet
After creating the sheet using the Capture Blog Post shortcut, I jump into Ulysses on any device and edit the sheet accordingly. I have to ensure the sheet is titled with an H1 at the top and the link I want to share has to be on the last line of the sheet, otherwise I’m free to write anything in the body of the sheet.
There are three types of posts on The Newsprint: posts, links, and Fresh Links. Fresh Links are super short posts with attached links and a very quick thought or blurb. I work to keep these to less than 150 characters at all times.
Because of the brevity of Fresh Links, for most of the posts that hit The Newsprint, my initial brief thought captured within the shortcut is all that’s needed. I edit this brief thought for spelling mistakes or auto-correct issues and move on to the publishing steps.
3. Share as Markdown
Capture is complete. Editing is complete. At this point, it’s time to publish, and this is where Shortcuts’ power really comes to fruition.
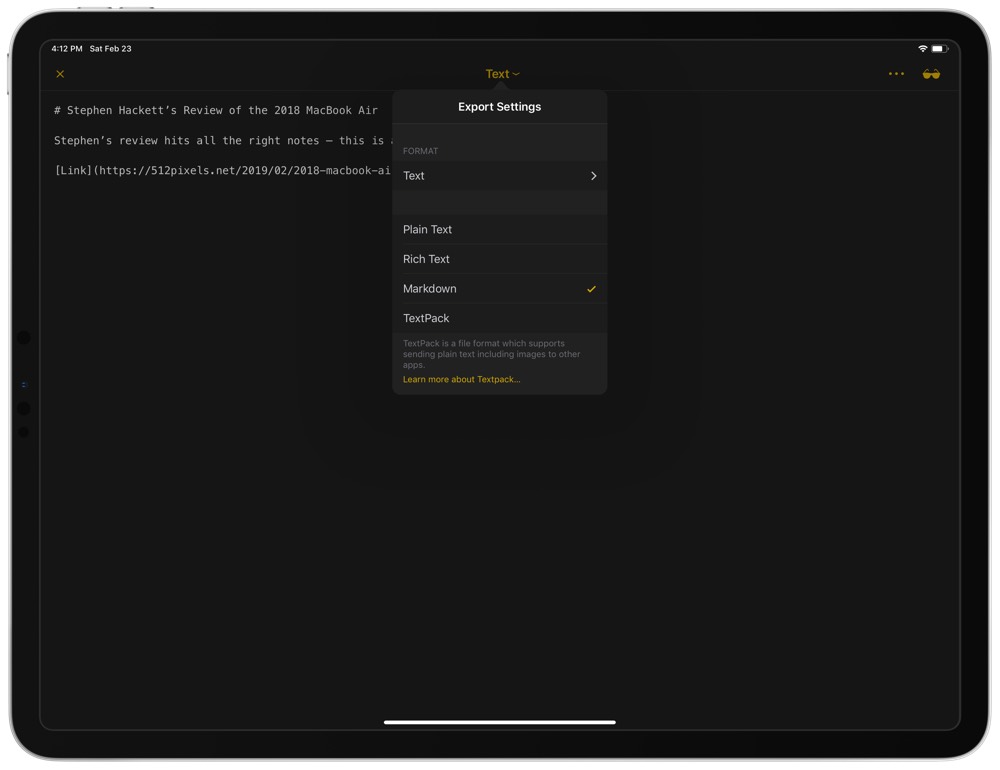
The first step is to share the sheet inside Ulysses as a Markdown text sheet. All that’s needed is to tap the share button, ensure the export settings are set to Text and Markdown, and I’m ready to move on to the Shortcuts step.
Very plain. Very easy. Super fast and efficient.
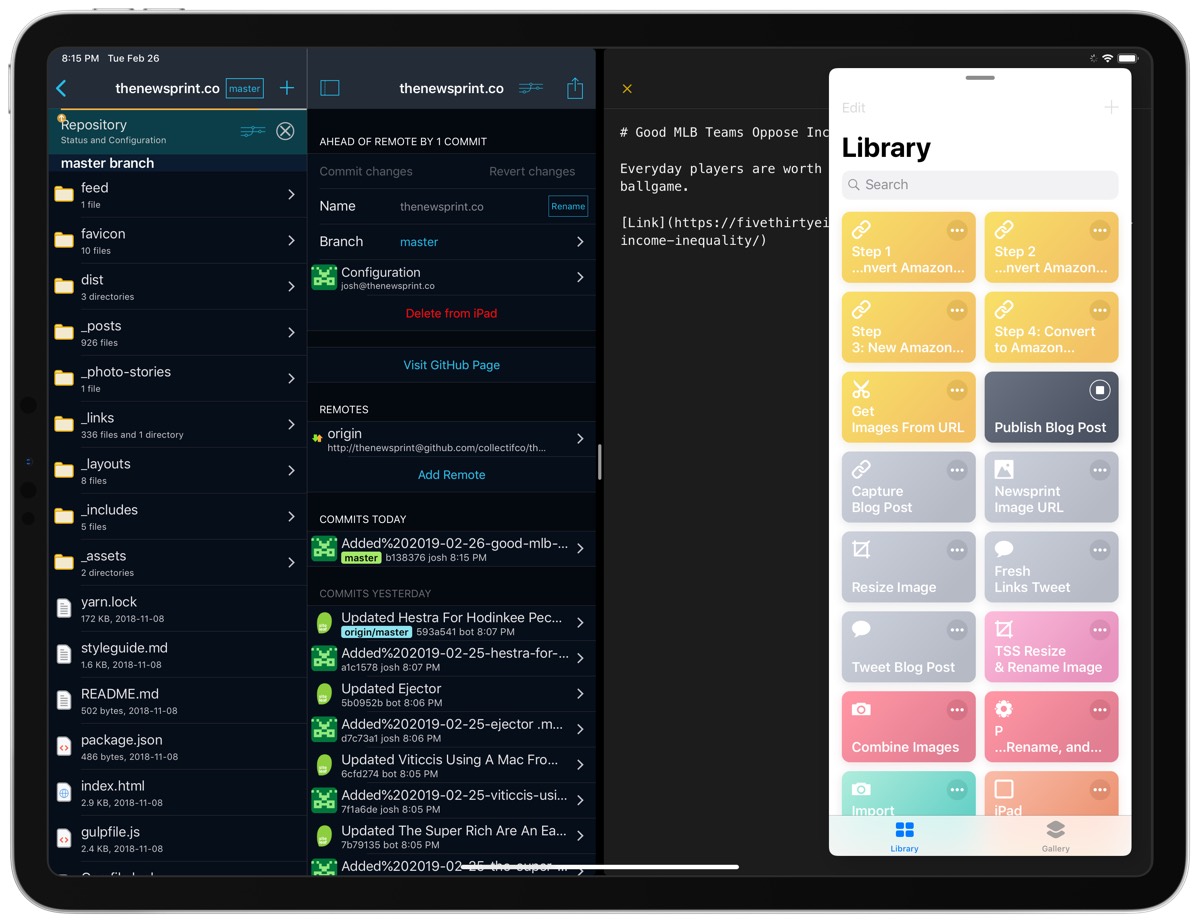
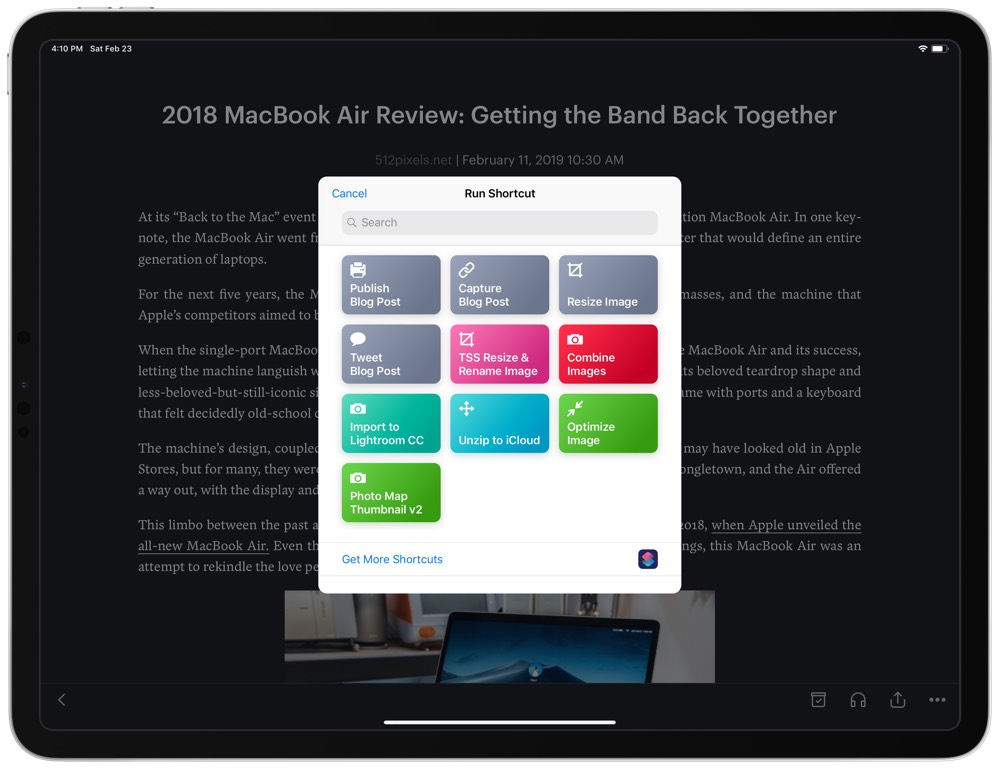
4. Publish Blog Post Shortcut
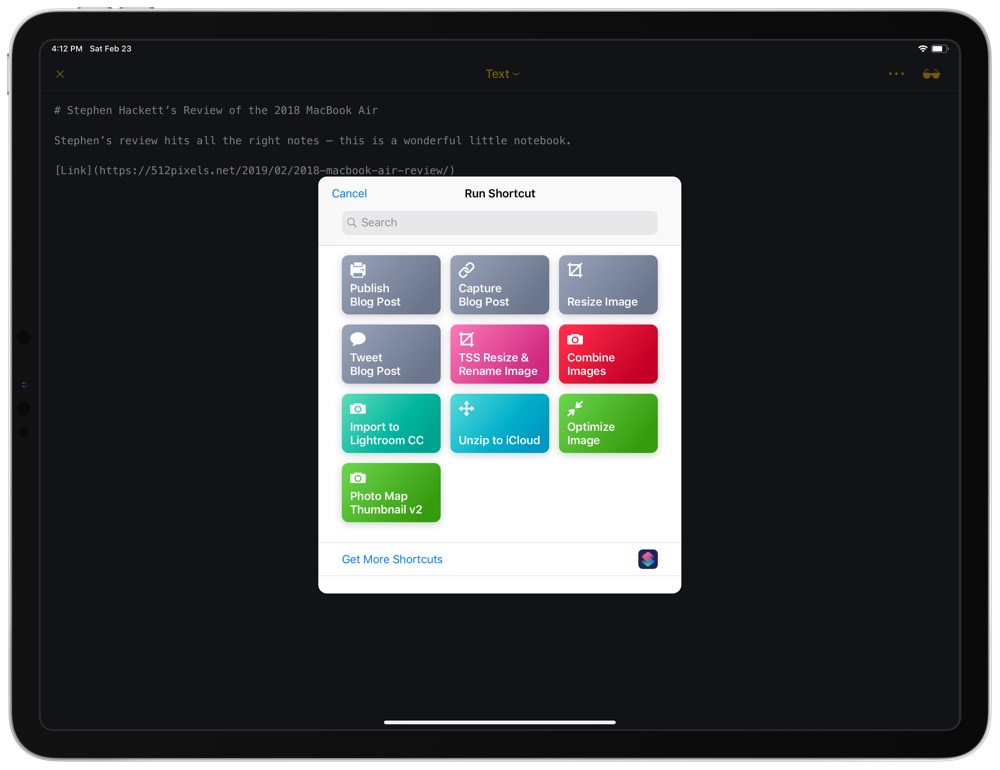
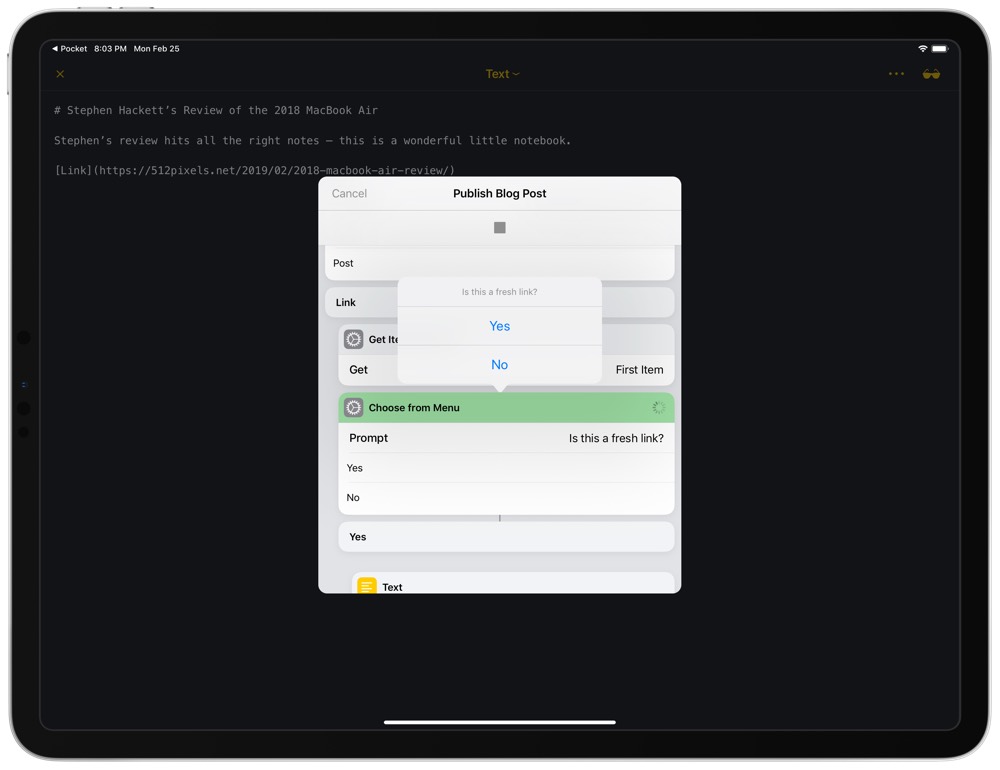
With the Markdown text sheet ready to go, initiating the “Publish Blog Post” shortcut is done by hitting the ellipses button in the top right corner (“…”), tapping Send to, tapping Shortcuts, and tapping the Publish Blog Post shortcut.
As Josiah will explain in more detail in a second, Publish Blog Post takes the Markdown text, provides a few options for selecting the type of post, and then whisks the Markdown text into a Markdown file and through Working Copy to create a new blog post on the site. Two taps — one to select post or link, and the second to specify a Fresh Link or a regular link — is all it takes for the shortcut to work its magic. (The linked Jekyll publishing shortcut eliminates the Fresh Link step.)
I’ll let Josiah dig into the details on the Publish Blog Post shortcut next — there’s a lot going on here.
More on the Publish Blog Post Shortcut
Josiah Wiebe is a full-stack developer and designer who markets for Leisure Travel Vans and moonlights as Collectif. When he’s not devising some new solution for something, he enjoys bikepacking, travelling, and spending time with his wife Katie and baby girl.
The Newsprint has gone through numerous iterations ever since Josh made the decision to move away from Squarespace. The current website is built using Jekyll, so it’s completely statically generated. It’s hosted on Netlify and is managed through Siteleaf.
As Josh noted earlier, The Newsprint has been using Siteleaf for a while. In 2016, Siteleaf made the switch to native Jekyll instead of their own proprietary templating engine. This didn’t really change anything for Josh, but it meant that I had greater flexibility to do more with the site.
Siteleaf has the ability to automatically sync your website with Github. This is super useful if you have some people working on a theme and other creating content and it allows everything to be 100% in sync, no matter who is working on it. (If you’re not familiar with Github, it’s a Git repository hosting service and a tool that many developers use to host and version control their source code.)
Each time a user uploads changes to Github, they create something called a commit. A commit basically records which files were changed and what changes were made (it’s an oversimplification, but this explanation will do for our purposes). To publish a post from an iOS device without using Siteleaf, we needed a way to create a commit.
This is where Working Copy comes in. Working Copy is the best Git client for iOS. What makes it so good is the robust support for x-callback-urls — the backbone of what’s needed to work with Shortcuts.
Once you have a post in Ulysses and Working Copy ready to create the commits, Shortcuts is the glue that holds everything together. I’ll do a brief run through of the shortcut, line by line, explaining what everything does.
Parsing the title
Since Josh has already written the title of the post in Ulysses as an H1, the shortcut parses the title instead of having to re-type it. We take the input of the shortcut (which is the Markdown body of the post), and split it twice: at the first hash and then at the first new line.
Next, we use Get Item from List, choosing the first item. Voila! That’s our title. The shortcut saves the title as a variable called title, and then runs some additional actions.
We are going to need a file name for the post, and I like to simply use the title. This part of the shortcut is something I’d like to improve, as it does not handle special characters or long titles very well. For now, the shortcut changes that title to lowercase and replaces all spaces with dashes. The shortcut then adds some URL encoding to try to weed out any funky characters and saves it as the slug variable.
Formatting the body
With the title completed, we can get to work on the body of the post. The Newsprint has three main types of posts – Fresh Links, posts, and link posts. We can handle all those cases using a prompt.
First, the shortcut gets the content from the original split text back when the title was parsed. The shortcut grabs the second item from the list and saves it as a variable called content.
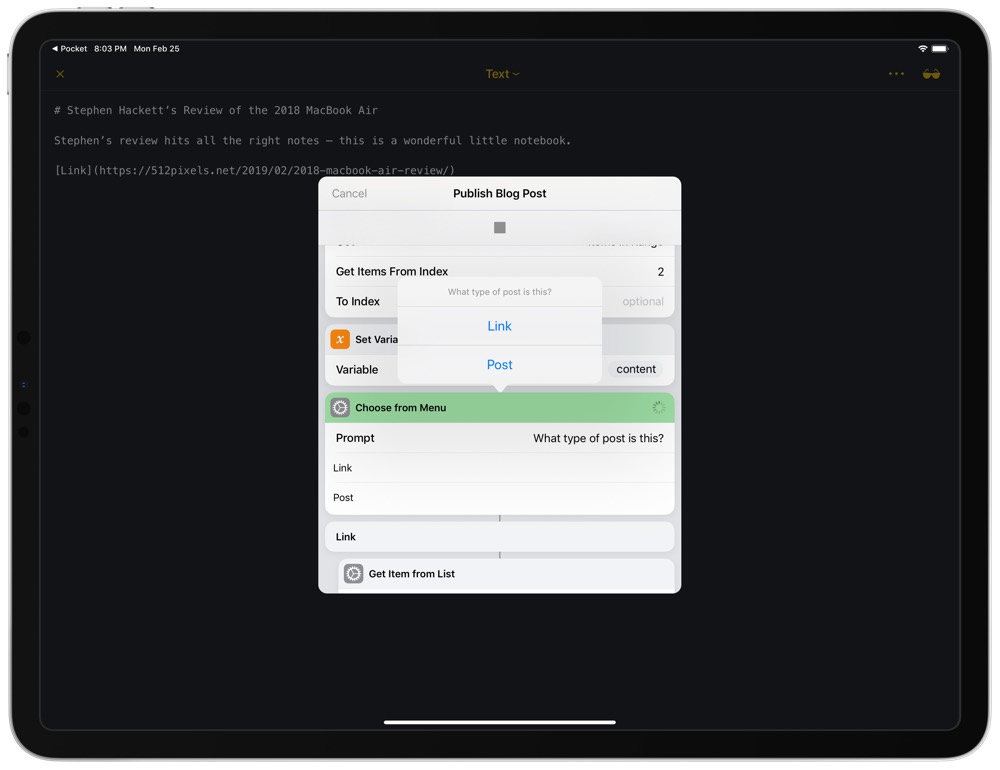
Next, the shortcut displays a prompt asking, “What type of post is this?” Each option results in different steps, so I’ll break them out for you.
1. Link:
If Link is selected, the shortcut immediately prompts to see if it’s a Fresh Link.
I’m using a collection called “links” in Jekyll to keep Fresh Links separate from the main posts collection. This means that they are stored in a different folder in the site. If the prompt is answered “Yes,” the shortcut sets a variable called path to _links. Otherwise, it sets the path variable to _posts.
Link posts and Fresh Links share the same post type, so the shortcut sets a variable called post-type to link. This tells Jekyll which template to use for that post.
Now we need to get the link. Since Josh always saves the link at the end of a post in Ulysses using [Link], this should be super easy. We’ll get the content variable and split it at [Link]. Next, the shortcut grabs the last item from the list and we can grab any URLs from that. The shortcut then saves a new variable called link with the value of link: http://example.com. I’ll explain why I add the “link:” string instead of just saving the raw link later.
It’d be weird if the link showed up in the post body, so, luckily, we have the power of regular expressions at our disposal. Using a replace text action with a regex of (\[Link\]\(\S*), we can replace the link from the content variable with nothing. Now we will set the content variable again to overwrite the original contents.
2. Post:
Similarly to a link post, this shortcut then sets our post-type variable right away. In this case, the value is post.
We also need to set the path, which is simply _posts.
Building the post with front-matter
Every Jekyll .md file has something at the beginning called “front-matter.” This tells Jekyll how to interpret that file. We can use the variables we’ve set up in the shortcut to create the front-matter for the post. We’ll create a text action with the following contents. Variable names are wrapped in curly braces for clarity.
---
title: {{title}}
date: {{date}}
author: Josh Ginter
layout: {{post-type}}
{{link}}
---
{{content}}
As you can see, each variable has a corresponding tag. The Newsprint’s Jekyll theme has some specific formatting based on whether the “link” tag is present in the front-matter, so this is why I set the link variable to actually contain the link tag. This way, if it’s not a link post, that tag will be omitted from the front-matter.
The content variable contains all our original Markdown body, with the exception of the title, as well as the link (if applicable).
Lastly, the shortcut copies everything to the clipboard.
Creating a commit
All of the Working Copy actions happen in one line in Shortcuts, so it’s a bit difficult to illustrate.

Here’s the full x-callback-url. I’ve wrapped all variables in curly braces so they’re easily distinguishable:
working-copy://x-callback-url/chain?key={{wc-key}}&repo=thenewsprint.co&command=pull&command=write&clipboard=yes&path={{path}}/{{slug}}&command=commit&message=Added%20{{slug}}&{{path}}={{path}}/{{slug}}&command=push
Working Copy allows you to chain commands, so you can build out a single URL to perform a number of actions. I’ll break the URL up into segments and dive in a little bit.
working-copy://x-callback-url/chain?key={{wc-key}}&repo=thenewsprint.co&command=pull
chain: This tells Working Copy to expect a number of different commands.key: Working Copy generates a key to be used forx-callback-urlcalls. I set this as a variable in the shortcut.repo: This is the name of the repository in Working Copy.command=pull: This command pulls the latest data from Github into Working Copy. We want to make sure we have the most up-to-date copy before making any changes.
&command=write&clipboard=yes&path={{path}}/{{slug}}
command=write: This command creates a new file in the repository.clipboard=yes: Using this argument tells WC to create the file based on your clipboard — and if you remember from earlier, this is where the output of our shortcut currently is.path={{path}}/{{slug}}: This is how we tell Working Copy where to store this file.
&command=commit&message=Added%20{{slug}}&path={{path}}/{{slug}}&command=push
command=commit: Now that we’ve created the file, we need to make a new commit describing the changes we’ve made.message=Added%20{{slug}}: The message is the description of the changes we’ve made in this commit. This would output something like “Added 2019-02-23-a-new-post.md.”path={{path}}/{{slug}}: This tells Working Copy which files to include in the commit.command=push: The command that makes the post go live. This saves our commit and pushes it to Github.
Unfortunately, there’s a few more steps to go through before the post is live on the website.
In order to allow Josh to continue using Siteleaf as well as this new Shortcut, I had to change the way the site was hosted. Previously, we had been using Github Pages, which is a great way to host a Jekyll site (for free!). Unfortunately, this wasn’t quite going to work with our new workflow.
Since Siteleaf decouples syncing from publishing, it wouldn’t actually know when we want to publish a post. Netlify has some really nice Github hooks, so I thought I’d try hosting the site there.
I won’t get too technical with this part, but the gist of it is that when there is a new commit pushed to Github, both Netlify and Siteleaf automatically pull those latest changes to their service. Netlify runs a build-step and publishes the site live. The same process runs if Josh decides to publish a post via the Siteleaf admin panel — this ensures a consistent experience, regardless of the tools used to publish. If you want to find out more about how this works, please get in touch.
Wrap Up
So, what appears to be a relatively simple workflow to capture ideas and publish blog posts is actually a super in-depth, super geeky way of using Shortcuts, Ulysses, and Working Copy — one that brings out the power of automation on iOS.
I find this workflow to be the most efficient workflow I’ve ever used to publish to my personal site. There’s a lot going on, but once this workflow was created, it’s incredibly simple to use.
Best of all, as Josiah noted above, these shortcuts are also device and app agnostic — you don’t need to use Ulysses for capturing ideas and could instead capture ideas in Drafts or Bear, while publishing can be done from any app so long as the text is formatted with an H1 and body content.
If you have a Jekyll-based blog and want to harness the power of automation on iOS, I recommend jumping into Shortcuts head first and seeing what you come up with.
Or, you could be like me and consult with Josiah. He’s a wizard with this stuff.
We have more useful workflow examples right here.
Wait. There’s a Bonus….
Custom Productivity Templates
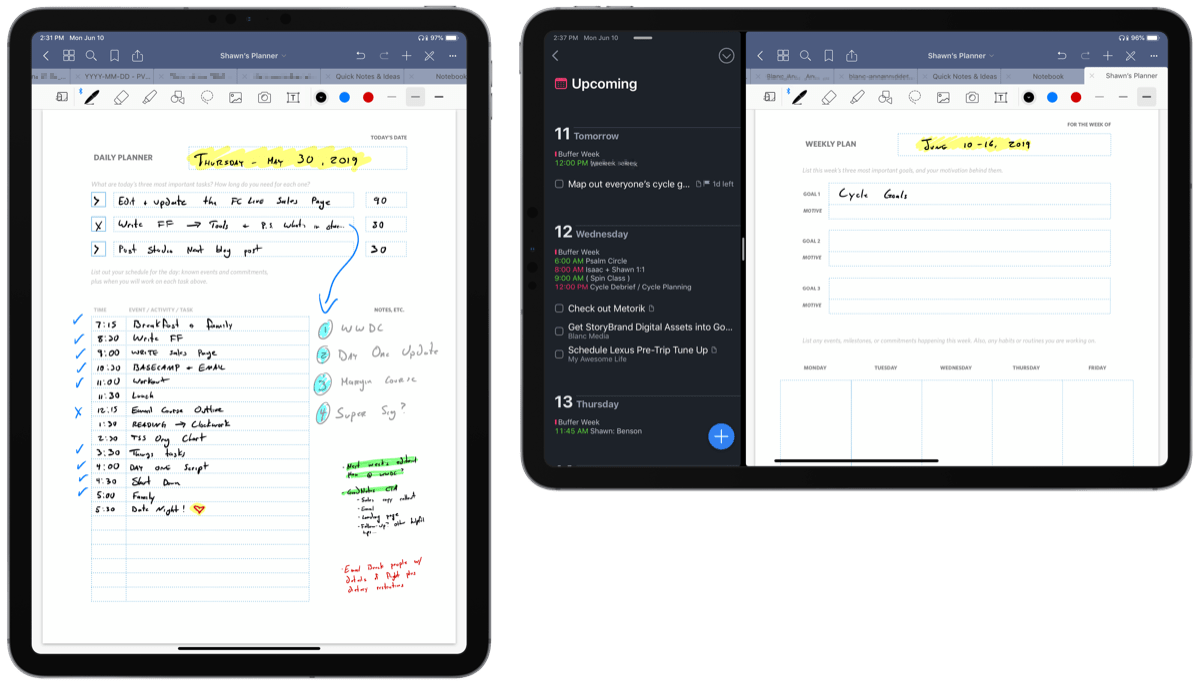
We have a set of custom productivity templates that work well with the iPad app, GoodNotes. And if you want to try them out, we’ve put together a free guide that can help you.
We’ll show you…
- How to create and save custom page templates in GoodNotes.
- How to use those page templates to transform GoodNotes into your own productivity notebook (or any other type of notebook replacement).
Plus, we also have included a couple of our custom productivity templates for you to get started with. These templates are right out of our popular productivity course.
The custom templates and the guide are available for FREE to our email subscriber community. And you can get it right now. By joining the Sweet Setup community you’ll also get access to our other guides, early previews to big new reviews and workflow articles we are working on, weekly roundups of our best content, and more.