Enhance Your Home Automations with Logic
iOS 13 brought many things — including automations in Shortcuts. These automations allow us to do lots of things, but they also added the ability to seriously enhance our home automations.
The Home app has limitations when it comes to automations. For example, you can’t check if a light is on and use a button to toggle the state, or check what the weather is like before turning on the lights when a motion sensor detects movement. That is, unless you convert it to a Shortcut.
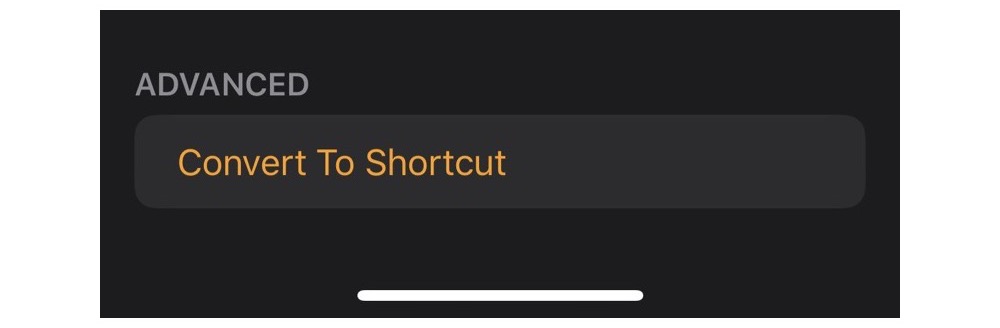
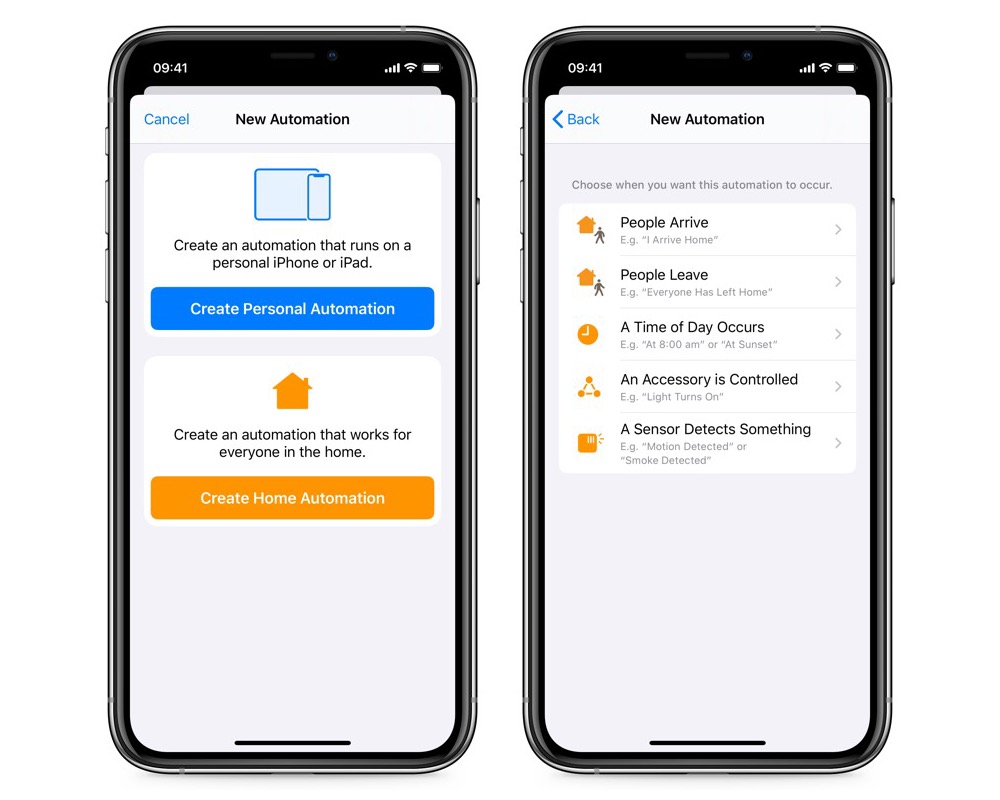
We can start in the Home app or in the Automations tab inside Shortcuts and start by creating a new automation. All of the automations work the same way from here — just select a trigger, scroll down as far as you can on the next page, and then tap Convert to Shortcut.
The first thing you see is an action to set a scene for the home in which you are currently located (should you have more than one). This action can be removed, and now we can start programming!
If you program a sensor (or anything!) to trigger different things at different times without Shortcuts, you end up with one automation per time. Then, if you want to change the time window, you need to adjust more than one automation. I’ll show you how to recreate this in Shortcuts to give you more control with less admin.
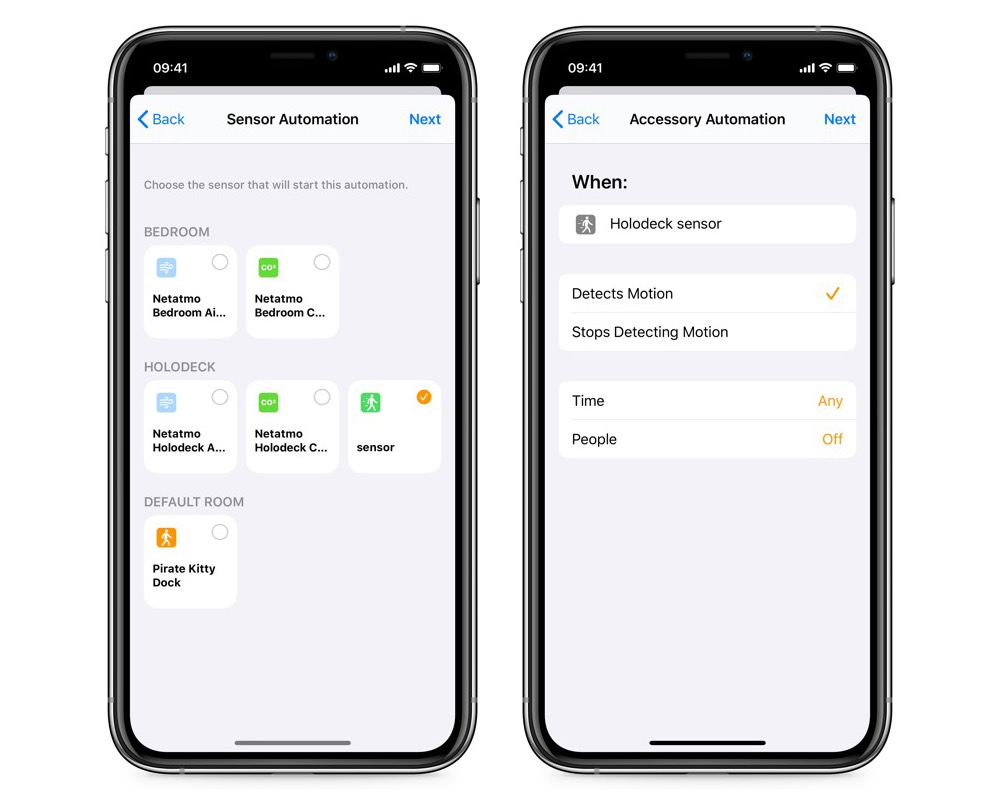
The first thing to do is to choose your trigger and set it up. I’ve chosen my Philips Hue Motion Sensor, and left everything else alone. Any motion should trigger my lights.
The first action is a Format Date action, and I used the Current Date variable by formatting the date as HH (I format the hours in 24-hour time; even if you normally use 12-hour time, it’s easier to use 24-hour for something like this because it reduces the amount of work you need to do in Shortcuts). Add a Get Numbers from Input action after this to make your life easier as we go.
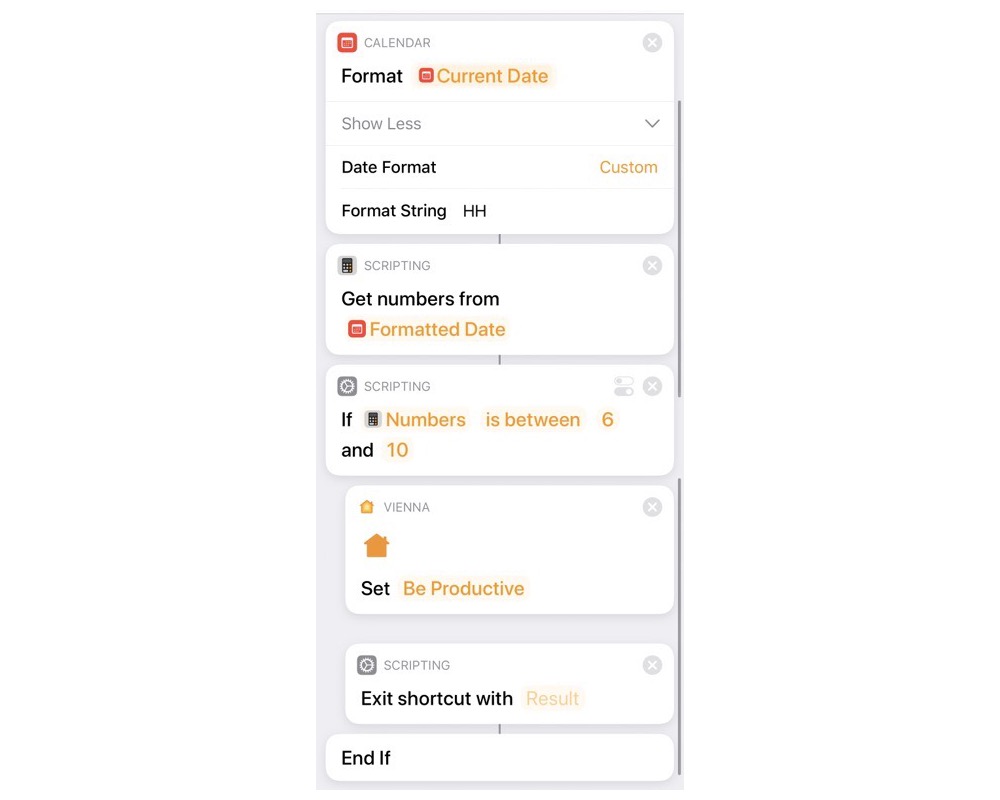
Let’s start with “between 6am and 10am.” For this, we need an If action, and we’ll use the Numbers magic variable from our Get Numbers from Input action and set it to is between 6 and 10. Now, add a Homekit scene and follow this with an Exit Shortcut action. We can delete the Otherwise part of the If action. By adding the Exit Shortcut action we don’t need to worry about anything else running, which is going to be useful at the end!

Let’s say that we don’t want anything to happen between 10am and 3pm. Again, we use the the If and between (set to 10 and 15, because we’re using 24-hour time!) and just add the Exit Shortcut action. That’s it!
Now we can get fancier. Let’s get the sunset time and calculate back an hour before this, then we can say between an hour before sunset and 10pm. First, we need to use Get Current Weather. You can either set this to your home location (tap on Current Location to change it), or leave it alone. If you live with someone else, I recommend changing it to be your home location.
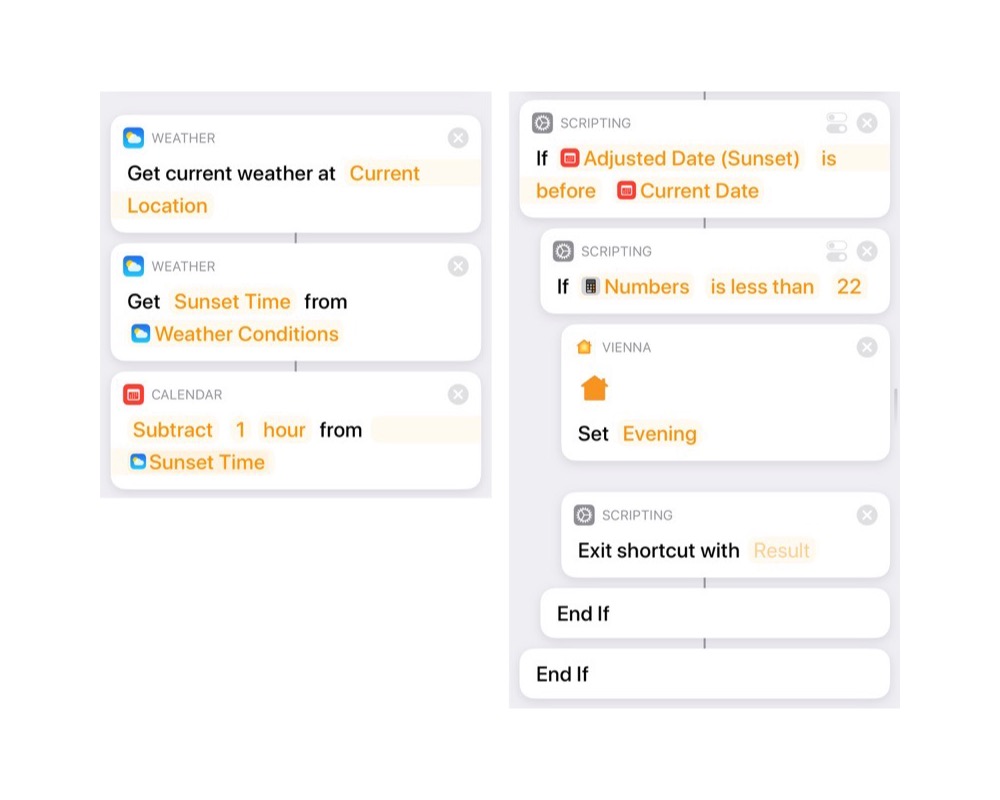
Next, we can use Get Details of Weather Conditions to get the sunset time, and then the Adjust Date action to subtract an hour. After this, we create two more If statements1. The first checks if our Adjusted Date magic variable (from Subtract 1 hour from Sunset Time) is before our Current Date (this is using the magic variable that’s always there), and the second checks if our time (as 24-hour numbers) is less than 22 (or 10pm). Inside this second If statement, we can add our actions to set a HomeKit scene and then Exit Shortcut.
Now we have one scenario left over between 10am and 6am. Because we added the Exit Shortcut action throughout the automation, we don’t need to use an If action here — we can just use the action to set a HomeKit scene! That’s it!
Unfortunately, you can’t easily share a Home automation, but I hope with the screenshots throughout this article you’ll be able to recreate it and have fun with your own home and routines!
We have more useful workflow examples right here.
Wait. There’s a Bonus….
Custom Productivity Templates
We have a set of custom productivity templates that work well with the iPad app, GoodNotes. And if you want to try them out, we’ve put together a free guide that can help you.
We’ll show you…
- How to create and save custom page templates in GoodNotes.
- How to use those page templates to transform GoodNotes into your own productivity notebook (or any other type of notebook replacement).
Plus, we also have included a couple of our custom productivity templates for you to get started with. These templates are right out of our popular productivity course.
The custom templates and the guide are available for FREE to our email subscriber community. And you can get it right now. By joining the Sweet Setup community you’ll also get access to our other guides, early previews to big new reviews and workflow articles we are working on, weekly roundups of our best content, and more.
-
We can’t compare the current date to just hours, we have to compare it to a date and hours – so you can check if it’s December 25th, but not if it’s 10pm. ↩