How to enable a unified inbox in Airmail
Back when I was in high school, I only had one email address. Once I started college, I had a school address on top of my personal one. Now, I have multiple personal email addresses, and one for work. If you also maintain multiple email addresses, Airmail can combine them all into a unified inbox.
I love having a unified inbox, and Airmail 3 makes that easy to implement. Follow these steps to set it up.
- On the main window, click your current account icon (for me, it’s my profile picture from Gmail) in the top left.
- Next, click All Accounts., and you have a unified inbox with all of your accounts. You can also still browse all of your individual account folders from this main window as well.

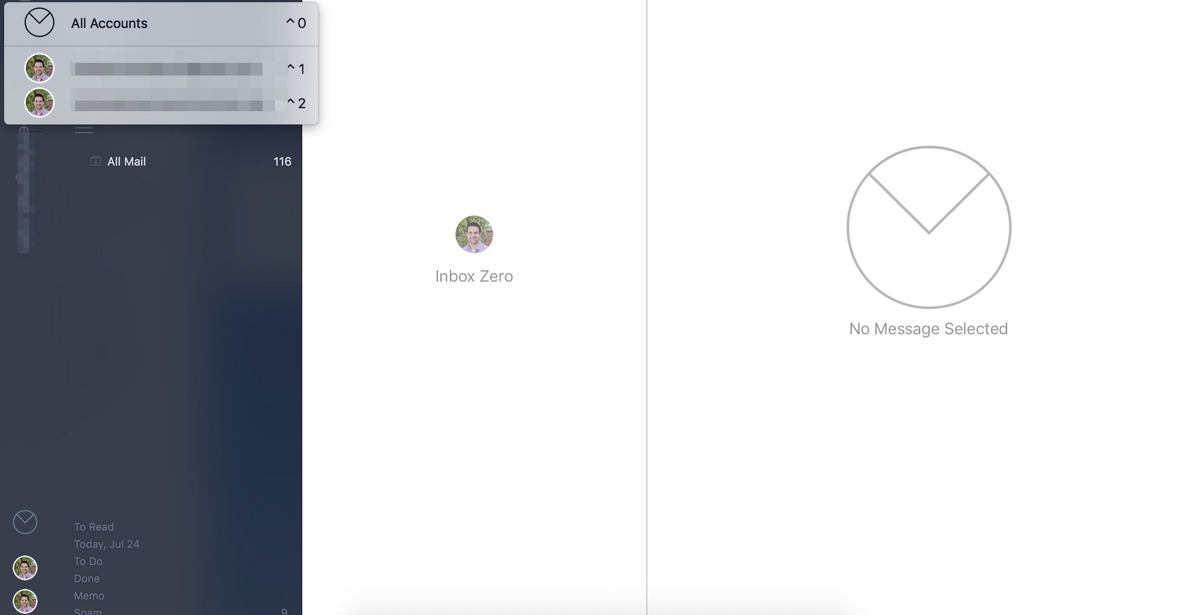

Alternatively, you can also use keyboard commands to navigate between accounts. To view all accounts, press Ctrl + 0. To view other accounts, press Ctrl + 1 to view the first account, Ctrl + 2 to view the second account, and so on.
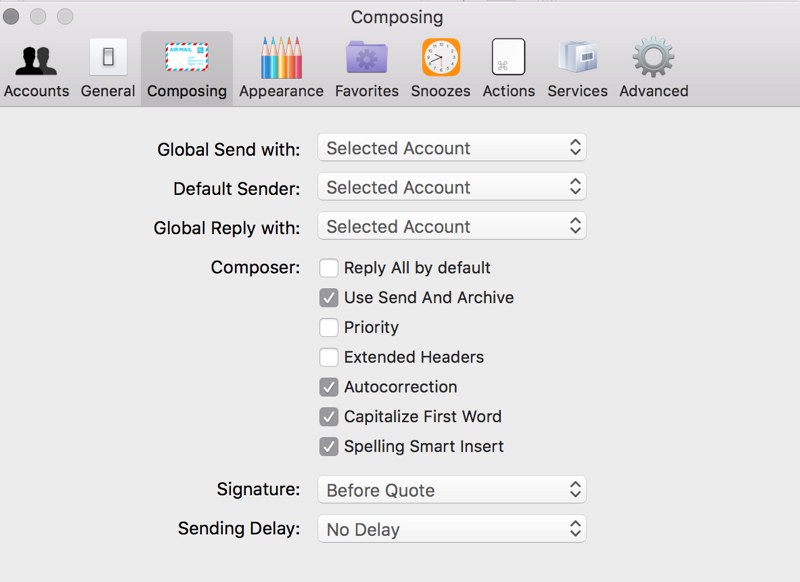
In the Composing tab of Airmail’s preferences, you can also set default sender accounts. You can specify which account to send email from regardless of which account is selected using the Default Sender option. This is useful if you want to make your main account the default sender, but always reply from the selected account. By default, new messages are sent from the selected account.

Featured Download
The Airmail Checklist. Get the most out of Airmail (and tackle your email inbox while you’re at it) with this quick-start checklist.