How to Install Custom Fonts on iOS Using AnyFont
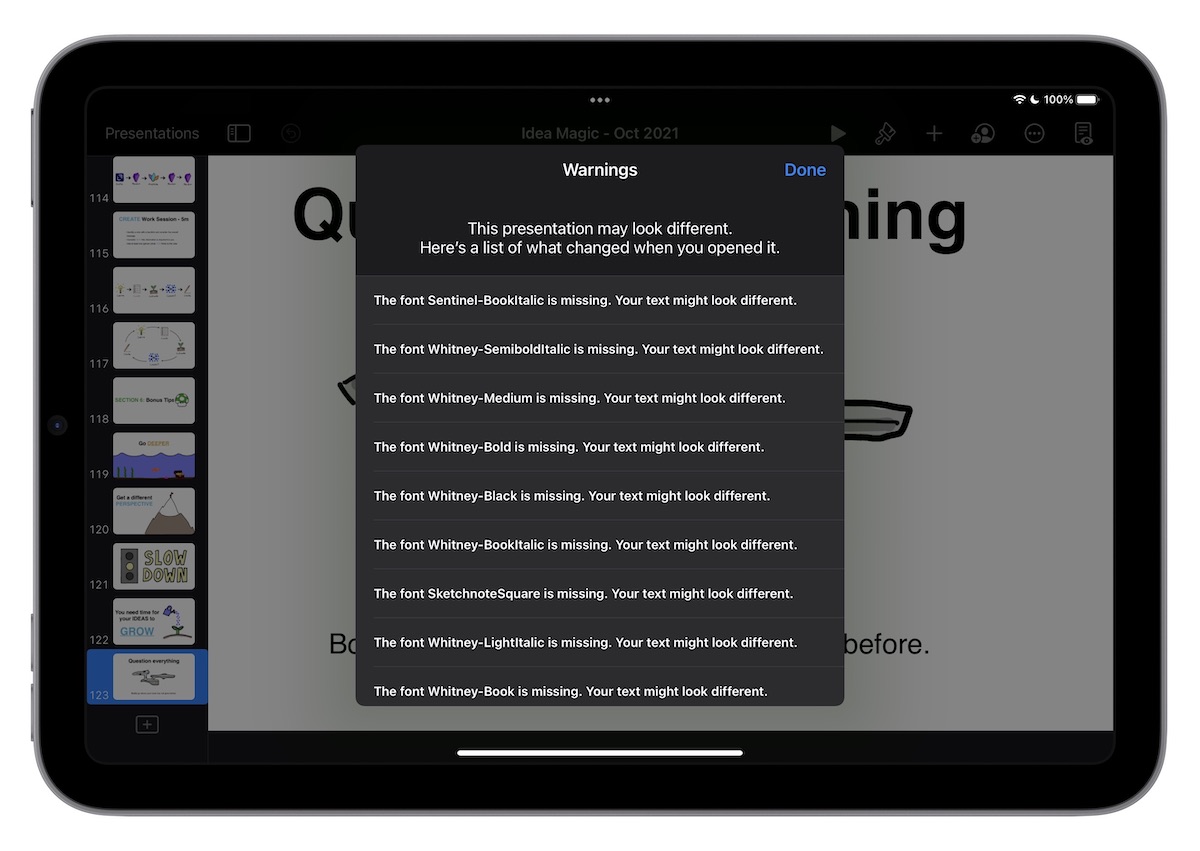
I’ve fallen in love with my new iPad mini and am trying to use it for just about everything. I even used it to edit the slide deck I used for the creativity workshop I hosted a few weeks ago. But when I first opened my Keynote file, I was greeted with a long list of missing fonts:
Unfortunately, using your own font files on iOS is not as easy as it should be. It’s kind of ridiculous that you have to install system profiles to add fonts at the system level on iOS. But at least there are apps like AnyFont to help make it less annoying.
Here’s how it works:
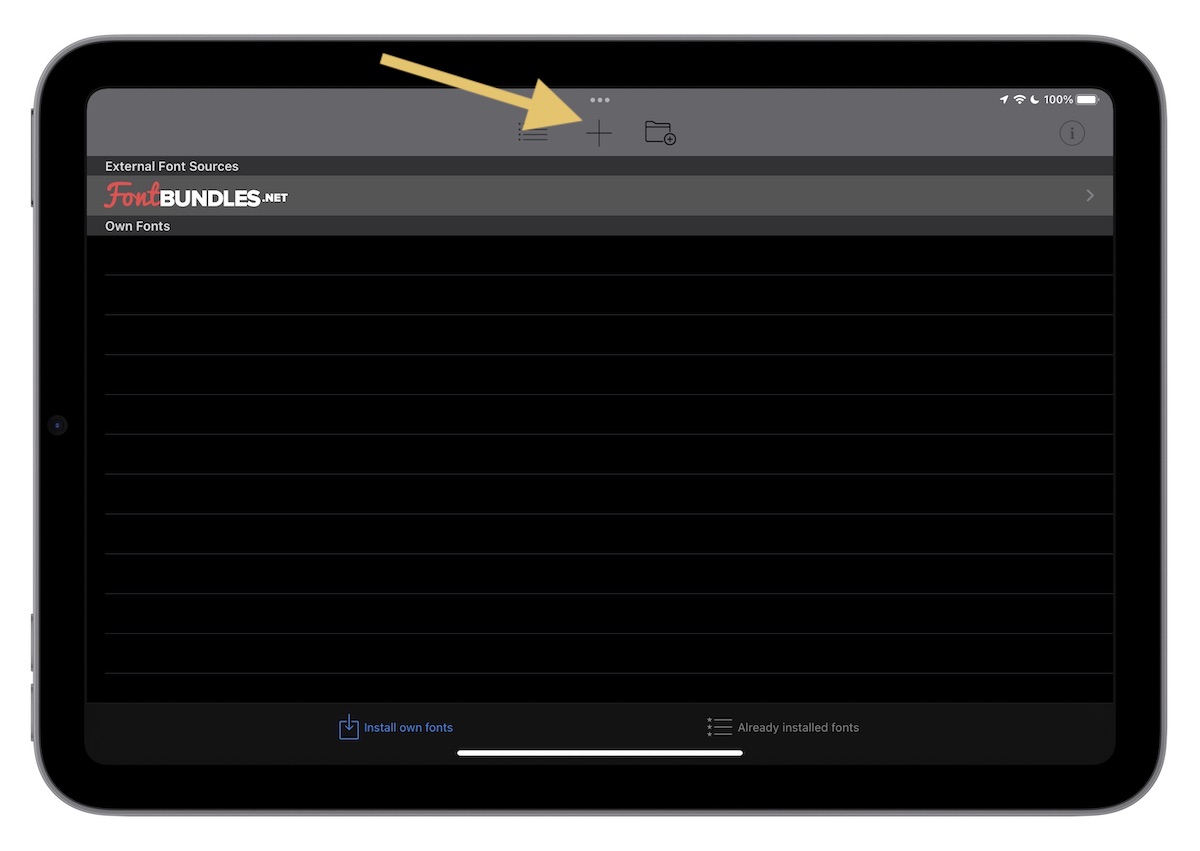
First, click the + button in the toolbar to reveal a list of sources for your custom font files.
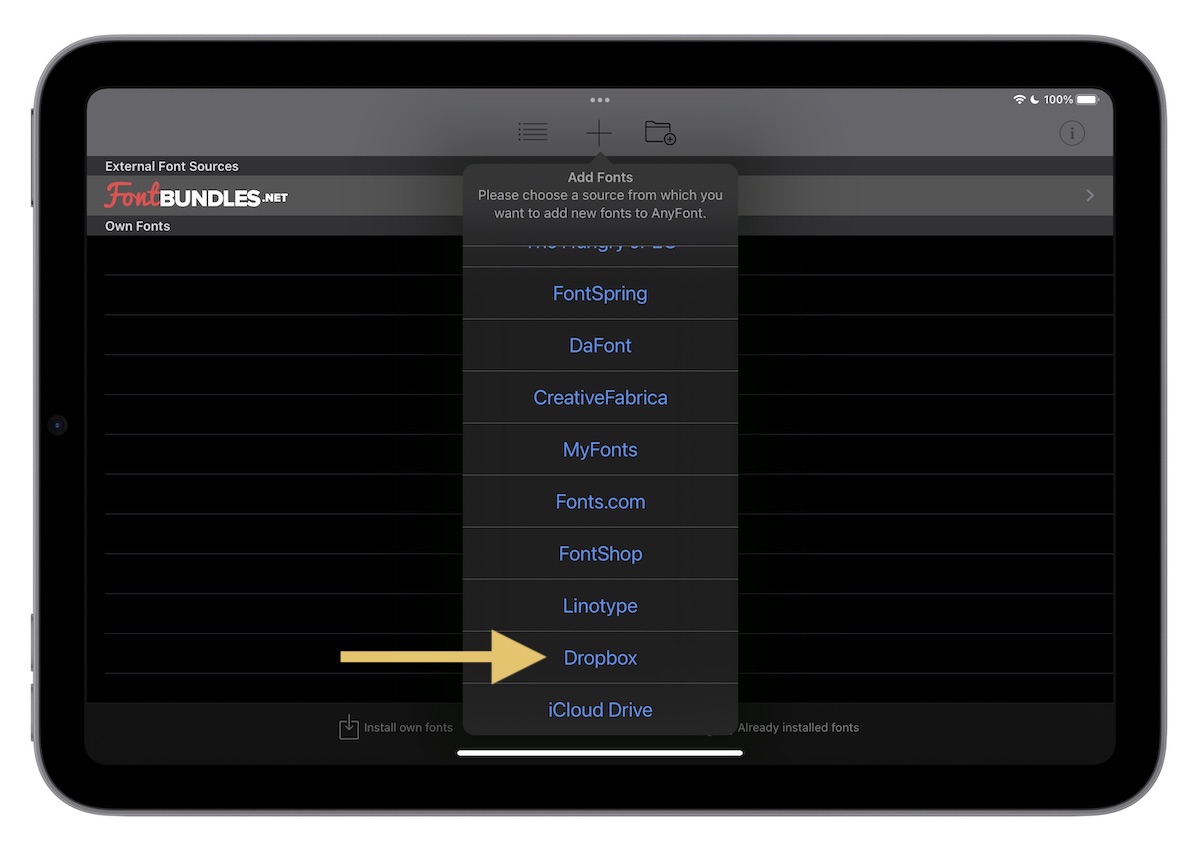
Next, select the location of your font files. In my case, I grabbed the files from my Mac and put them in Dropbox.
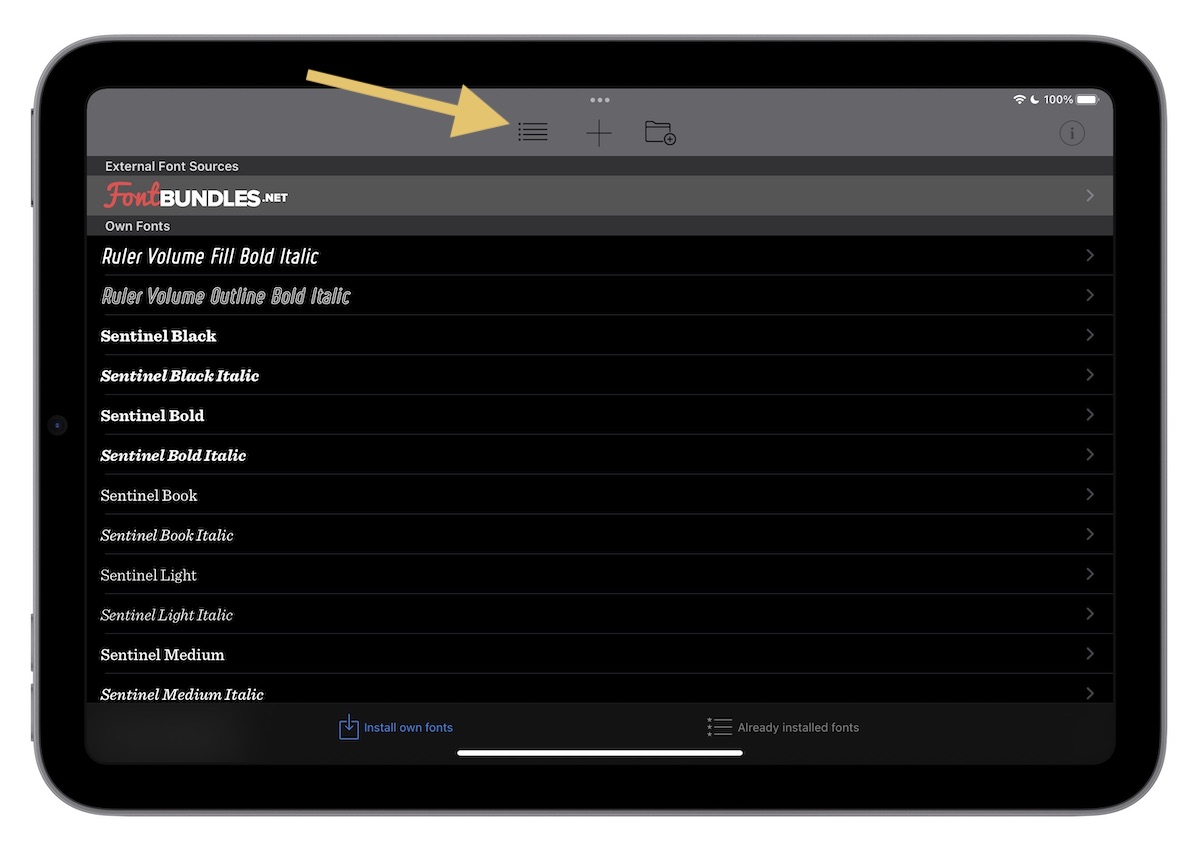
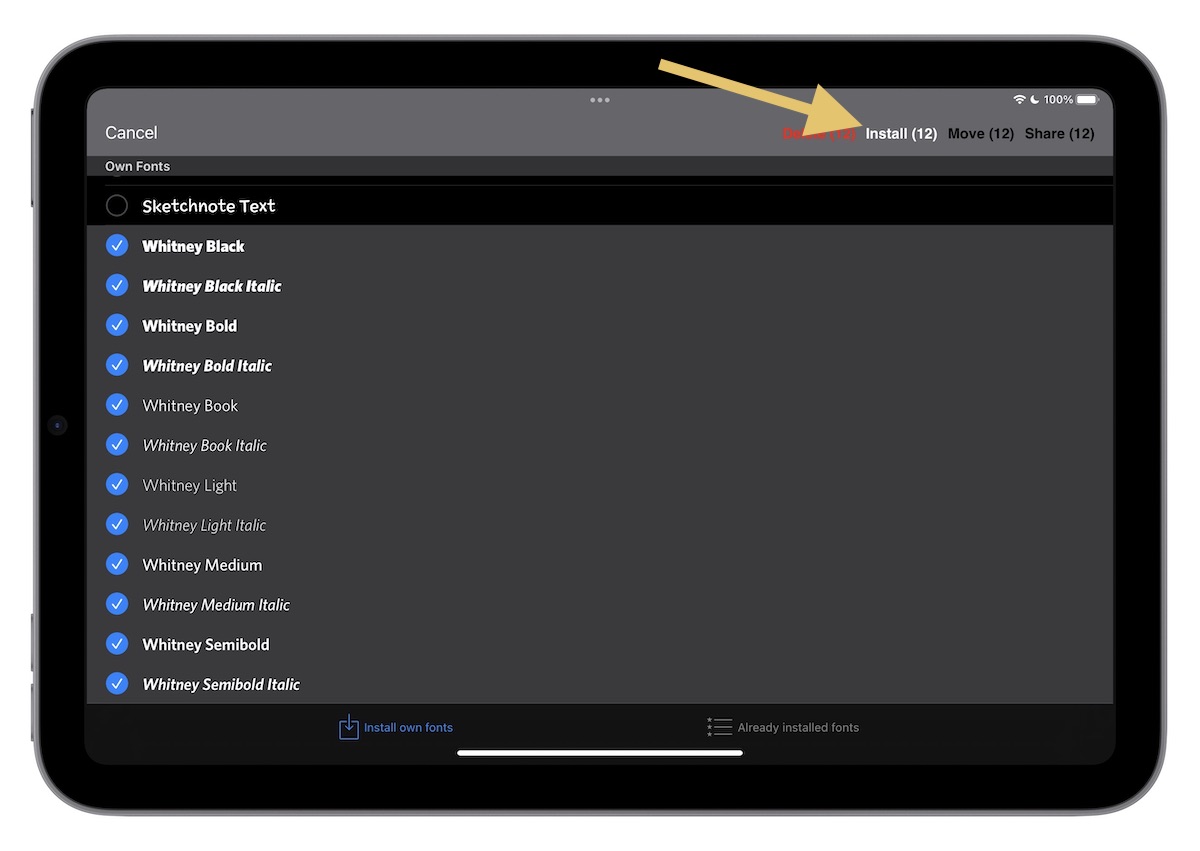
Once you have the fonts downloaded to AnyFont, you can add them to iOS by creating a custom profile. To do this, tap the list icon to select the fonts you want to install.
Select all the fonts you want to include in the profile and make sure they have a blue check mark next to them, then tap Install.
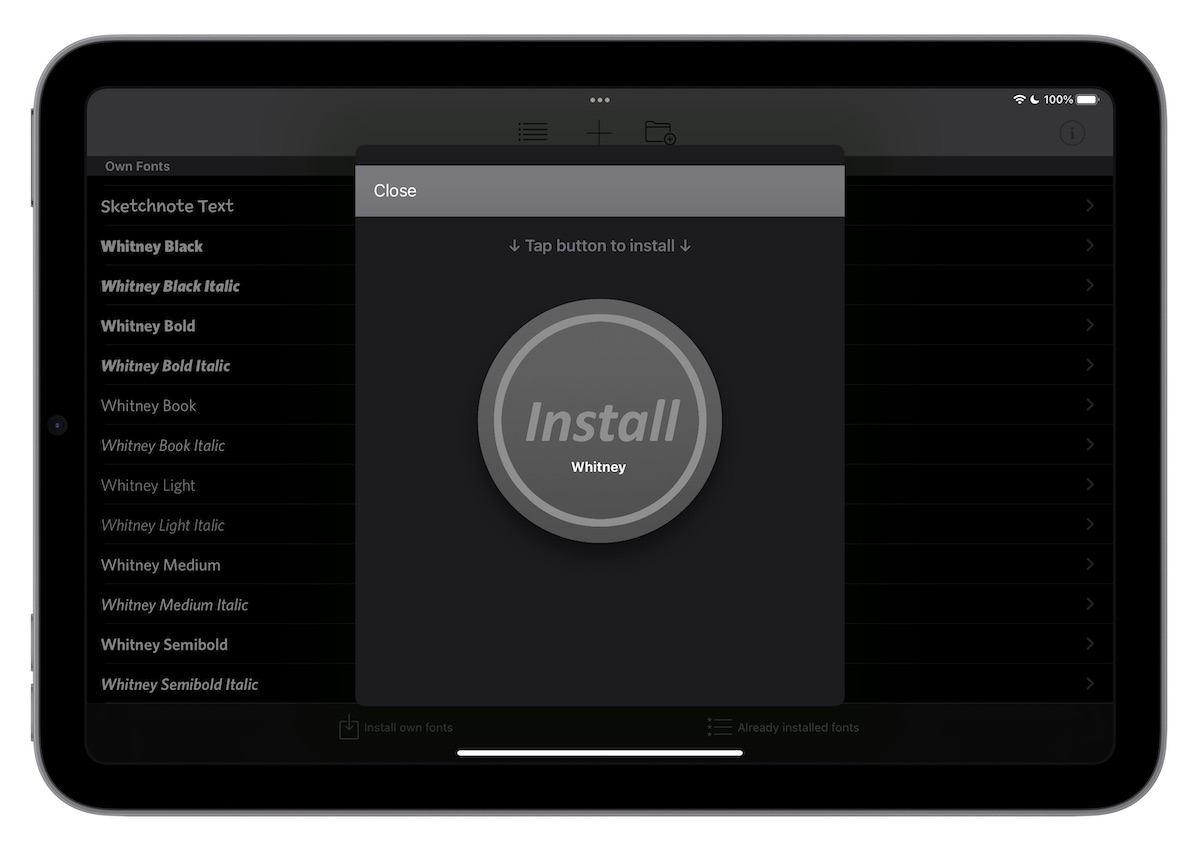
Next, type a name for the profile (i.e. “Whitney”). AnyFont will package the fonts together and give you a big Install button to press.
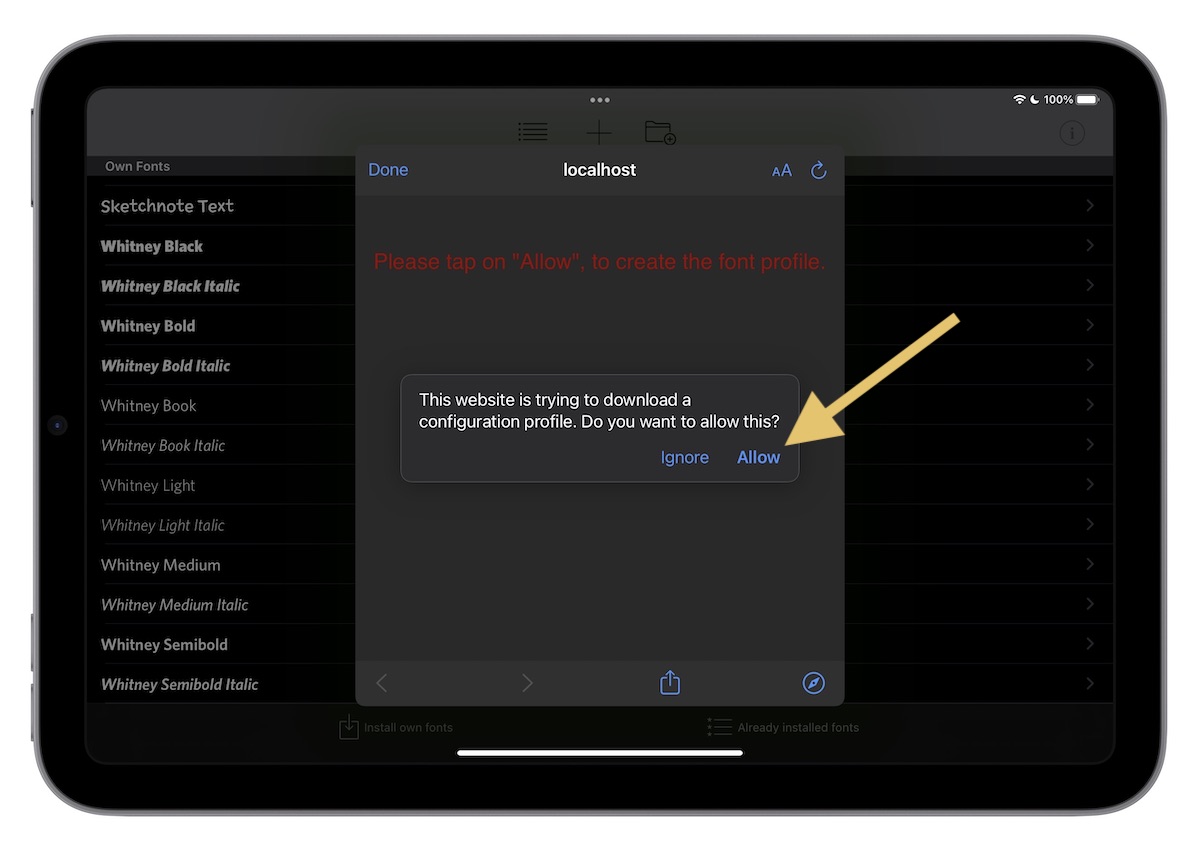
AnyFont will open a popup window called localhost and give you a warning about downloading a configuration profile. When you see this, tap Allow to download the profile.
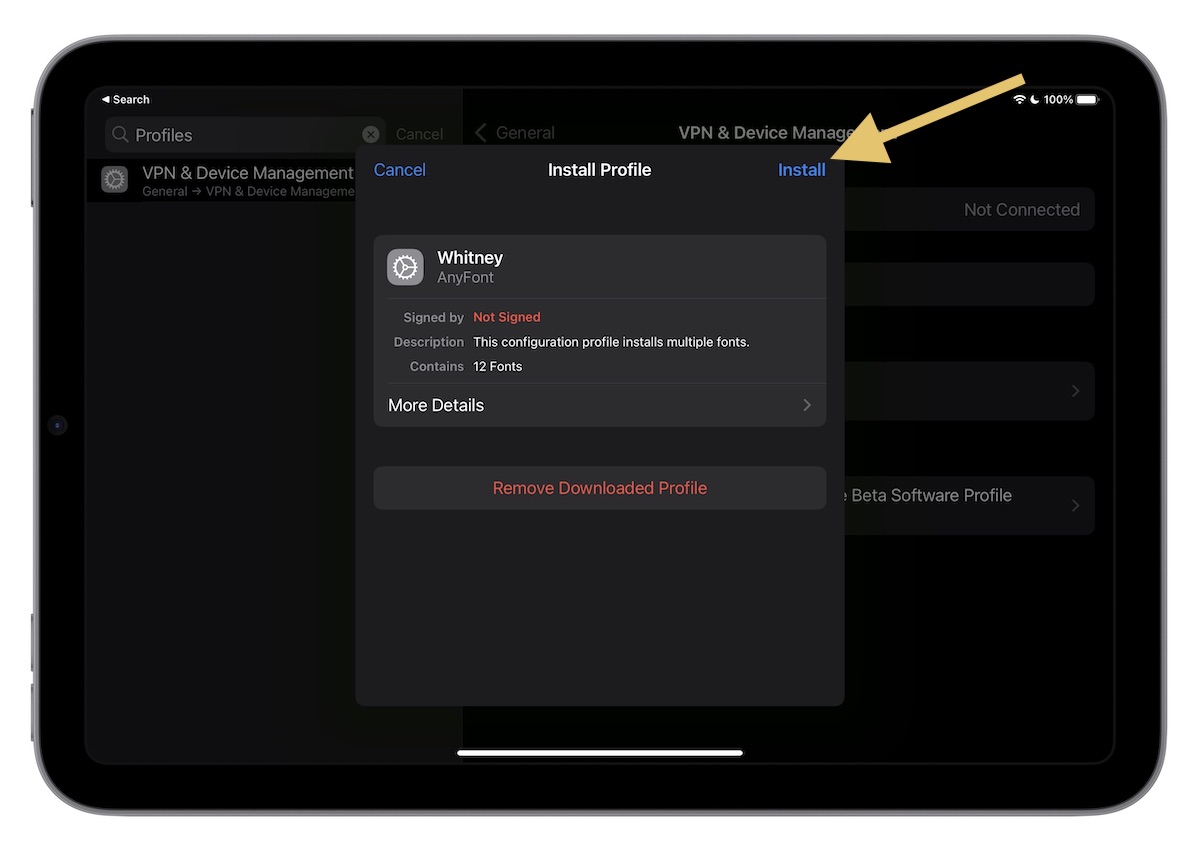
Next, go to your Settings app and search for Profiles. Tap on VPN & Device Management to view your newly downloaded profile.
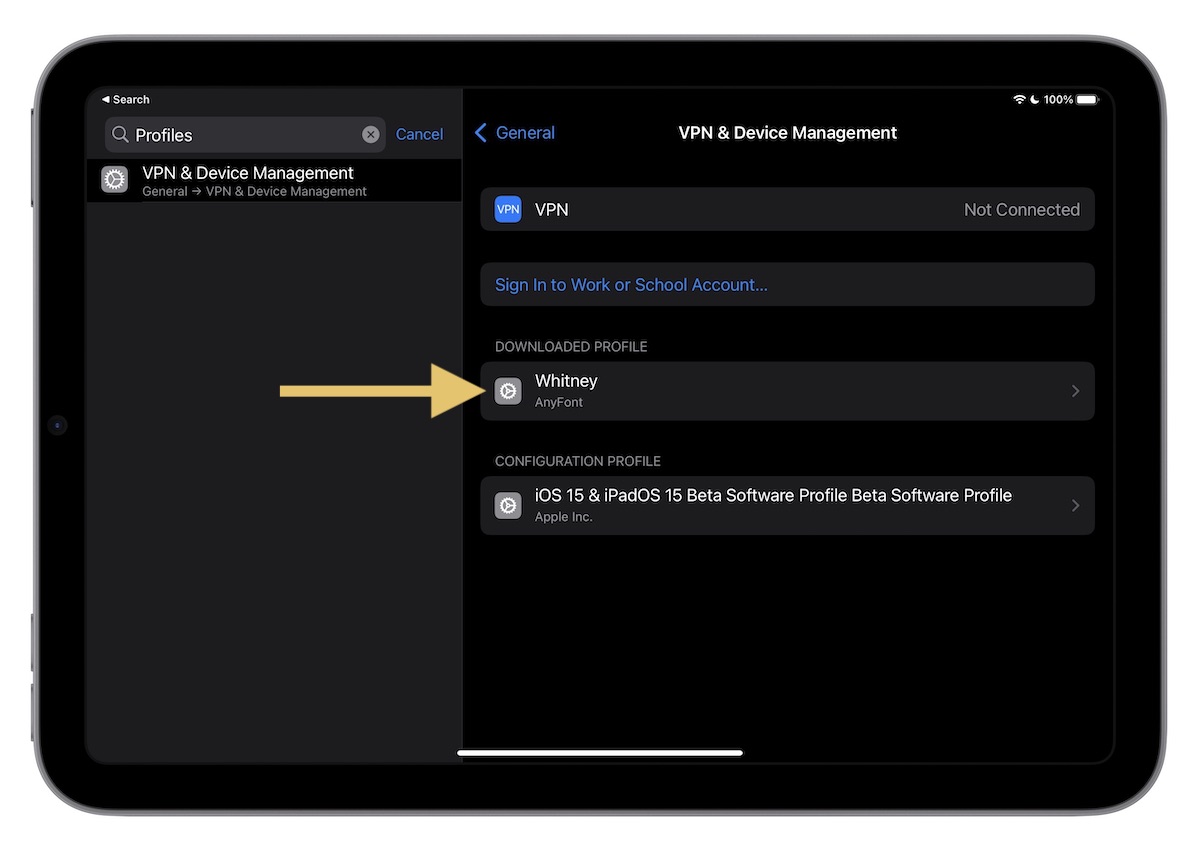
Tap the profile, then tap Install to install it (and the selected fonts).
You can now use your custom fonts in any iOS application that supports them — including Keynote, where the fonts from my presentation now render correctly.