Create Your Own Services Menu Items for Files on macOS using Automator
On your Mac, when you right-click files in the Finder you may well have seen an entry on the shortcut menu called Services, which contain some helpful actions that you can perform on the file. But, did you know you can create your own Services that can show up in this menu? Today, I’m going to show you how to create four services that will help you get the most out of your Mac.
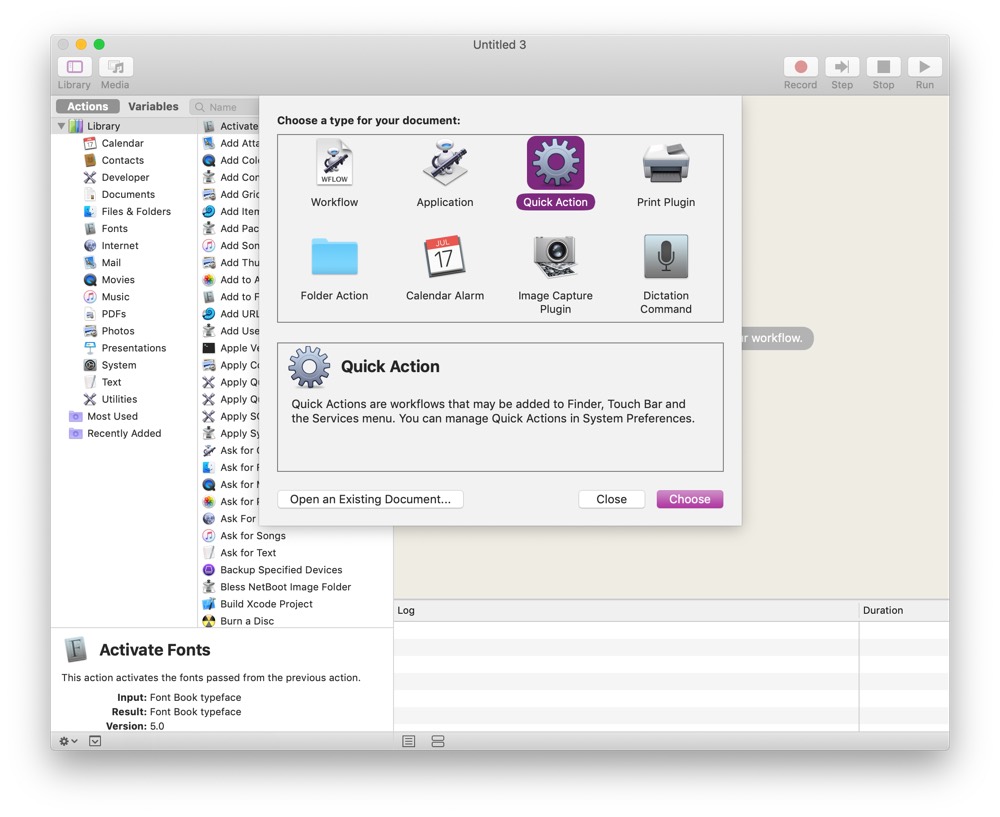
Let’s start by looking at how all this works. Open Automator.app and (if it doesn’t prompt you) tell it to make a new automation. You have a choice of eight document types, and we’re looking for Quick Action. This is a workflow which can be added to Finder, the Touch Bar, and the Services menu.
Move Items to a Specific Folder
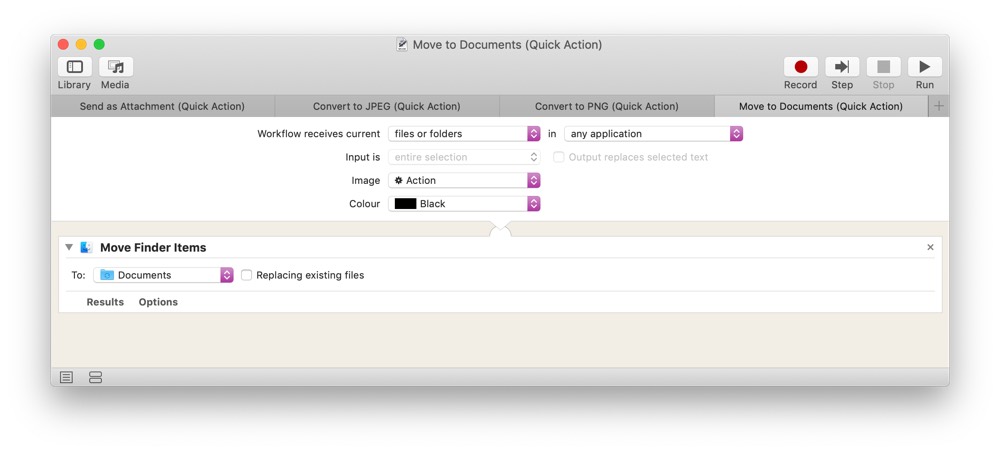
One thing I do quite frequently is move documents to specific folders. If they’re in the sidebar of my Finder, this is easily done with drag and drop, but I don’t want too many folders cluttering up the sidebar view — I just want to drop files in these common folders without always having to see them (and usually let Hazel or Keyboard Maestro work their magic!). Starting at the top of the window, I can specify what this service will receive. In this case, it will receive files or folders from any application. This service has just one action: Move Finder Items. You can select the exact folder you want to move the chosen item(s) to and save your service. The name of the file is how it will appear in the Services menu, so name it accordingly.
Convert Images to JPEG or PNG Format
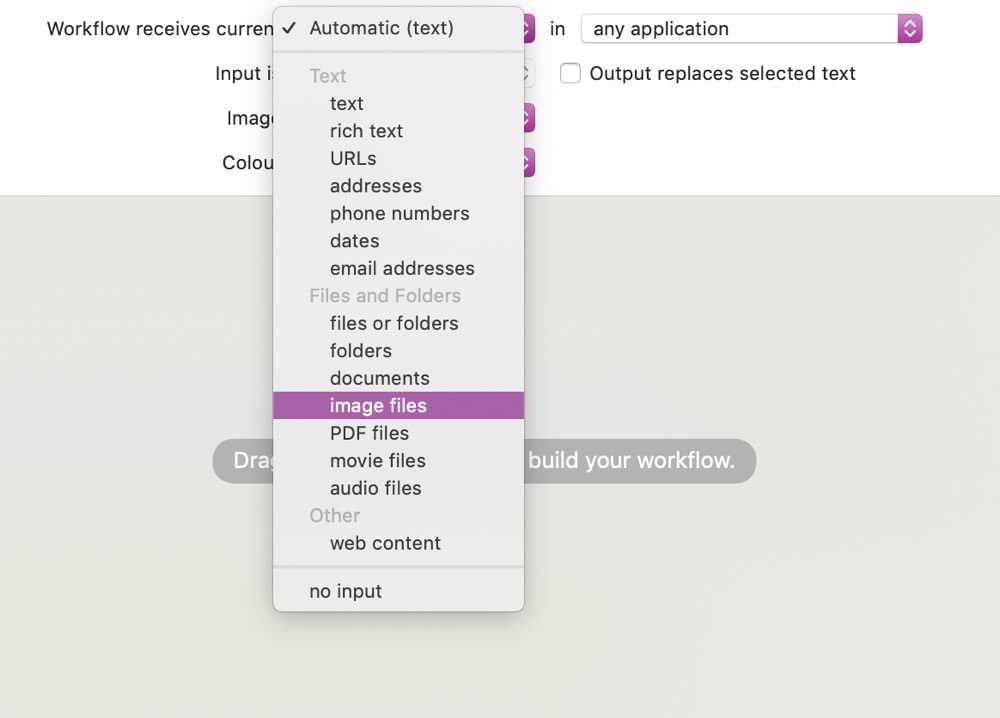
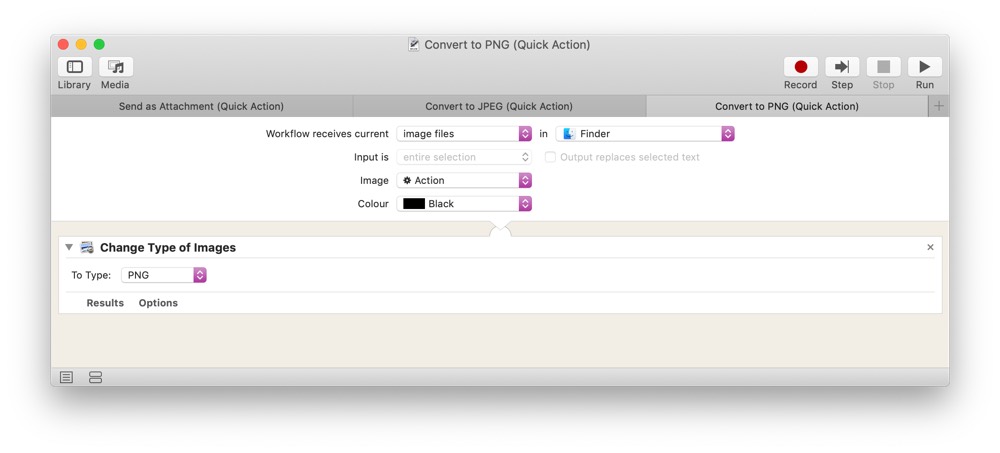
Next let’s create services to convert images to JPEG or PNG. Start by creating a new Quick Action and set it to receive images.
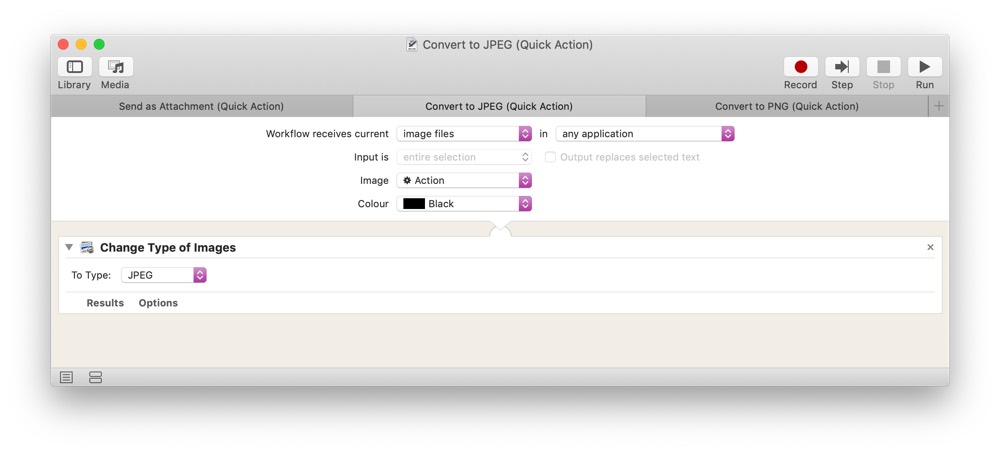
These services are also just one action – Change Type of Images. Set PNG or JPEG and save your quick action and you’re done!
Send File as an Email Attachment
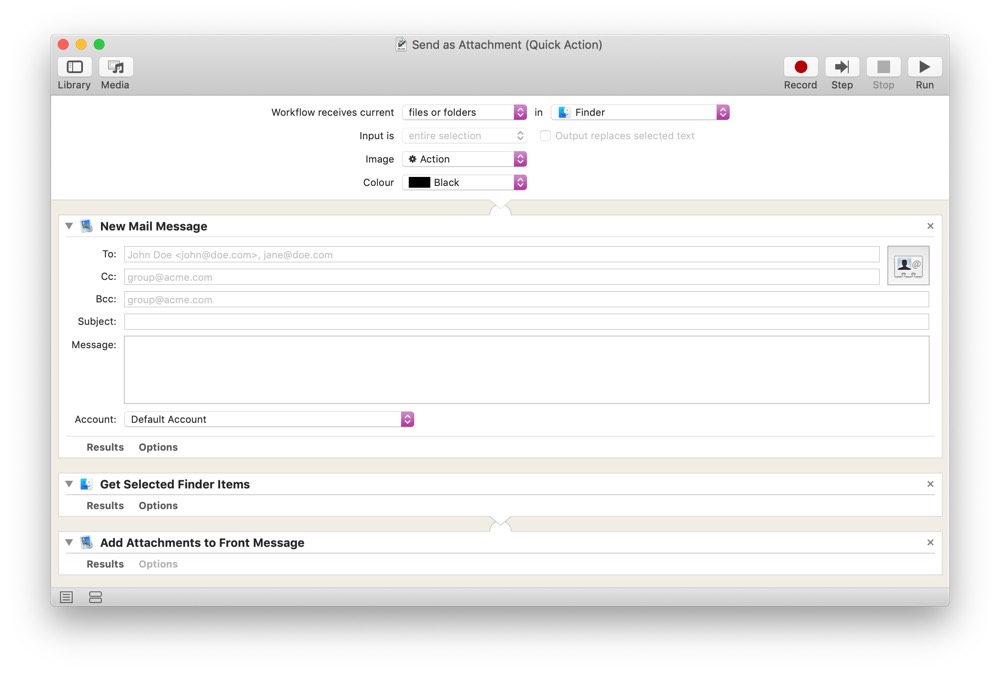
Our final service is a little more complex as it has three actions. This will create a new email with Mail.app and attach our selected files to it. Create a new automation in Automator and set the type to Quick Action again. Allow it to accept any file or folder (it’s up to you if you want it to work just in Finder or anywhere), and then we need to add three actions.
- New Mail Message
- Get Selected Finder Items
- Add Attachments to Front Message
If we didn’t create a new mail message, then we could add the files to an already-open email draft — a modification you may want to create as a separate service! Because we create a new email, we no longer have the files that triggered the action immediately available to do something with, so we work around this by getting the selected Finder items, which allows us to then add them to the message. If you look at the screenshot below, you can see a connection between the last two actions.
Have fun getting started with Automator services! To make it a little easier to get started, you can download the examples below.
We have more useful workflow examples right here.
Wait. There’s a Bonus….
Custom Productivity Templates
We have a set of custom productivity templates that work well with the iPad app, GoodNotes. And if you want to try them out, we’ve put together a free guide that can help you.
We’ll show you…
- How to create and save custom page templates in GoodNotes.
- How to use those page templates to transform GoodNotes into your own productivity notebook (or any other type of notebook replacement).
Plus, we also have included a couple of our custom productivity templates for you to get started with. These templates are right out of our popular productivity course.
The custom templates and the guide are available for FREE to our email subscriber community. And you can get it right now. By joining the Sweet Setup community you’ll also get access to our other guides, early previews to big new reviews and workflow articles we are working on, weekly roundups of our best content, and more.