How to create an iCloud shared photo album
One aspect of the iCloud service that can easily be overlooked is the ability to take and share photos using a shared iCloud photo album. Being able to take and share photos with friends and family in a Shared Album is a great (and often under-utilized) feature. In this post, we’ll show you how to set up a Shared Album, share your own photos with others, and allow them to contribute their own photos to a shared photo album.
Setting up the Photo Stream
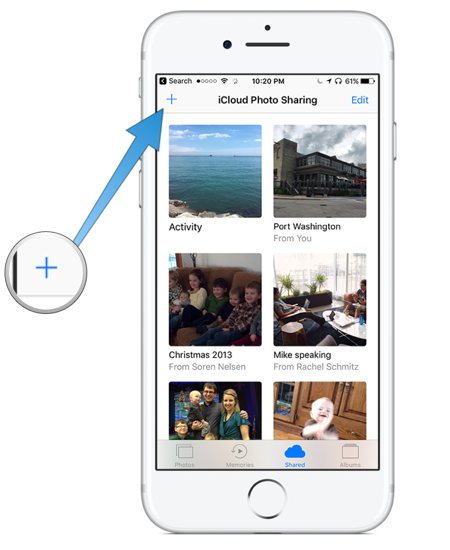
To set up a Shared Album, open the Photos app on your iOS device and select the Shared tab.

Next, tap the + icon in the upper left to add a new iCloud Shared Album.
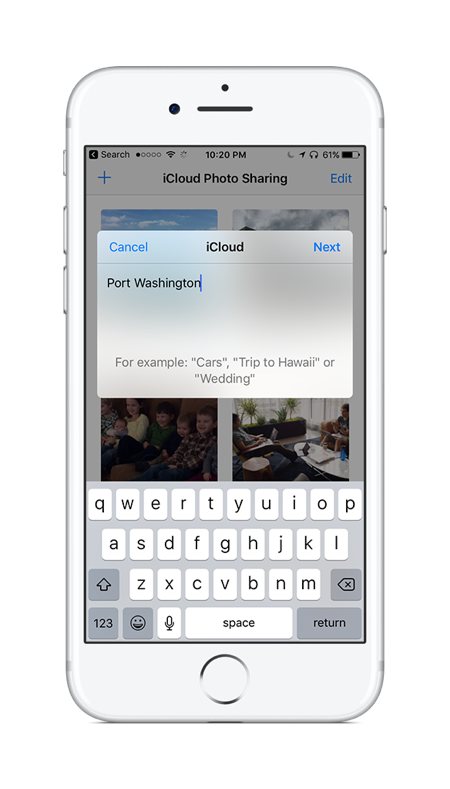
A prompt will appear asking you to name the Shared Album. Type in the name (i.e. the location) and tap Next.
The next screen will ask you who you want to share the album with. You can search your address book or just start typing the person’s name to share the photo album with them.

Once you’ve added everyone you want to share the album with, tap Create.
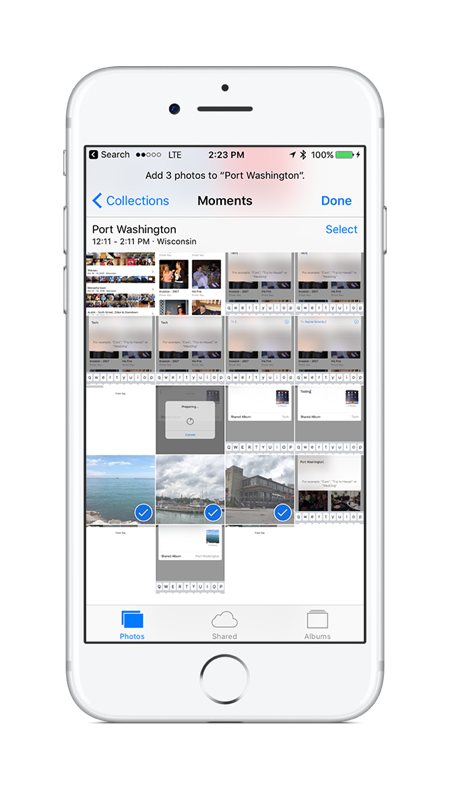
Next, you’ll be taken to the actual Shared Album, but you’ll see that aren’t any photos in the album yet. To add photos to the Shared Album so that people you’ve shared it with can see the photos too, tap the gray box with the + icon.

Select the photos you want to share by tapping them. A blue check mark will appear on each photo that will be added to the Shared Album. When you’ve selected all the photos you want to share, tap Done.
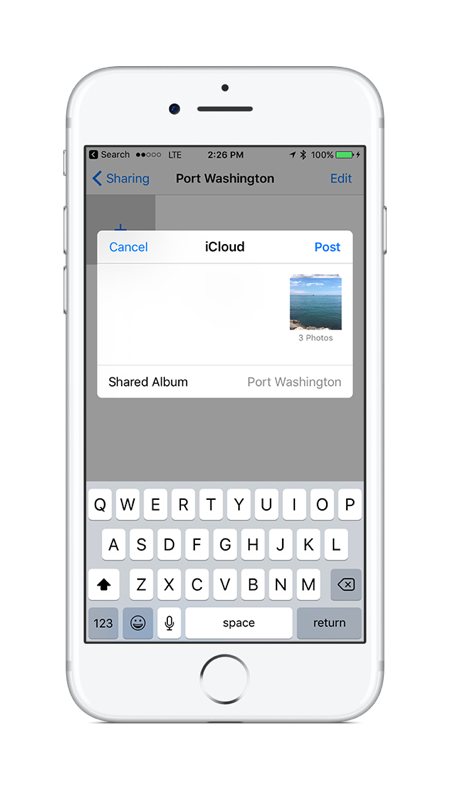
A dialog box will appear with the images that you’ve selected and the Shared Album that you are about to post the photos to (i.e. Port Washington). You can type a message if you’d like, or you can tap Post to add the photos to the Shared Album.
Your photos are now posted to the Shared Album and visible to everyone that you shared the album with.
People can also post their own photos to the Shared Album to be shared with you, but as the owner of the Shared Album you have to make sure that you have the proper settings enabled first. To do this, tap People from the Shared Album screen.
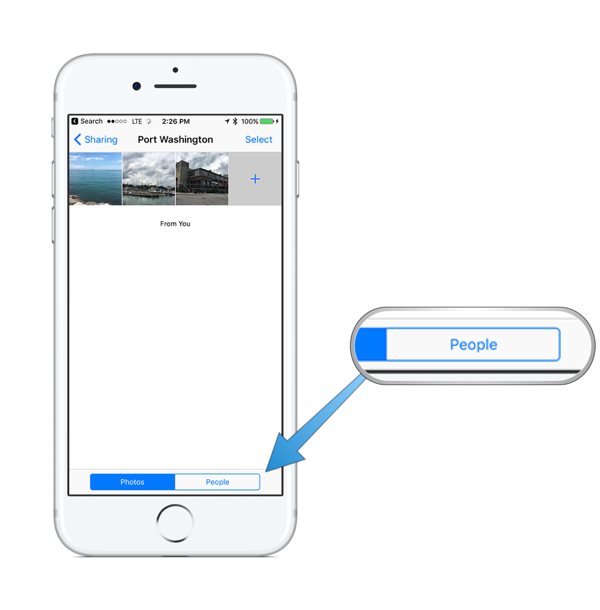
Here you can see everyone that you’ve shared the photo album with, including whether they’ve accepted your invitation to join the Shared Album yet. If you want people to contribute their own photos to the photo album, make sure that you have the Subscribers Can Post option enabled.
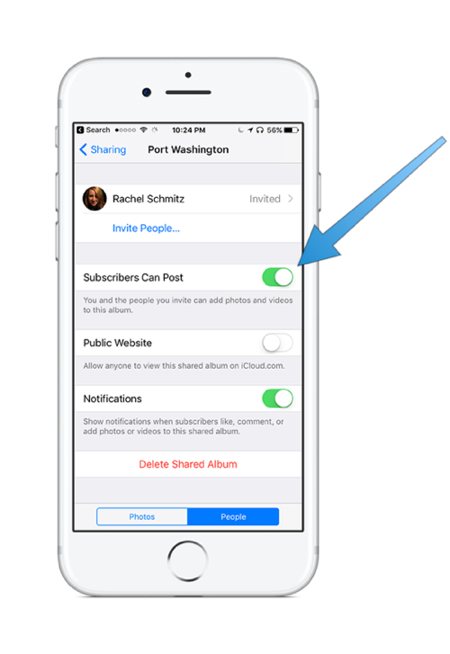
You can also select whether you want a public website accessible via iCloud.com with your photos from the Shared Album and whether you want to receive notifications whenever someone likes, comments on, or adds photos to the Shared Album. As the owner of the Shared Album, you can also delete the Shared Album from this screen.
We have more useful workflow examples right here.
Wait. There’s a Bonus….
Custom Productivity Templates
We have a set of custom productivity templates that work well with the iPad app, GoodNotes. And if you want to try them out, we’ve put together a free guide that can help you.
We’ll show you…
- How to create and save custom page templates in GoodNotes.
- How to use those page templates to transform GoodNotes into your own productivity notebook (or any other type of notebook replacement).
Plus, we also have included a couple of our custom productivity templates for you to get started with. These templates are right out of our popular productivity course.
The custom templates and the guide are available for FREE to our email subscriber community. And you can get it right now. By joining the Sweet Setup community you’ll also get access to our other guides, early previews to big new reviews and workflow articles we are working on, weekly roundups of our best content, and more.