How to Add Custom Paper Types to GoodNotes
We’re big fans of handwritten notes here at The Sweet Setup, and GoodNotes is our pick for the best app for taking handwritten notes on the iPad (Notability is also very good). We’ve even compared the two line-by-line to make the decision a little easier, but one reason we love GoodNotes is the ability to add our own paper templates to the app.
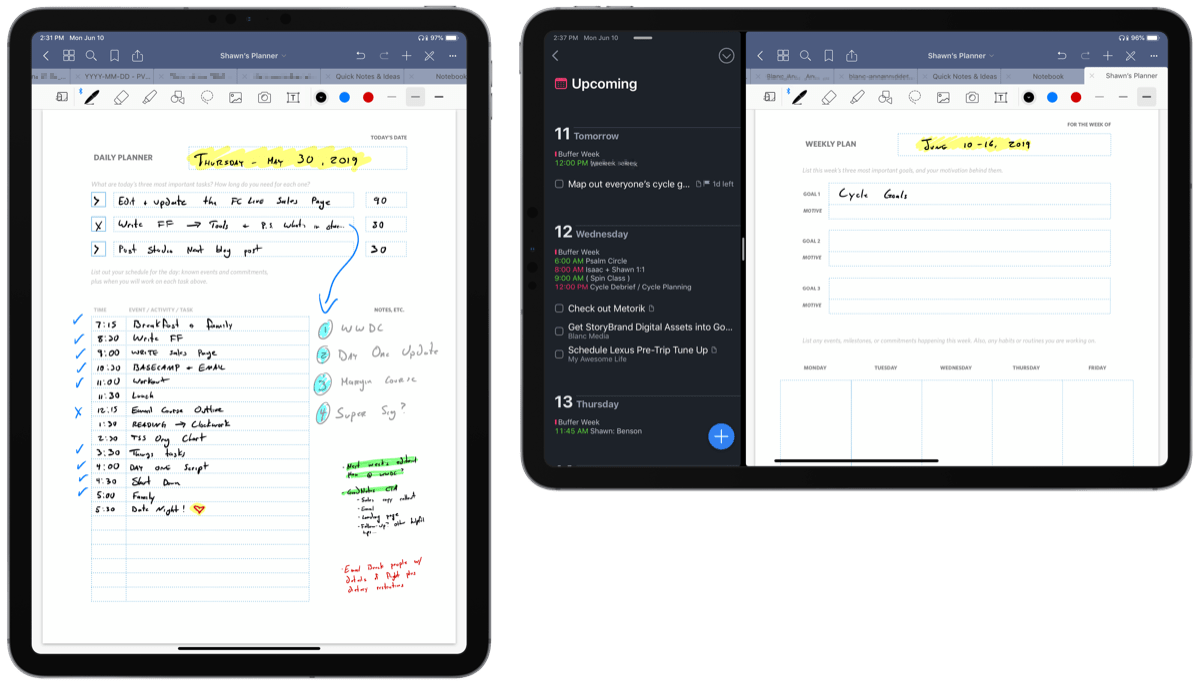
With GoodNotes 5, adding a new paper template is even easier. Provided you already have a PDF or image handy, it’s a simple process of adding it to the app. Personally, I’m a big fan of David Seah‘s Printable CEO series of planners, so I’m using the Emergent Task Planner as an example today. It’s a great tool for planning and tracking my day, and I’d be lost without it. Using it on my iPad with GoodNotes is phenomenal.
Wait. There’s a Bonus….
Custom Productivity Templates for Your iPad
If you want to use custom productivity templates on your iPad, we’ve put together a free, walkthrough guide along with two of our in-house templates that can help you get started.
We’ll show you…
- How to create and save custom page templates.
- How to use those page templates to transform GoodNotes into your own productivity notebook (or any other type of notebook replacement).
Plus, we also have included two of our custom productivity templates for you to get started with.
This guide is available for FREE to our email subscriber community. And you can get it right now.
By joining the Sweet Setup community you’ll also get access to our other guides, early previews to big new reviews and workflow articles we are working on, weekly roundups of our best content, and more.
How to Add Custom Paper Types to GoodNotes 5
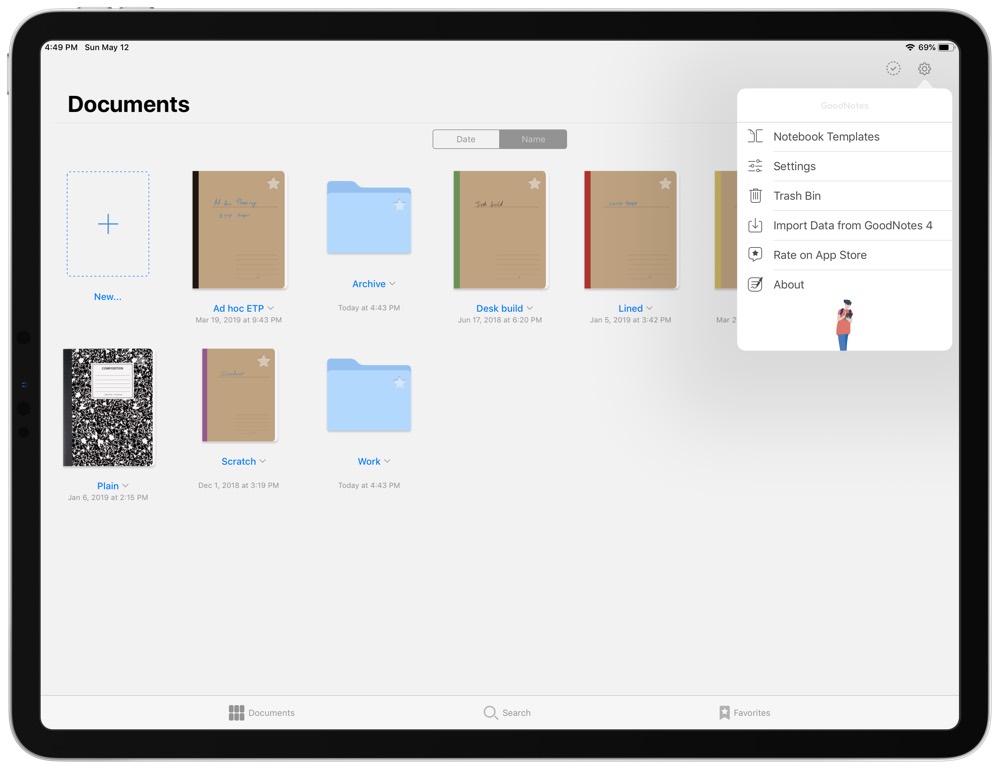
To start, open the GoodNotes app tap the gear icon in the top right corner, and then tap Notebook Templates.
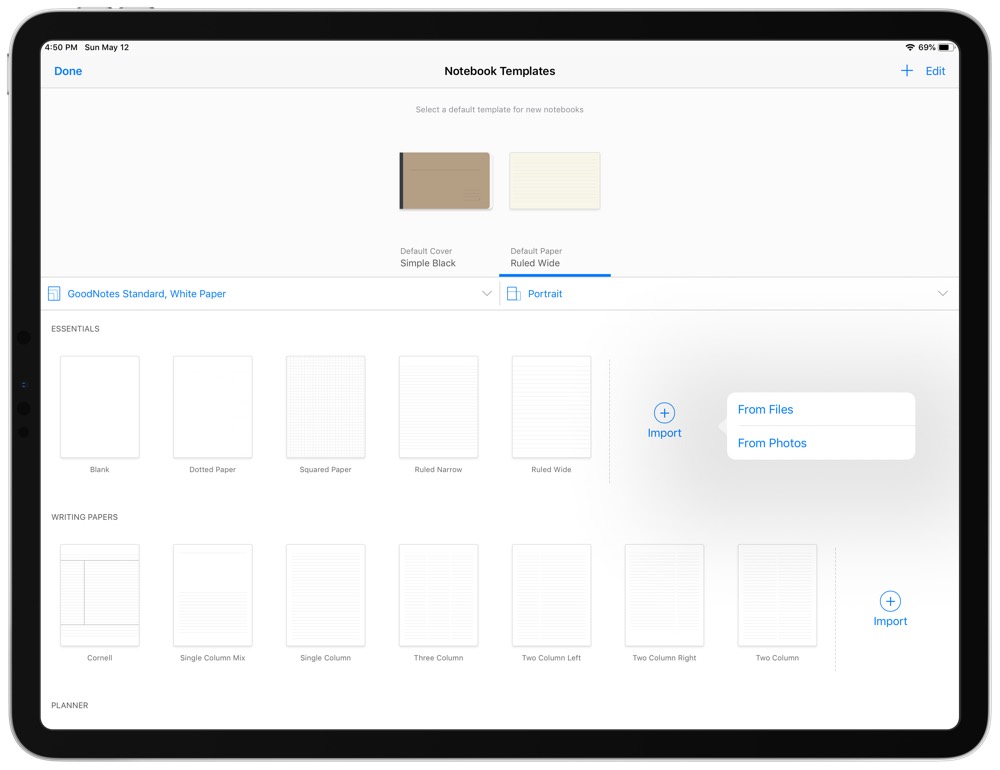
From this screen, there are several options to choose from, but we’re interested in the ability to import our own paper. The paper templates are broken up into different categories, so pick the one that makes the most sense to you, and tap Import in that section. Since I use this paper type so much, I’ve chose to include it in the Essentials section.
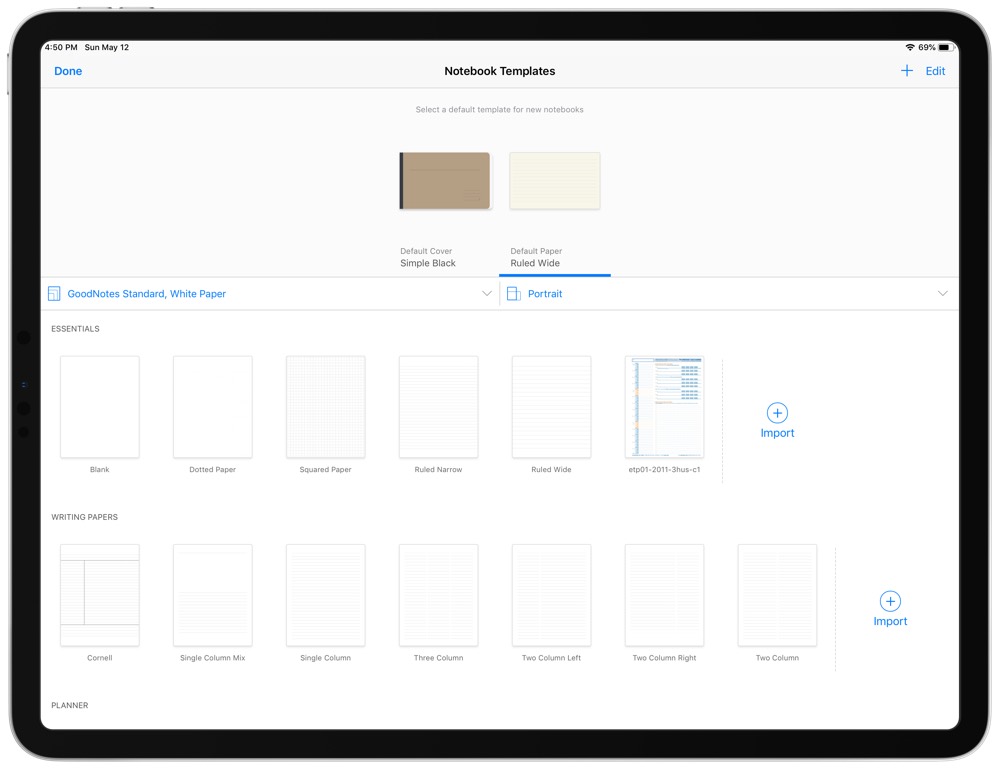
A Files chooser window pops up, and you can find and select your PDF or image from the correct area. Once you do that, the paper type is shown in the corresponding section to which you chose to import it.
Now that my paper is available as a template, I’ll create a new notebook to start using it. Go back to the main screen of GoodNotes, and tap the + button available in the outline of a notebook. From here, you’ve given the option to name your notebook, pick a cover, and pick a paper type. Make your selections, and tap Create.
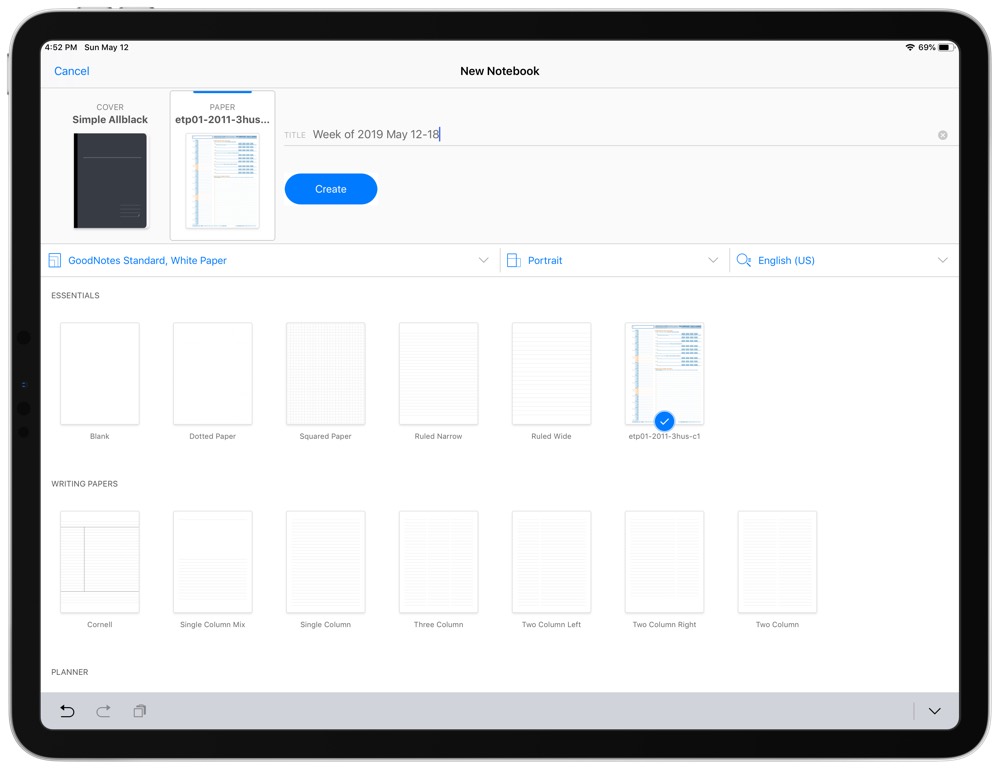
Open the notebook, and voila! Write, draw, and scribble to your heart’s content on your custom paper. Each new page of the notebook also contains the same paper.
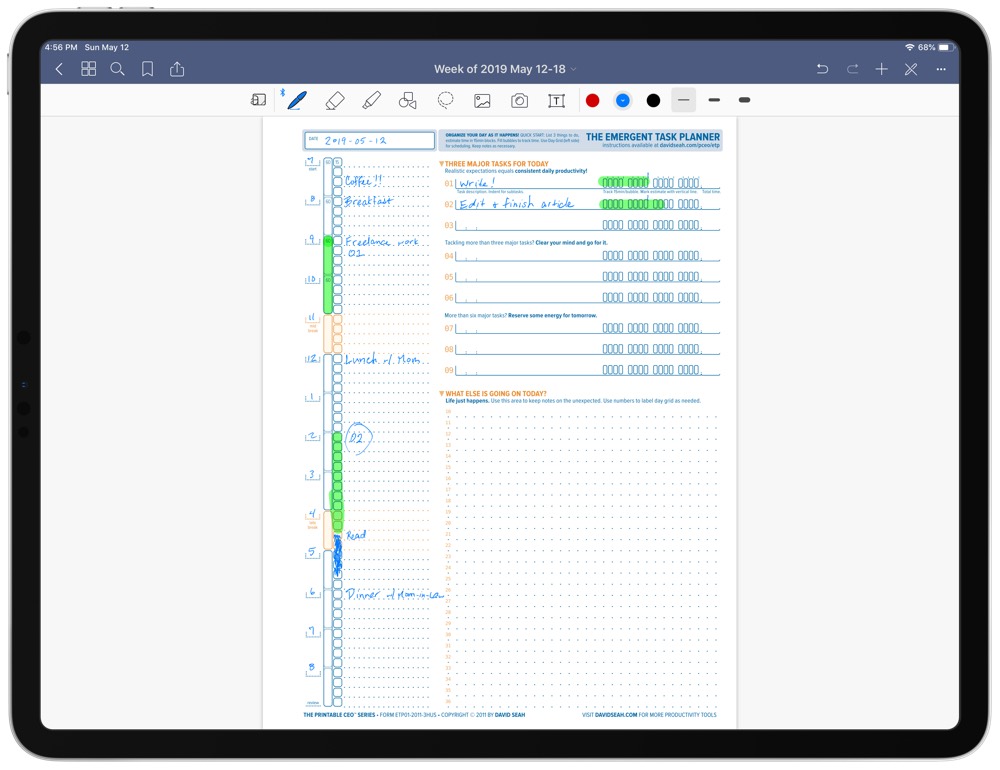
You can also add your new paper to existing notebooks as single pages. Ultimately, GoodNotes gives you the ability to completely customize your notebooks with any kind of paper you can find or imagine. As a jumping off point, check out this list of templates that Gabe (Macdrifter) put together.
Wait. There’s a Bonus….
Custom Productivity Templates for Your iPad
If you want to use custom productivity templates on your iPad, we’ve put together a free, walkthrough guide along with two of our in-house templates that can help you get started.
We’ll show you…
- How to create and save custom page templates.
- How to use those page templates to transform GoodNotes into your own productivity notebook (or any other type of notebook replacement).
Plus, we also have included two of our custom productivity templates for you to get started with.

This guide is available for FREE to our email subscriber community. And you can get it right now.
By joining the Sweet Setup community you’ll also get access to our other guides, early previews to big new reviews and workflow articles we are working on, weekly roundups of our best content, and more.
