Quick Tip: Using Hazel to Auto-File Your Documents
Years ago, Shawn embarked on his journey to go “paperless” in his personal and work life. Inspired by David Sparks’ Paperless Field Guide, he incorporated three important components:
In this Quick Tip, we are mostly going to focus on Hazel, but the scanners are worth a brief mention. Office scanners are great if you have a decent amount of stuff to scan and you want good-quality scans. iPhone scanning apps are ideal for scanning things quickly on the go. As digital as the world has become, we still have to scan stuff (receipts, medical bills, important documents — no matter how many times you “opt-in for paperless post”).
But the main star of the show is Hazel. Scanning stuff into your computer is a good first step, but then you have to put it in the right spot. Otherwise, your desktop and downloads folder becomes the Wild West — vast and chaotic.
Enter Hazel. You set up some rules once and it does crazy cool stuff for you. Set it and forget it. Amiright?
Filing Bills
Let’s look at a few examples. One of the reasons Shawn got into his journey for going paperless was to organize his monthly bills. In Hazel, you can set up rules (that all run in the background) that rename, move, and organize your files (and much more).
Every time Shawn’s utility bill hits his download folder, it gets added to his Utility Bills folder.
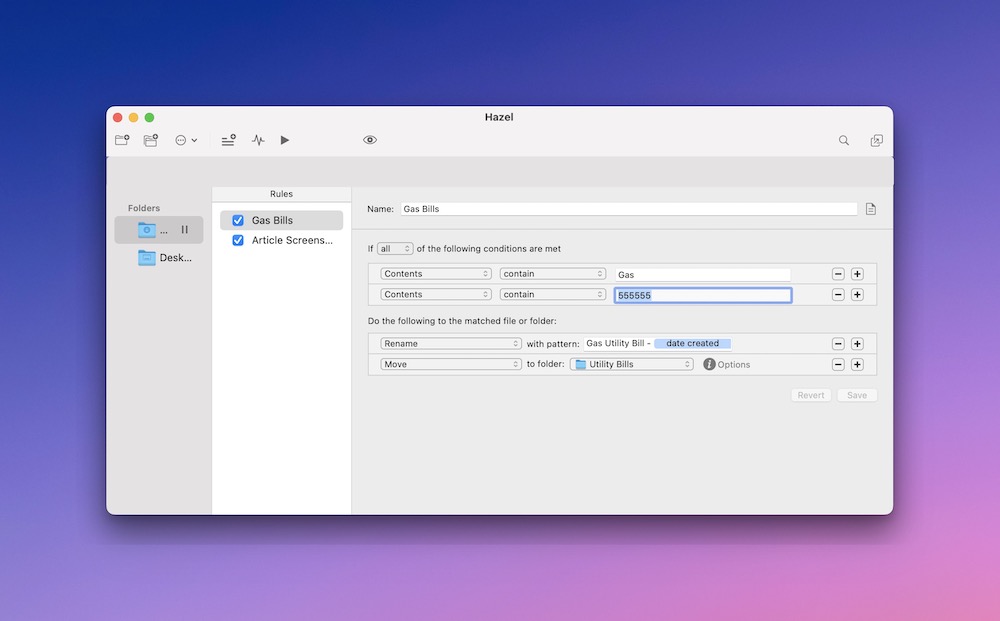
This rule states that any document that lands in Shawn’s downloads file that contains the words “Gas” and the numbers “555555” Hazel then renames to “Gas Utility Bill – DATE ADDED” and moves it to his “Utility Bills” folder. Cool right?
You could use this same logic to file your tax documents, expense receipts, PDFs, screenshots etc. The list is pretty much endless.
Organizing Screenshots
There are about a million use cases for Hazel (MacSparky has a whole field guide on Hazel), but one that I have that helps me write articles for The Sweet Setup is organizing my screenshots I take. Currently, whenever I take a screenshot using CleanShotX (is there even any other way?), it gets dropped on my desktop. In the past, I’ve tried to name and save all the screenshots to the right folder as I go, but sometimes I lose track or just want to move quickly and rename and move them around later. Also, I tend to take an absurd amount of screenshots and only use half of what I take, so I usually don’t want to take the time to edit, name, and save things I might not use. But then, Hazel.
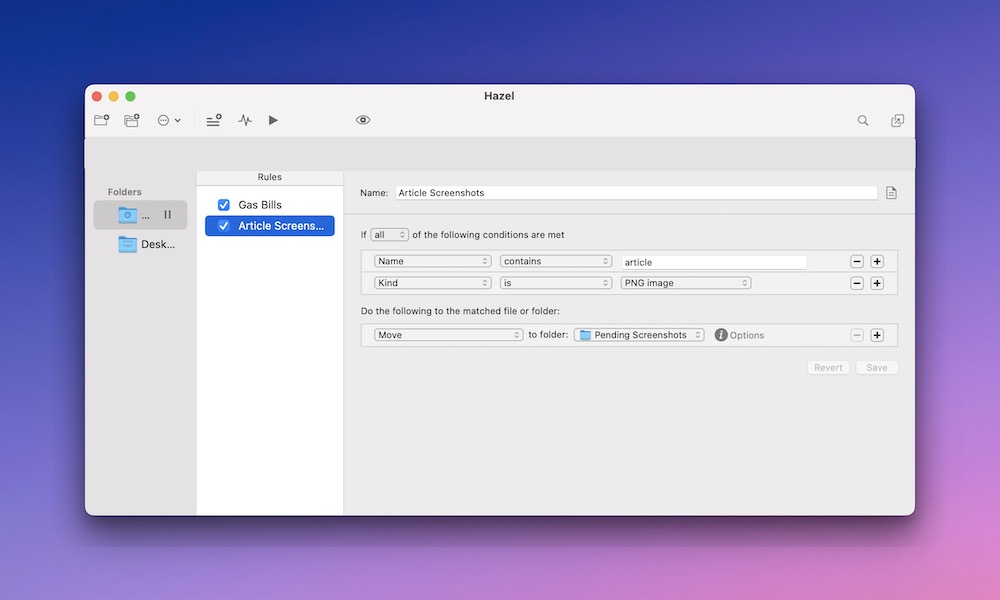
I set up a rule to take all screenshots that land on my desktop that contain the word “article” in them and that are a PNG image and drop them in a “Pending Screenshot” sub-folder inside of my Articles folder. So when I am ready, I can easily find and pick the screenshots I need and upload them straight to WordPress instead of rummaging through my (embarrassingly) cluttered Desktop. It basically holds all my screenshots in a “holding area” until I am ready for them.
Once you set up your rules in Hazel, it runs in the background and you don’t have to think about it anymore. It’s the missing piece to paperless organization and helps put your mind at ease knowing that everything is being put in its rightful place.
We have more helpful tips right here.
🚀 Upgrade: Boost Your Habits
Introducing the new Focus Boosters.
Inside our popular Focus Club membership, join us for the Habit Building challenge (a.k.a. “Booster”). You’ll find out how to make simple changes that will make your daily life better, remove distractions, and create a new simple habit.
Membership Includes: Simple Habits Course, Habit Tracking Templates, Digital Planner, Private Chat Community, Monthly Coaching Calls, and much, much more…