Underwater Portraiture with iPhone
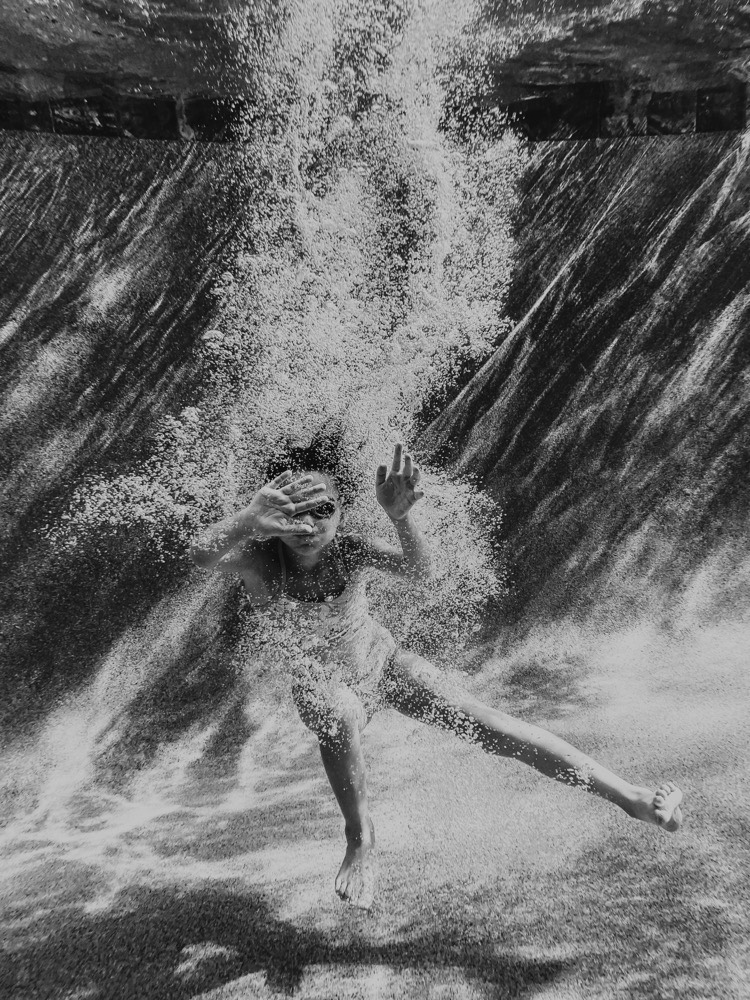
I moved from the Pacific Northwest to Texas a year ago, and due to the large amounts of swimming pools here, a whole new world of photography opened up to me. I wanted to learn to take photos underwater.
I am a seasoned photographer, but I am new to underwater photography, learning as I go this summer. And it’s hard! Between holding my breath, timing the shot, composing in new circumstances, figuring out underwater lighting, phantom iPhone operating, and post-processing for underwater color correction, it’s quite a learning curve.
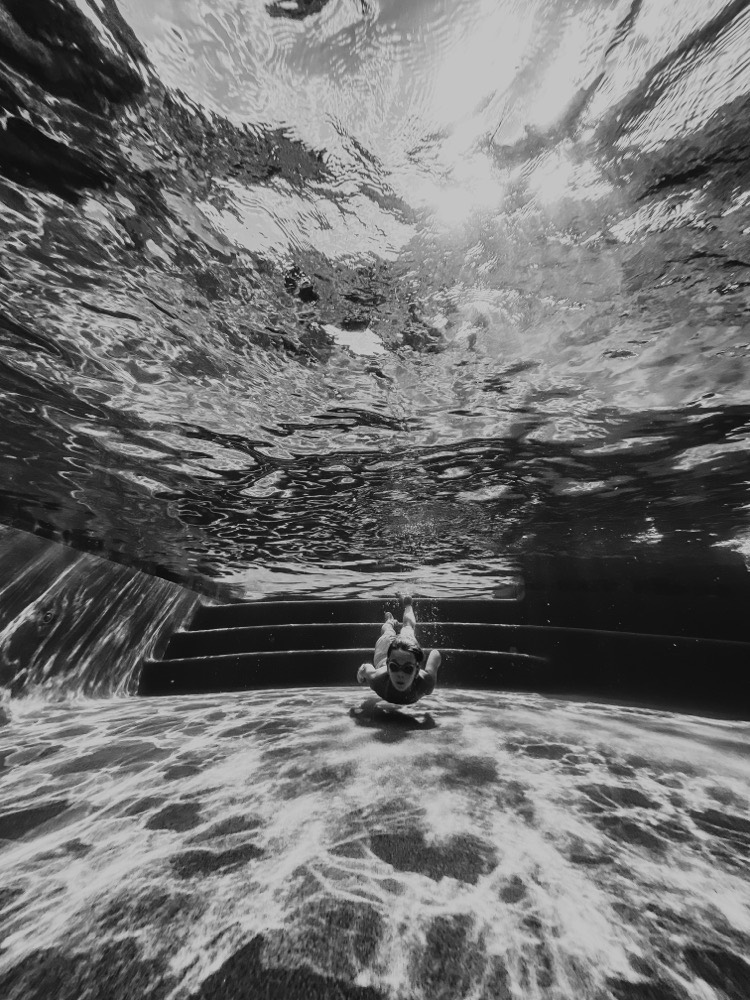
But maybe you’re like me, wanting to take the plunge, unsure how to start, and a few tips to make it easier would help. I’ll share what I’ve figured out and tried so far.
The first thing I did when I decided I wanted to try this, is look for a waterproof casing. I read many reviews and felt comfortable in my decision to purchase the DOOGE iPhone 11 Pro Waterproof Case for my iPhone 11 Pro. When it arrived, I popped it on my phone and jumped into the pool.
It. Was. A. Mess. I couldn’t figure out how to get the shutter to work, the screen phantom operated and would switch between apps, it would suddenly turn the camera app off, switch it to video, change my focal length, etc. It was frustrating, and in an inadvisable move, I removed the case from my phone and went back in.

I want to be clear that I don’t recommend doing this. Dunking an iPhone without any protective housing isn’t something I can tell you to do. Many an iPhone has been lost this way, so if you do this, do it at your own risk. I will say, it was much easier for me to use it underwater this way.
So what happened when I went in waterproof case-less? I got great shots and nothing too serious happened to my phone. The case had made my photos more hazy, removing it made them more crisp, and made my phone phantom operate a whole lot less. I couldn’t charge my phone with a cable (wireless charging was fine) for about 7 hours. And my phone was hot when I was done. Otherwise, there were no lasting effects that I can tell. I was even able to exit the pool and immediately use it to edit my shots in Lightroom Mobile, without issue.
Haziness underwater is a bit difficult to judge, but here are side by side, unedited shots, taken a minute apart, out of water, to show the slight haze the DOOGE case creates:
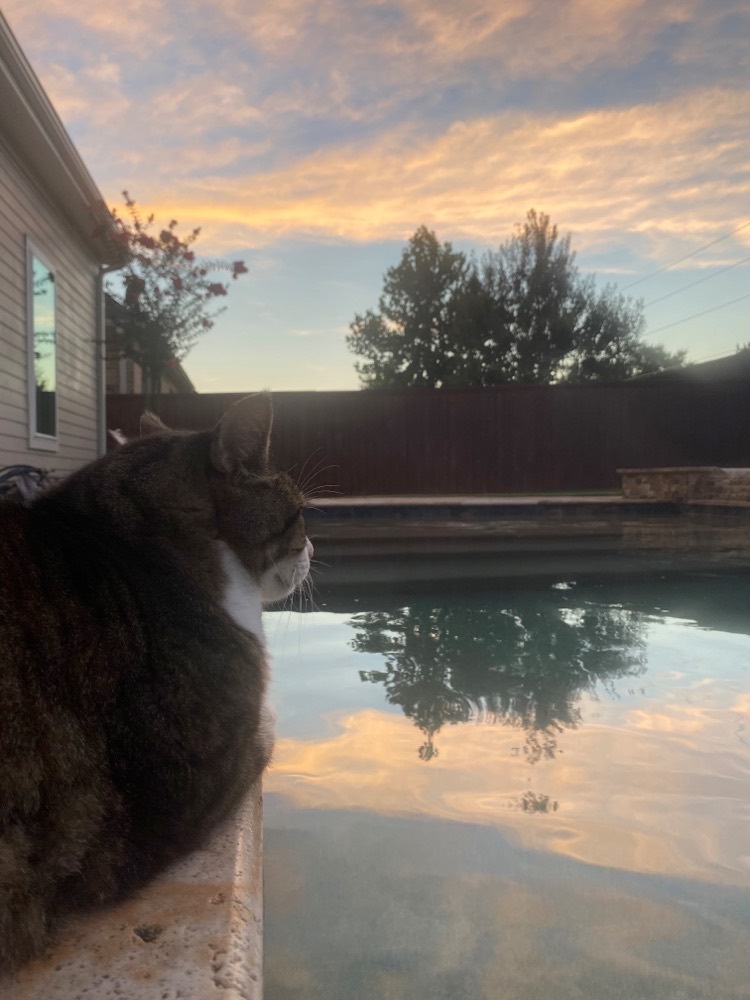
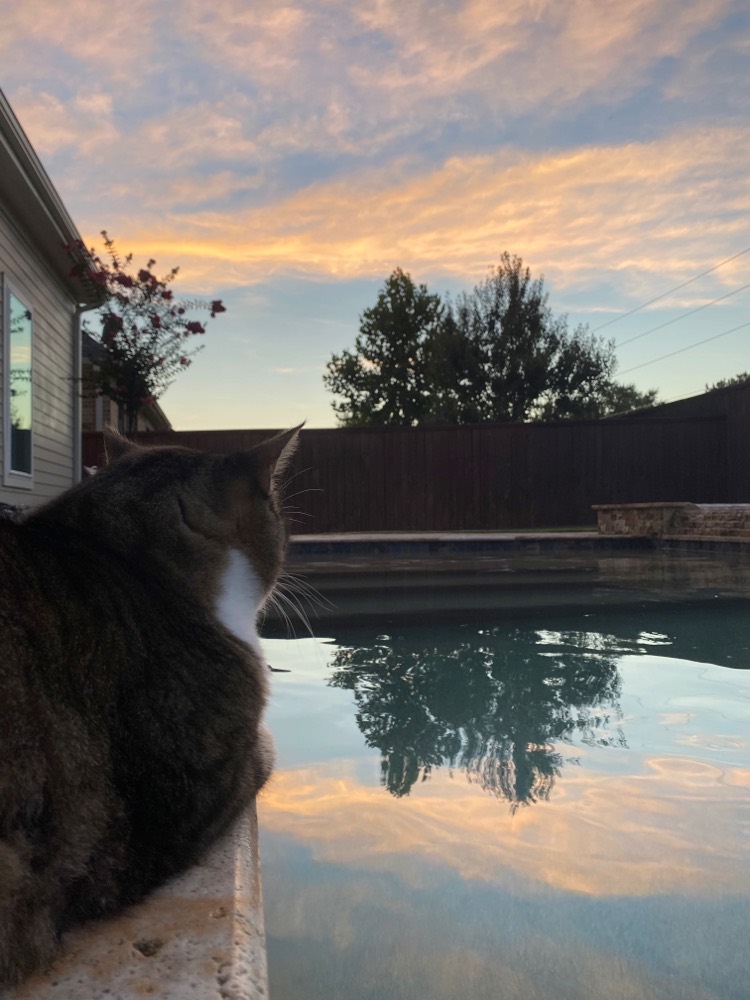
You can see it a lot in the sky, it’s lighter and fuzzier in the photo taken with the DOOGE. I don’t think it affects the images enough underwater to count it out, though.
Speaking of haze, my next brilliant idea was to try using a ziplock bag as a case. While it was much easier to operate my phone underwater in the bag vs. the case, and it did in fact keep my phone completely dry, it was not good to have that plastic across my lens, and I ended up with extremely distorted shots like this:
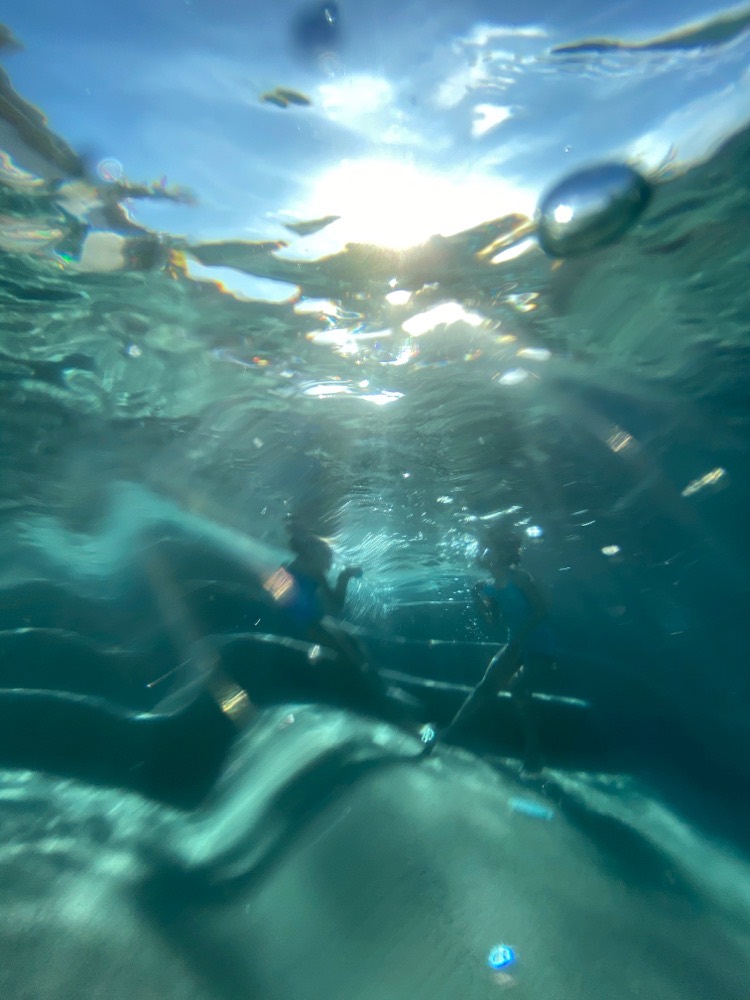
Versus:
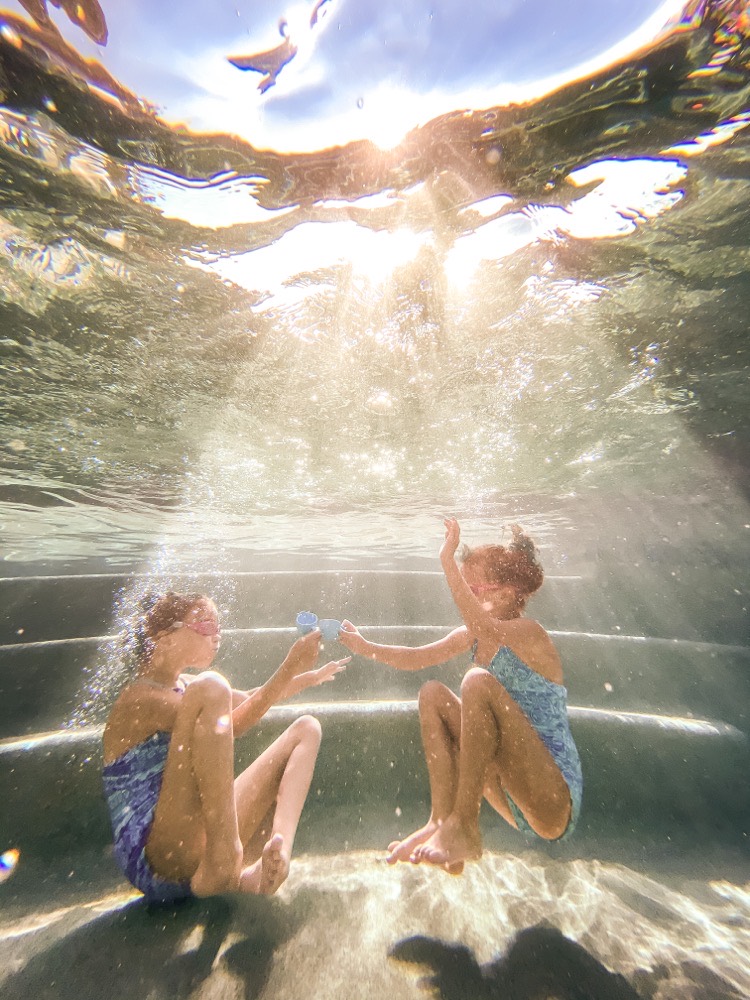
Stark contrast. I can barely even tell my kids are in the Ziplock shot.
After these initial trials of ditching my case, and quickly learning that a Ziplock was not even close to the answer, I went back and forth between using the DOOGE waterproof case, and using no case at all. The results were the same each time: the shots were nice and clear enough either way. It was easier to shoot without the case due to less phantom operating, less bulkiness in my hand, and I had an easier time pressing the shutter. My phone was always fine afterwards, albeit a bit hot and having to wait to charge, but it still scared me to do, especially as I wanted to shoot for longer durations. I may be willing to try shooting underwater caseless a few times, but not over an extended period of time.
I kept trying with the DOOGE, and did figure out how to make using the case, and using the iPhone for underwater photography in general, more comfortable, and I now use the case more often than I don’t. My phone also gets less hot when I use the case. If I keep this up, I plan to look into different cases to try.
The first technical thing I learned when using the iPhone to take photos underwater: Only the volume button works as a shutter. The screen button won’t be responsive, even without a case. Also, I can’t shoot for very long per session. After about 10-15 minutes, this is especially true with the case on, my phone starts to phantom operate so much I can barely get it to keep the camera app open long enough to take a shot.
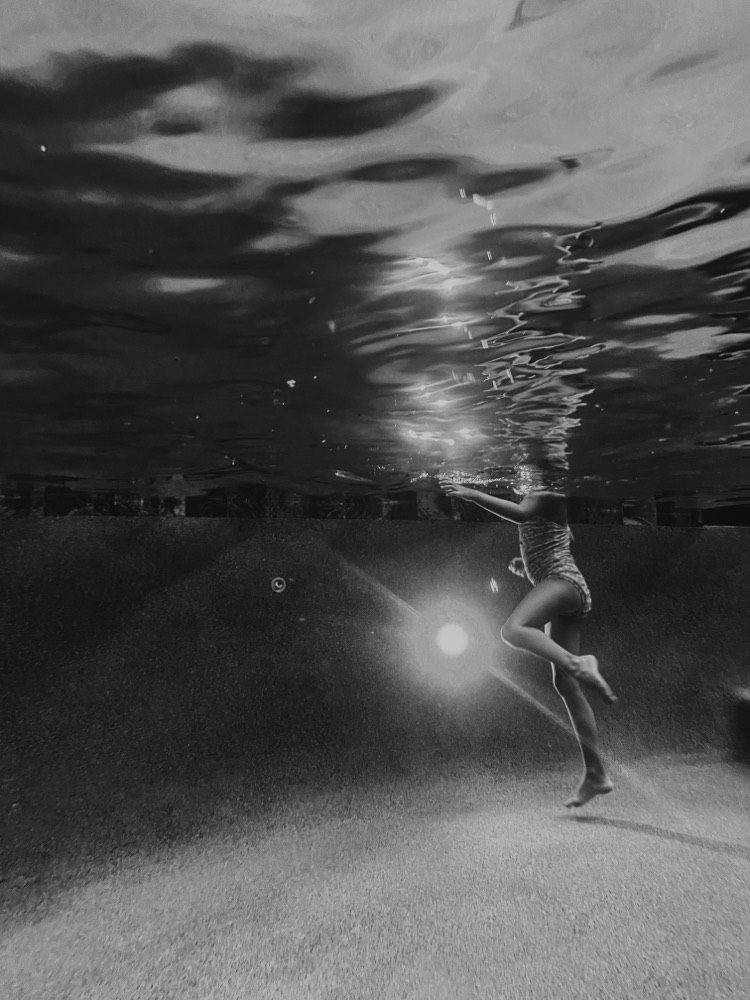
I noticed that most of the phantom operating happened right as I dunk the phone underwater, and often, the camera app will completely shut off. To help combat this, I learned to: open the camera app, select the focal length I wanted, and go underwater with it. Once it’s underwater and if the camera app stays open, I keep my phone submerged, even as I come up periodically for air, until I am done with a round of shots.
This works for a little while, until my phone starts opening every app and it’s time to quit.
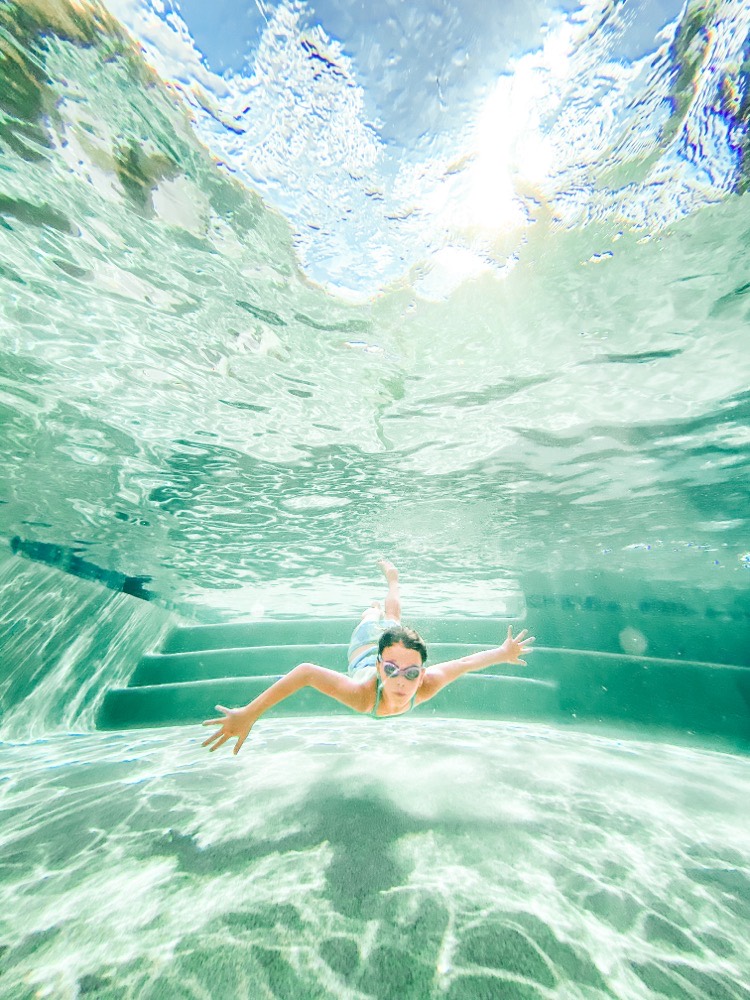
It is much easier to see what I’m shooting underwater if I turn my screen’s brightness all the way up while I’m down there, looking through goggles.
Beyond the case and technical struggles, I learned a few compositional, and editing tricks for underwater that I want to share. Bear in mind, I have only shot underwater photos in a controlled environment: In a residential pool with clear water that only goes to a certain depth (about 7 feet). I have no idea how to shoot in murky, moving, or deeper water. I also don’t know if I would have the guts to try, because if I drop my phone in a pool, it’s easy to retrieve! But trying to find it at the bottom of a lake would prove far more difficult.
Get Our Best Photography Tips & Workflows
Transform your photos and edits from average to awesome with our in-depth, mobile photography course. It’s jam-packed with training, ideas, and lessons that can literally transform your photography overnight.
When it comes to composing, time of day, and light in general, matters most. Underwater is already a darker environment as the water filters out more light (and colors) the deeper you get, so the stronger the sun/light, the crisper the images will turn out. Even at dusk with underwater lights on, I struggled to get crisp shots the same way I could in the middle of the day, because the lack of light meant my exposure times were a lot slower. Here’s an example, the first shot was taken during the middle of the day, the second at dusk:
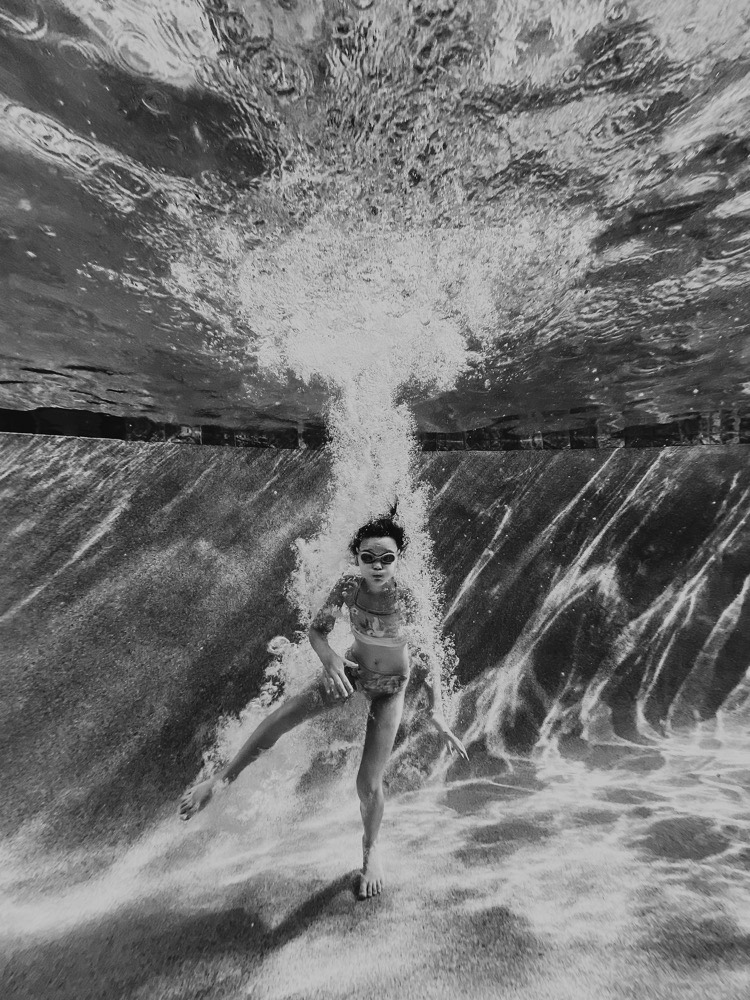
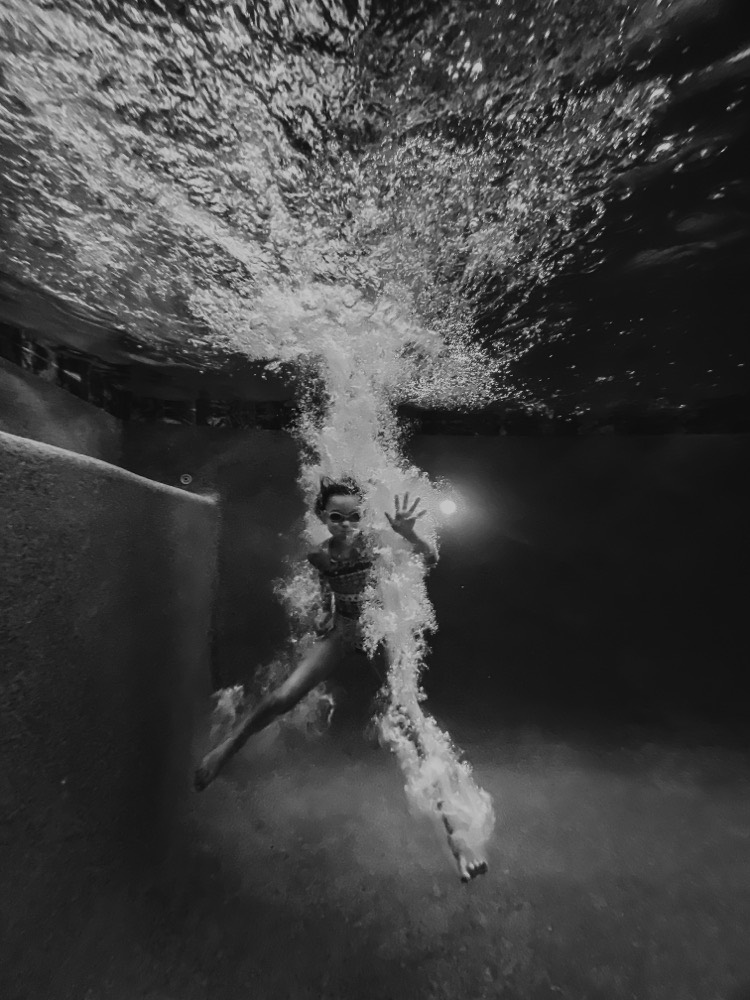
Even though the second image is less clear, the mood the night time gave was something I loved, and I liked the way the bubbles were backlit by the pool light. I personally didn’t mind the trade-off of adding blur to the shot. It’s worth it to play around and see how different lights affect your images.
It’s pretty difficult to thoughtfully frame a shot underwater. Between holding your breath, trying to see through goggles and water, trying to keep still and not float back up to the surface, trying to furiously catch a moment, and equipment struggles, it can be a frustrating endeavor. During my first attempt at underwater photography, I felt like I was shooting blind because I was trying to manage so many things at once, and thinking about all of them. Just like shooting on land, it gets easier and more natural, and one thing that helps is shooting with the wide angle lens. Yes, it will distort the image, but it’s (at least for me) somewhat difficult to not cut off limbs with the standard length iPhone lens unless you move way back from your subject.

Using the wide angle lens also allows for interesting and creative shots. I love getting under my subject and shooting upward to try and capture a bit of the scene that’s outside the water, like the sky, or even the side of the house. It draws attention to two different worlds in a visually interesting way. You can see in the images above and below what I mean, and also, how I cut off a foot in the second shot, even with the wide angle!
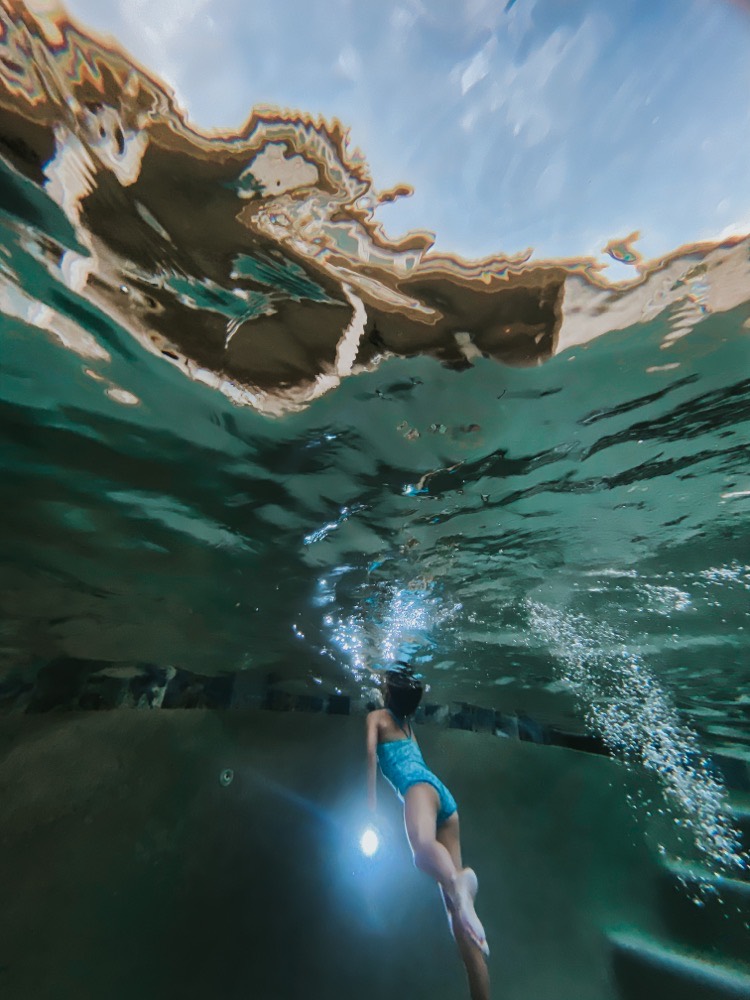
Shooting underwater portraiture is a whole new world of possibilities and things to try, and it’s important to be creative. Try having people jumping in for bubbles and texture (have them give you a 3 second lead to get underwater and into position), change your angle, get underneath your swimmer, move back, move closer, creatively crop, or even use the water to create an interesting crop. Now that I’m more comfortable shooting in the water, my next thing might be playing with wardrobe and using something lightweight and airy, like a tutu or gauzy dress, to create an ethereal look. Just be sure to take your time and compose thoughtfully, even when it feels rushed as you shoot between breaths.
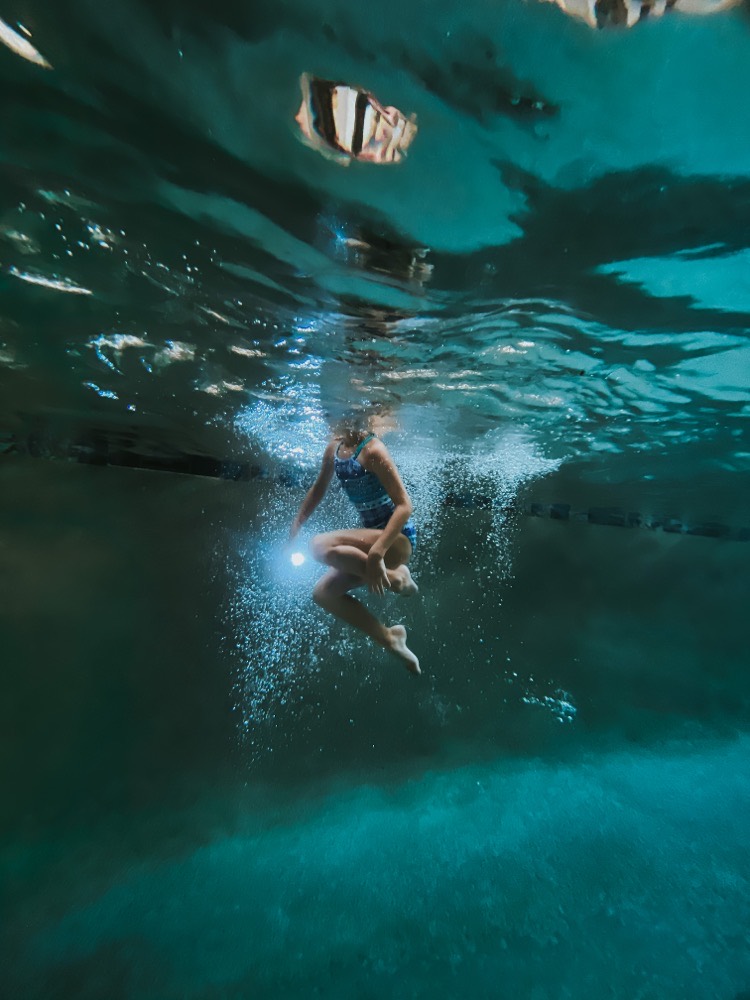
And finally, editing. You’ll notice a lot of these images are converted to black and white. This is for two reasons: I love black and white and tend to favor it, especially in situations with cool light, and the second reason is color correcting for underwater photos is time consuming and a lot of work.
I like to keep the water color close to true, which in my case has been turquoise/ green water. But, that wreaks havoc on skin tones. Using color and tint sliders too much takes the blue and green completely out of the water before I get to a skin tone I feel is accurate. So, I’ve found the best way to edit is to warm up the white balance just enough until I get to a point before it takes the blue out of my water, and I do the same with the tint — move it toward red to help my skin tones, remove some green, without taking it all away. This, however, won’t fix the skin enough, so next, I paint over the skin with the select tool (in Lightroom/ Lightroom Mobile) and adjust the warmth and tint further until it looks right.
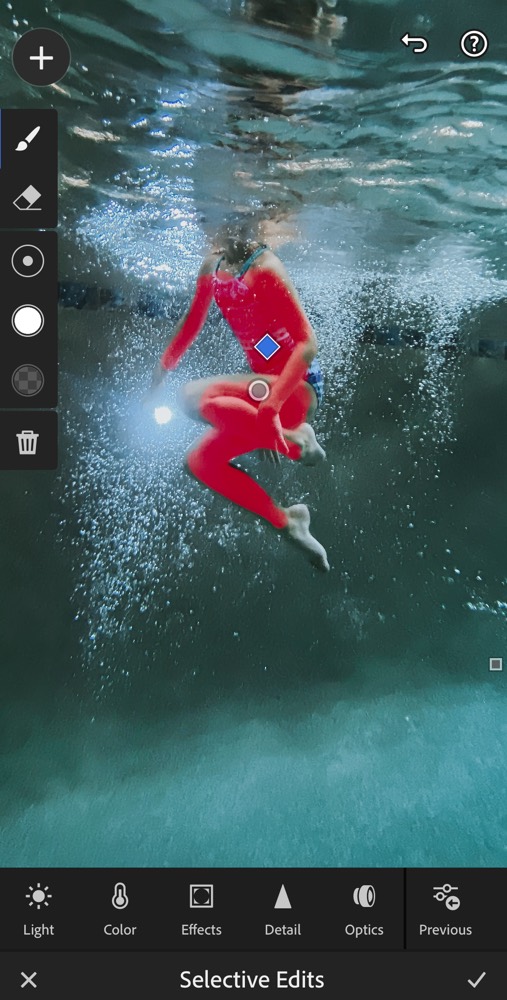
Often, this isn’t just one step. Due to different depths and shadows, some parts of the skin can remain green or blue-tinged. I carefully select those sections and color correct them to match the rest of the skin on the body.
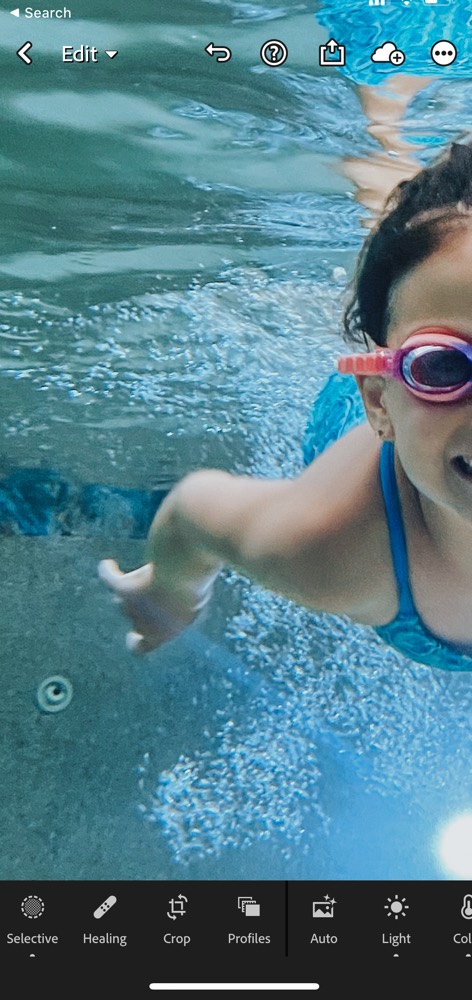
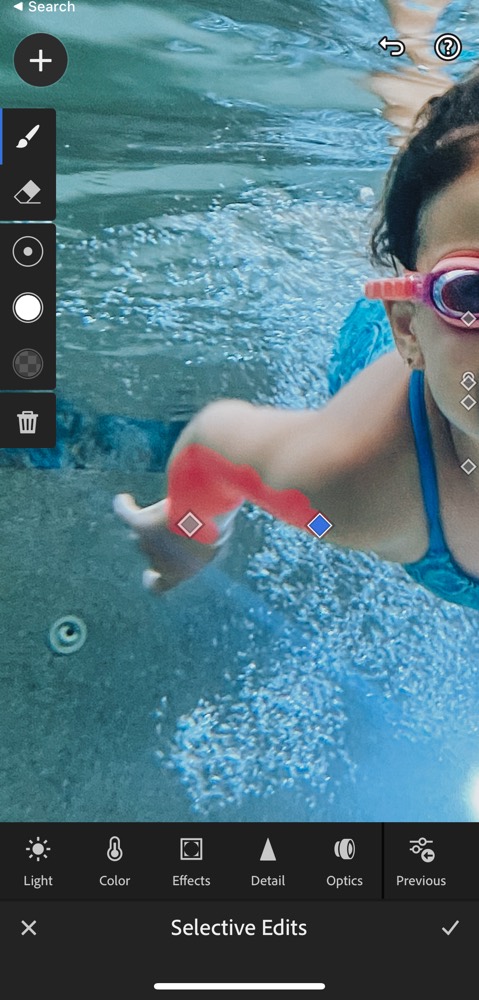
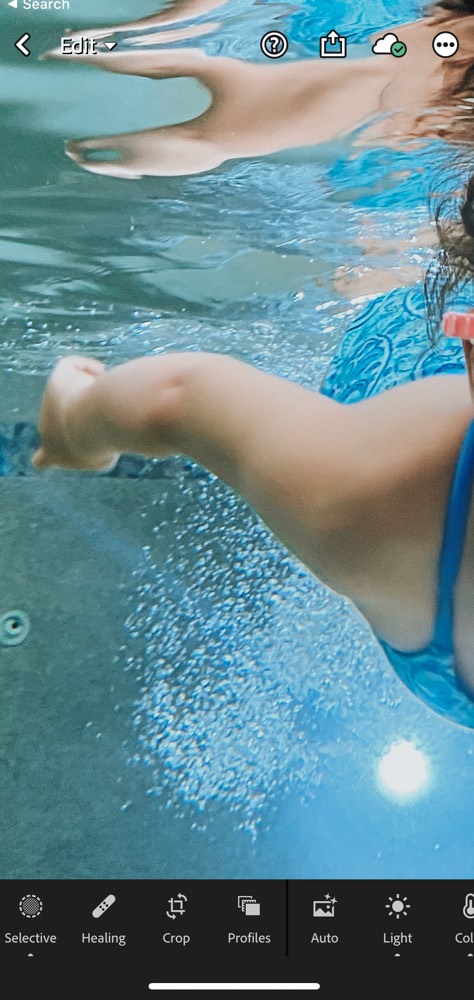
You can see in the screenshots above, her arm had a green spot. I used the select tool and painted it again and changed the tint of the selected area, to match the rest of her skin. This happens a lot on lower parts of faces underwater, too. Sometimes you have to correct spots more than once.
A few more editing tips: Most likely, you will need to add a slight bit of dehaze to combat the haze that the water, and phone case, creates. I also add some contrast to help with this, and a slight amount of sharpening and clarity. I don’t sharpen or clarify too much because that will inevitably call attention to noise. Every shot I’ve gotten under water with my iPhone has had noise. In some photos, I’ve opted to de-noise and smooth the image out a touch, while I embrace the grain in others. It comes down to editing style with this one, but I usually love grain in general, especially in a black and white photo.

In the end, iPhone may not be the camera of choice for serious underwater photographers. The images are grainier and hazier than they might be with a DSLR in a waterproof housing. But, it’s quite a capable learning tool and I’m happy with the quality of underwater images I’ve gotten with it. I also enjoyed trying something new and developing my photography skills further. For me, the greatest joy of photography has always been constantly expanding the way I see and capture the world, and this pushed me to learn more. Using iPhone is a great way to try underwater photography out before committing to expensive gear. It’s an otherworldly way to compose images, be creative, and have some fun.
Get Our Best Photography Tips & Workflows
Transform your photos and edits from average to awesome with our in-depth, mobile photography course. It’s jam-packed with training, ideas, and lessons that can literally transform your photography overnight.
