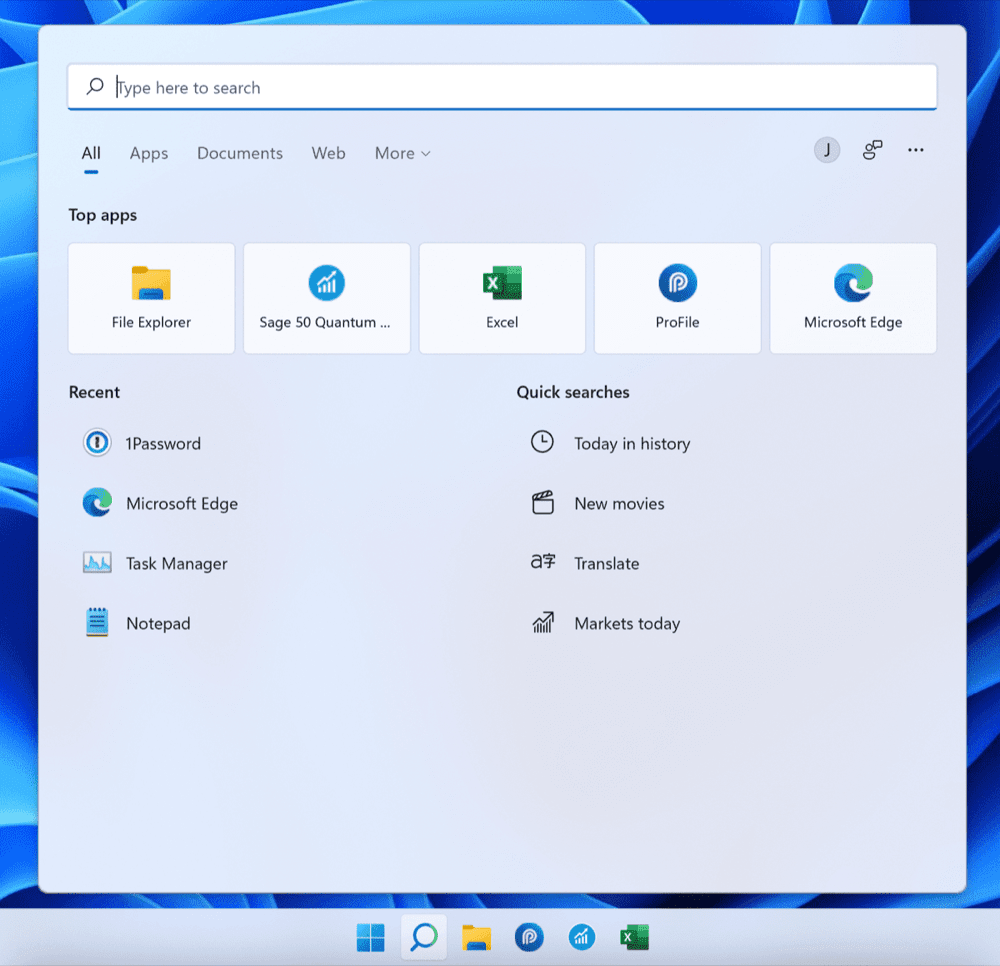
Three Tips for Making Windows 11 in Parallels Seamless on a Mac

A colleague on the The Sweet Setup team recently asked me a profound question related to Windows on the Mac — a question wherein I completely dropped the ball in answering. The question was simple:
Why would a regular Mac user choose to work in Windows on a Mac instead of macOS?
Tough question.
I’m going to answer a tangential question instead:
”How can a regular Mac user benefit by working in Windows on a Mac instead of macOS?”
My answer to the second question is fulfilled in one term: compatibility.
If you’re a Mac user working inside business of any sort, you can bet you’ve run into multiple instances of cross-platform compatibility issues. A “Here’s a spreadsheet I built to calculate the return on investment” email hits with an Excel attachment and opening the workbook in Numbers just doesn’t do the trick. Or you take a course where the required software is available only on Windows. Or you have to help troubleshoot for a colleague and they have no idea what you mean when you say “Hit the Command button.”
Been there, done that, right?
You can alleviate so many of these issues by working seamlessly between Windows and macOS using Parallels on the Mac. In Coherence Mode, Parallels effectively treats Windows and macOS as equals, putting windows side-by-side in a way that it would be difficult to determine if you’re working in a Windows app or inside a Mac app.
Parallels boosts compatibility across platforms and the experience is relatively seamless. There are, however, a few ways to boost the seamlessness of working across both Mac and Windows. Here are three quick tips for boosting the seamlessness of working back and forth between Windows and macOS on a Mac.
Inside Parallels, Change Command Key to Control Key
Perhaps the biggest disruption when flipping between macOS and Windows 11 is the situation around the Command key. In my sincerest and humblest opinion, the Command key is superior to the Control/Windows key arrangement in Windows. The Windows key brings up the Start menu when hit, while Control handles a hodge-podge of keyboard shortcuts inside Windows applications. Command inside macOS is more like the Control key than like the Windows key, but Command seems to fit the bill more than Control does in Windows. Plus, Command is in a more ergonomic position, if you ask me.
All told, if you’re a regular keyboard shortcut user in macOS, you’re going to want to turn off the Windows key support and remap the Command key to act as a second Control key in Windows.

In Parallels’ settings, go to Hardware → Mouse & Keyboard → Open Shortcuts Preferences… and select your Windows virtual machine. From here, click the + button to add a keyboard shortcut and map the Command key to the Control key in the Windows virtual machine.
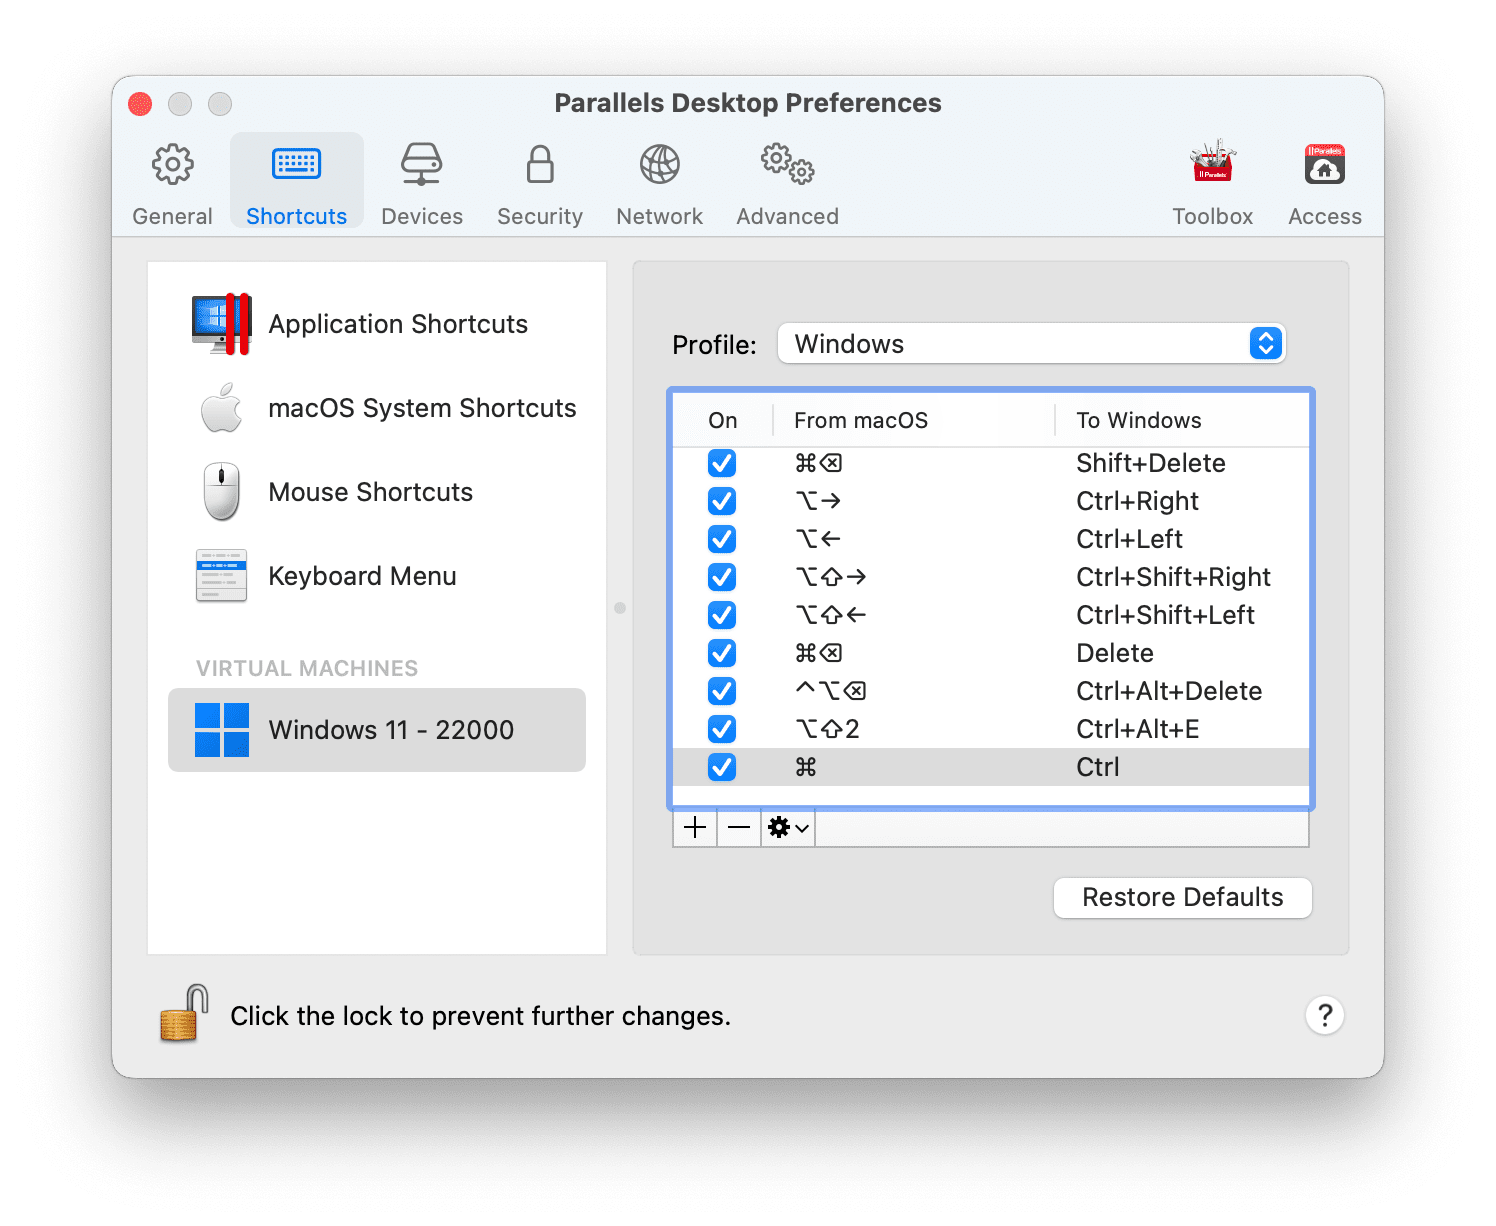
Once created, the Command key will no longer trigger the Windows key in Windows in Parallels. Instead, you’ll effectively have two Control keys on your keyboard when working in a Windows app. Which, as I stated above, really isn’t a duplication given the limited use of the Windows key.
Having Control in the Command key location will allow you to have more consistent text selection across Windows and macOS, will provide more consistent cell movement experience in spreadsheet apps, and maintains consistency for standard keyboard shortcut operations like printing, opening a file, and saving a file.
Curated List of Must-Have Apps
We spend an inordinate amount of time sorting through hundreds of apps to find the very best. Our team here at The Sweet Setup put together a short list of our must-have, most-used apps in 2022.
You will get…
- The current list of The Sweet Setup’s top 8, must-have apps.
- A special, pro tip for each app to help you save time and become more of a power user.
- A hidden feature of each app that you may not have known about.
The Sweet Setup Staff Picks for 2022
These apps work on iPad, iPhone, and Mac. And they range across several different categories but are mostly focused on productivity. They will help you get the most out of your devices and your day.
Inside Karabiner, Use Return as Open in Finder
No matter how big a fanboy you are of Apple’s choices, you must admit to at least a few superiorities in Windows.
One of those areas for me: Windows Explorer keyboard navigation.
In Windows Explorer, you can navigate into a set of files and folders by using the Enter/Return key. In macOS, the same keyboard shortcut is Command + O. The extra hand requirement to hold down the Command key is truly infuriating, especially if you’re not used to it.
Fortunately, you can quickly create a keyboard modification inside Karabiner Elements which brings Windows Explorer keyboard navigation to macOS.
First, you’ll need Karabiner Elements, a keyboard remapping program (among other things). You can download it here.
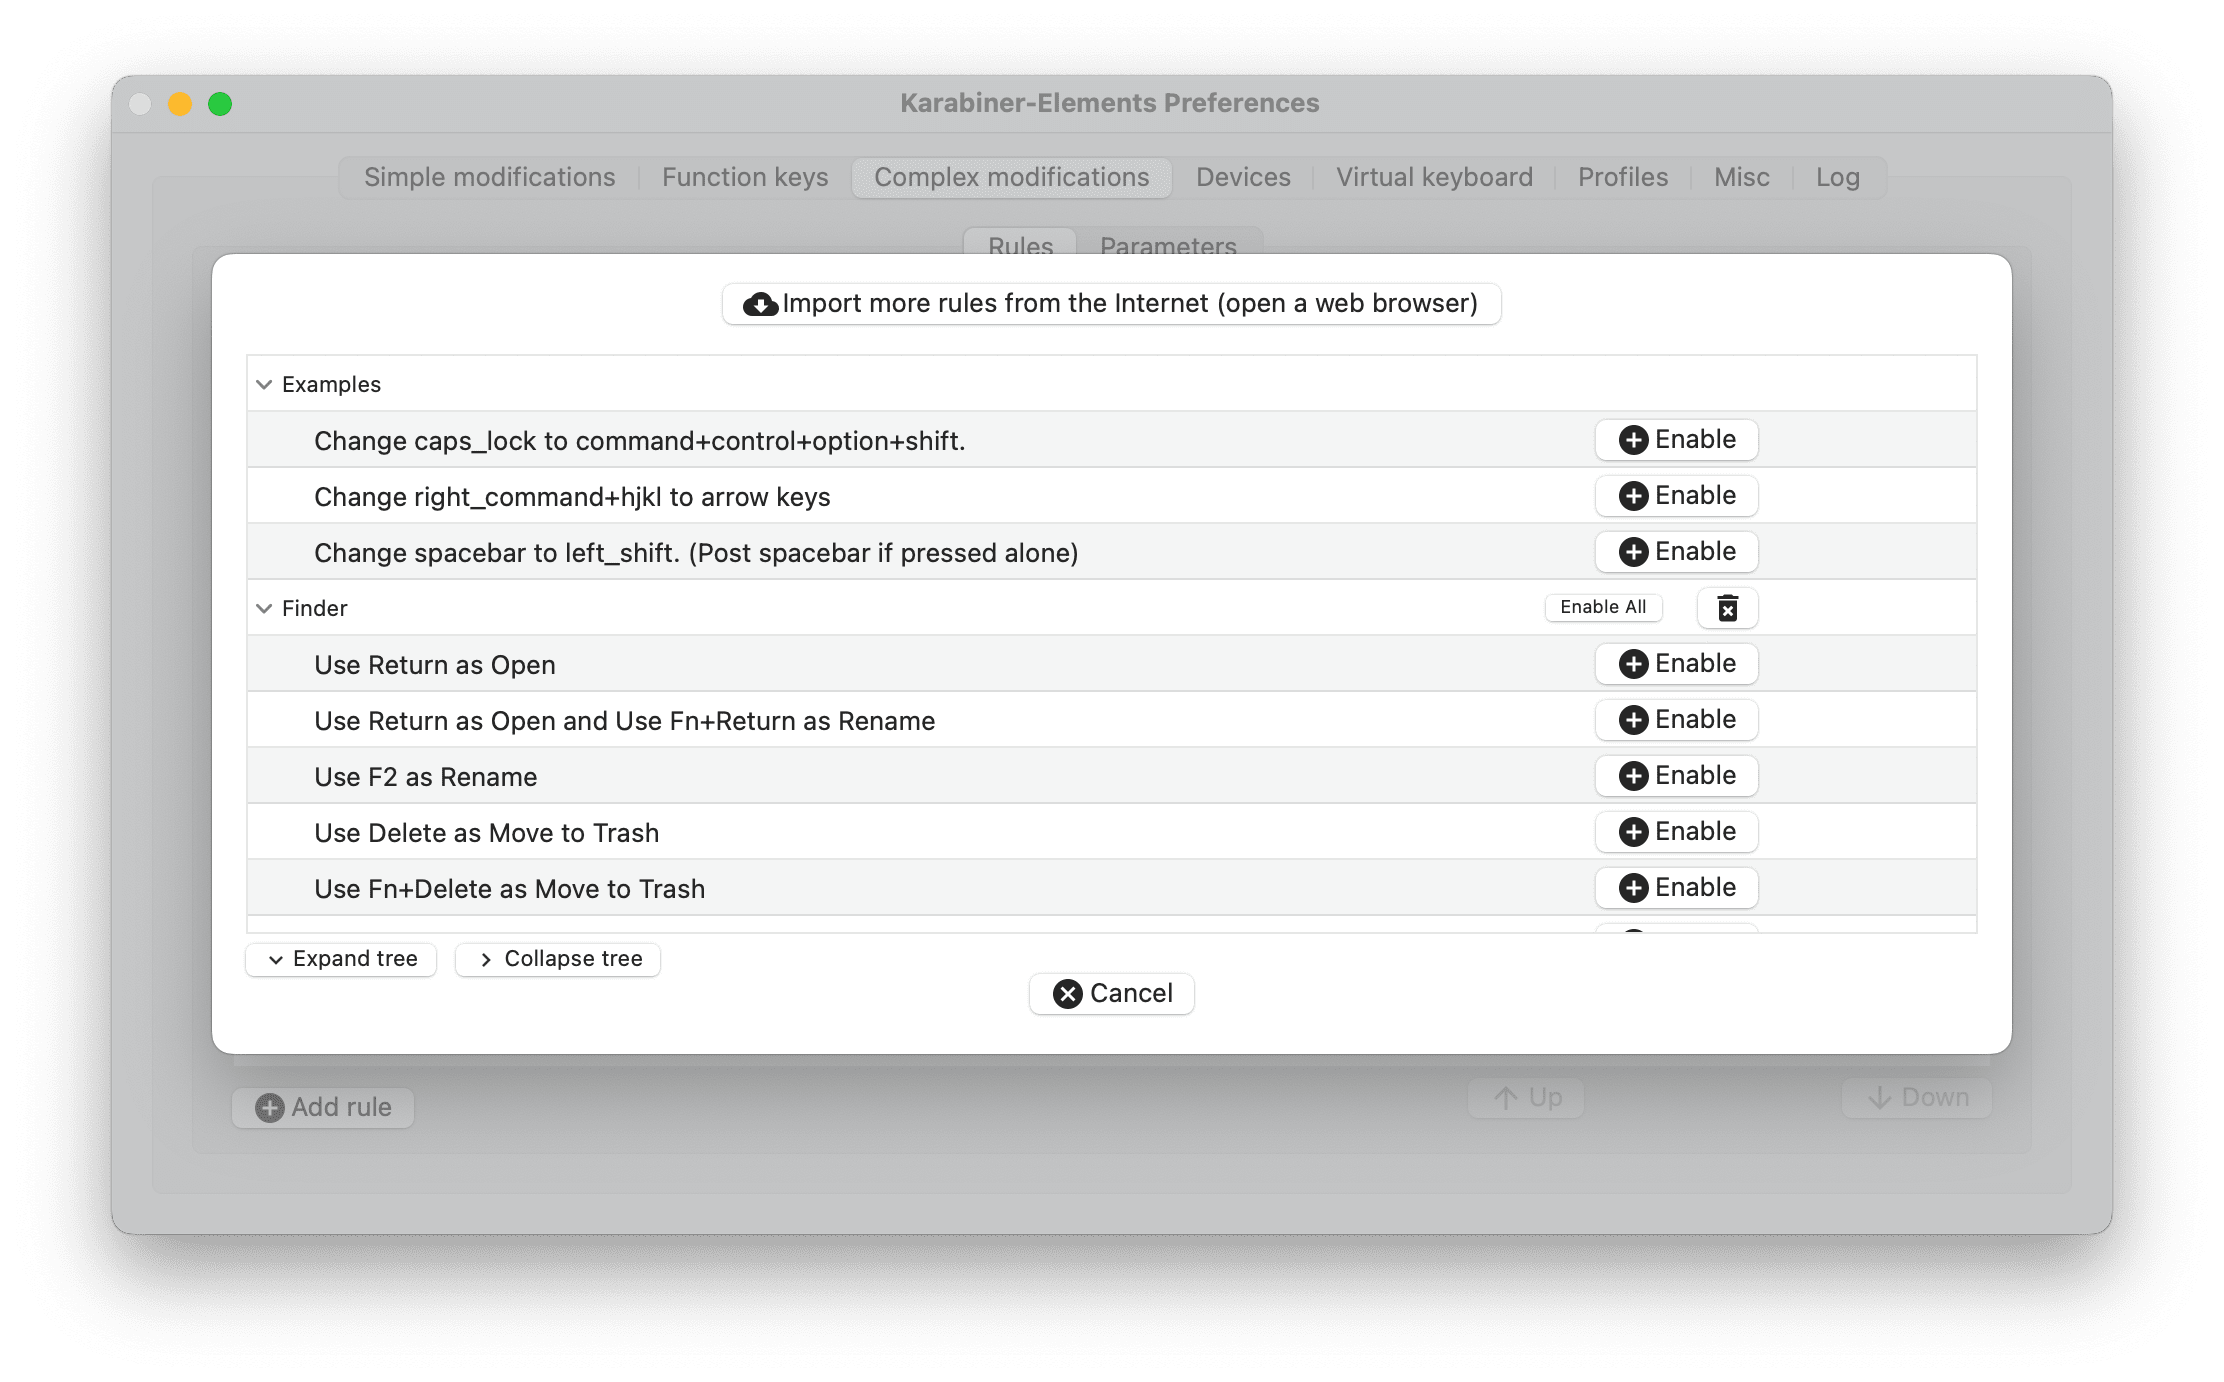
Next, inside Karabiner Elements, click Complex Modifications → Add Rule in the bottom left corner, and then Import more rules from the Internet at the top of the pop up window.
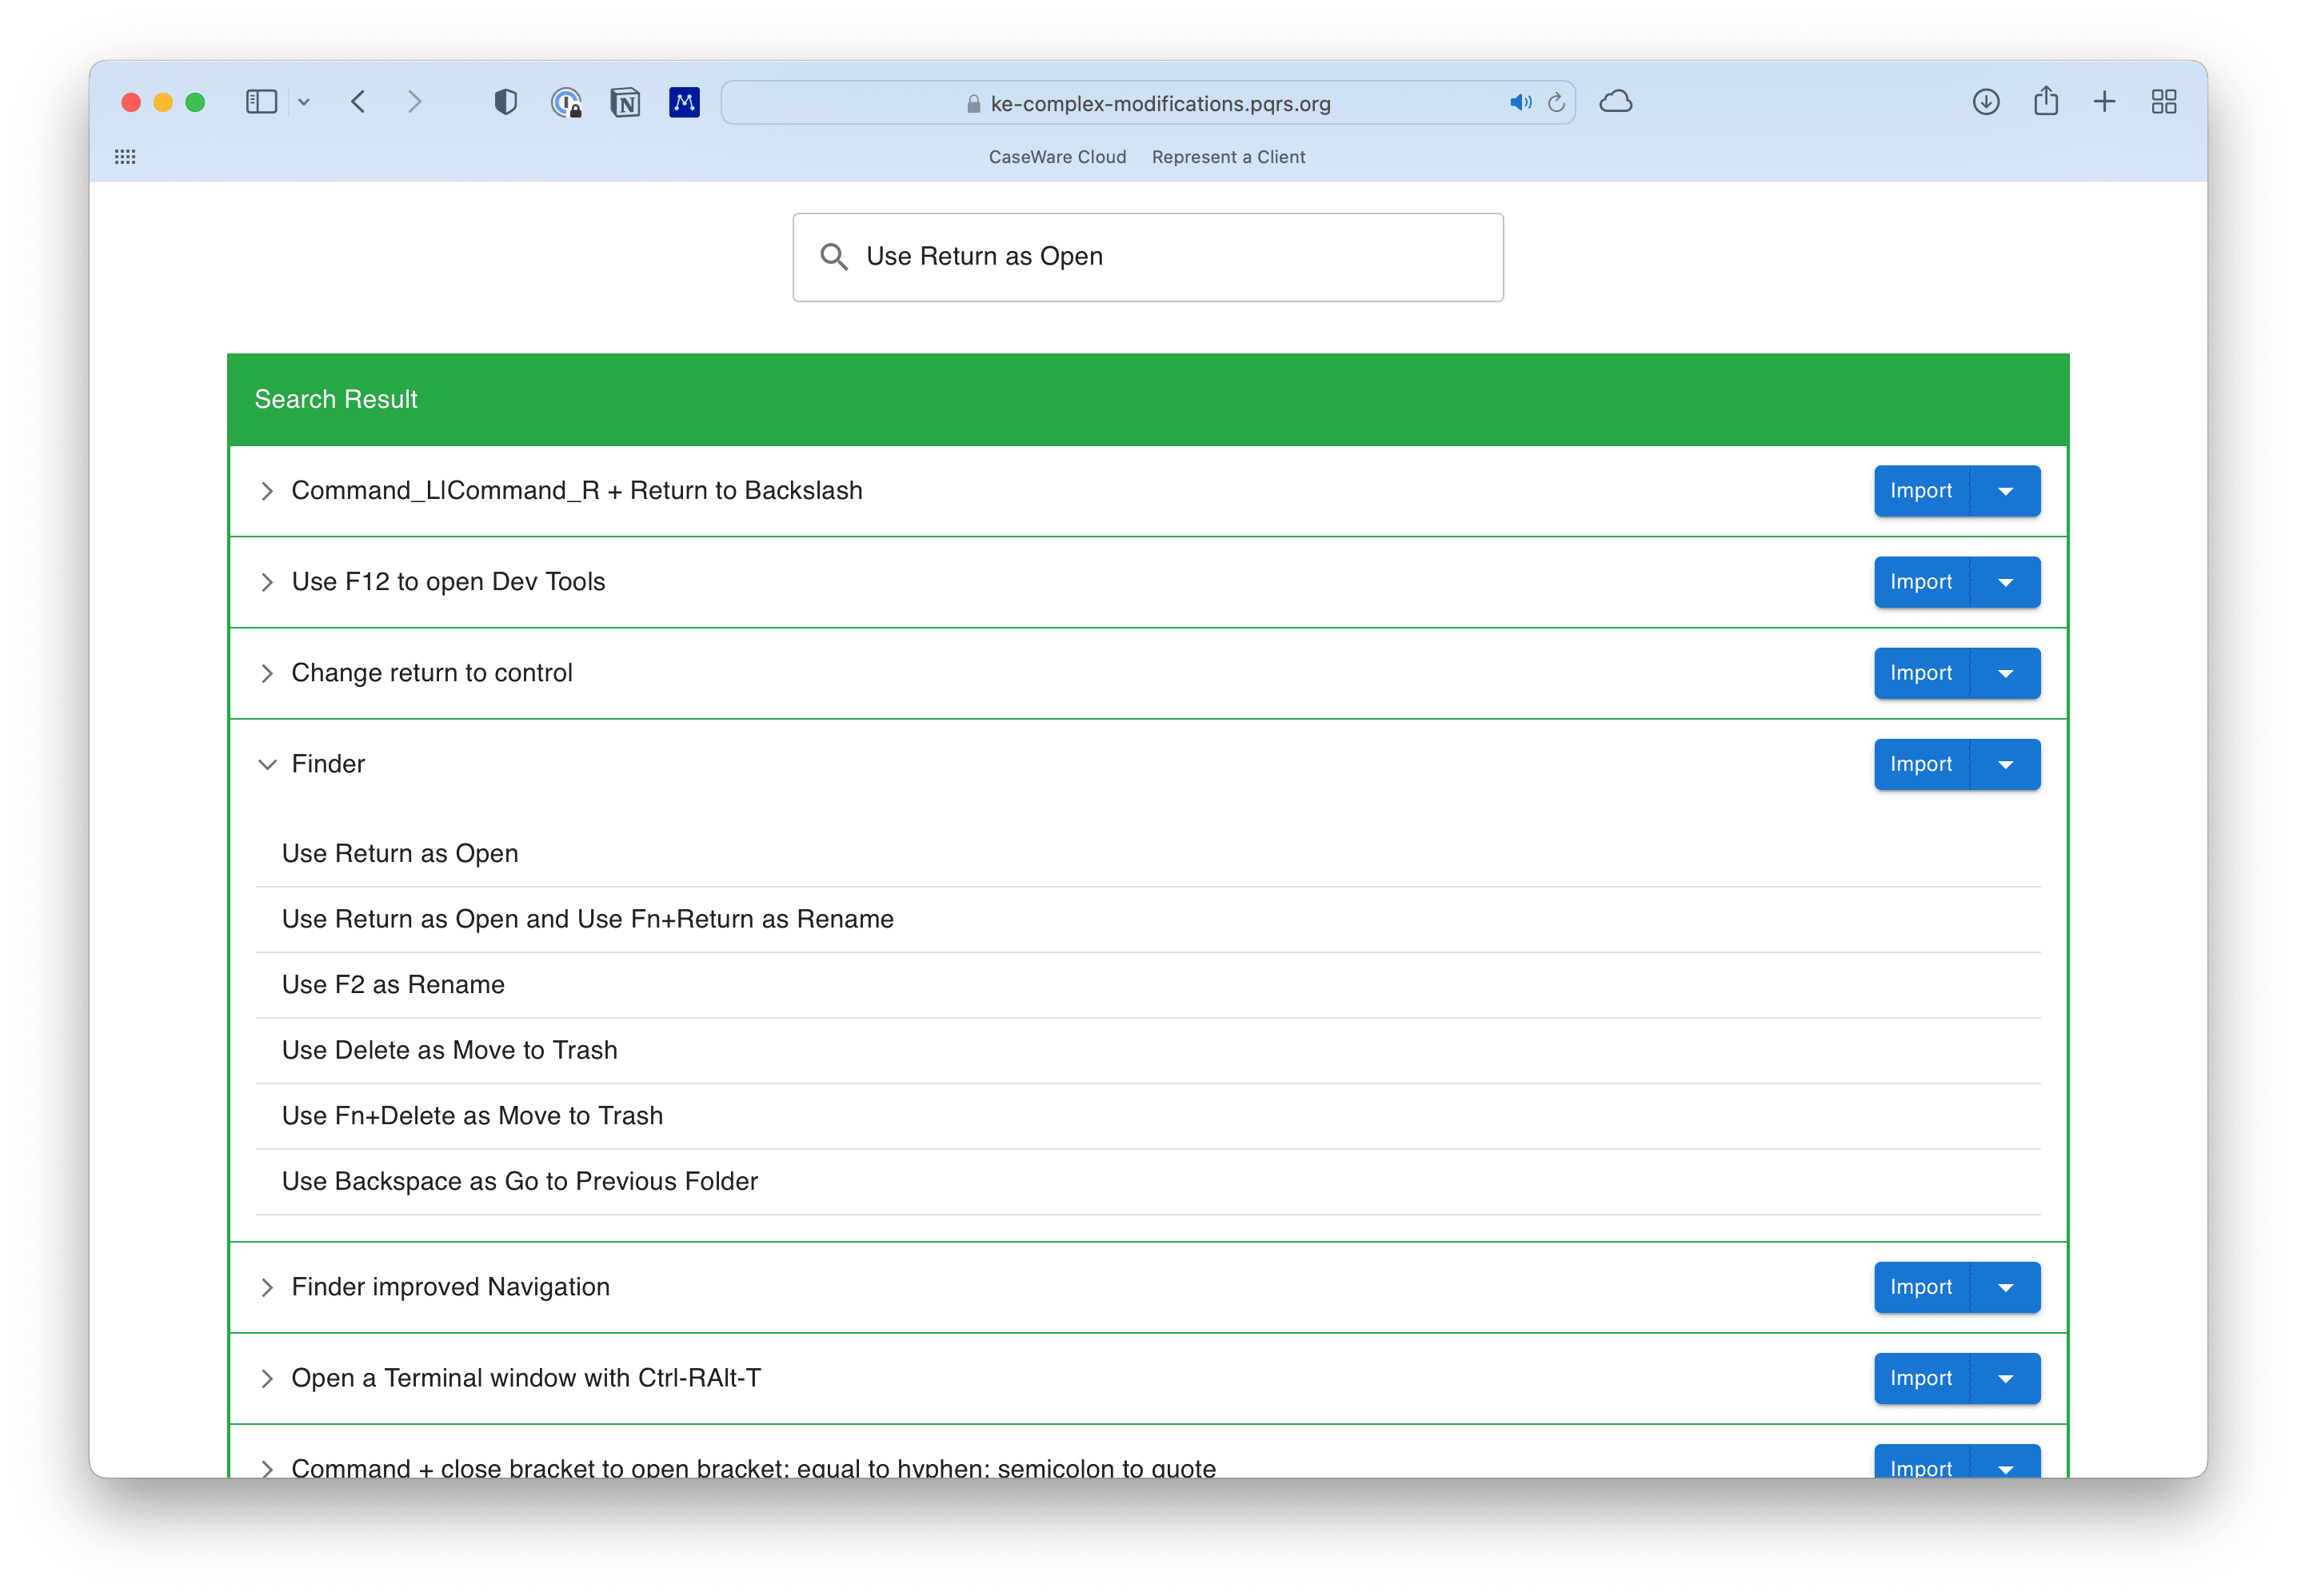
A browser window will open. Search for Use Return as Open and click the Finder result. You’ll note six different modifications, such as Use Return as Open, Use Return as Open and Fn+Return as Rename, and more. Click Import to open the modifications inside Karabiner Elements.
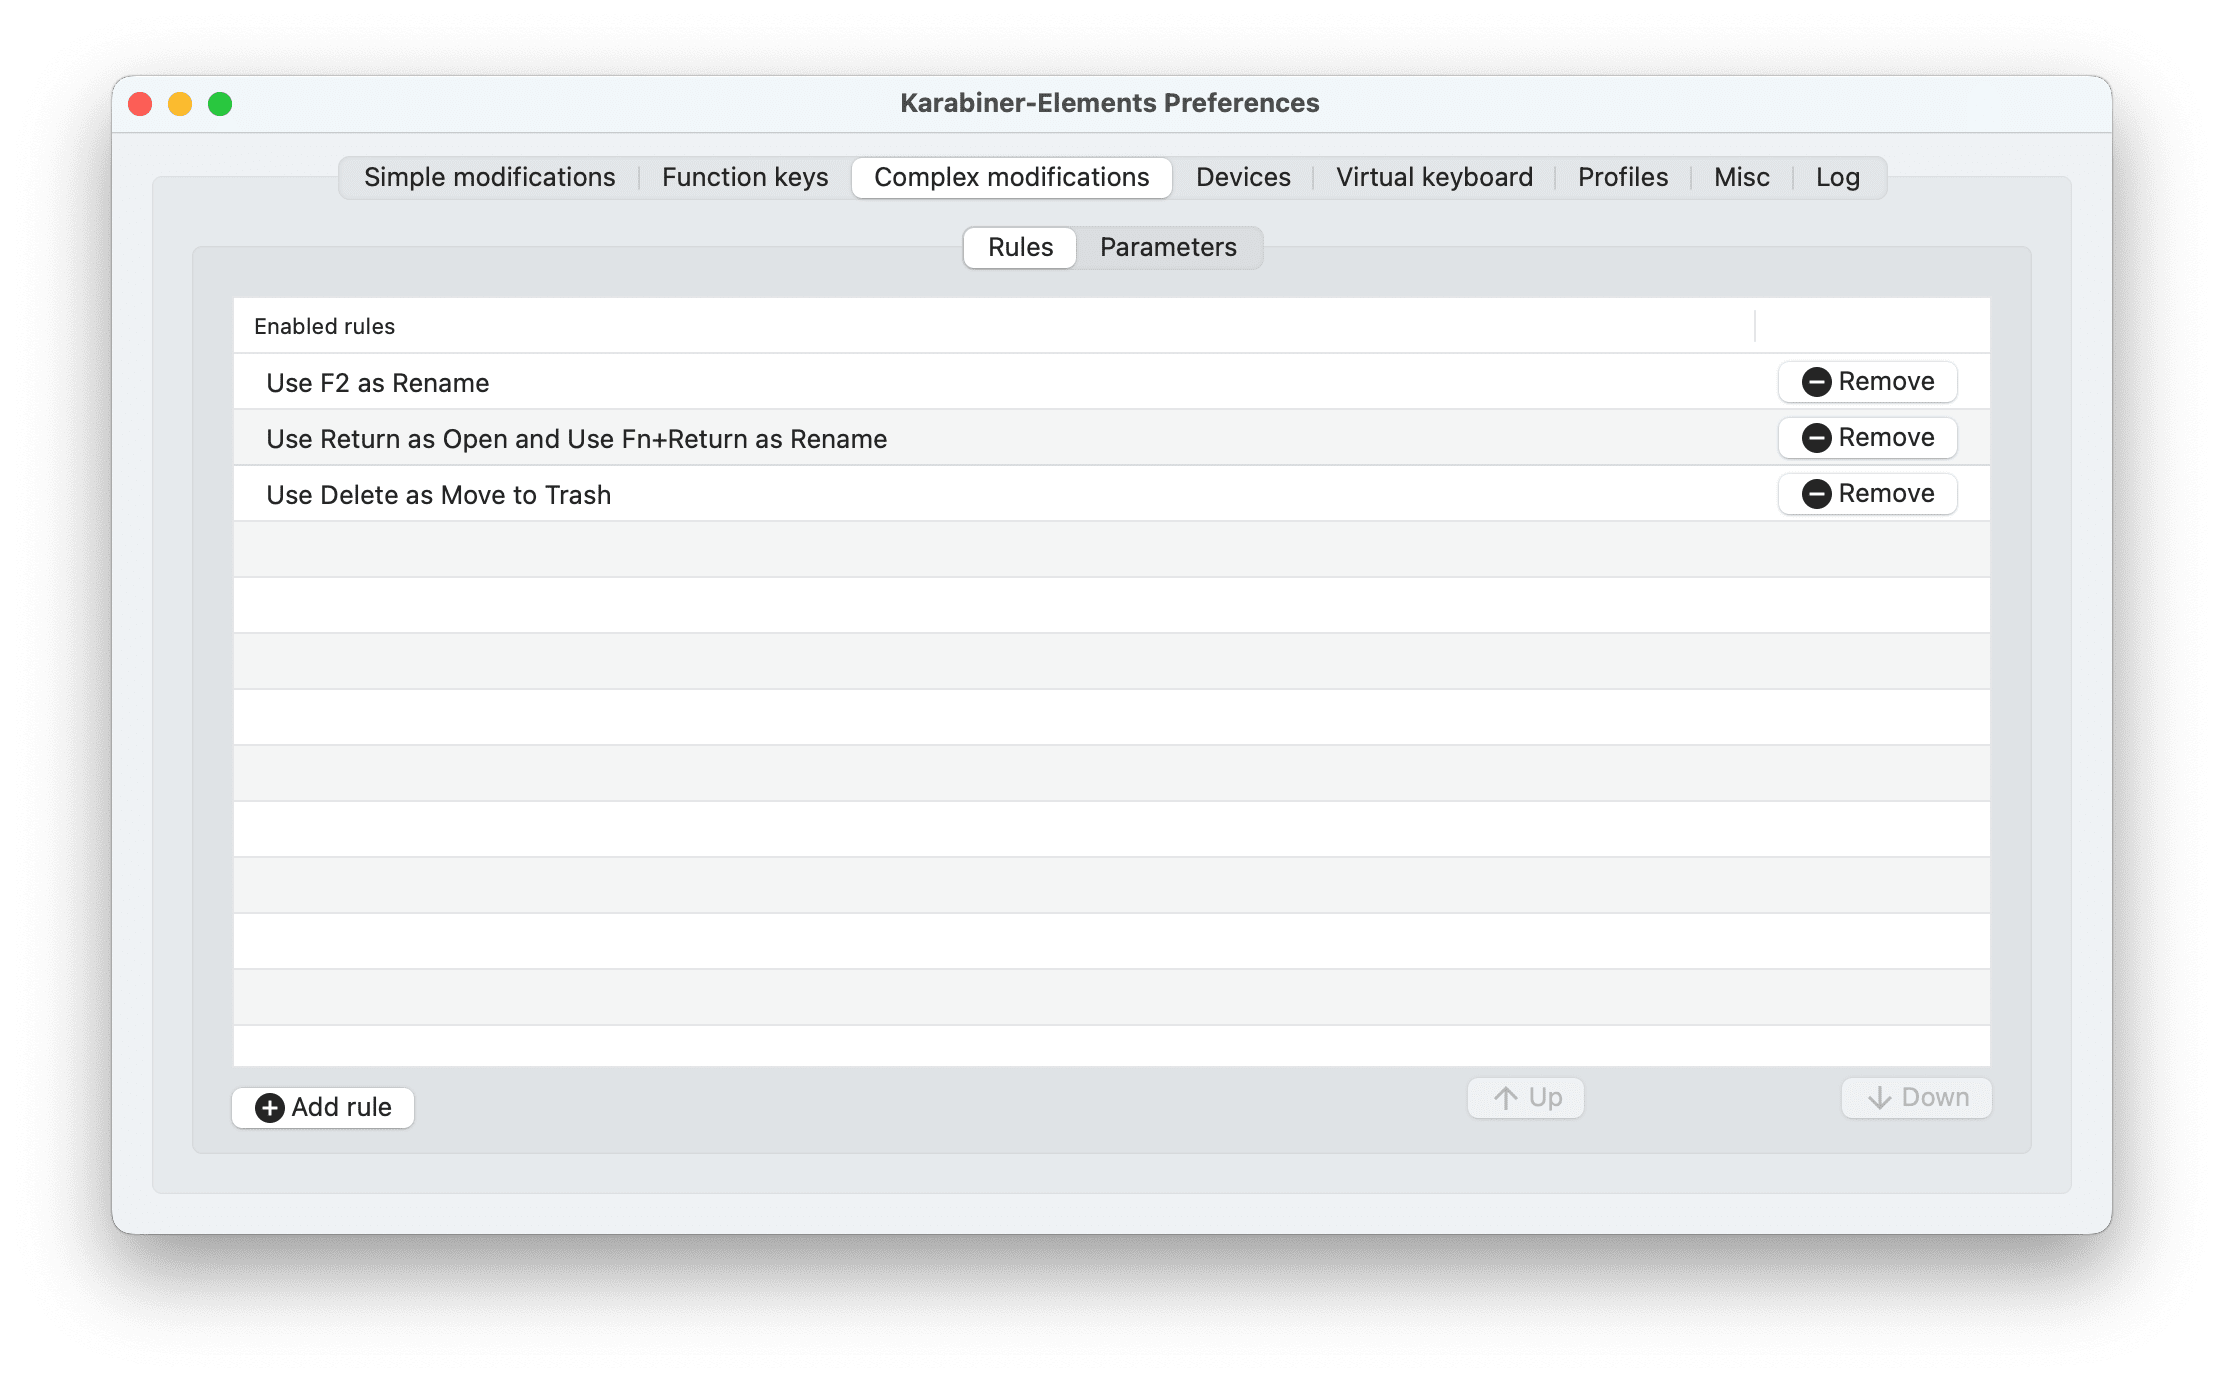
Finally, in Karabiner Elements, click Add rule again and enable the keyboard modifications you want. I use Use Return as Open and Fn+Return as Rename and Use F2 as Rename, which more closely reflects the file renaming keyboard shortcut inside Windows Explorer.
Now, when you navigate through files and folders in Finder, you can navigate into folders by hitting the Return key rather than needing to use two hands to hit Command + O to open a folder.
Choose Cross Platform Default Apps
Since you’re effectively using two computers and two sets of apps when working back and forth between Windows and macOS, you’re bound to fall into doubled-up applications and workflows. For instance, I have 1Password installed on both macOS and Windows 11 despite the ability to transfer your clipboard back and forth between operating systems.
By default, you’ll have access to both Finder and Windows Explorer for navigating your file and folder structure. I have our large OneDrive file structure immediately accessible in both Finder and Windows Explorer and I use them interchangeably throughout the day, wherever I find myself working at that time.
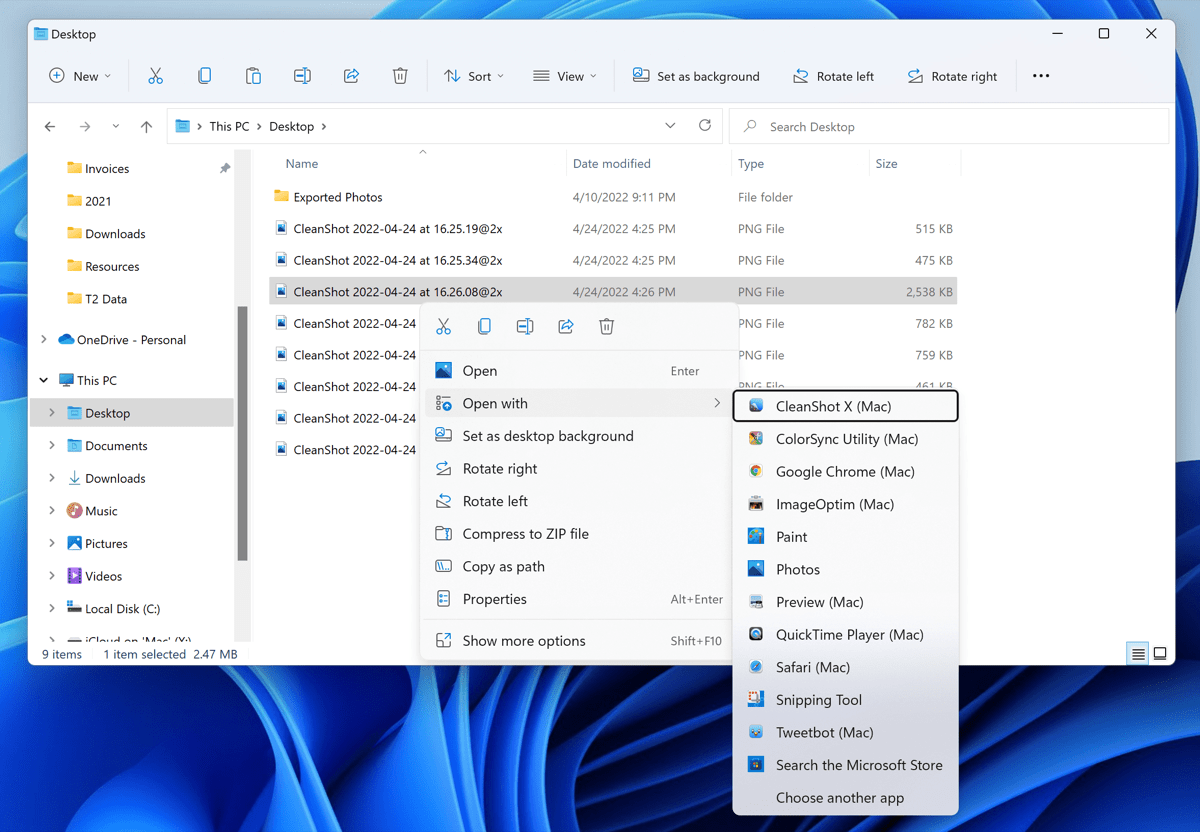
But what can be annoying is the inconsistency in the apps chosen to open certain files. If you want to open a PDF in Finder, Finder will automatically open that PDF in macOS’s Preview app. And if you open that same PDF with Windows Explorer, Windows 11 wants to open the PDF in Microsoft Edge or a PDF application installed inside the Windows VM.
Fortunately, you can select the same default app for opening PDFs, Excel worksheets, Word documents or text files, no matter where you open them from.
In macOS
Choosing a default application for opening a specific file type in macOS is pretty easy if it’s a Mac app — simply right-click on a file, highlight Open With in the menu, select Other, and choose your default app while checking the box that says Always open with at the bottom of the dialog box. A Mac app in macOS is easy.
But what if you want to open a Windows application by default when you open a file in Finder?
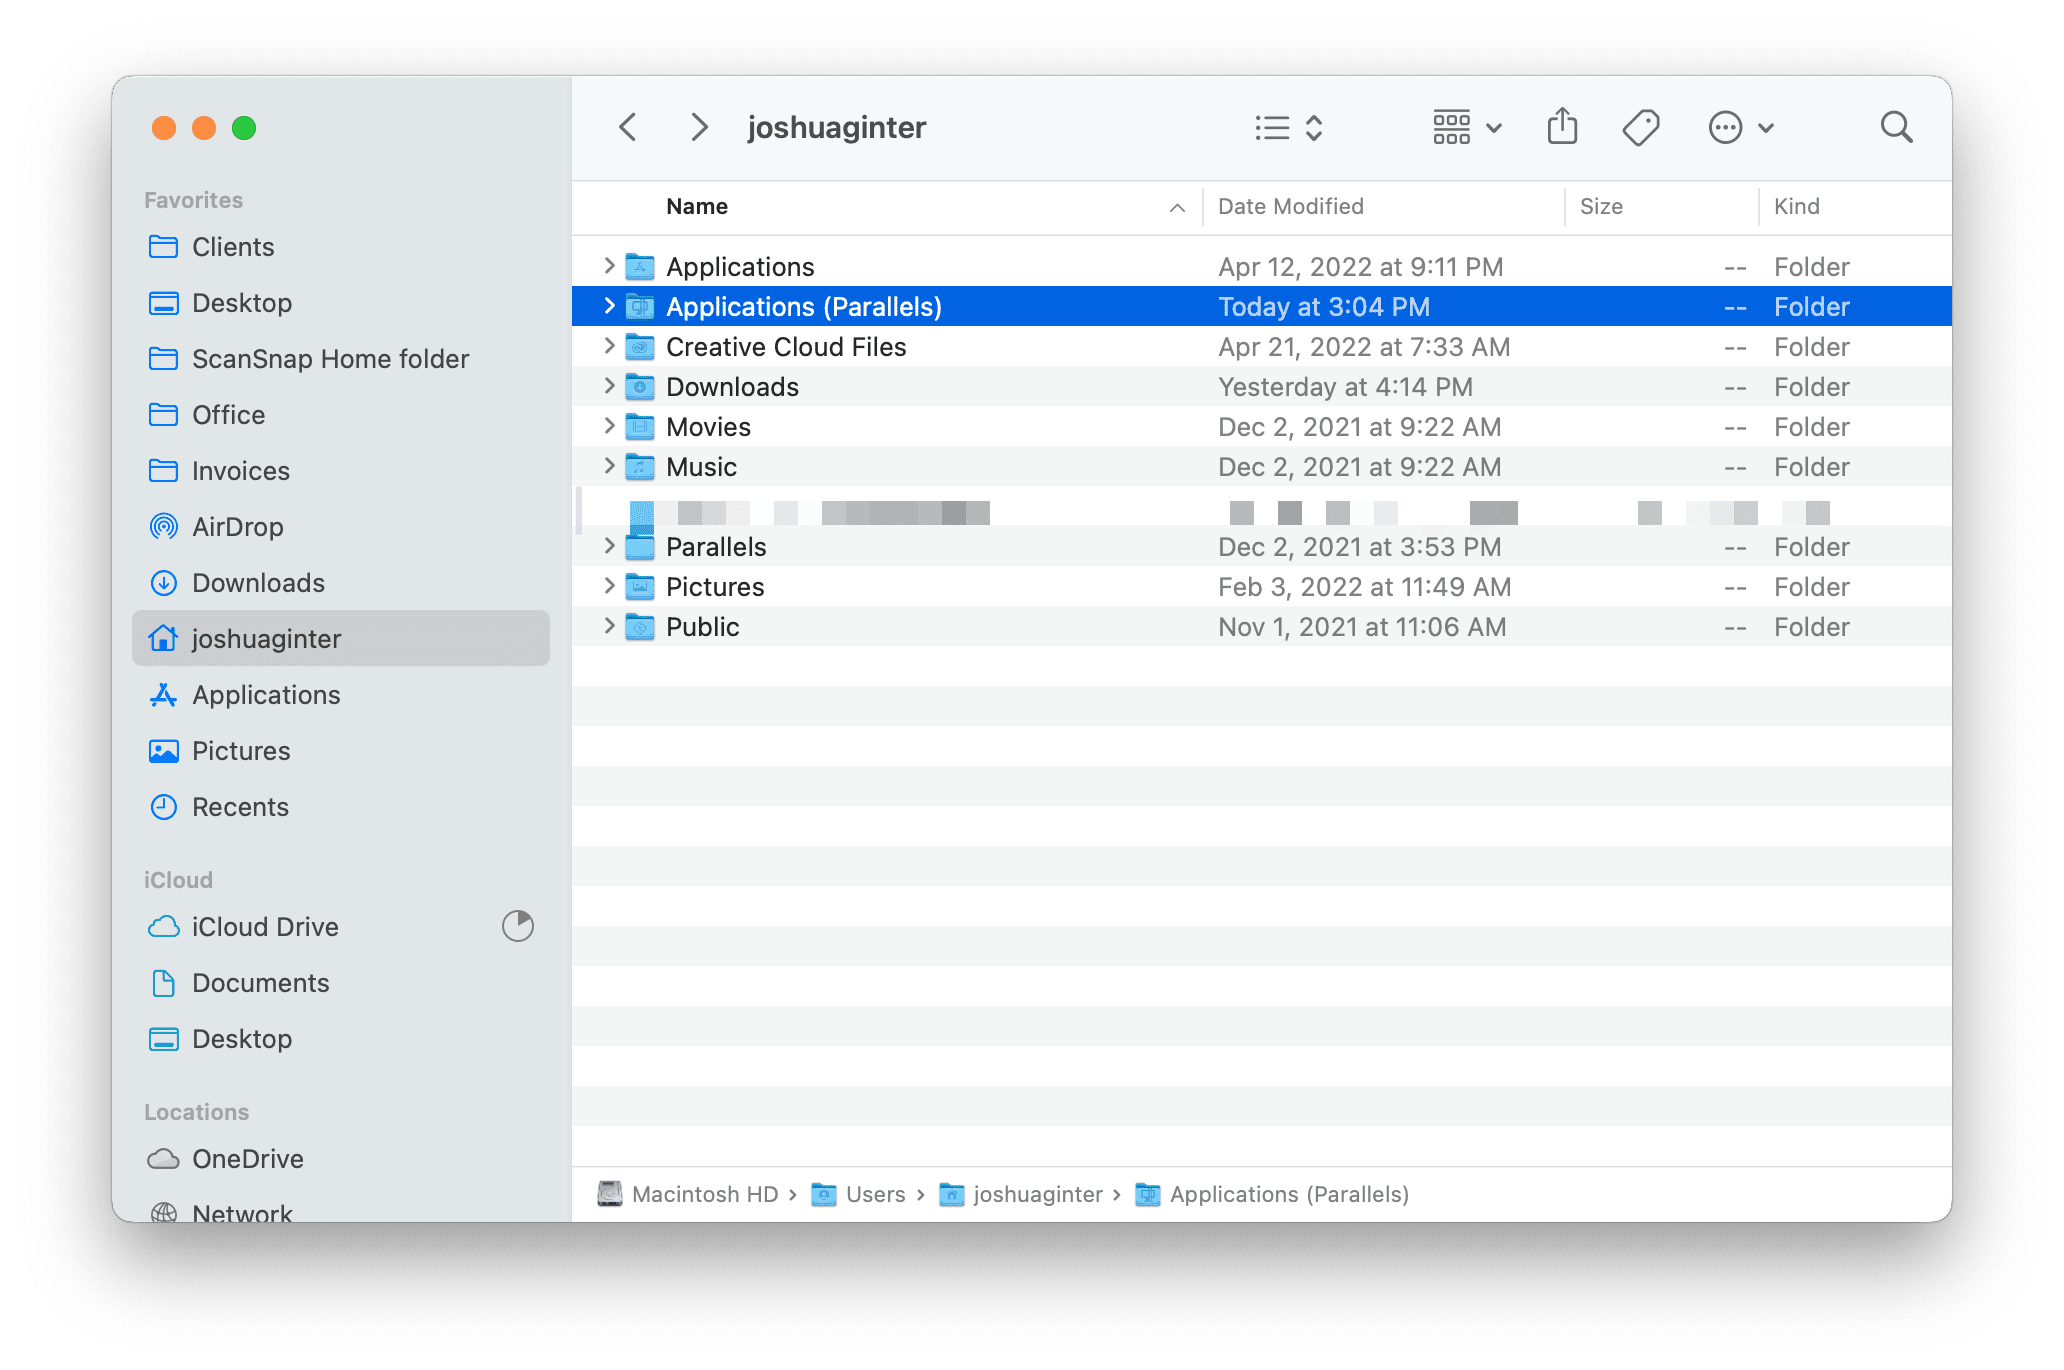
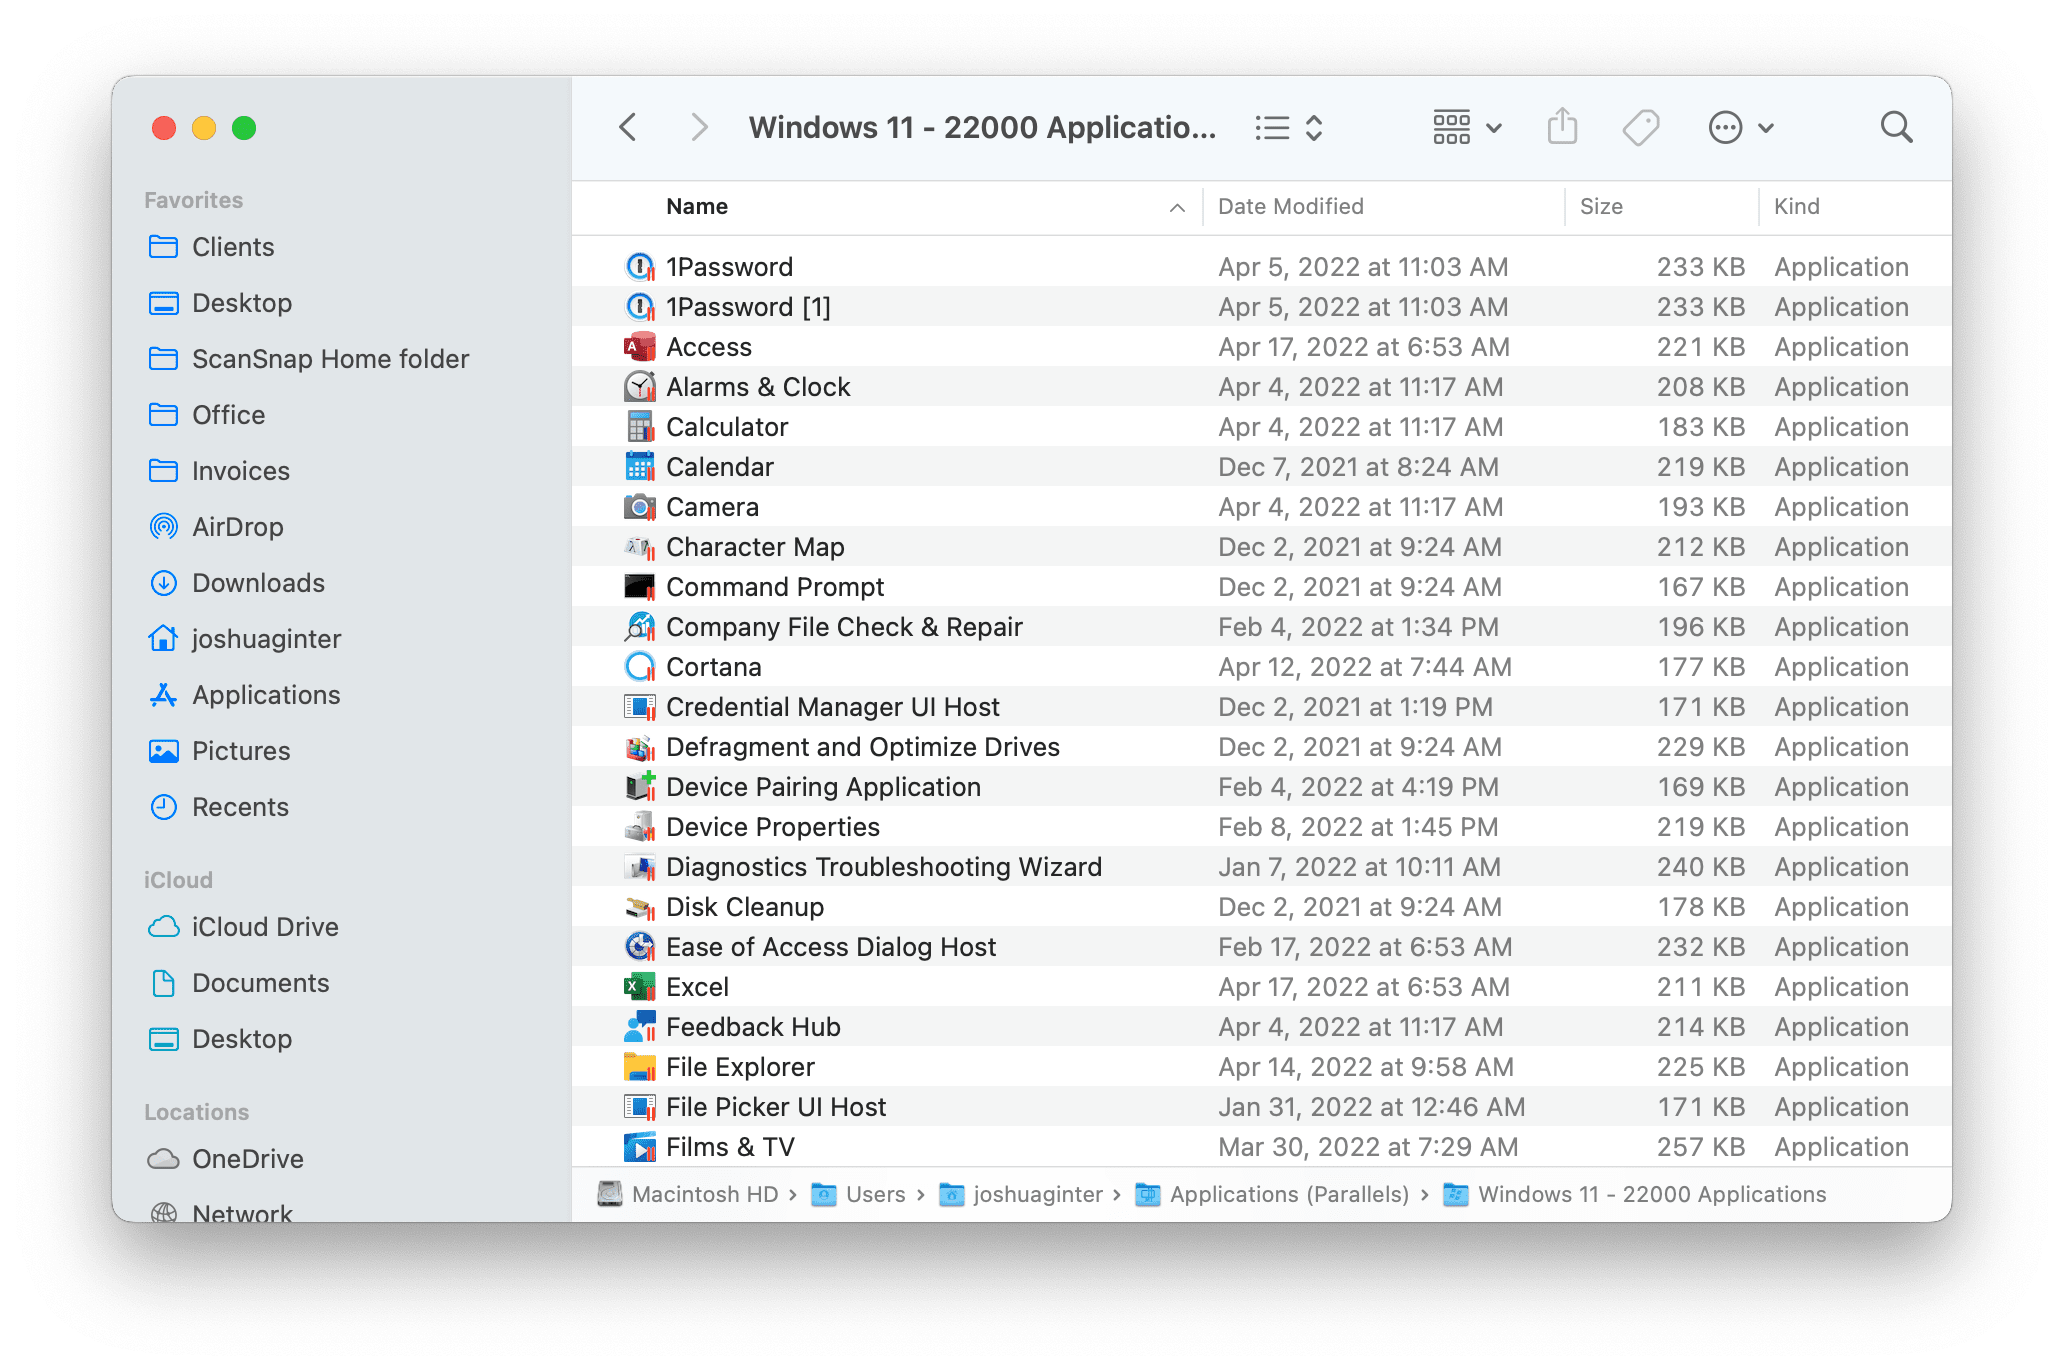
Here, you’ll have to right-click the file, highlight Open With in the menu, and select Other. In the left sidebar, select your home user profile, select Applications (Parallels), select your VM’s application folder, and then select the app you want to use to open the specific file type.
This is especially handy for opening all .xls and .xlsx workbooks in Excel in the Windows VM without opening them in Numbers or the macOS version of Excel (if you have them installed on macOS). Same goes for Word documents and Pages.
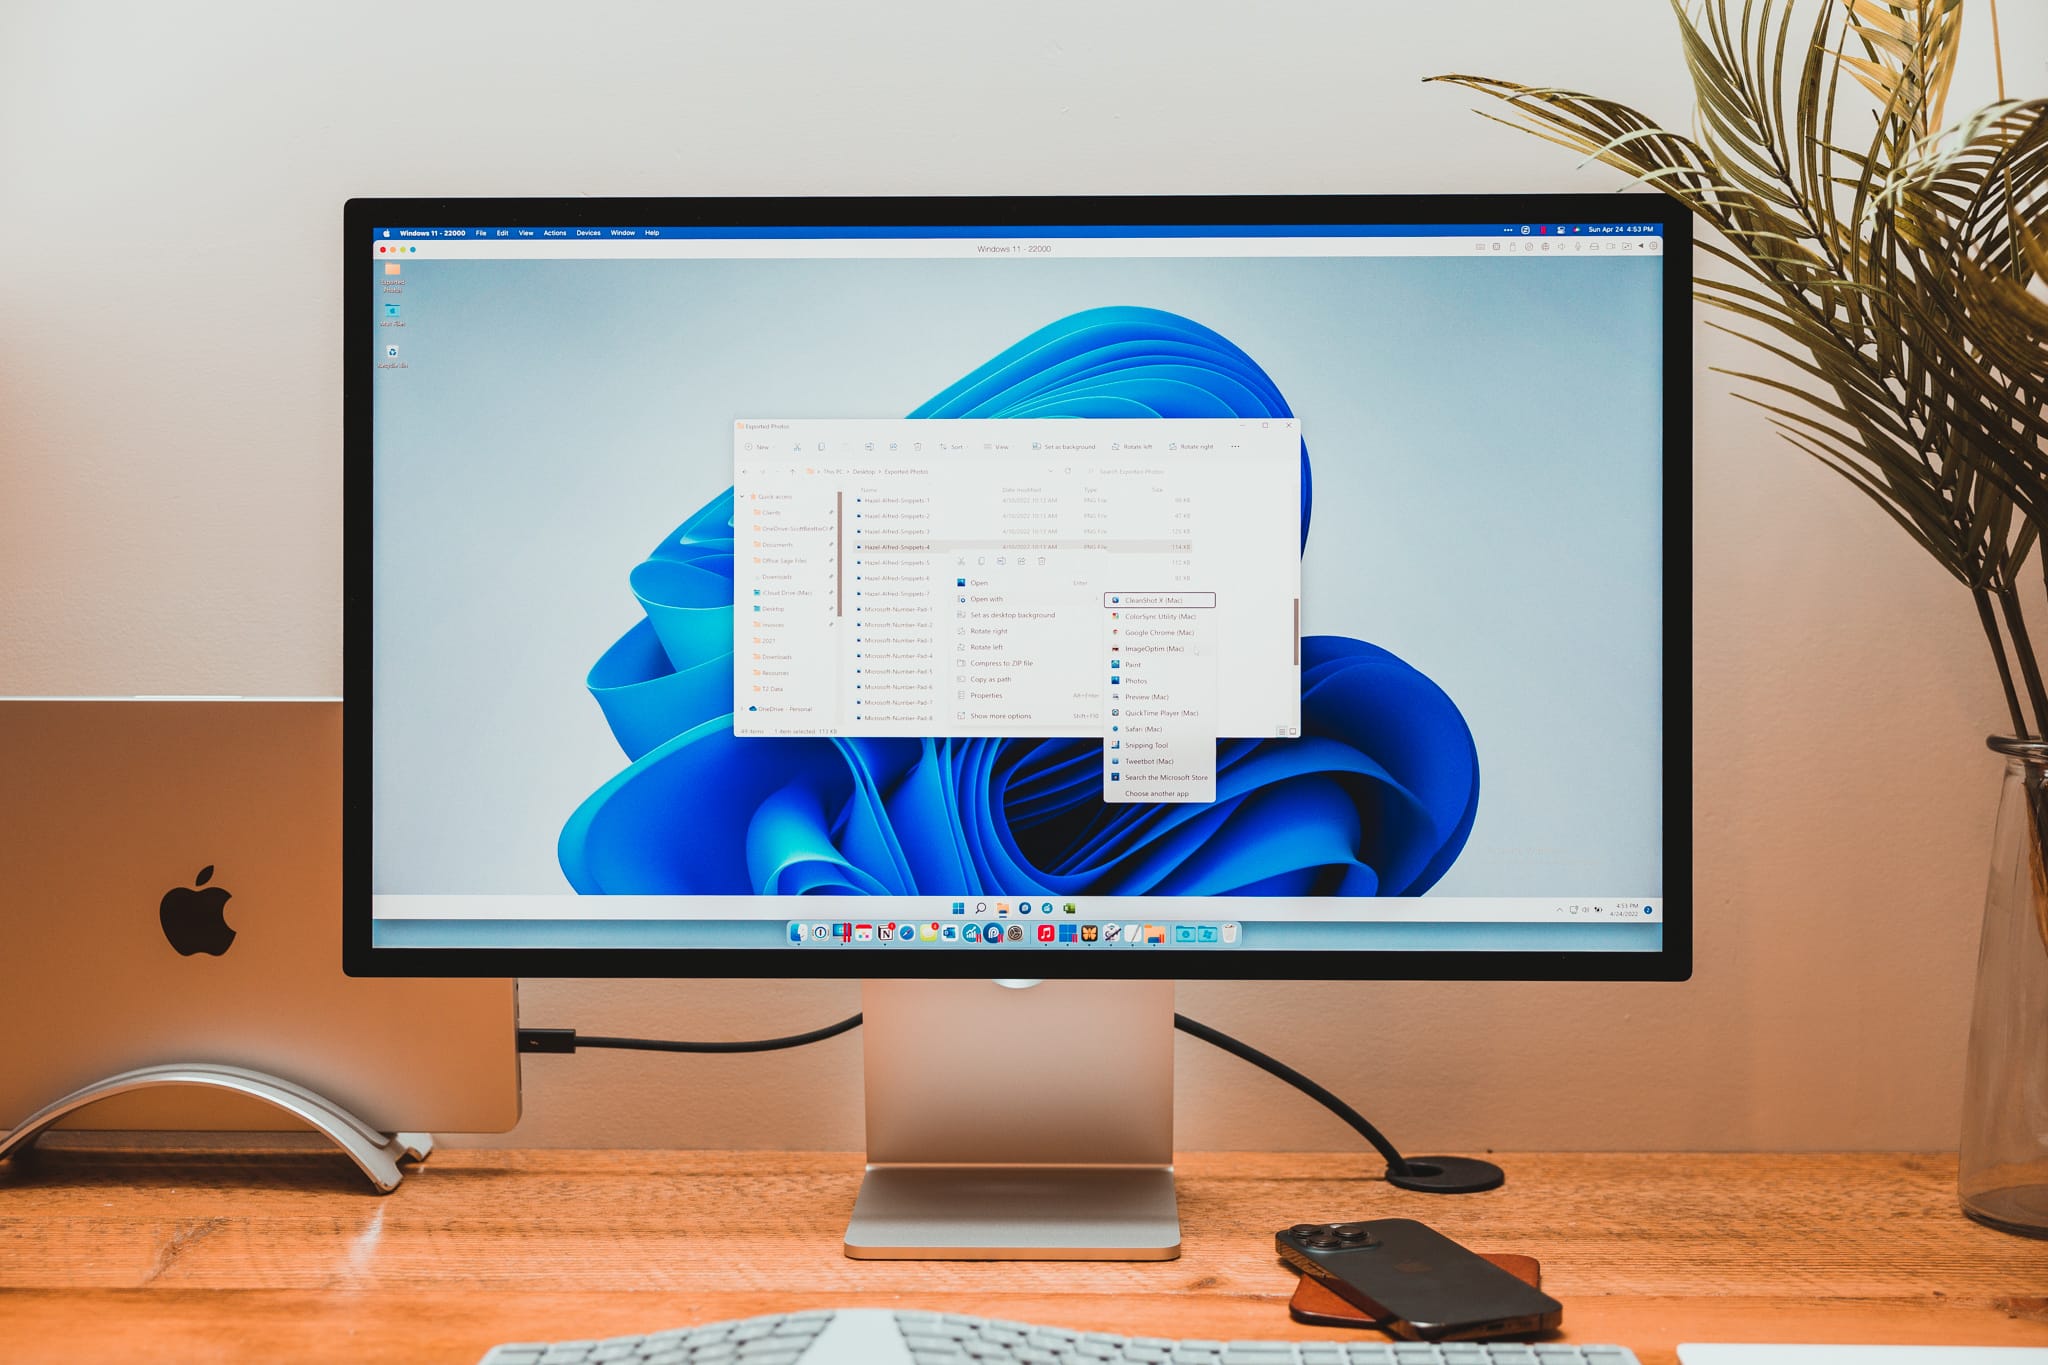
In Windows
Selecting a default app is a little easier in Windows. Simply right-click the file you want to open, highlight Open With, and select the app you want to use from the list. That list combines all apps across the Windows VM and macOS — you don’t have to navigate to a special folder to find the macOS app list.
I’ve used this ability to ensure I am opening all PDFs across macOS and Windows inside Preview on the Mac — no matter whether I open that PDF from Windows Explorer or from Finder. I’ve also ensured text files and Markdown files appropriately open in a macOS app and all photograph files (be they raw or .jpegs) open inside apps on macOS.
Wrap Up
The premise of working inside both Windows and macOS on the same high-quality MacBook Pro device is still a new phenomenon to me. Each day, I discover new tips and tricks, new workflows, and new ways to not do things.
These three tips have been the most useful to me over the last six months of heavy Parallels/Windows/macOS use. These three Aha! moments consistently brought a smile to my face and have consistently saved me headaches and frustration each day.
I’m starting to believe the best Windows laptop is a MacBook Pro. When Windows and macOS can work this well beside each other, the compatibility and flexibility achieved by having both at your disposal is increasingly invaluable.
Curated List of Must-Have Apps
We spend an inordinate amount of time sorting through hundreds of apps to find the very best. Our team here at The Sweet Setup put together a short list of our must-have, most-used apps in 2022.
You will get…
- The current list of The Sweet Setup’s top 8, must-have apps.
- A special, pro tip for each app to help you save time and become more of a power user.
- A hidden feature of each app that you may not have known about.
The Sweet Setup Staff Picks for 2022
These apps work on iPad, iPhone, and Mac. And they range across several different categories but are mostly focused on productivity. They will help you get the most out of your devices and your day.