Our First Look at Using a Mouse with iPad and iPadOS
Sure enough, Apple debuted mouse support for iOS 13 and iPadOS at WWDC a few weeks ago. There hasn’t been an outcry for mouse support on the iPad the way we’re seeing with broken butterfly keyboards and other features, but the premise seems somewhat natural. As the iPad screen gets larger and as it becomes increasingly suited for a desktop, the more ergonomics come into play.
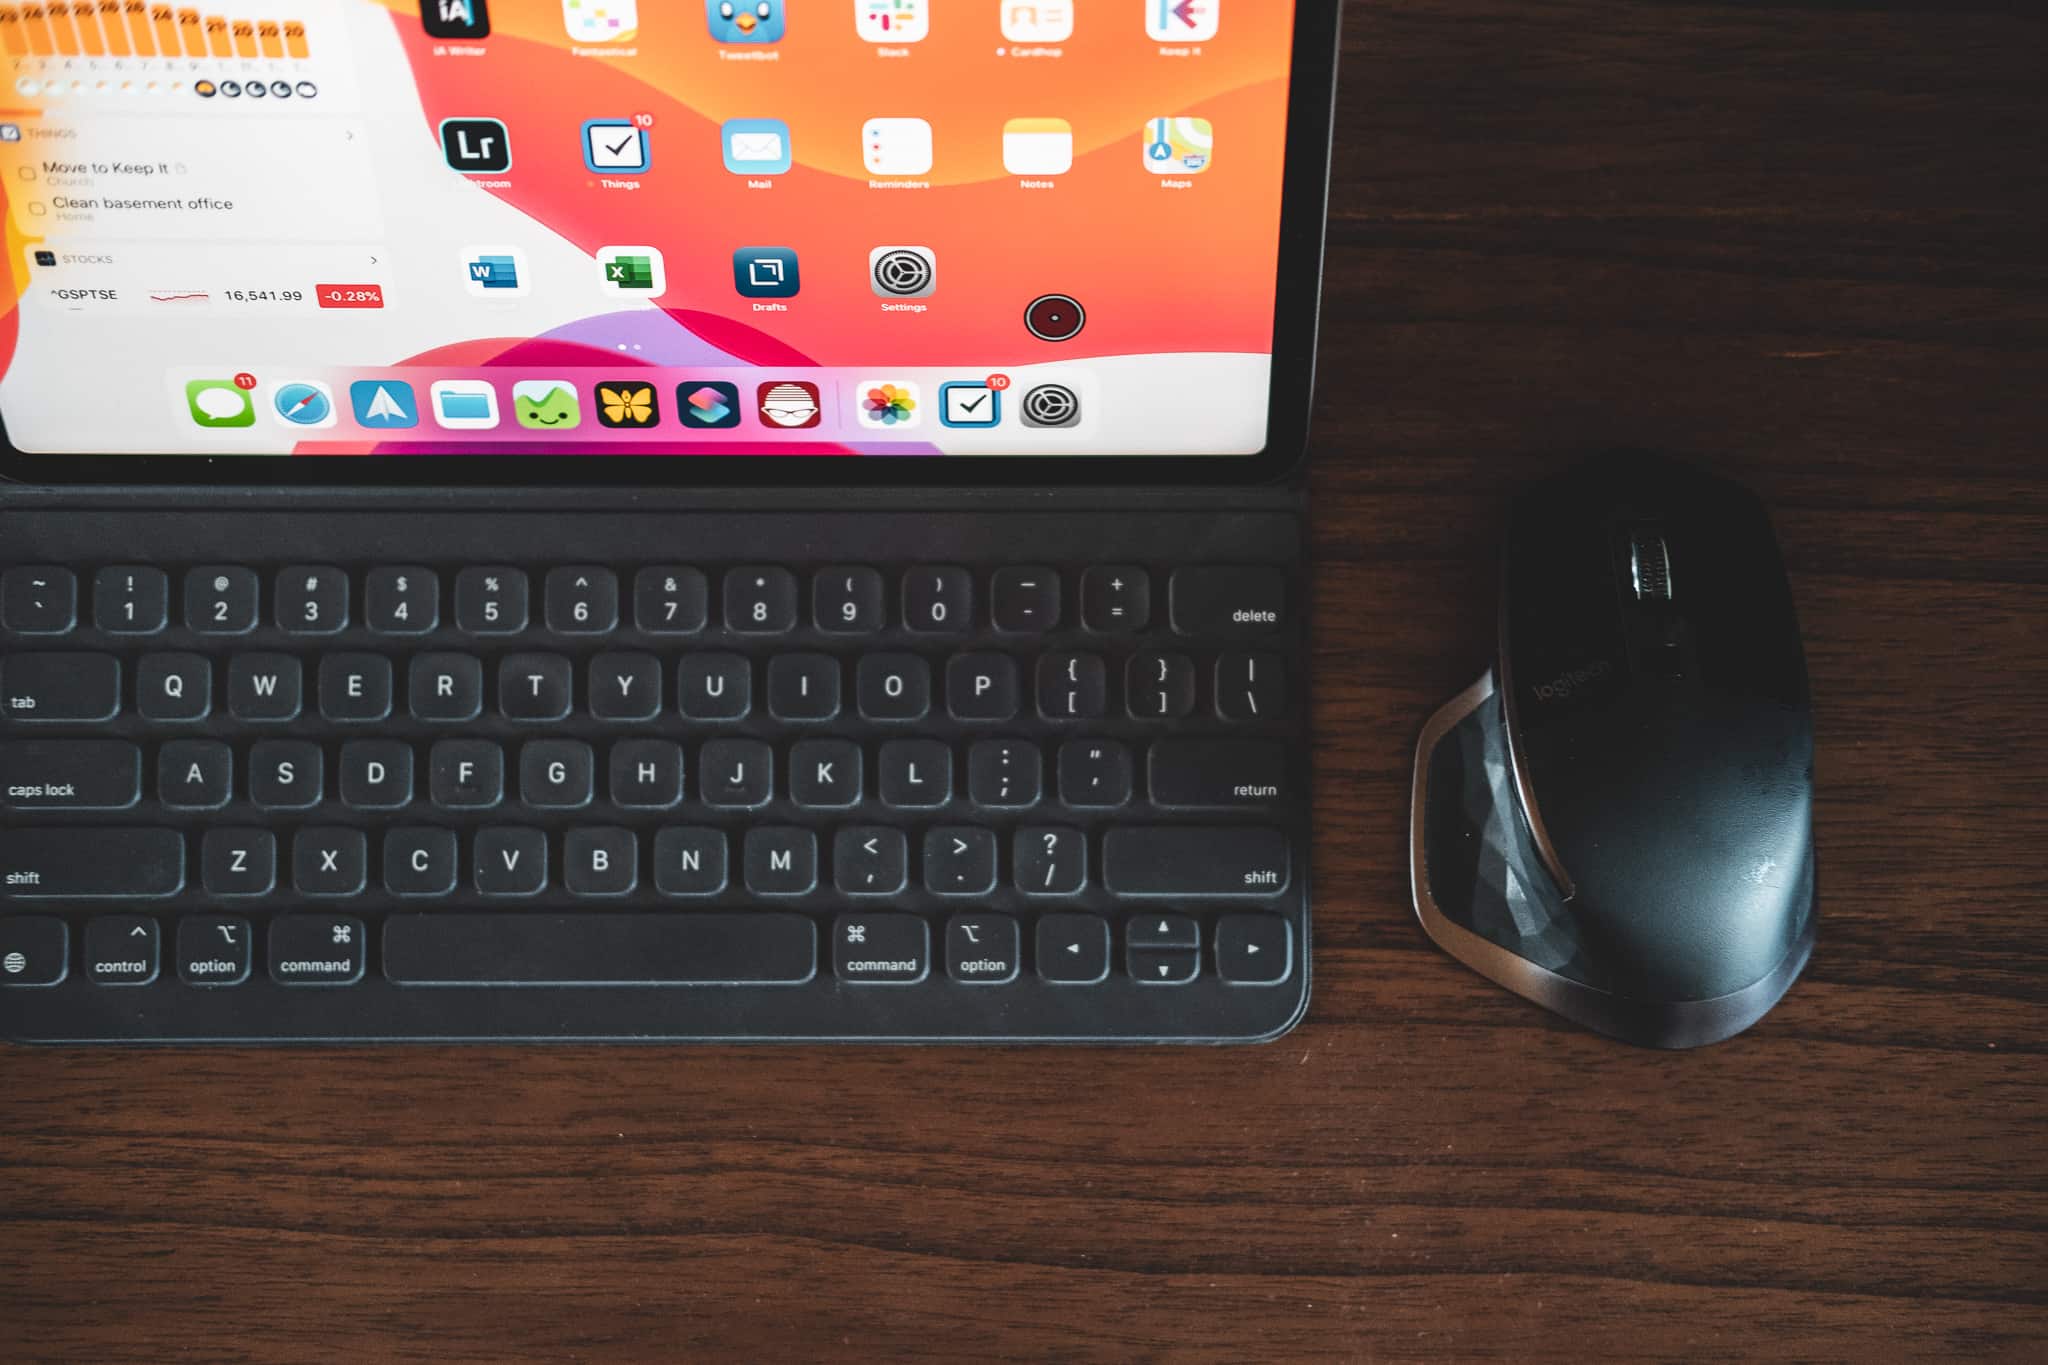
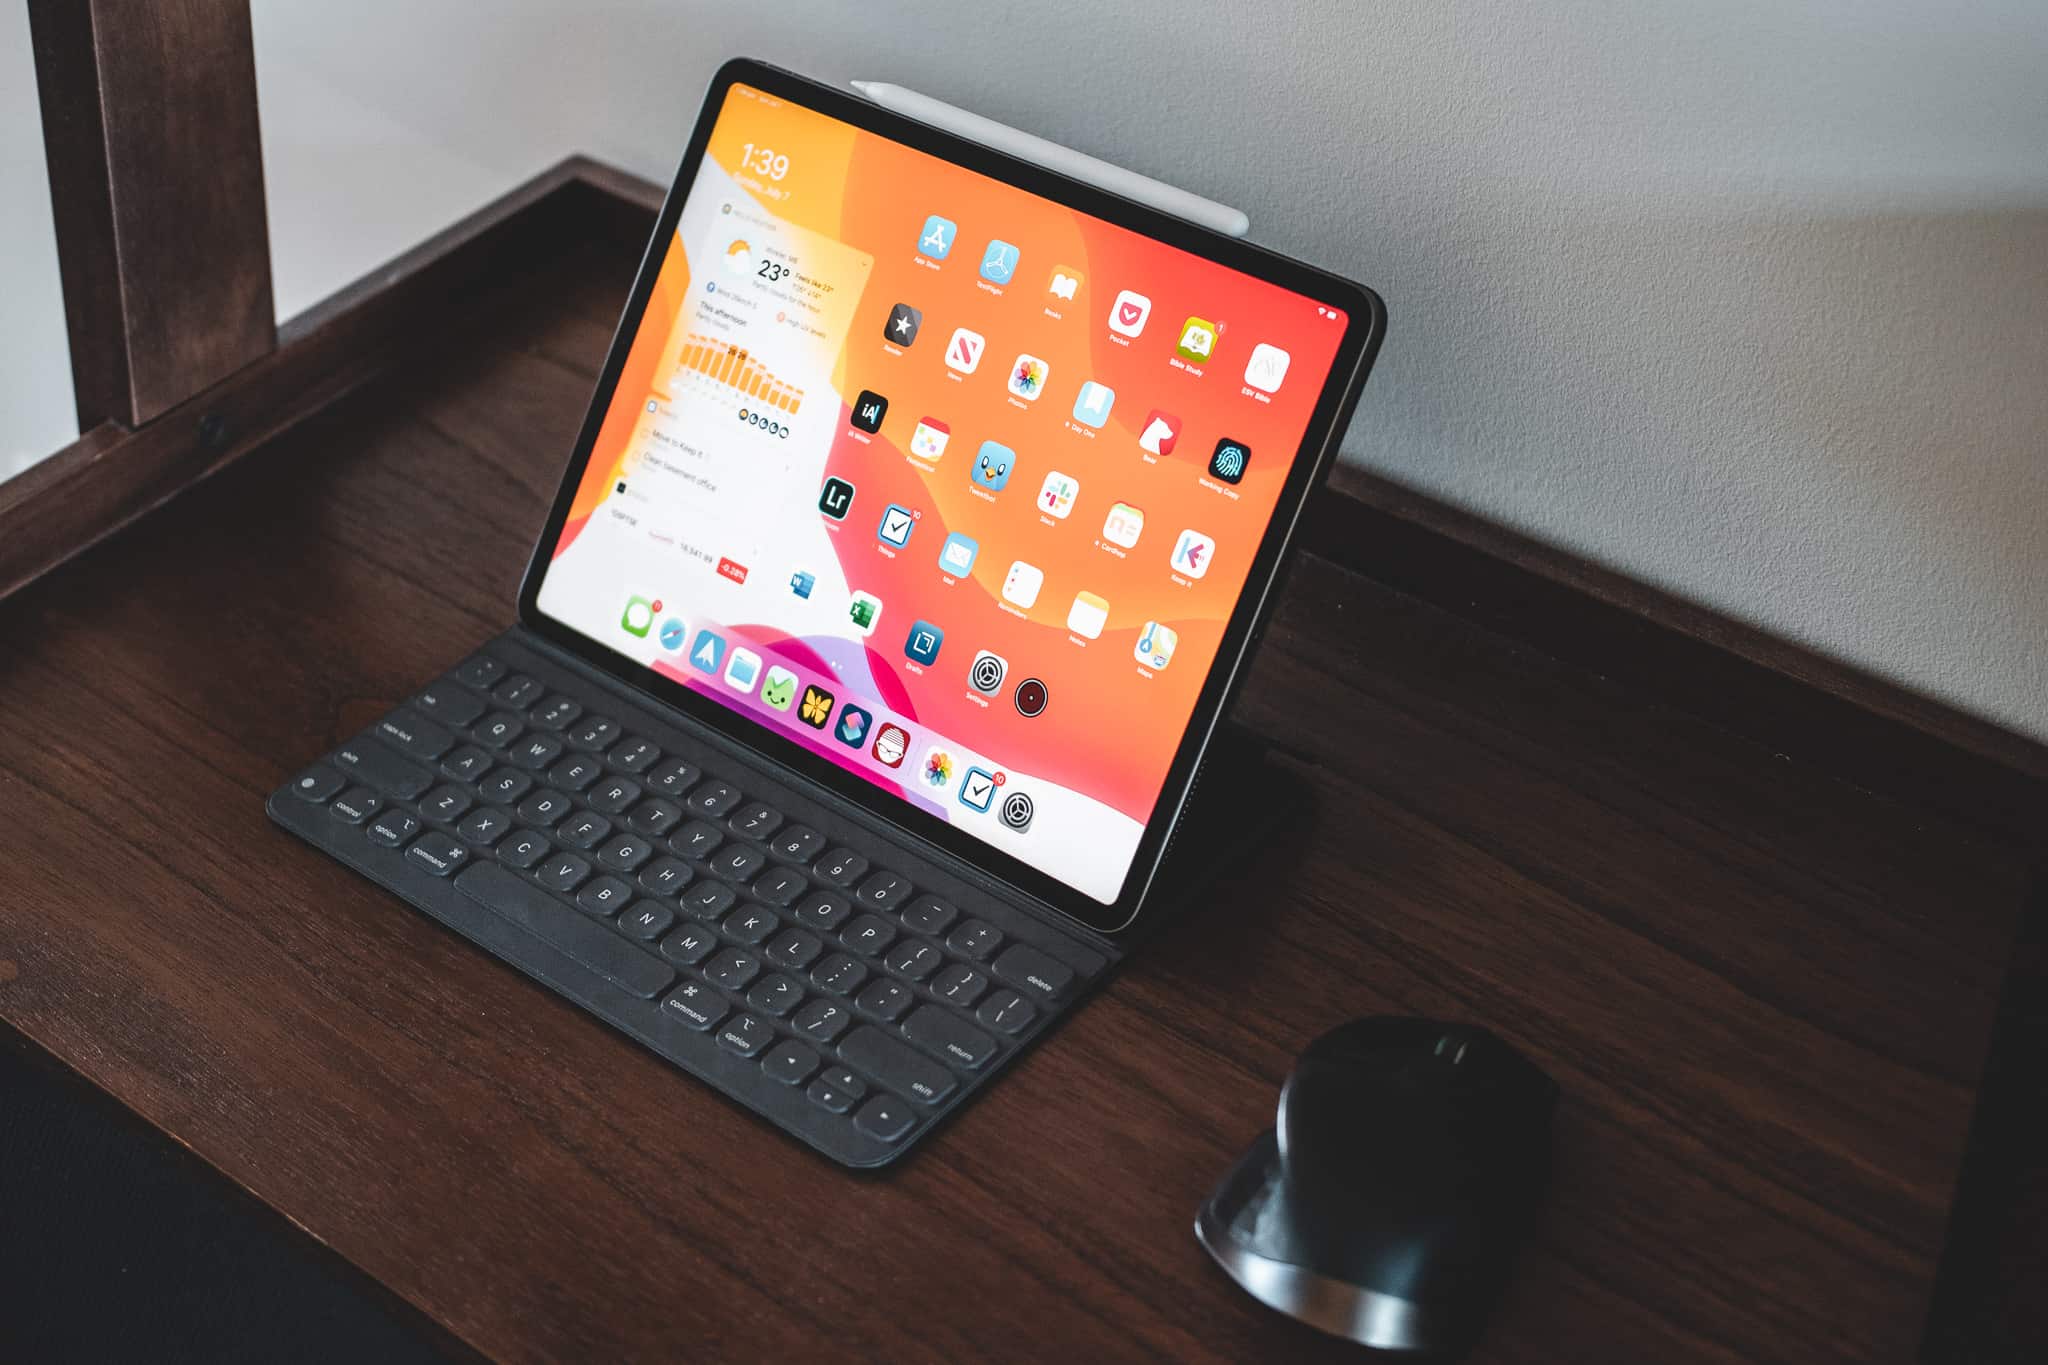
I had a dream pre-WWDC 2019 of a desktop iPad setup: an LG UltraFine 4K Display, external hard-drives and Ethernet connected to the display, and a wireless Logitech MX Master mouse all driven off of the single USB-C port on the iPad Pro. Really, the only thing missing in iOS 12 was mouse support.
But that dream setup can very much be a reality now.
Our Must-Have, Most Used Productivity Apps
We spend an inordinate amount of time sorting through hundreds of apps to find the very best. We put together a short list of our must-have, most-used apps for increasing productivity.
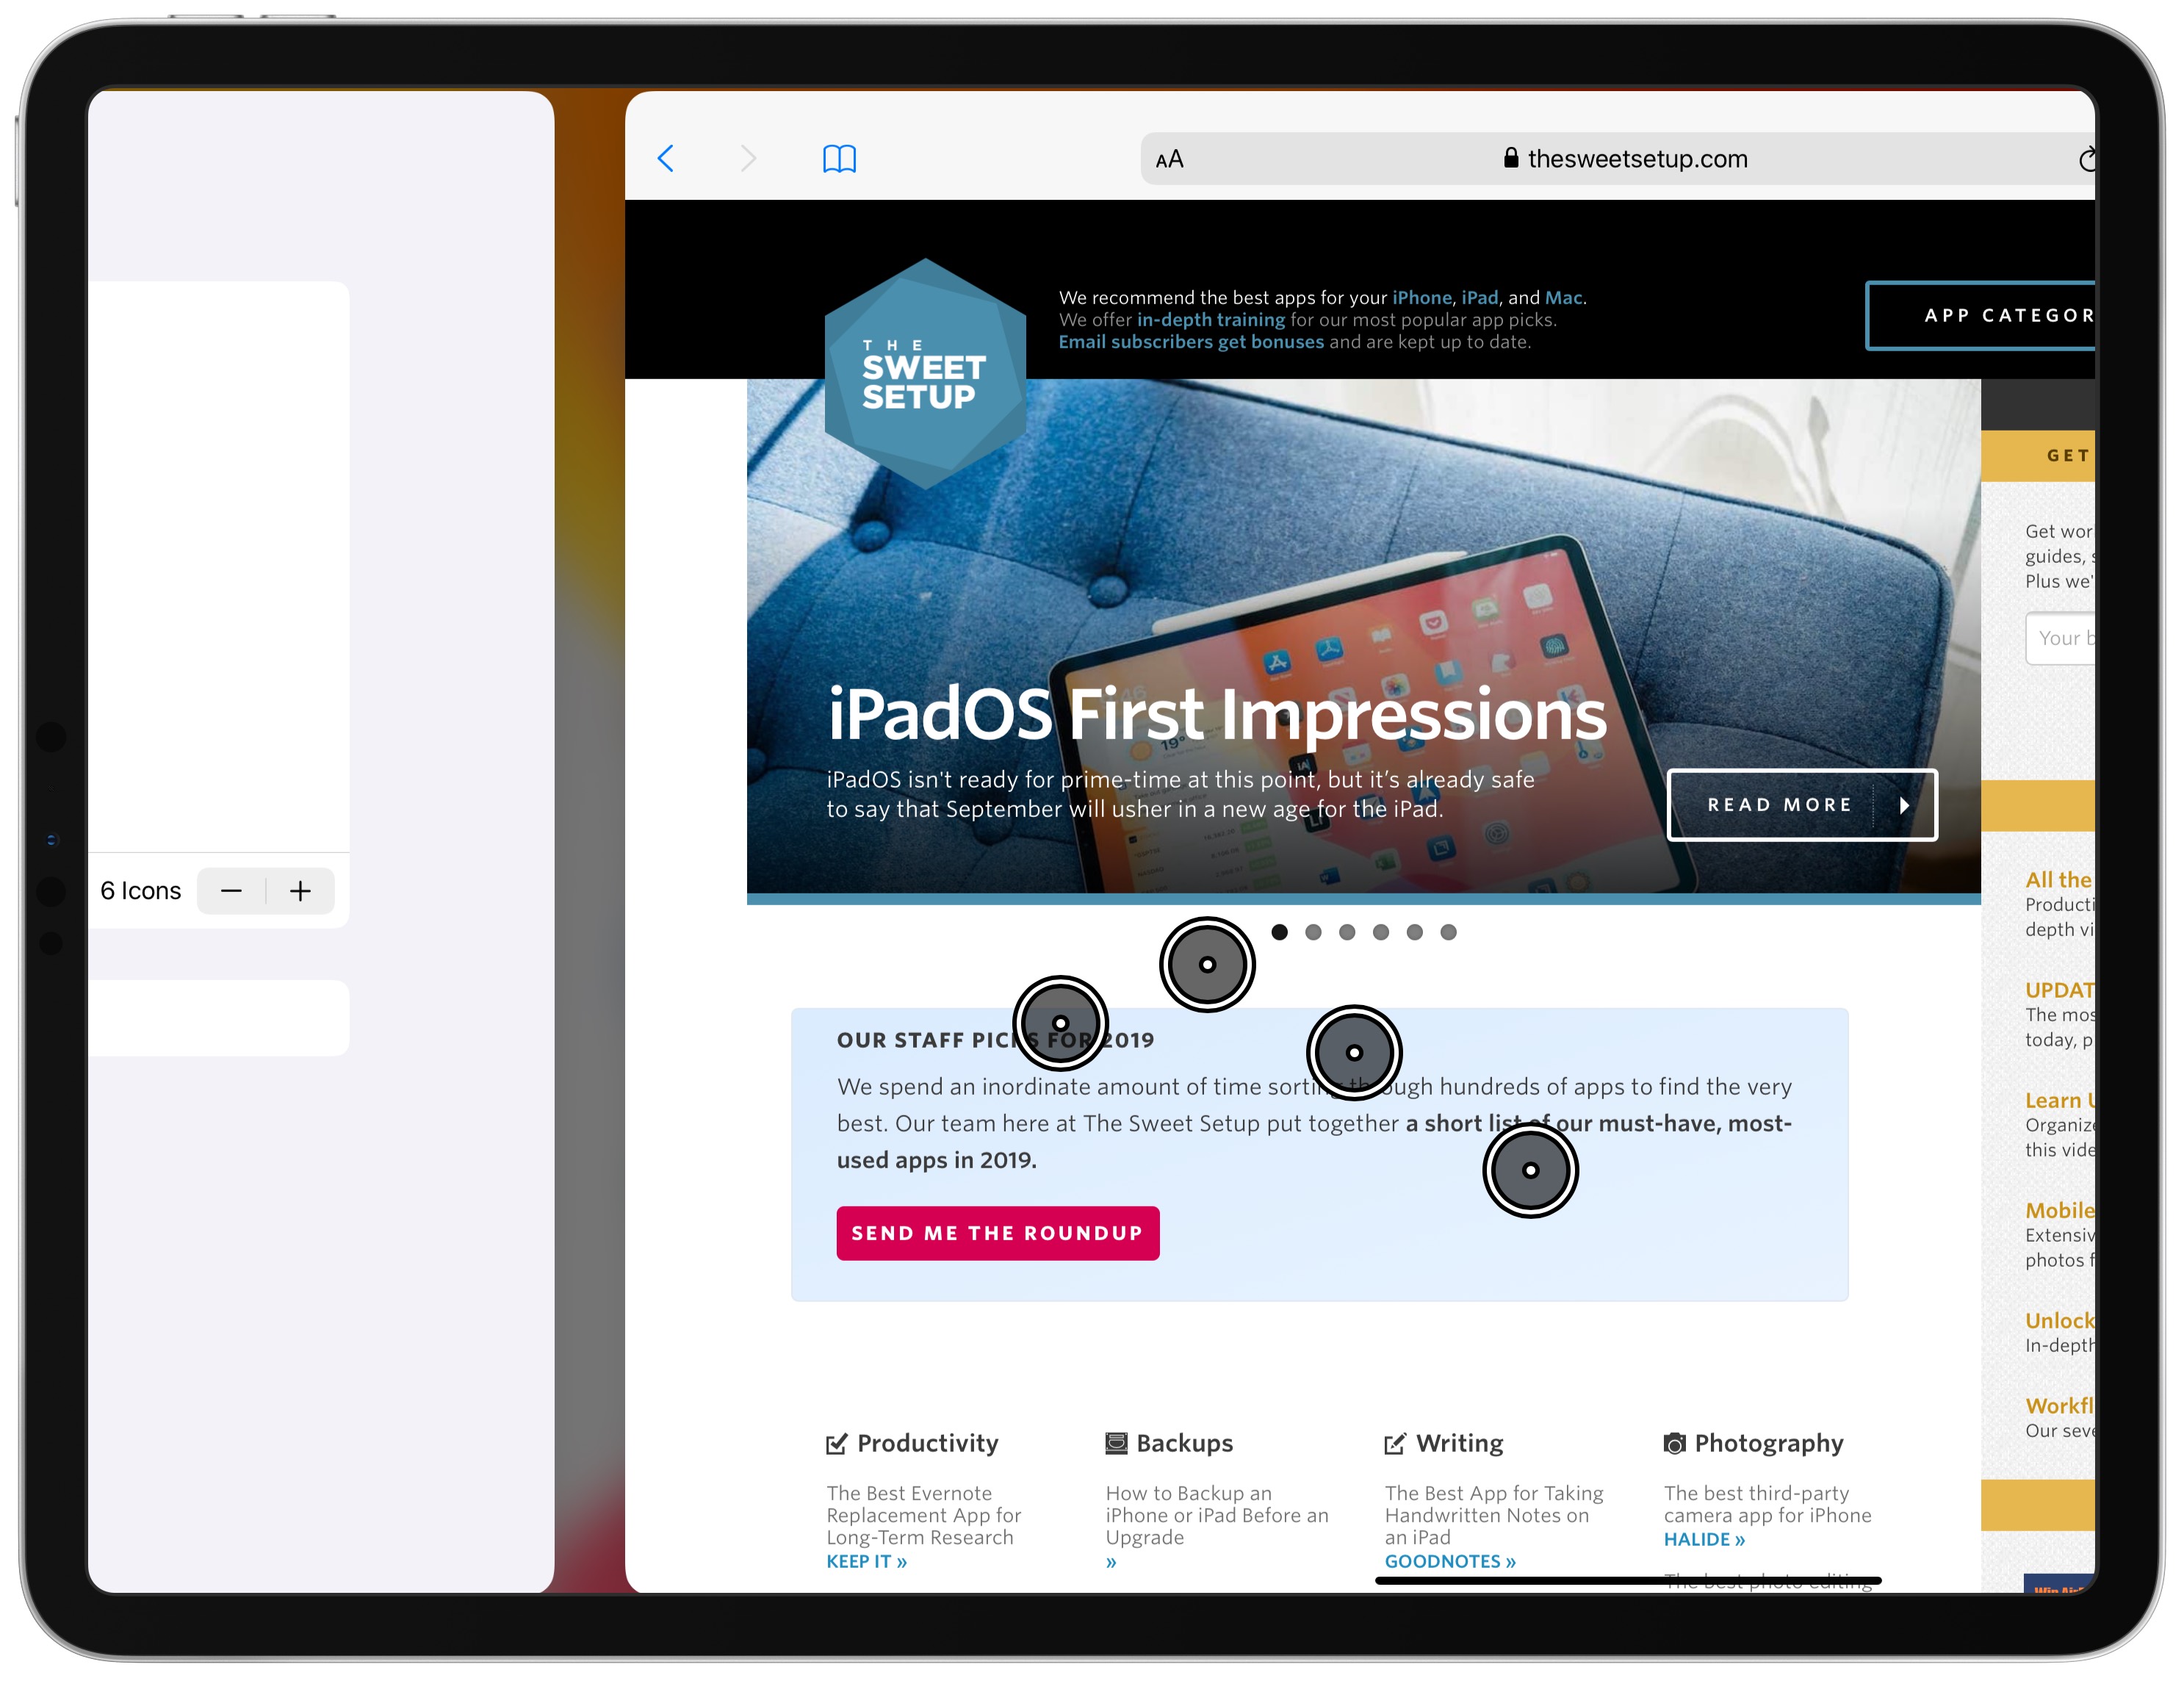
Mouse support in iPadOS acts slightly different than how I envisioned it, but I hadn’t really fleshed out any thoughts prior to trying it. The cursor is (currently) a large circular pointer rather than the ubiquitous arrow pointer, right and left clicks work fundamentally differently on iPadOS than standard desktop operating systems, and how the current iteration of mouse support interacts both individually and alongside finger-touch support (and other Bluetooth devices, like the Apple Pencil, for that matter) is different as well.
But even just after a few days of fooling around with a mouse in the current iPadOS public beta, I think a ton of people are going to find mouse support functional, enjoyable, and — dare I say — even more powerful than anything they’ve seen on macOS.
Setting Up a Bluetooth Mouse
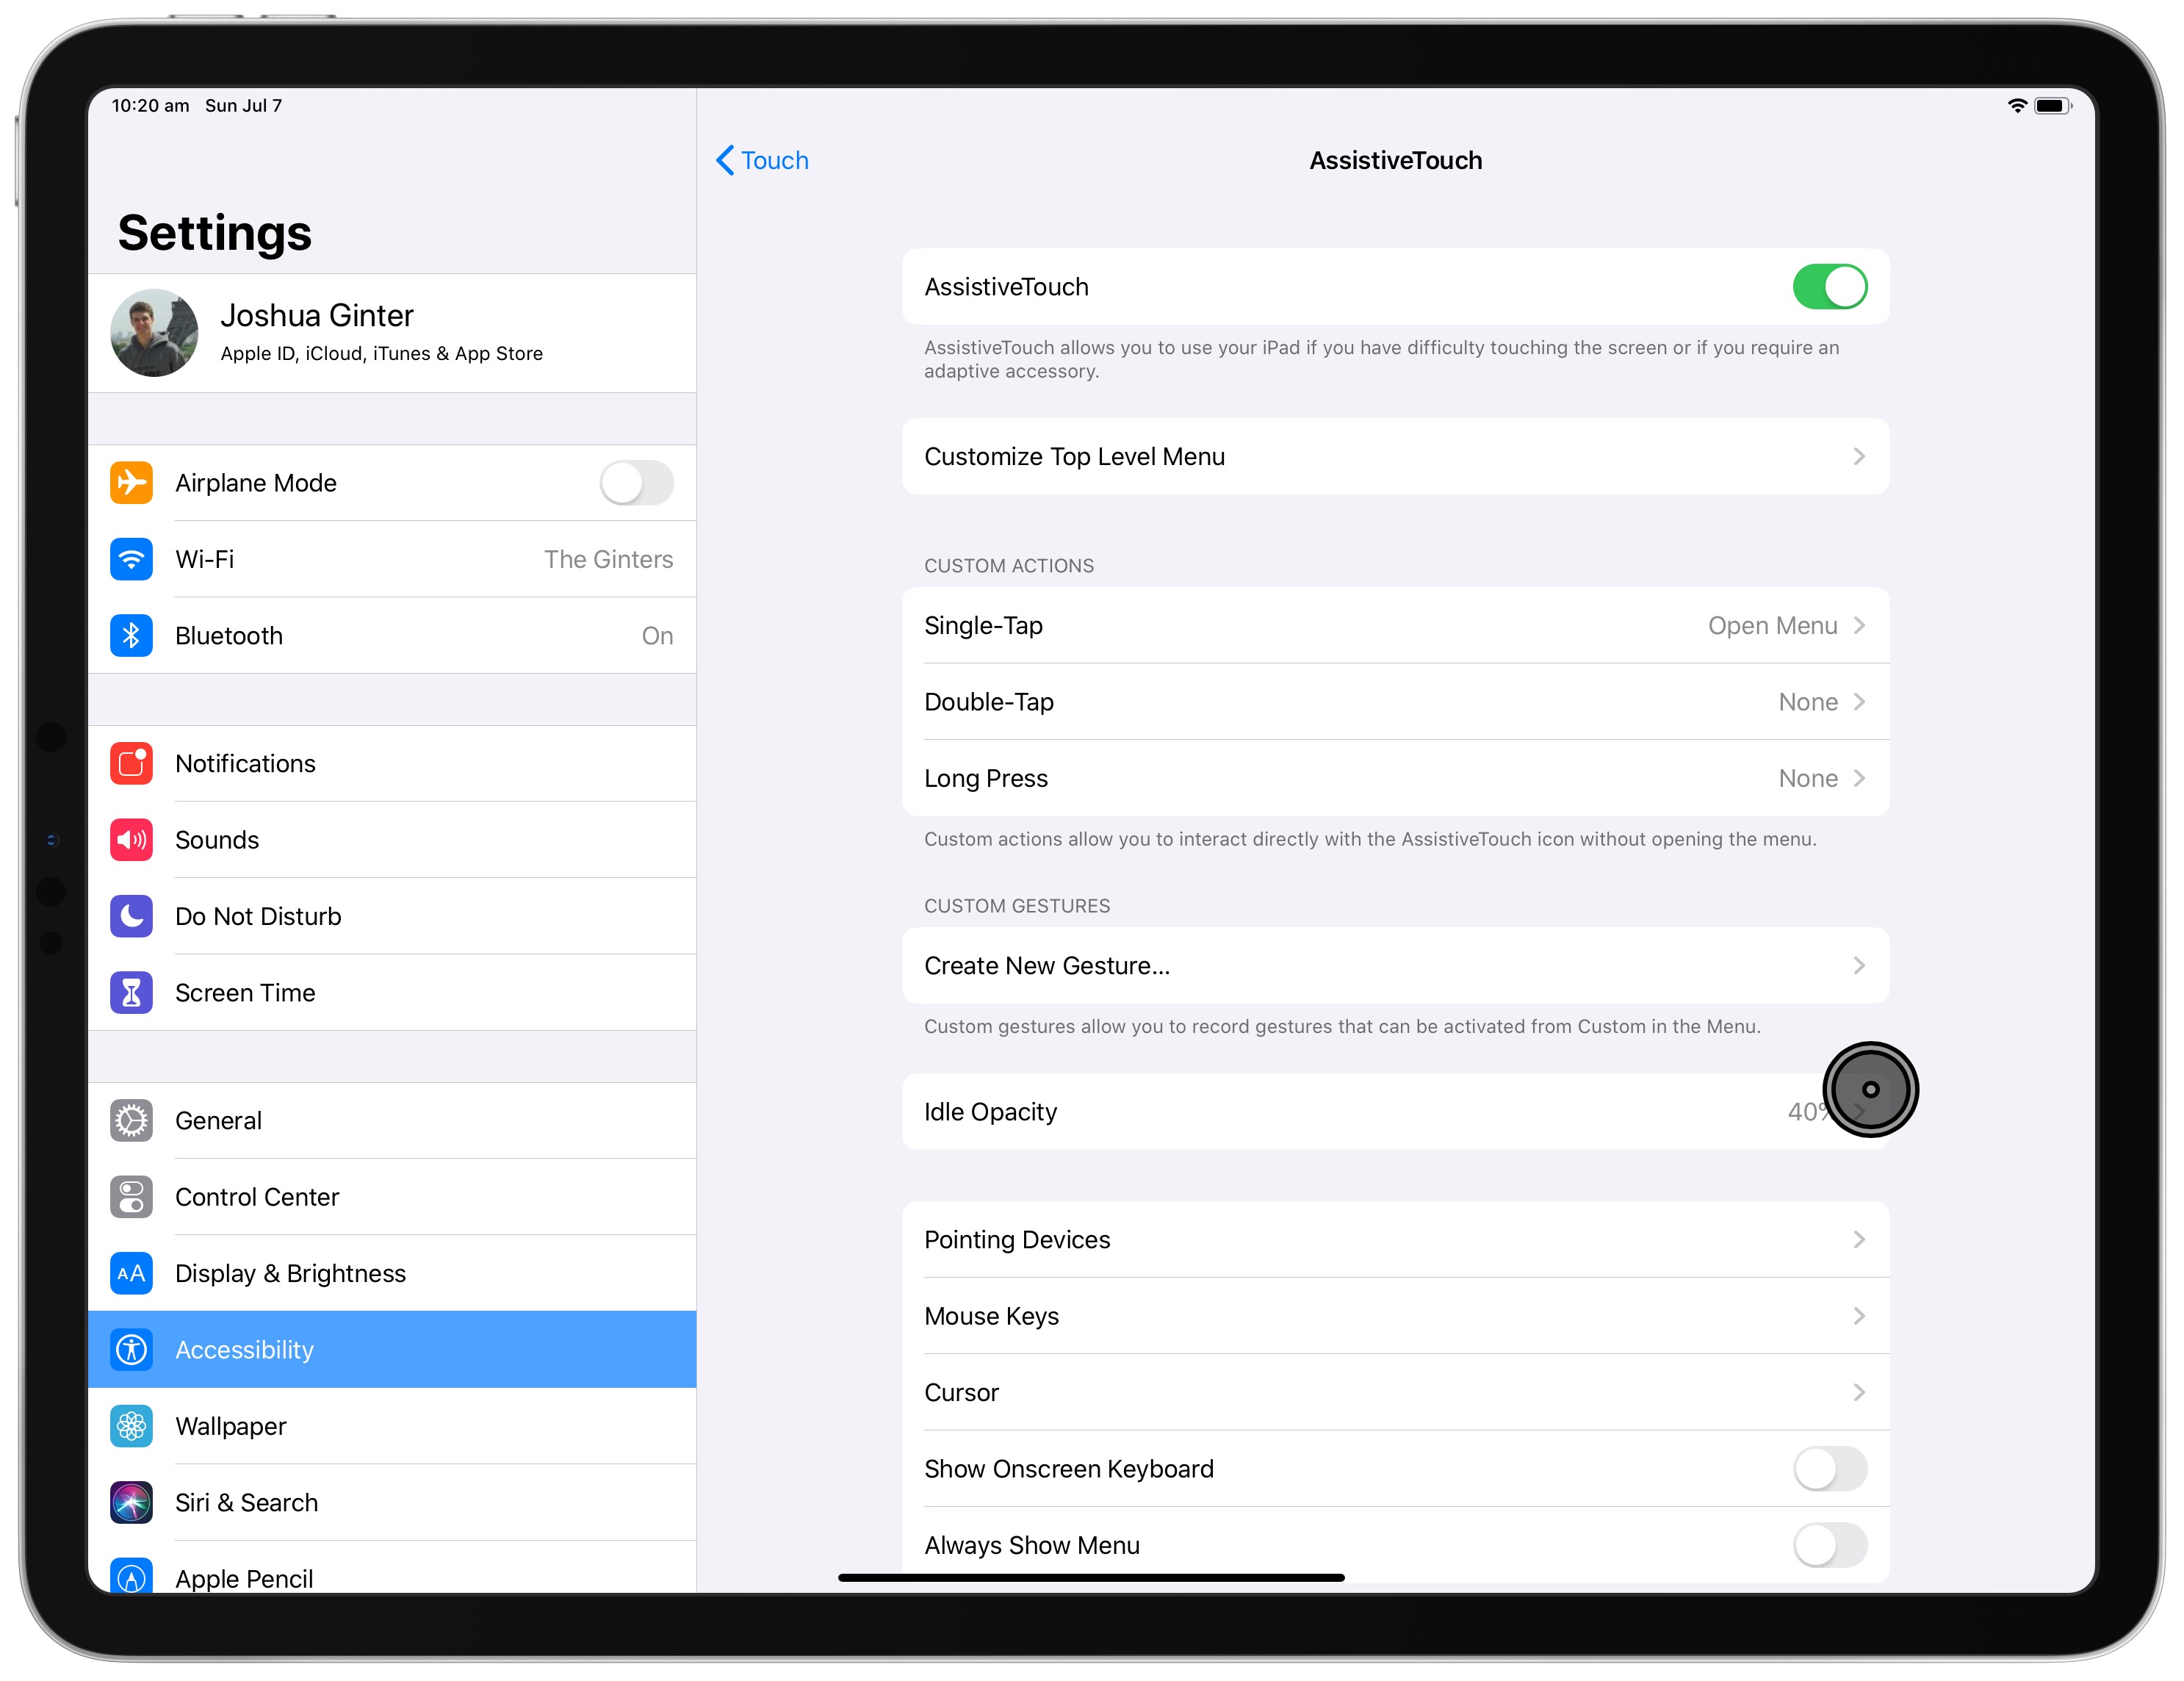
Apple has hidden mouse support away in the Accessibility category of Settings. Go to Settings → Accessibility → Touch → AssistiveTouch → Pointing Devices to setup a Bluetooth or wired mouse. My iPad found my MX Master mouse almost immediately after setting the mouse into pairing mode, so the pairing experience here was phenomenal. Tap your mouse device and you should be all set.
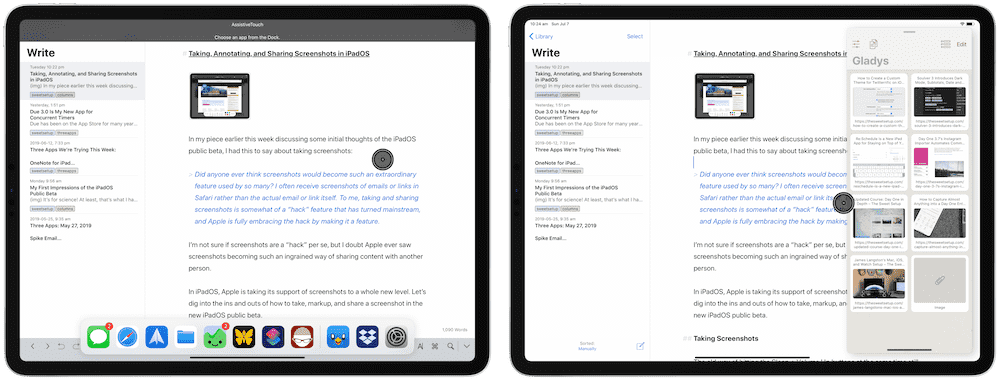
In order to get everything working though, you’ll have to navigate back to the AssistiveTouch menu and toggle AssistiveTouch on. Once completed, you should see a large gray pointer floating around the middle of your screen.
For regular moving around, the mouse works exactly as your finger would. Move the mouse around and click on screen elements as though you were tapping with your finger. Drag up with the pointer from the bottom of the home screen to go to the home screen or bring up the App Switcher. Scroll through pages (in “natural” direction, as Apple puts it, which is entirely opposite of how scroll wheels have worked since inception) and columns with the scroll wheel like you normally would slide with your finger. It’s all fairly intuitive.
You can take mouse support much further though and you can avoid having to complete regular gestures by assigning custom functions to individual mouse buttons.
Mouse Customization
There are a variety of ways to customize your mouse experience in the iPadOS public beta — so many, in fact, that a rookie like me initially thinks there’s more options here than in macOS.
If you navigate back to Pointing Devices and select your mouse device, iPadOS will guide you through clicking buttons on your mouse and assigning a default action to that button click. For instance, my current MX Master setup is:
- Left-click for a one-finger tap
- Right-click to bring up the top level menu
- Middle-click (scroll wheel click) for the App Switcher
- Back button to go to the home screen
- Forward button to bring up the dock
Unfortunately, iPadOS doesn’t seem to recognize the pad button press on the MX Master — this would be an ideal App Switcher or home button. Hopefully this is fixed in an upcoming beta.
The Top Level Menu
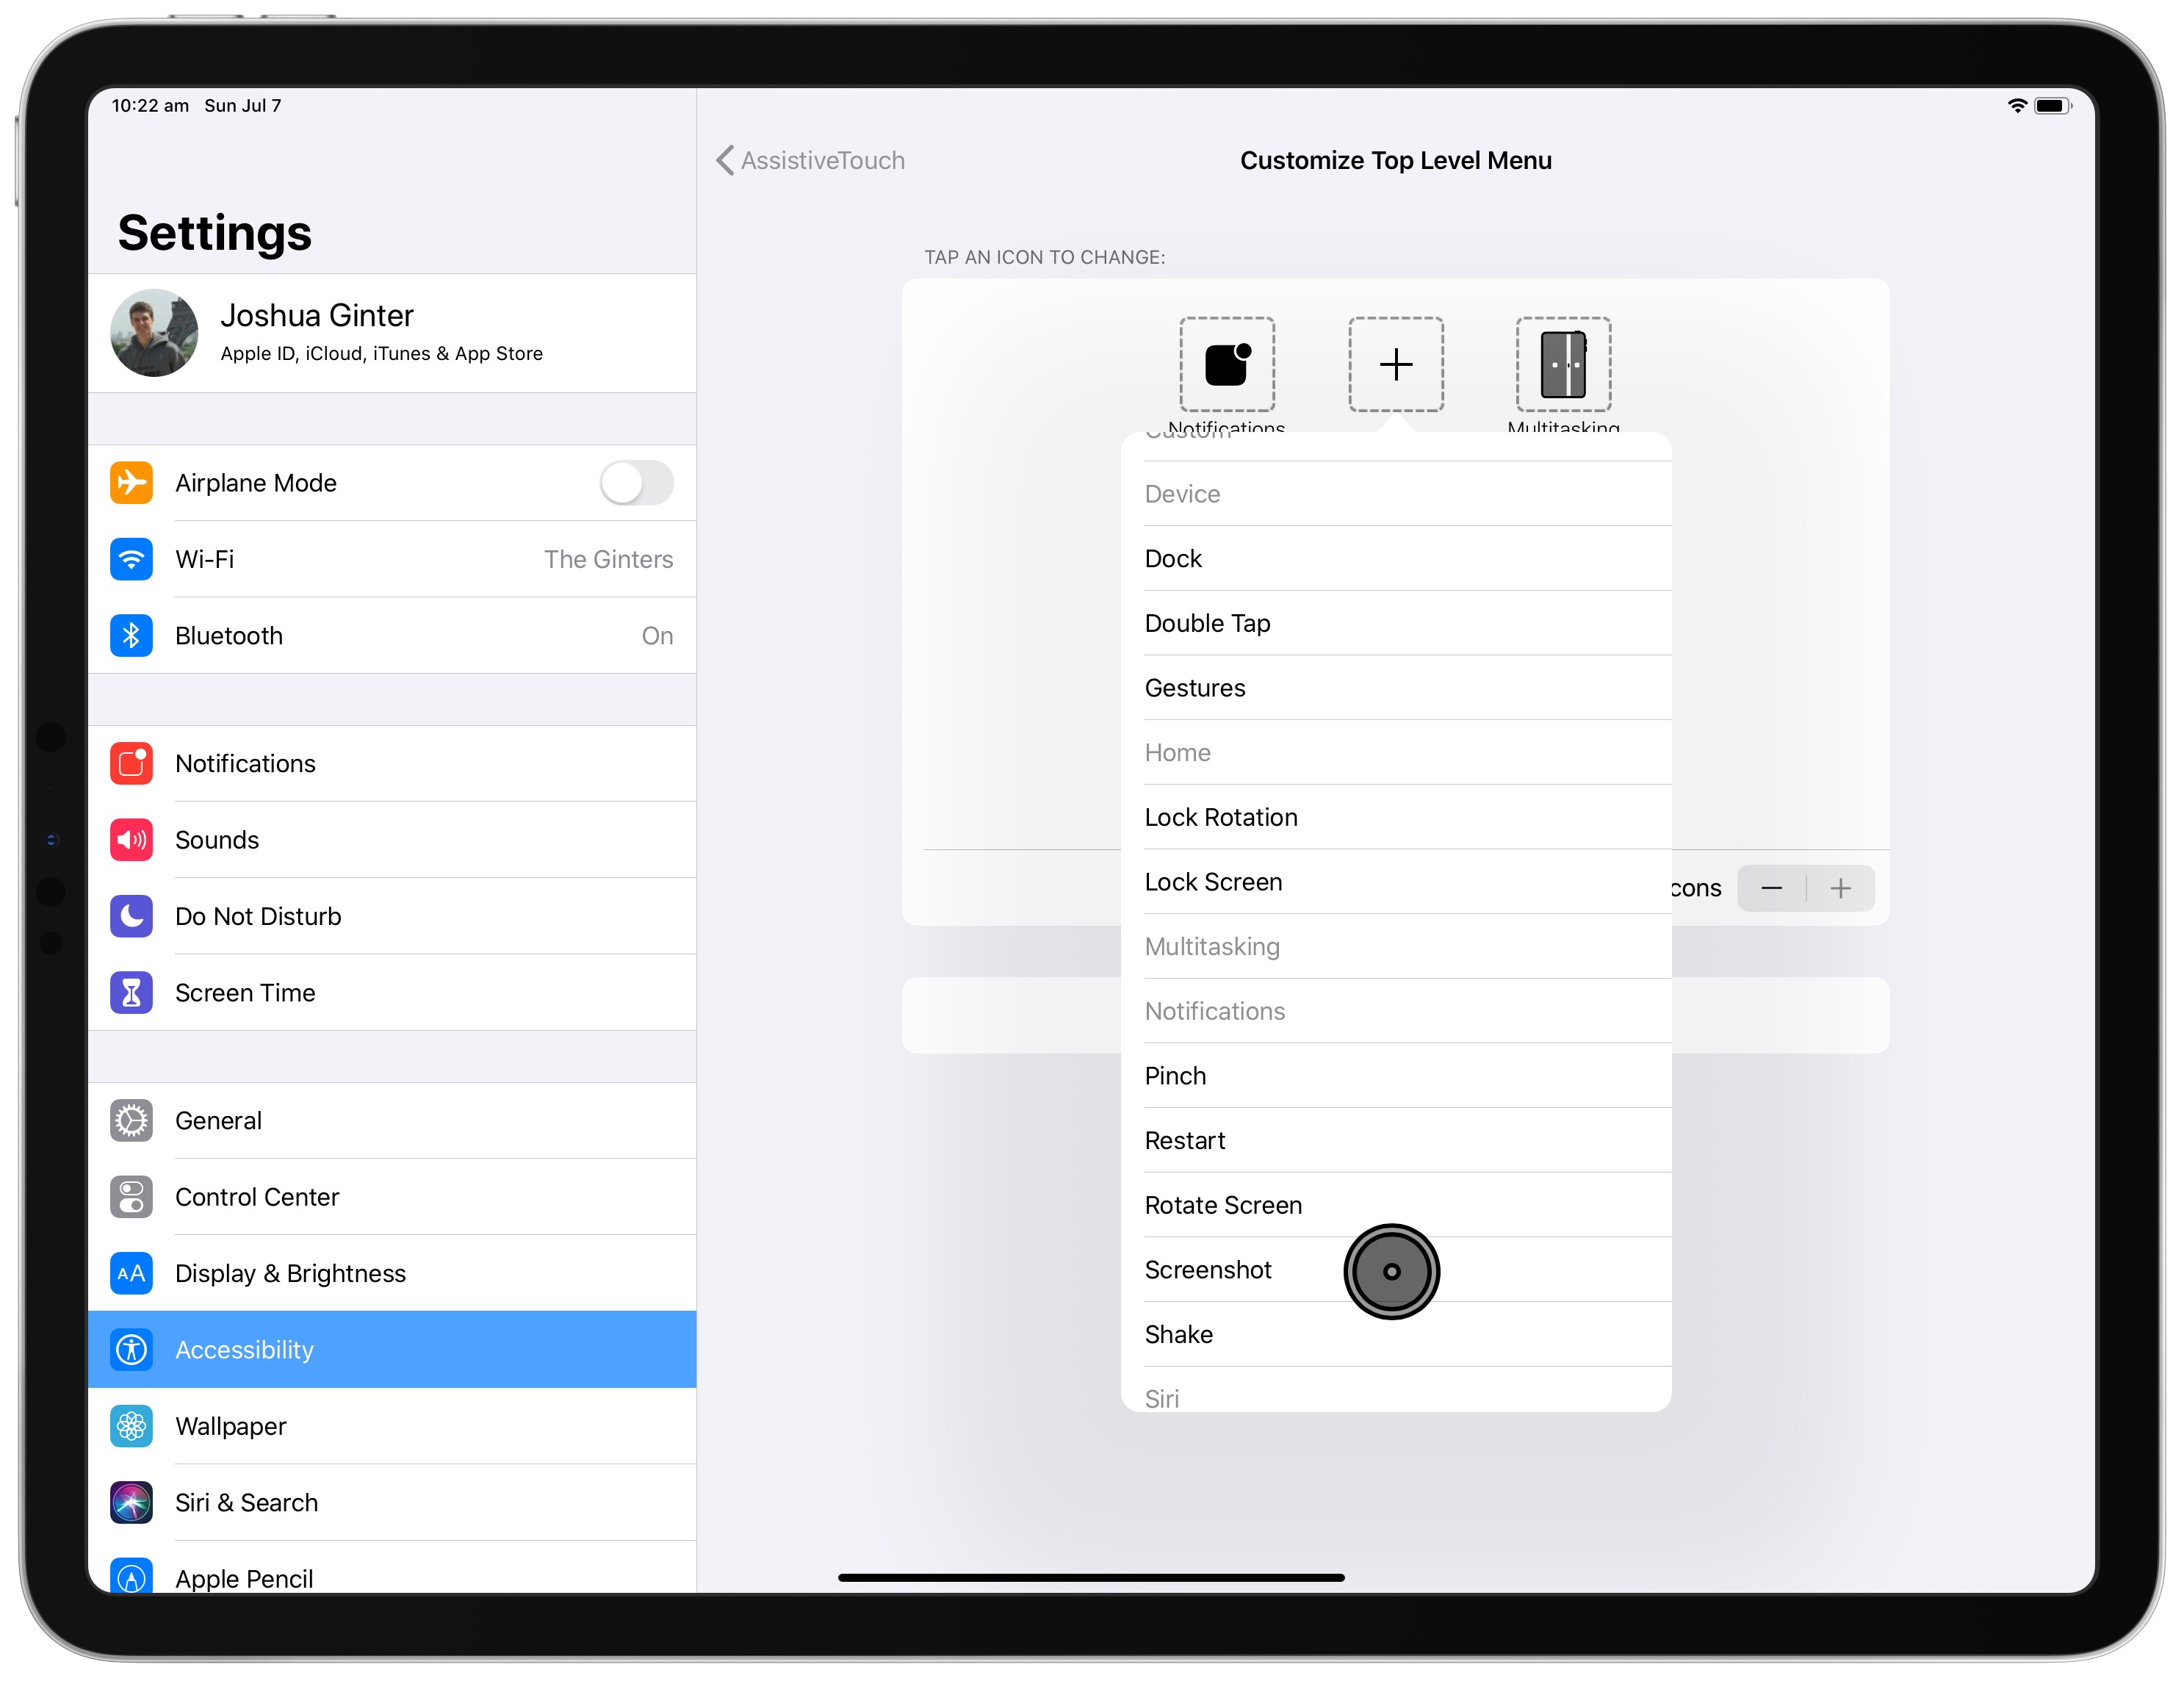
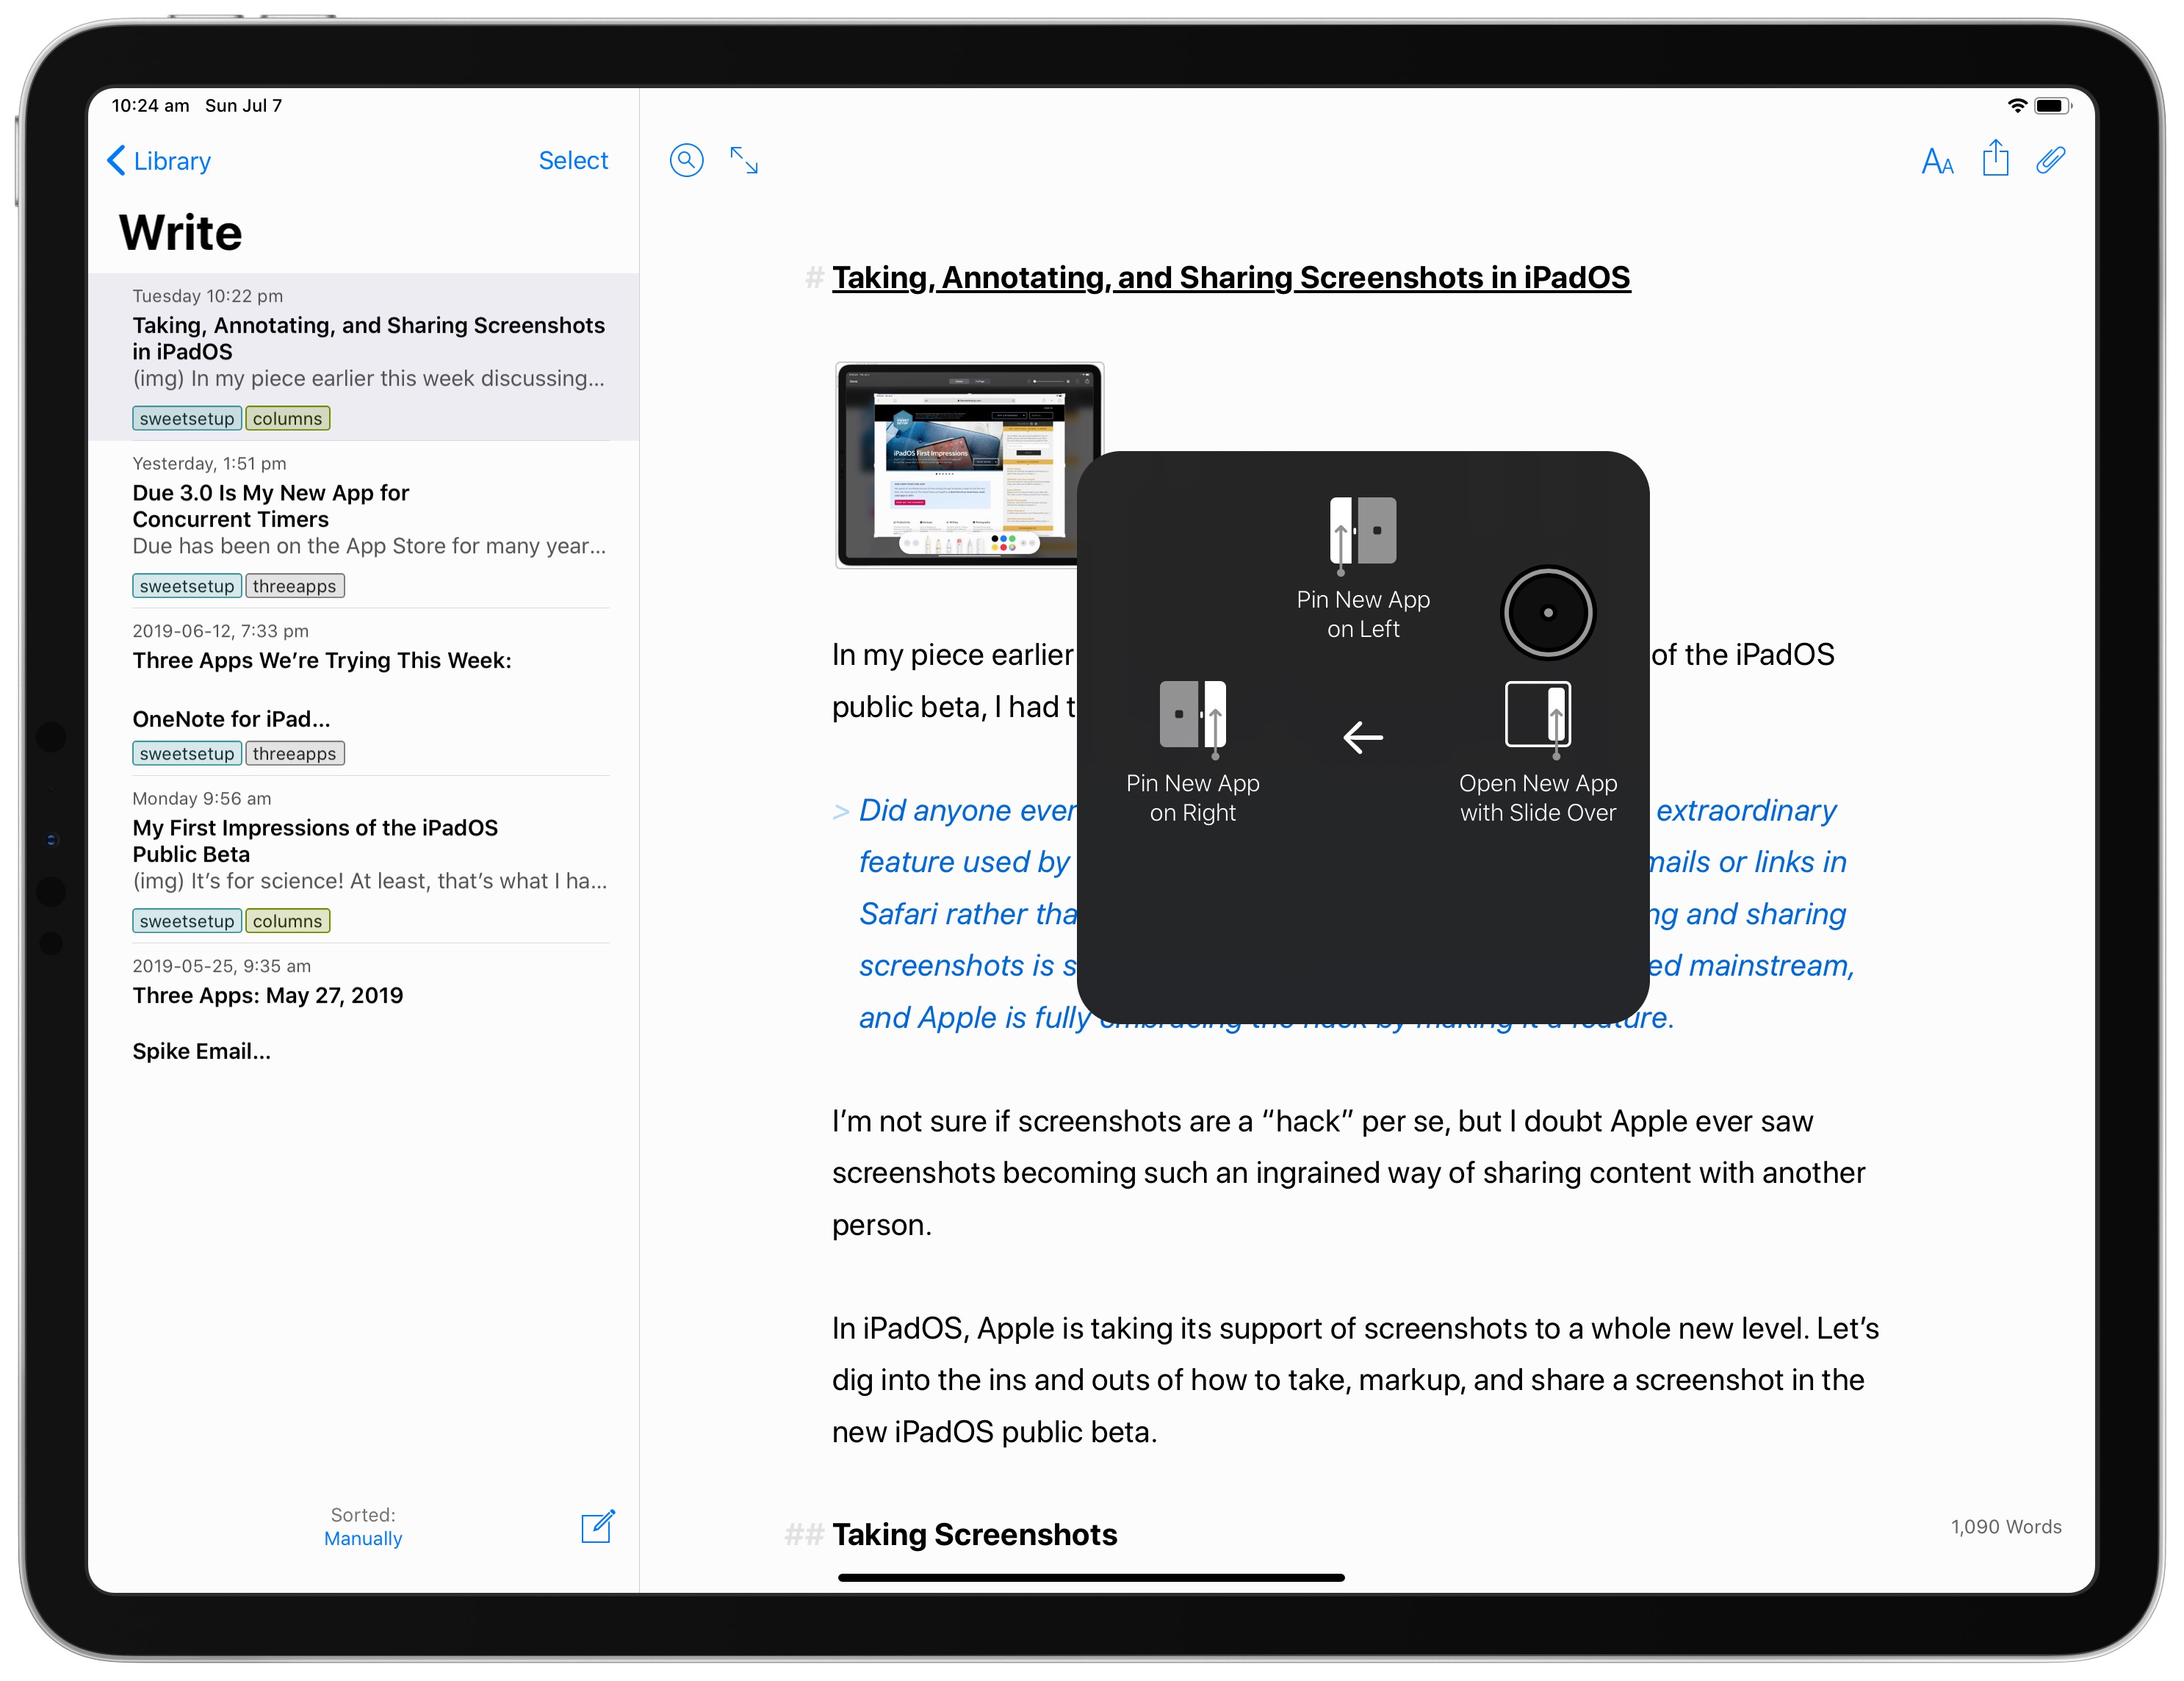
There is an inordinate amount of power hiding beneath the top level menu in iPadOS’s mouse support. With just two mouse clicks, you can access direct multitasking support, Control Center, device controls, and even your own custom shortcuts.
I currently have this top level menu mapped to my right-click mouse button. A simple click of the button brings up an accessibility menu that has six default actions. Hover over the action, left-click (tap) and done.
I’m still in the early playground days of customizing my own top level menu, but I currently have the following actions mapped to my top level menu:
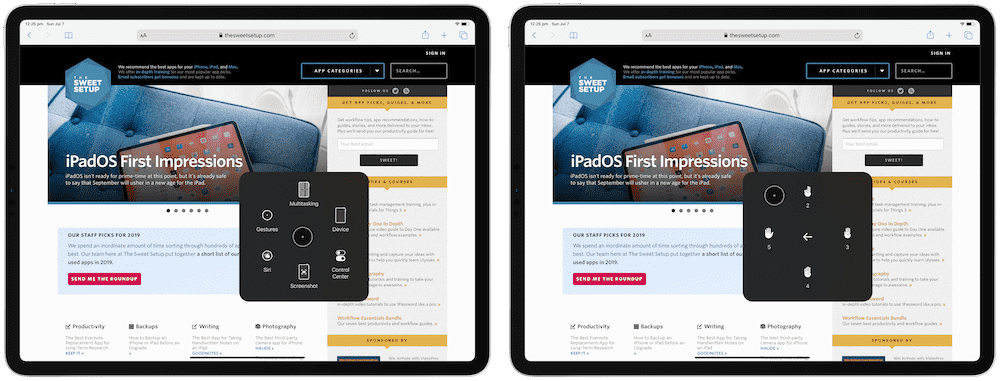
- Gestures: provides the ability to swipe with 2, 3, 4, or 5 finger gestures.
- Multitasking: provides the ability to directly move apps from your dock into Slide Over or Split View.
- Device: device controls, like screen lock and rotation, and volume controls.
- Control Center: immediately brings Control Center into view from the top right corner.
- Screenshot: takes a screenshot of everything you see on-screen; however, iPadOS smartly removes the top level accessibility menu before snapping the screenshot.
- Siri: immediately initiates a Siri command.
You can add up to eight different icons to the top level menu or scale it down to just one. And, best of all, you can add your own custom shortcuts directly to this menu.
The potential power here is immeasurable. Having the ability to add a shortcut to within two button clicks is more powerful than iPadOS’s touch-first input system in many ways and provides ample opportunity for people to customize their entire iPad experience.
Just as a quick example: I take a lot of screenshots for The Sweet Setup. I could create a shortcut that takes a screenshot (less the accessibility menu), then grabs that screenshot and feeds it into a shortcut like, say, Federico Viticci’s Apple Frames shortcut. The result, after two button clicks, would be a perfectly mocked up iPad Pro device mockup saved to the Photos app. I’m sure I could take this a step further and link it to one of our own in-house WordPress uploading shortcuts, which then takes the mockup and uploads it directly to The Sweet Setup WordPress back-end.
All with two mouse clicks. Pretty insane.
Again, I’m in the early days and so is iPadOS. Functionality could change over the next few months or be flat-out removed. Whatever the case, the current iteration of the iPadOS public beta holds enormous potential for power users to bend iPadOS and the mouse to their will.
Mouse Experience
Setting up and customizing a mouse for iPadOS is really only half the battle, as the whole experience needs to be smooth in order to use it. For all the bridges to cross when converging a touch-first input method with a mouse-first input method, I think Apple has done an incredible job in making the experience as intuitive as expected.
There are hiccups (bugs, I hope), though.
I remember when the Apple Pencil first debuted — initially, you could use the Pencil for all sorts of navigation, and then Apple tested the idea of keeping the Pencil for drawing purposes only. You couldn’t navigate with the Pencil, scroll, select apps, etc.
There are no such limitations with the mouse — if you can interact with an on-screen element with your finger, you can interact with it with the mouse as well.
You can drag up from the home “bar” at the bottom of the screen and drag yourself back to the home screen. You can pause halfway through that gesture to invoke the App Switcher. You can resize Split View apps. You can drag apps from the dock into Slide Over.
Basically, everything works.
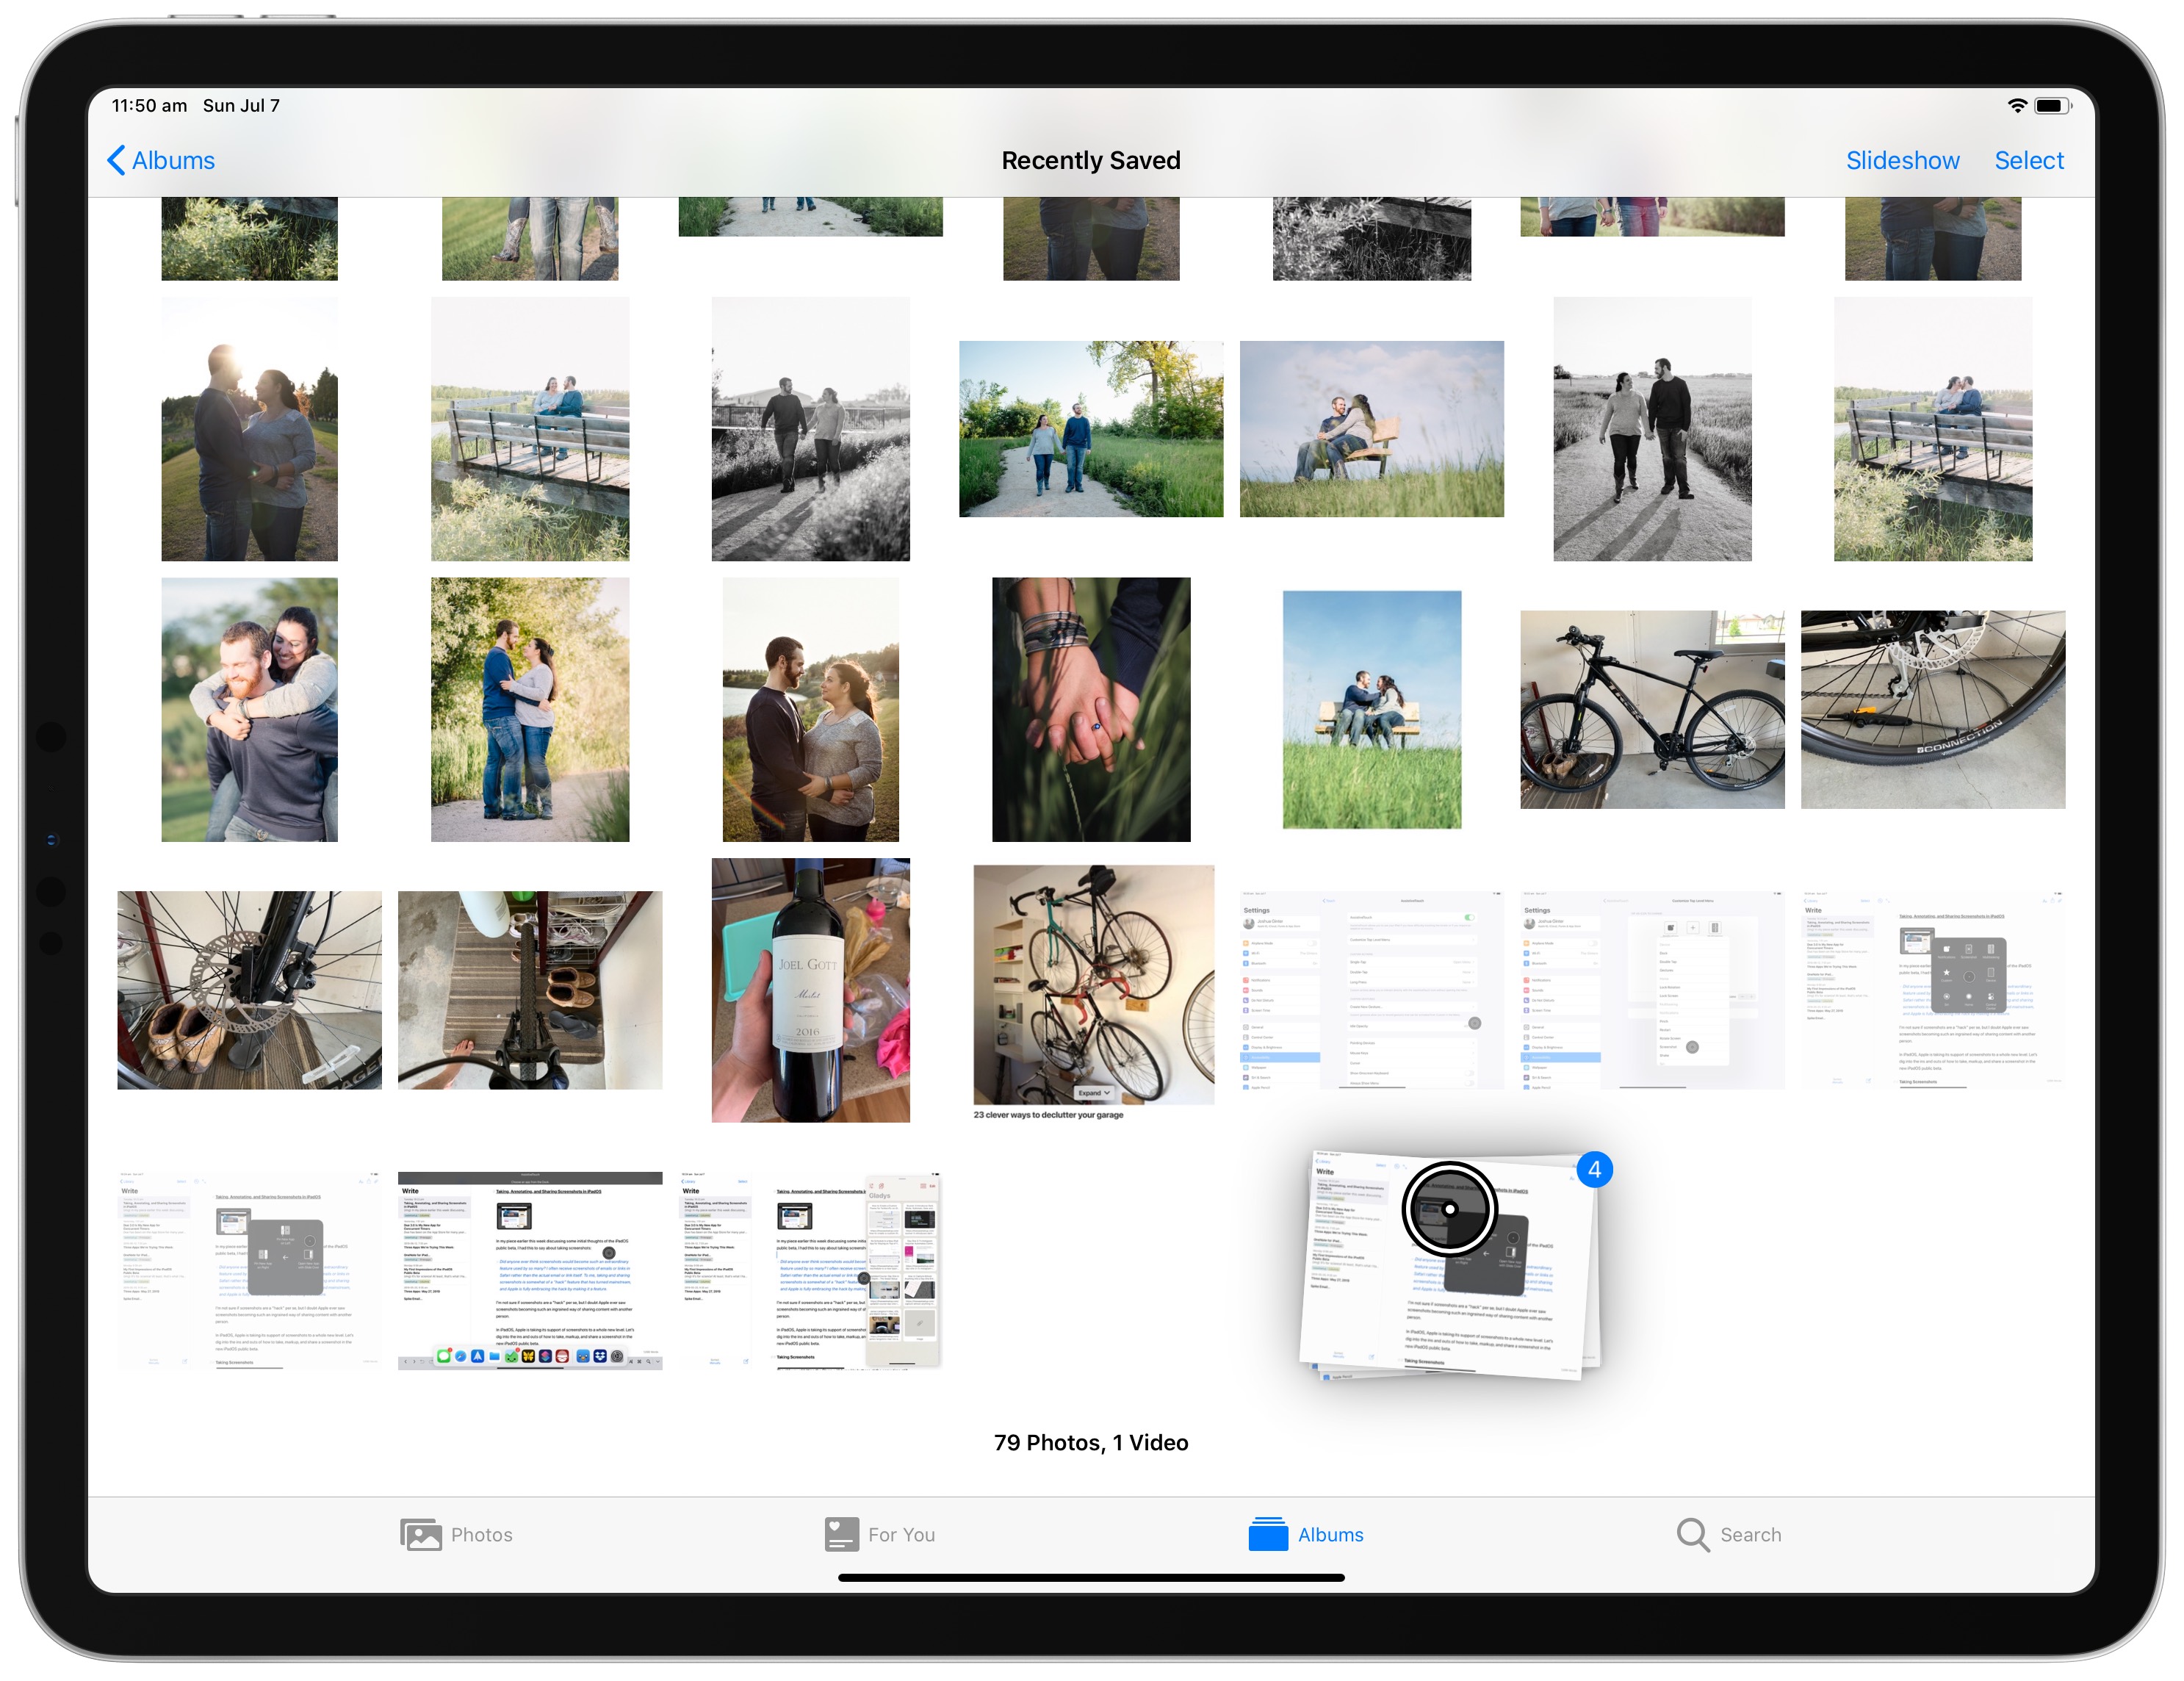
I say “basically” because there are some road bumps. Picking up multiple elements, dragging them, and dropping them somewhere else either doesn’t work, is half-baked, or is difficult to implement. If you long click on a photo, for instance, it’ll be picked up and you can drag it anywhere you’d like. But if you want to add another photo to your stack, the only method I’ve figured out is by grabbing the Apple Pencil and tapping on all your other required photos before dragging with the mouse and dropping them elsewhere. This doesn’t work with your bare finger, at least at this point.
I hope the ability to add multiple photos to your dragged stack with your finger is fixed or comes to the final version of iPadOS, as it’s quite a natural way to work. Interacting with iPadOS with both a mouse and your finger is quite fun to do.
Pinching and zooming is another somewhat difficult task with a mouse, even if it is available. Double-tapping is also difficult to do. Both of these inputs are available in the top level menu, but it’s somewhat foggy on when iPadOS is double-tapping on an element and when it’s single tapping. Also, what if you want to exit double-tap mode? There are a few questions I still have that I expect to be answered in the near future with subsequent updates.
Wrap Up
I fear sounding cliche, as everything with the iPad seems like it could be ground-breaking. As always though, having mouse support in iPadOS does feel like there’s an enormous amount of potential under the hood.
I’m very excited to see what types of mouse shortcuts power users create over the next year. A quick right-click and a simple left-click can invoke a shortcut, pushing iPadOS into an automation frenzy and leaving you with a finished product.
We’re still not exactly at that “dream” iPad setup — Apple will need to launch actual external display support for that to be the case.
But mouse support is a great peek into how Apple is building a touch-first operating system that is oriented for the future while also embracing traditional mouse-first operating system paradigms.
Our Must-Have, Most Used Productivity Apps
We spend an inordinate amount of time sorting through hundreds of apps to find the very best. We put together a short list of our must-have, most-used apps for increasing productivity.