How to back up and move to a new Mac or iOS device
New iOS devices or a new Mac are great Christmas gifts for anyone in your life. If you are lucky enough to get one (or helping a family member upgrade from an old device to a new one), we want to help guide you along the path. Let’s start with iOS devices.
iOS
On iOS, there are 2 options for restoring: iCloud and iTunes. There are different advantages to each, so let’s cover them both.
iCloud
iCloud is probably the easiest way to do this (especially on a busy Christmas morning) as you may be helping someone who doesn’t have their Mac handy. It’s probably my least favorite restore method because it requires logging in to a lot of apps once the restore is complete. With that being said, it’s the way to go for simplicity on getting the device to the state it was before.
So, here’s how to back your data up to iCloud. First, let’s determine what you want to include in (or exclude from) the backup. To do that, navigate to Settings → iCloud → Storage → Manage Storage, and choose your device under Backups.
Under Backup Options, you will see a list of toggles for the photo library and every app on your device, sorted by file size:
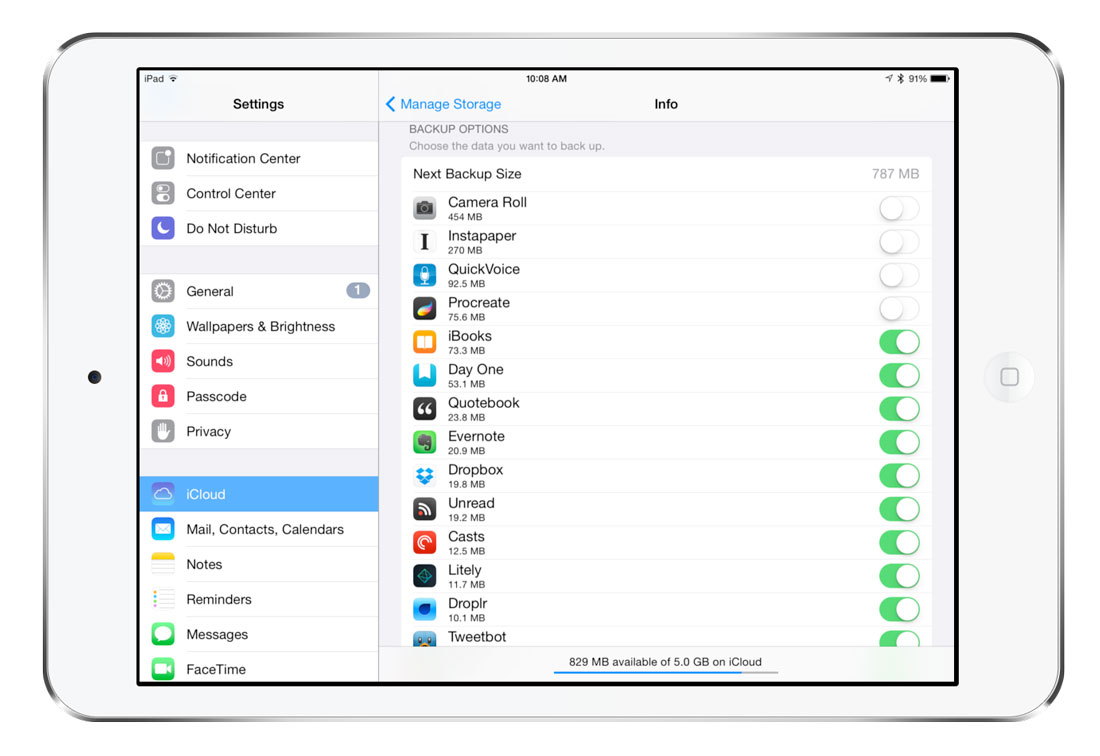
Everything will be toggled on by default, so turn off any items you’d rather not back up. If you don’t have enough space, you’ll want to upgrade to at least the 50 GB iCloud plan for $1/month.
Once you’ve determined what to back up, make sure the device is on a Wi-Fi network and, for best results, connected to a power source (this process can take a while). Now, navigate back to Settings → iCloud → Backup and ensure iCloud Backup is toggled on. If it is, you’ll see a Back Up Now option. Just tap that button and wait for the process to complete.
When you start up the new device, Restore from iCloud Backup will be an option. Just make sure you are picking the backup that you just made. Depending on the amount of data, it can take an hour or so to get the device to a usable state. Even after it comes back to the home screen, iOS will continue to download data in the background. If you have a large photo library, it can also take a little while to show everything. Give it time, plug it up, and go enjoy your day!
Note: If you accidentally set up the device as new when you wanted to use a backup, you’ll have to wipe it and start over again. You can do this from Settings > General > Reset > Erase All Content and Settings. This also applies if you ever get a replacement phone with an older version of iOS than your backup is.
iTunes
An iTunes backup is a great option for a quick restore. It doesn’t require a fast internet connection, and it keeps you logged in to considerably more apps than the iCloud restore does.
The process is simple:
- Plug your device into your Mac or PC.
- Open iTunes and select the iPhone icon in the upper-left corner.
- Click the Summary tab and scroll down to the Backups section.
- Click Back Up Now and wait for the backup to complete. I’d also recommend doing an encrypted backup in order to limit the number of passwords you have to enter on your new device.
- To verify that the backup worked, open iTunes Preferences and select the Devices tab. If the backup was successful, you’ll see it listed there.
It’s not as slow as iCloud, but it can still take a while if you’re not in the habit of regularly backing up your device. If you don’t keep local copies of your applications stored in iTunes, you’ll want to transfer purchases before trying to restore to a new phone. You can do that from File → Devices → Transfer Purchases in iTunes.
When you plug up your new iOS device to your Mac, you’ll get a prompt in iTunes (be sure to have it running) to Set Up as New or Restore from Backup. Choose the latter, and wait until it finishes.
Mac
For Macs, Time Machine is your best bet for moving to a new Mac. It’s simple, quick, and reliable. Best of all, it keeps you free to enjoy your day.
Time Machine Restore
If you are moving to a new Mac, Time Machine is certainly the easiest way. Time Machine is Apple’s solution for the everyday Mac customer. It’s easy to set up and use, and creates an excellent safety net for those who wish to back up their data to a locally-attached external hard drive.
Time Machine has lots of nice features. It is automatic, and backs up every hour without any user intervention. By default, it will copy everything on your Mac — system files, applications, accounts, preferences, email messages, music, photos, movies, documents, and more.
Time Machine is incredibly easy to set up. Simply buy a hard drive (we like this one for desktop users and this one as a more portable option) and plug it into your Mac. Once you do, OS X will display this dialog box:

Once a drive is selected, Time Machine will begin its initial backup. Depending on the number of files on your computer and the type of drive you’re using, this could take several hours. But, since Time Machine only grabs changed files during subsequent backups, future backups should be much, much faster and hopefully will just happen without you even noticing.
After the initial backup is finished, eject the hard drive by right clicking on the icon from the desktop and clicking Eject.
When you start up your new Mac, you’ll be presented with an option to restore from a Mac, Time Machine backup, or start up disk.

Choose Time Machine backup (plug in your new backup drive if you haven’t). You’ll then be presented with an option to choose what data to migrate over. Unless you have a specific reason to not select something, leave everything selected. Depending on how much data you have, this could take 30 minutes or a few hours.
After the migration finishes, you’ll be able to continue setting up your Mac.
Note: If you have a Thunderbolt cable handy (and both of your Macs have thunderbolt), you can bypass restoring from Time Machine and make a direct copy using the Migration Assistant application in Applications/Utilities folder on your existing Mac. This will likely be faster, but we still recommend keeping a Time Machine drive handy for local backups in the future.
We have more helpful tips right here.