How to Take Great Photos on Your iPhone (Or Any Camera)
This article on how to take great photos on your iPhone is a written excerpt from one of lessons in our Mobile Photography course.
Get Our Best Photography Tips & Workflows
Transform your photos and edits from average to awesome with our in-depth, mobile photography course. It’s jam-packed with training, ideas, and lessons that can literally transform your photography overnight.
There are a lot of reasons I reach for my camera — ranging from the everyday, my-kids-are-so-cute shot, to an amazing light pattern I see and want to capture.
Often, as in the photo below, it’s both! I shoot with my iPhone and my Fujifilm XT-1 almost equally, but I find myself reaching for my iPhone more and more, and I’ve taken some great photos with my iPhone.
I currently only have one lens for my Fuji, a Fujinon 56mm, which is equivalent to an 86mm lens on a full frame camera. If that lens is too long, I’ll grab my phone without hesitation. And if I’m out and about or on vacation, I may only have my iPhone with me.
I never treat my iPhone as a lesser camera, meant just for snapshots — I thoughtfully compose with it just like I do with my Fuji which is something a lot of people forget to do with their phones.
It doesn’t matter which camera you have on hand. As long as you have one, the importance lies in composing a great shot with what’s available to you. If you find yourself struggling to take ‘as good as’ shots on your phone as on your dSLR, try treating your phone as seriously as you would with a dSLR.
In this article, I’m going to share what I believe is one of the most important things — if not the most important — to look for and to use in your photos: Light.
I also have a few other tips and ideas here that you can begin using today to improve your photos.
Note: In the full version of this lesson, found in our upcoming photography course, we’ll also dive into: how to frame your shot so it looks balanced and polished; using the rule of thirds; being aware of “lost limbs” in your photos; using frames within your framing; and the ever-important soft skill of just “feeling it”.
Okay, with that said, let’s dive in…
Using Light to Get Great Photos on Your iPhone

The first thing I look for when I’m about to take a photograph, is my light. I will consider the time of day, the strength of the light source, and how I want it to enter my photo or illuminate any subjects in the photo.
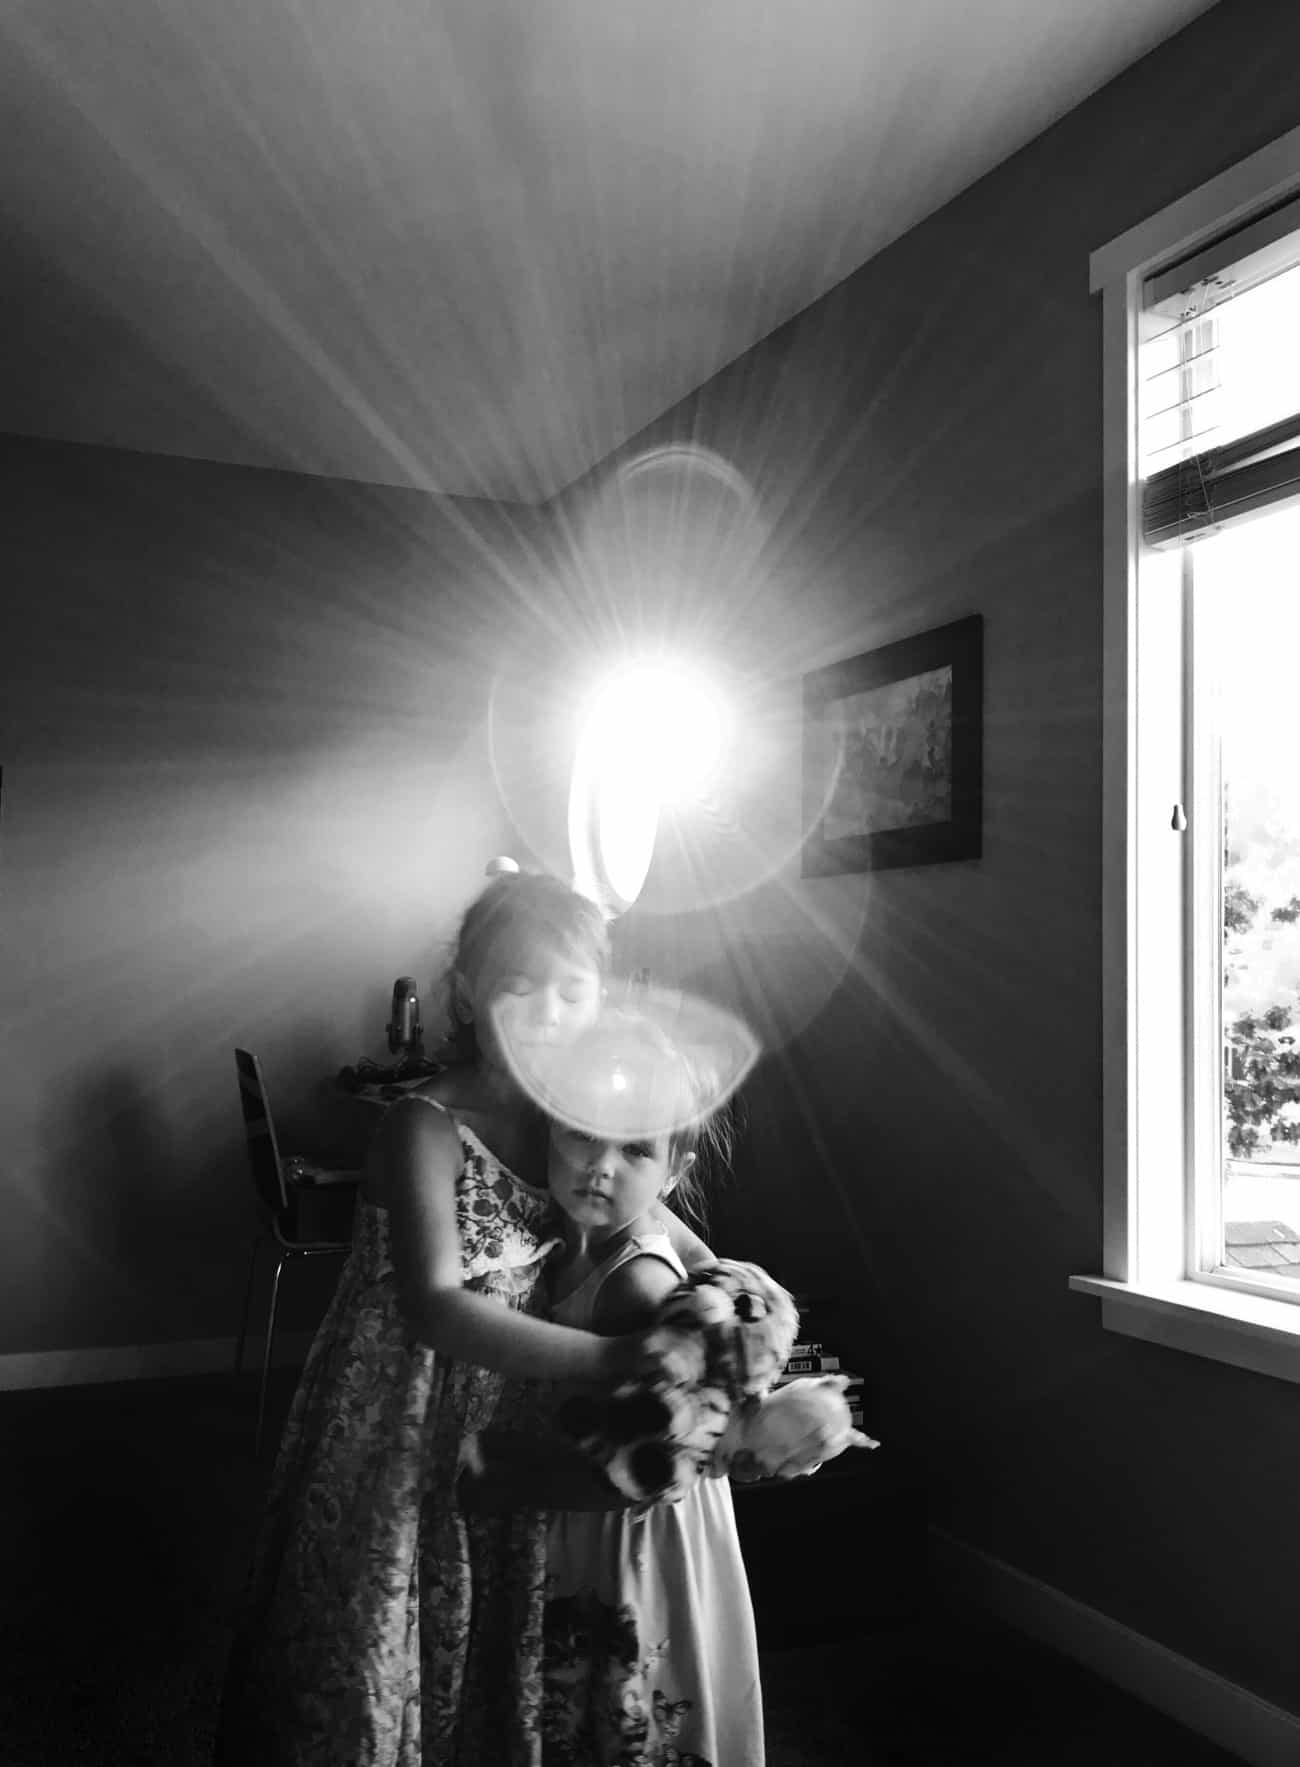
The shot above was a sunny morning, and the light was coming from the side, still low, soft and flattering. I crouched down, placing my daughter and the steam from her cup between the sun and my phone’s lens, and moved to get it to illuminate her outline and the steam.
Often, I will notice a cool light pattern: light dots through a sun hat, light lines made by window blinds, shadows made from trees, anything that is visually interesting. I will think about how I want it to move through the frame and also how I want it to hit my subject.
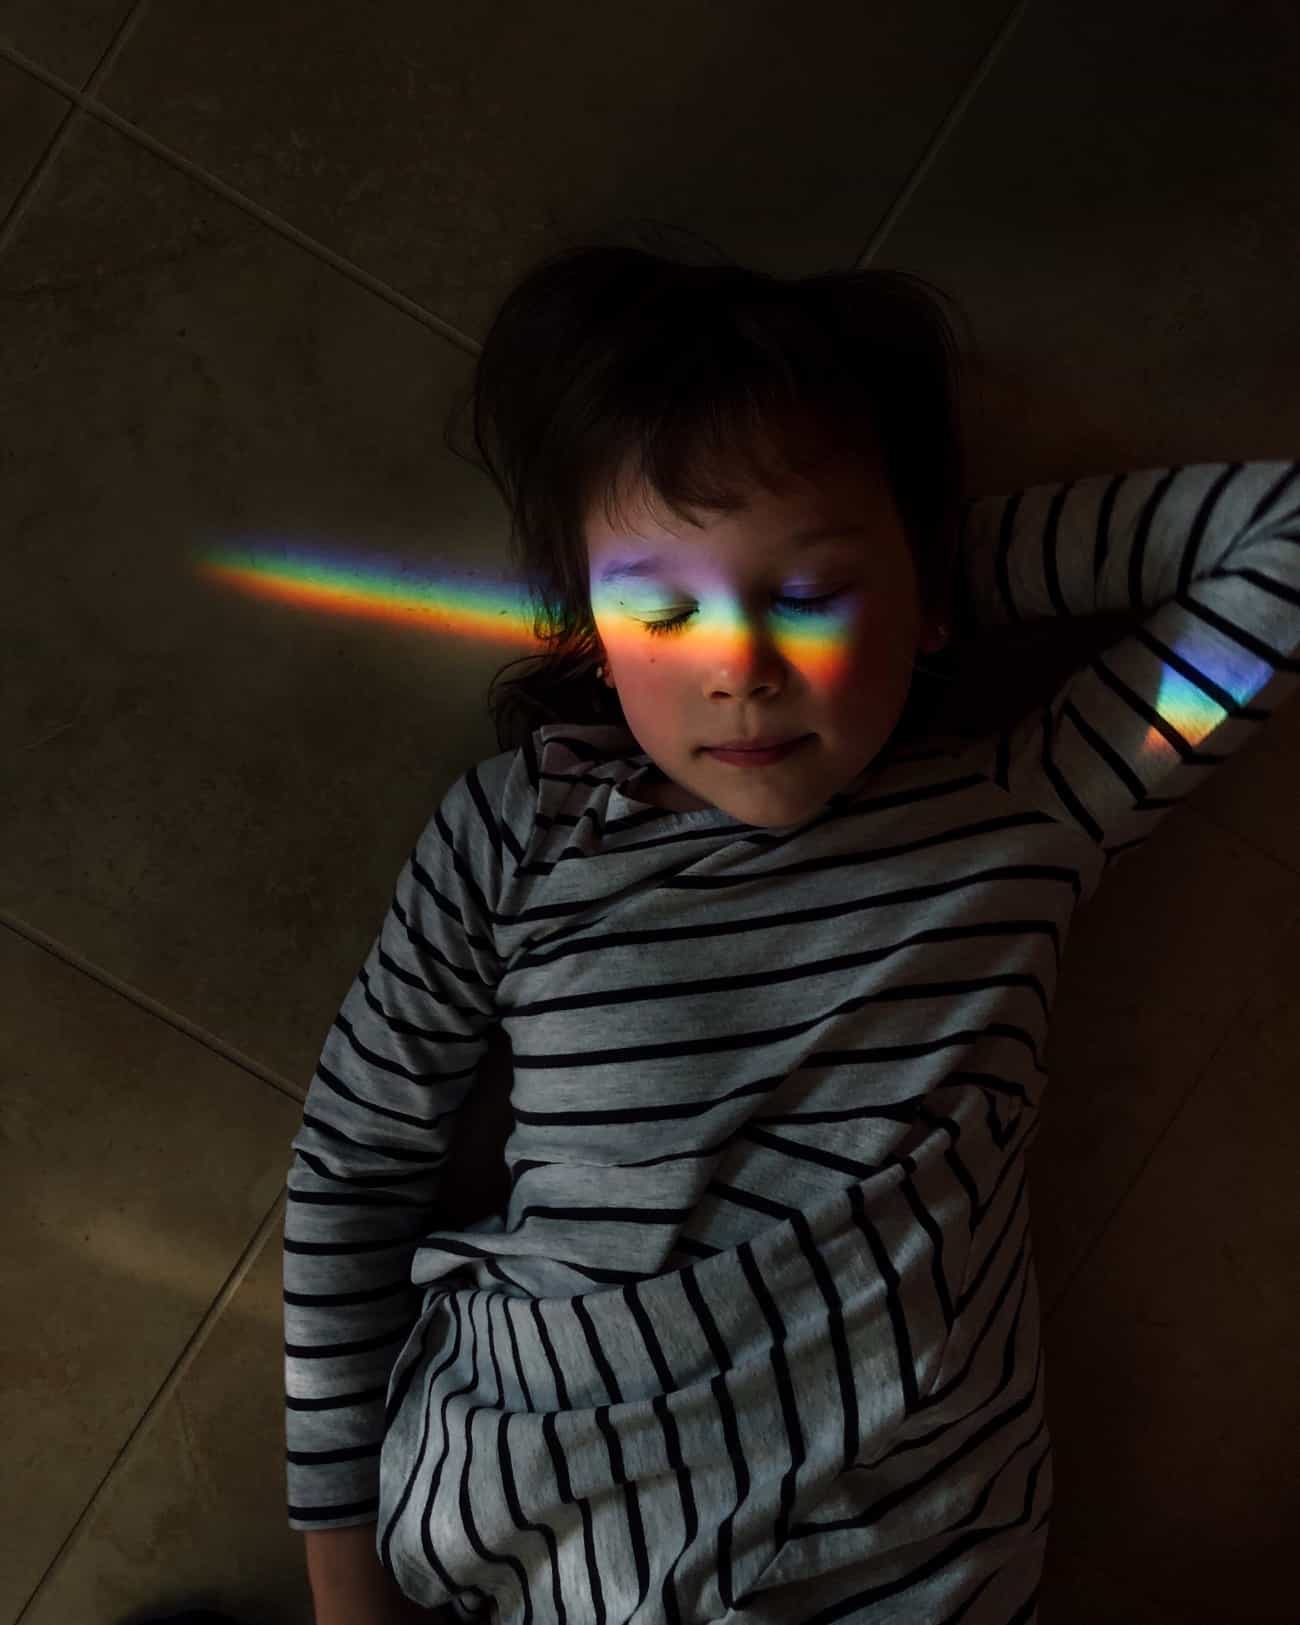
Manipulating the strength of the light via exposure and angle is the next step. In the rainbow photo above, I noticed it on the bathroom floor and had the idea to do a portrait in it. Because the rainbow light was strong, I had to underexpose my shot to avoid losing details in the highlights, to keep the details in her face intact.
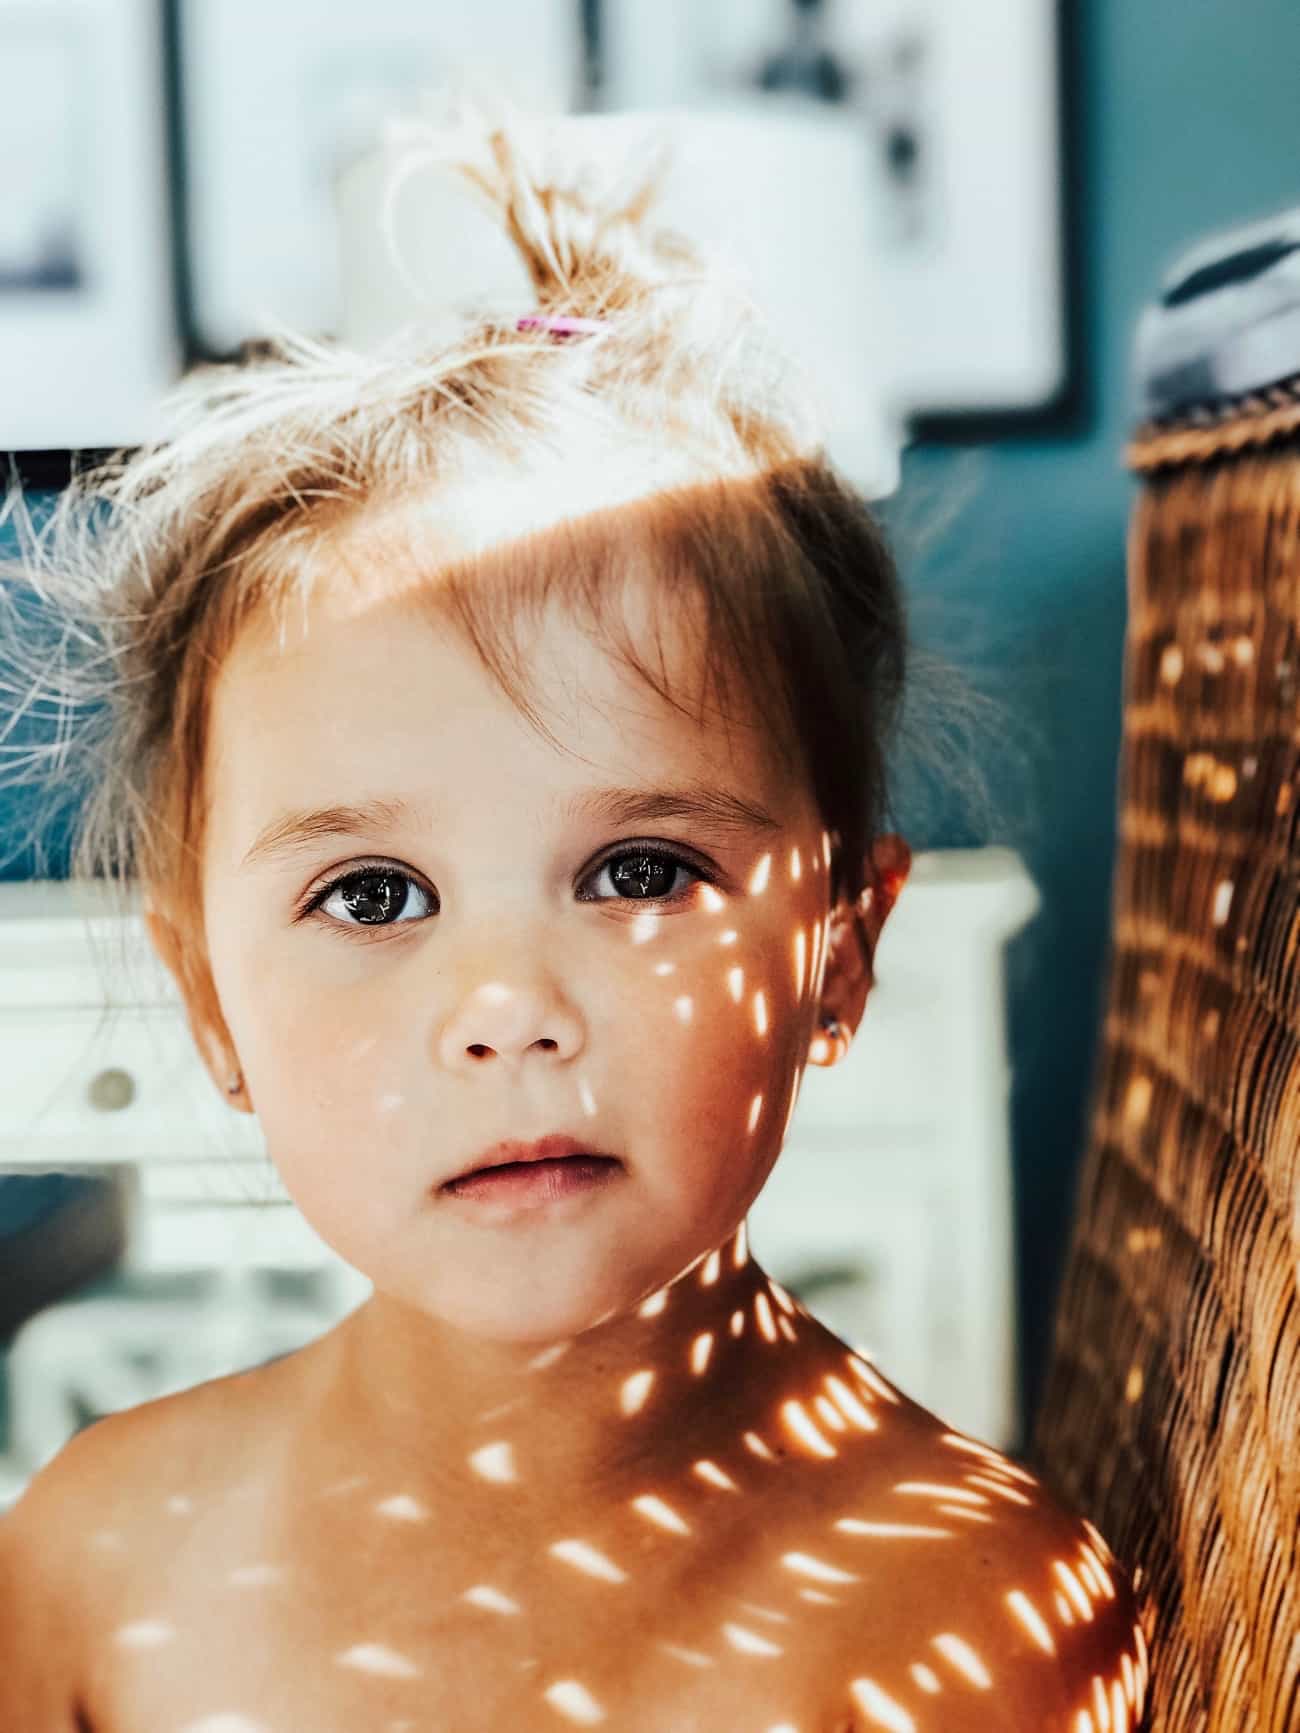
Sometimes, like in the above dappled light photo, it can be impossible to underexpose enough to get every single part of harsh light full of details, and still retain the ability to bring the shadowed portions up without causing them to have too much additional noise. I didn’t want my daughter’s face to be super grainy, so I just did my best to underexpose as much as I could.
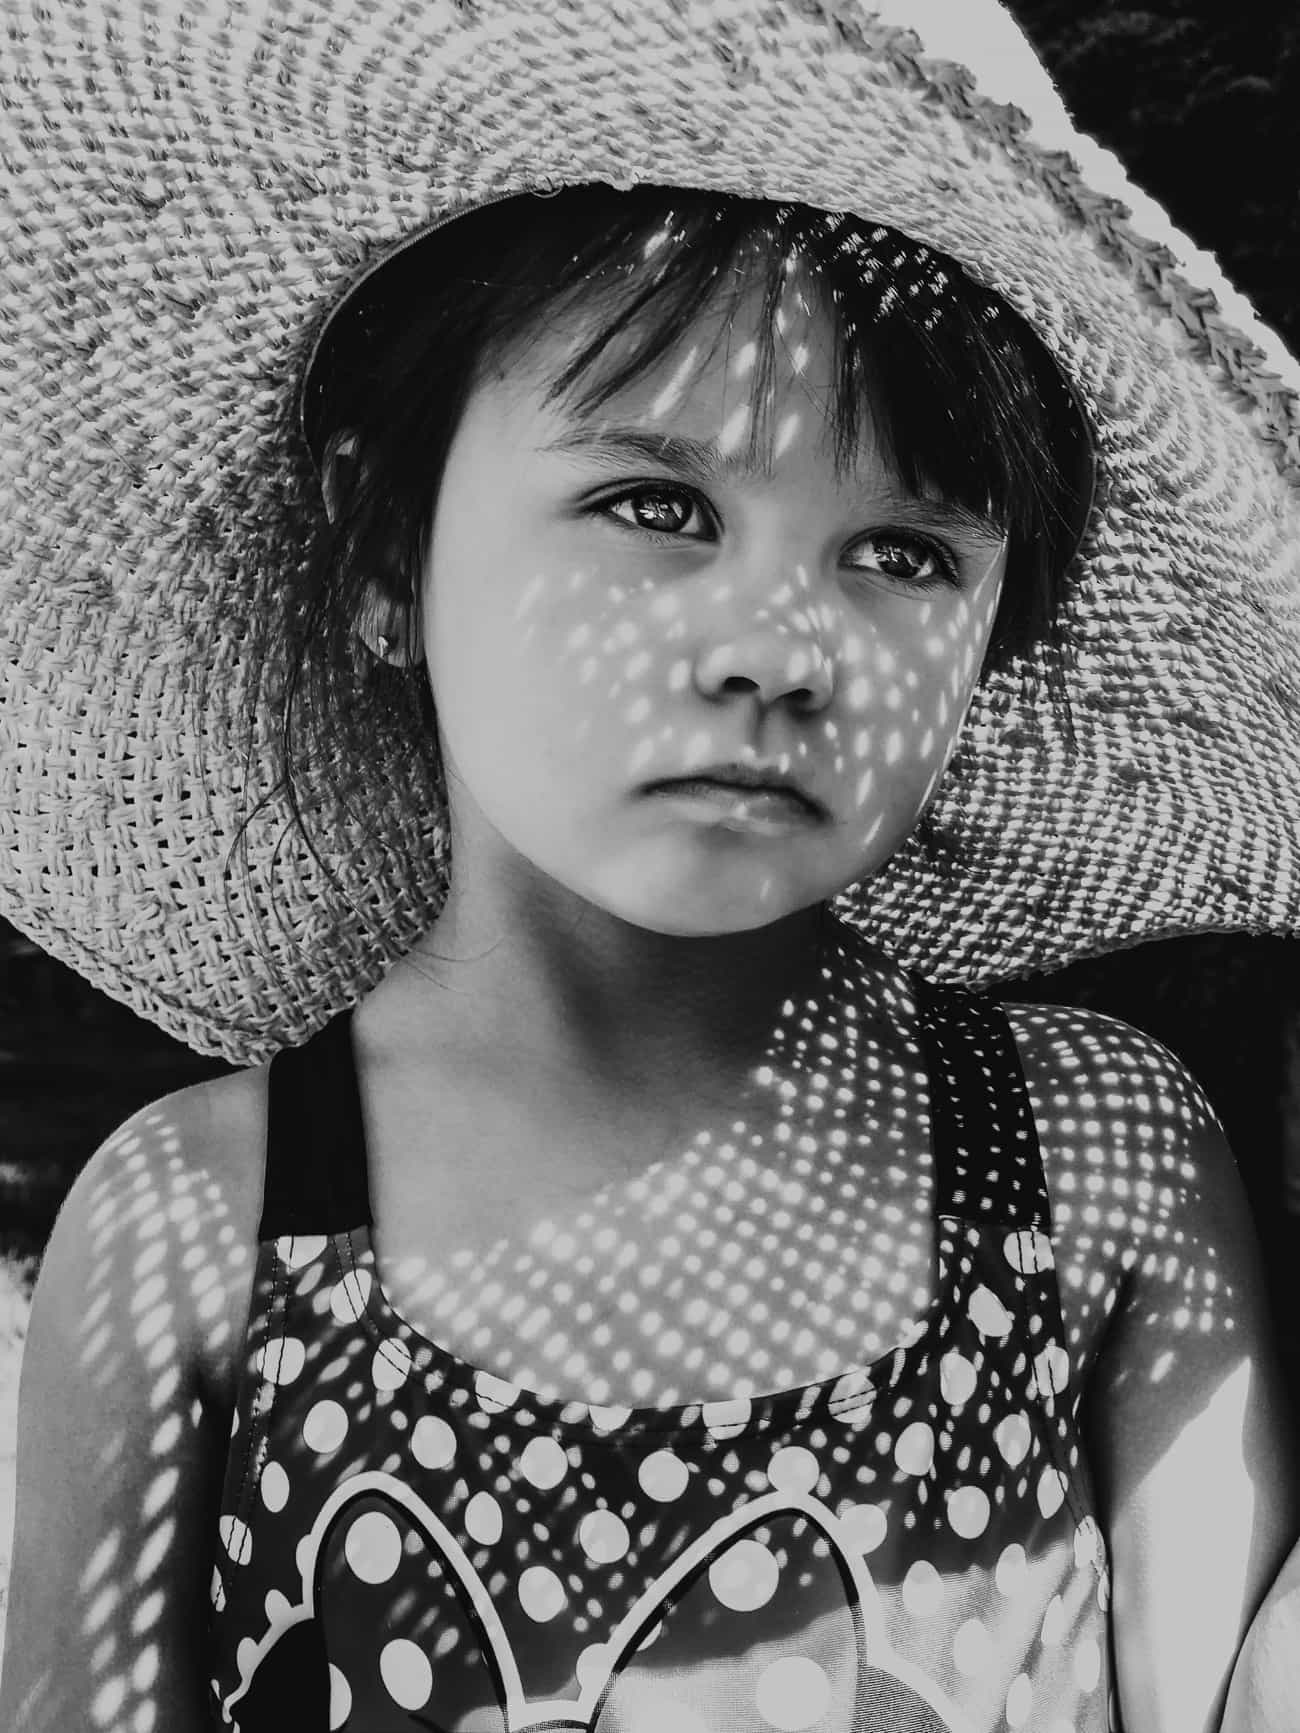
I’ll even create light patterns intentionally, one of my very favorite Summer shots is through a sunhat. The trick here is to turn my daughter enough that the light illuminates her face, but still streams through the hat to create the light dots, and then underexpose enough to keep the details in the light spots on her face. This is tricky, and takes some practice. If all else fails, shoot a few, at different exposure levels, and see which one keeps the most details.
Backgrounds and Lines
There are lines everywhere. When you’re shooting, try and notice: walls, houses, fences, horizons, ceilings, etc. Pay attention to them and keep them straight within your frame. Photos that are crooked can be very distracting to the eye and detract from your subject.
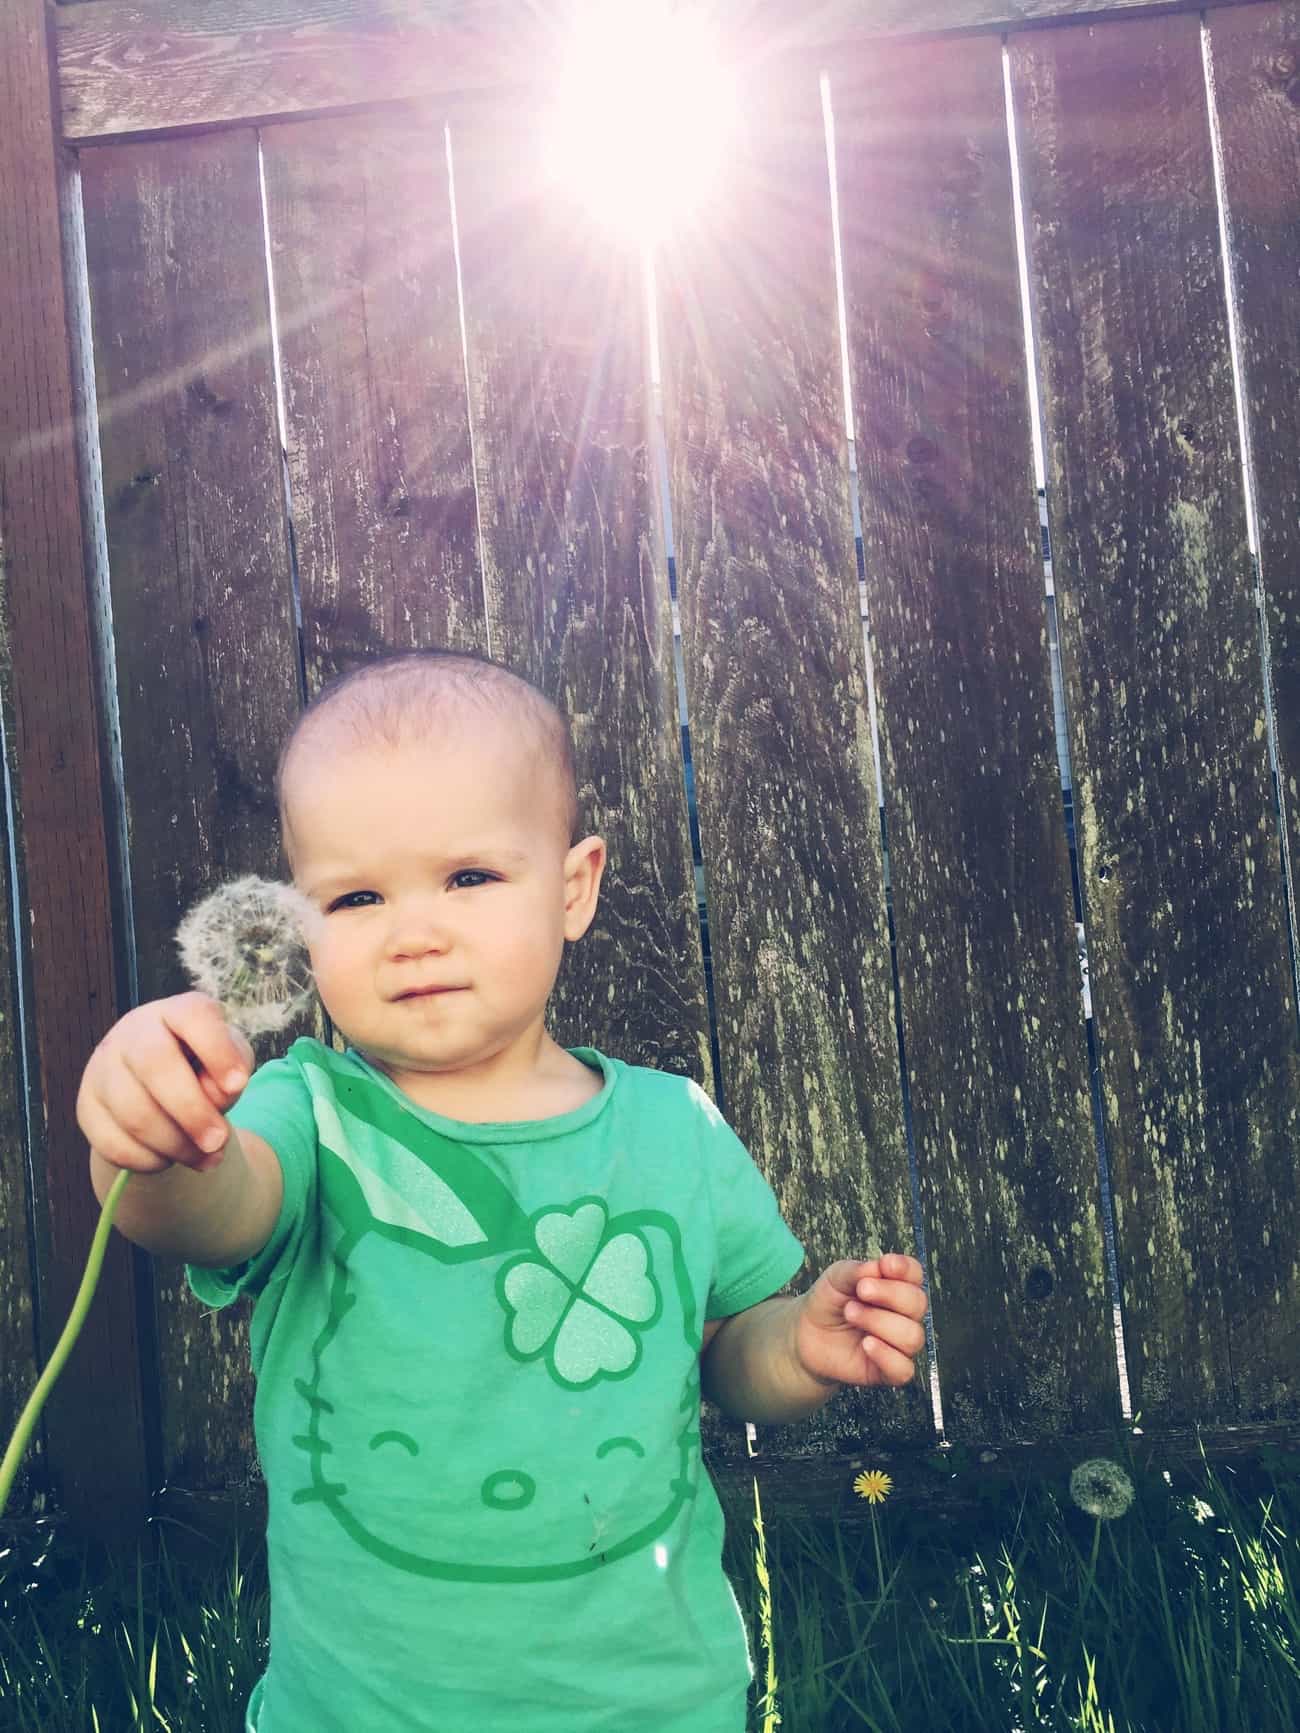
This image above is so cute, but the crooked lines in the fence behind my daughter are very distracting and make the image look less polished.
I can straighten it out, but in doing so, I lose some of the photo around the edges. If I had been paying more attention to my lines and to the entire frame, I wouldn’t have lost part of the photo.
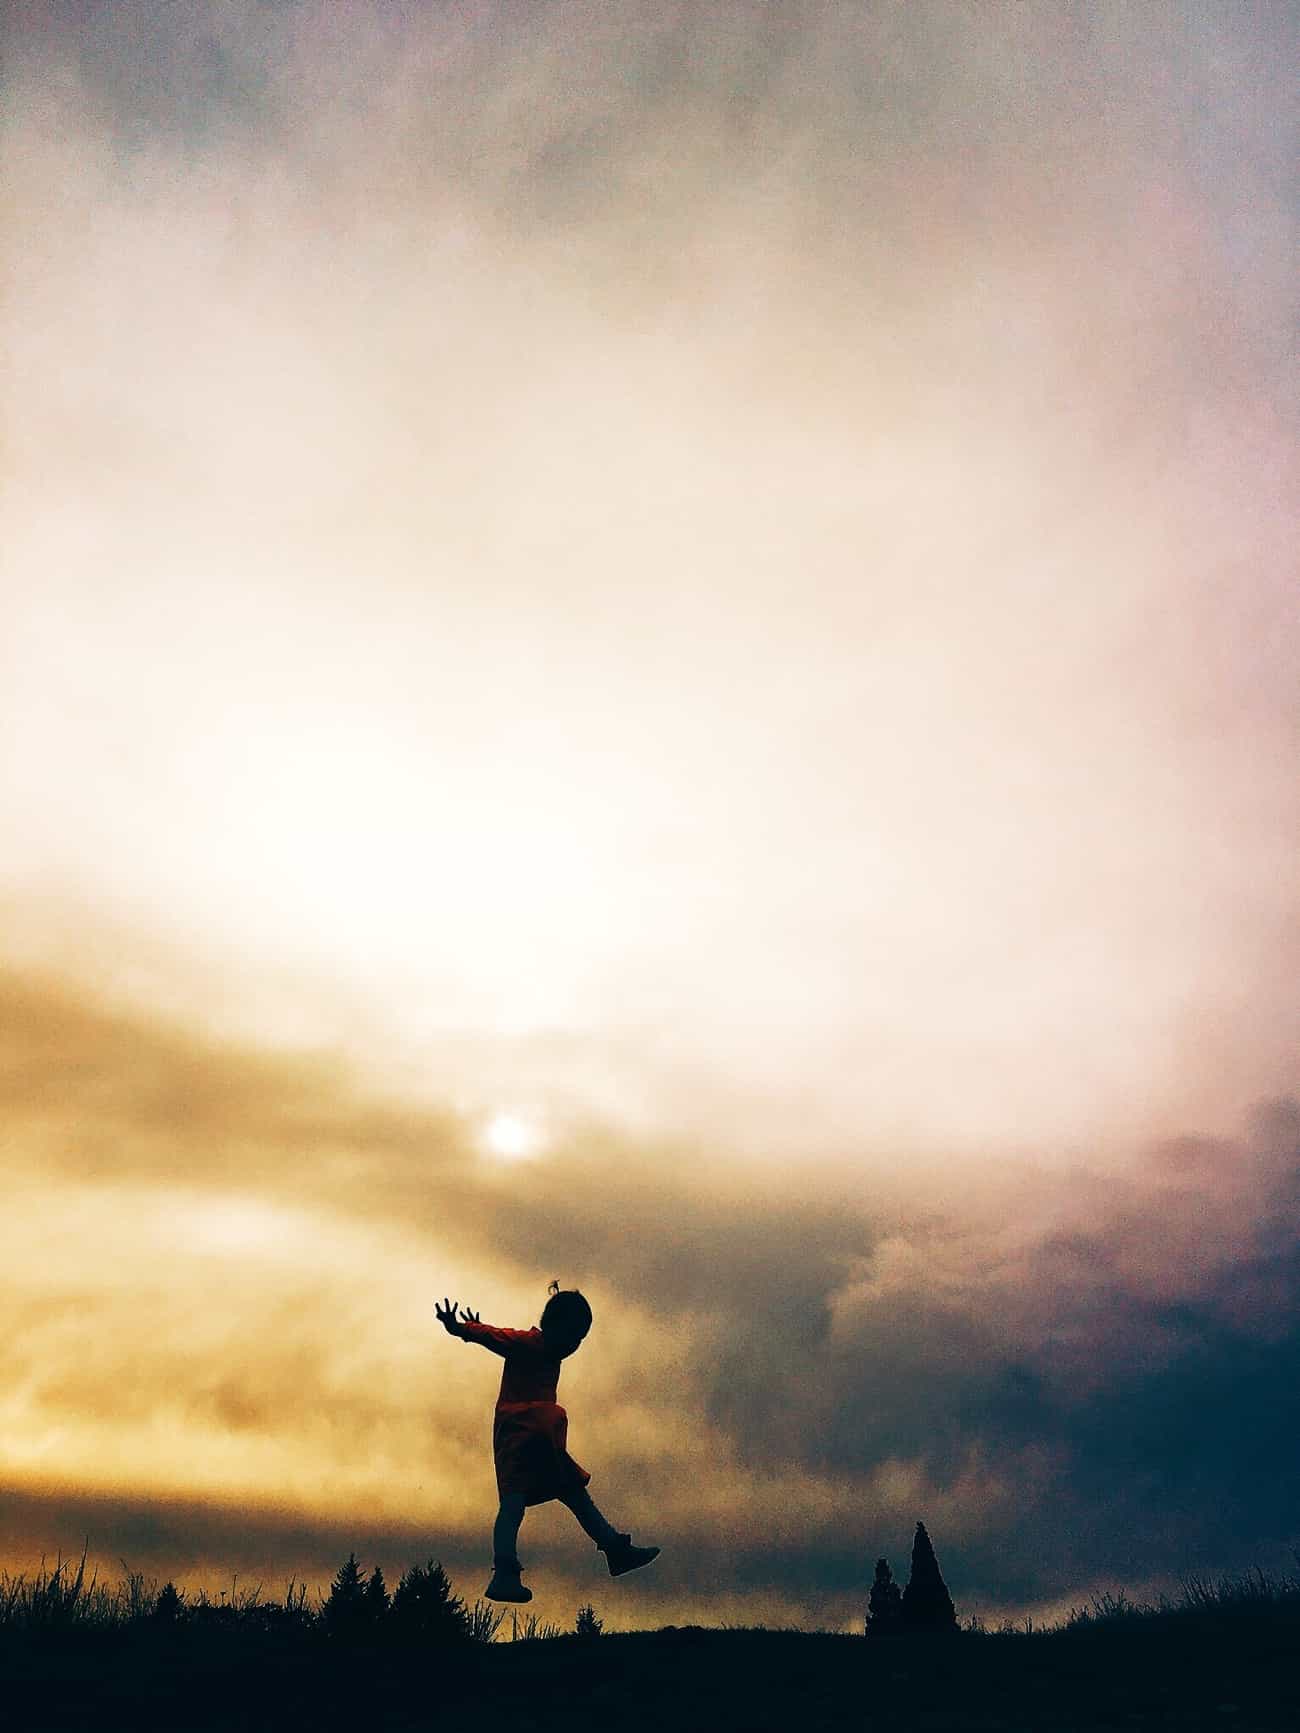
In addition to adjusting the angle of your lens to try and keep lines straight, you can also use it to enhance your shot. When I took the below photo of my daughter against a horizon line, I moved my body down to the ground and tipped my camera up, so the sky would be her background and she wouldn’t disappear into the ground. Doing this also helped me catch the air between her feet and the ground as she jumped.
I always try to decide how I can either remove background distractions, or incorporate them and use the details, depending on which way helps me tell the story, the best.
A good background is one that doesn’t steal the show but rather adds to the narrative of the photograph. Adjust your focus, angles, get closer in, get further out, low, high, or even get on the other side of your subject, to create the background you want, to help you tell the story of your photo.
My “Thing”
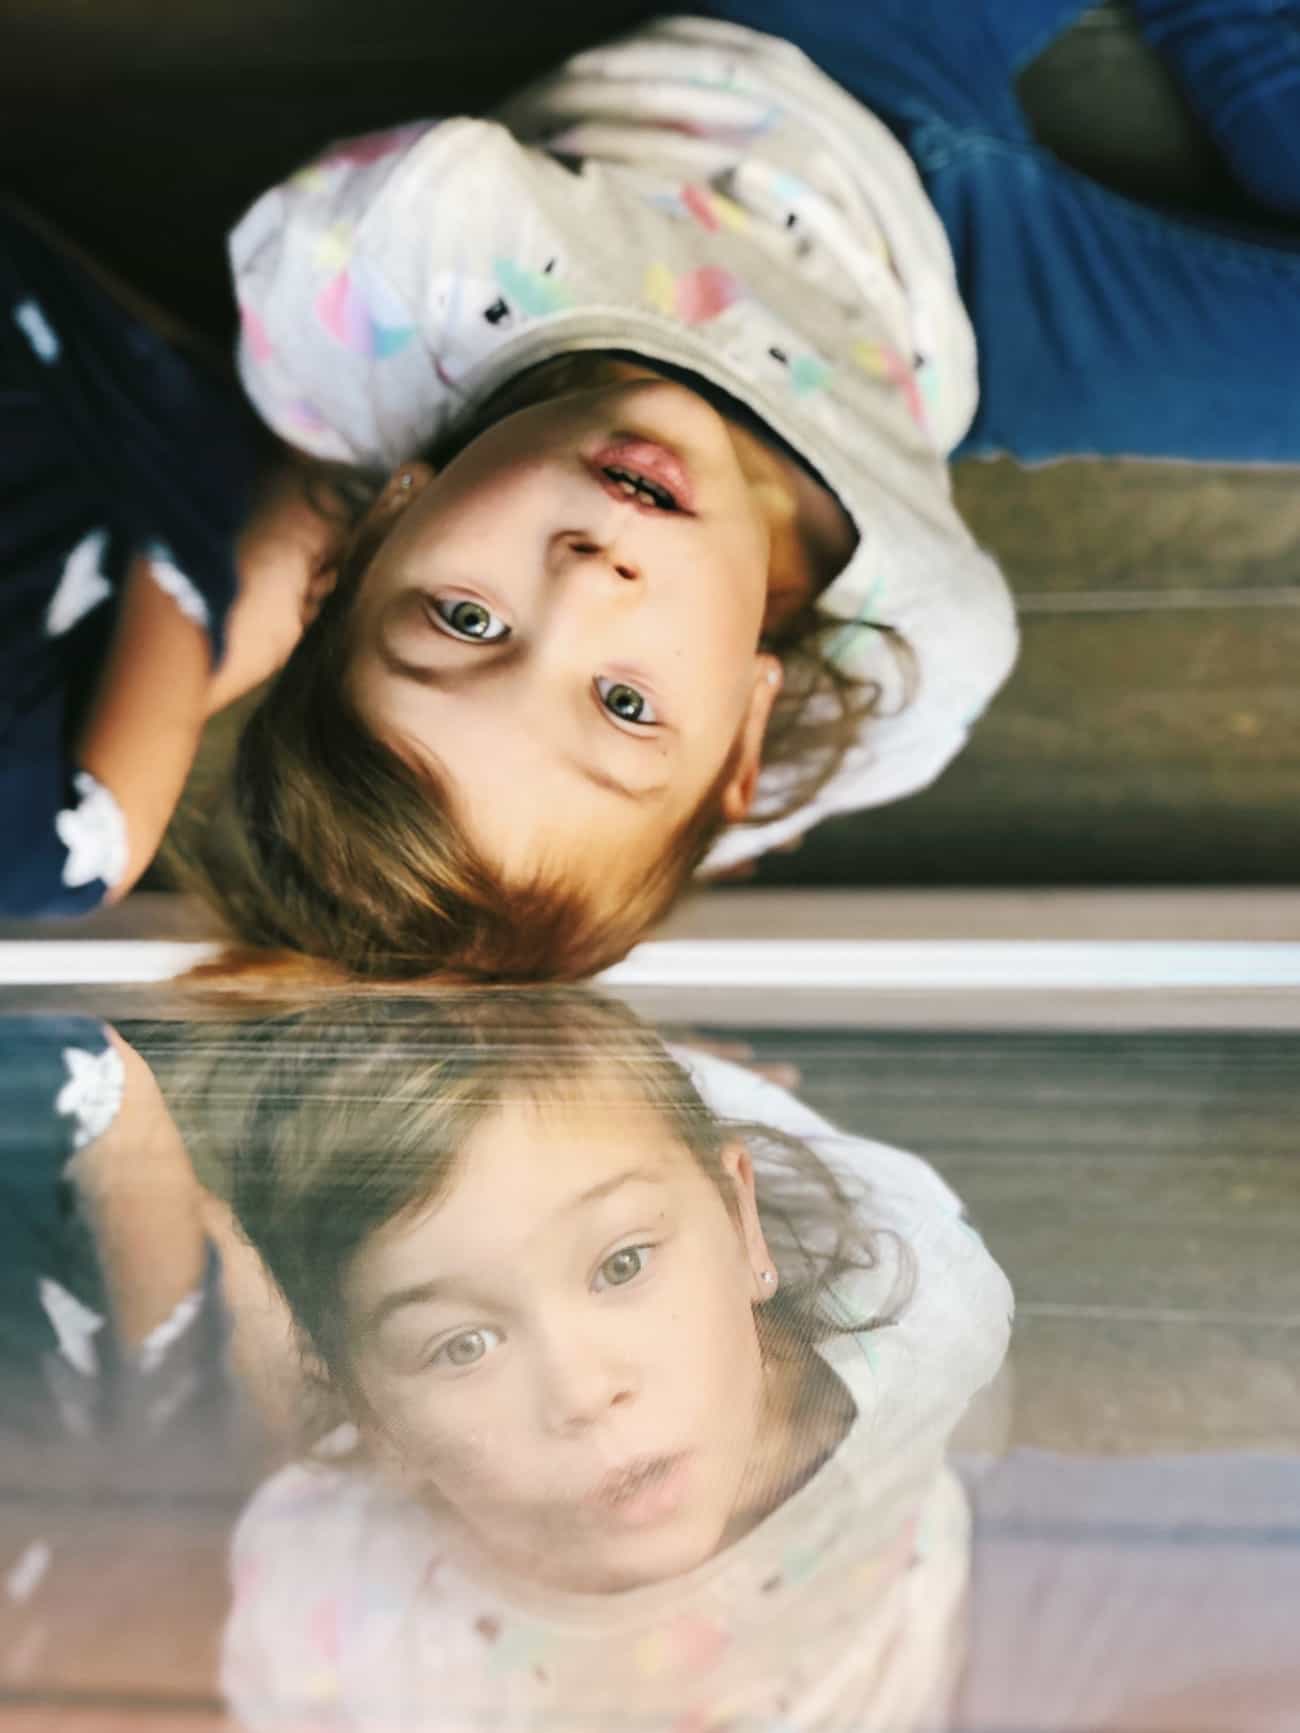
Another thing I am always looking for when I compose are reflections.
This is definitely not for everyone, but I can’t get enough. It’s my “thing,” and it’s a great tip to find your “thing” and shoot it until you find a new one. Doing this means you get a ton of practice, and won’t get bored because it’s interesting to you. (My thing used to be lens flare, and I shot it like crazy, and it helped me understand light a ton.)
The concept of capturing a perfect reflection makes me excited and I will shoot reflections all day long if I can. I will look at windows, the wet sand at the ocean, mirrors, puddles, anything that will give me a double view. To achieve these, I’ve had to get some pretty crazy angles. For shots at the beach, I crouch down and hold my phone so low it’s almost touching the wet, reflective sand. For the above window reflection, I stood on a chair, over my daughter, and held the phone directly above her, not at an angle, with the camera lens close to the glass. Reflections add amazing visual interest to a photo.
Get Our Best Photography Tips & Workflows
Transform your photos and edits from average to awesome with our in-depth, mobile photography course. It’s jam-packed with training, ideas, and lessons that can literally transform your photography overnight.