How to back up your Photos Library to S3 using Hazel
In 2017, there are a multitude of ways to back up your photos, but it can feel a little like walking down the toothpaste aisle at the grocery store — there are too many options. For most folks, using iCloud or Google Photos is all you need. But for some people, the idea of trusting big corporations to protect their most precious memories is a stretch.
I’m somewhere in the middle. I made the move to using Apple’s Photos app and iCloud as my primary backup in 2016, but I’ve also backed up my images on my own as well. Those backups were in the form of clones of my hard drive using SuperDuper and manual backups to my Amazon S3 account.
But in 2017, I rarely make copies of my MacBook. Why? Because almost all my content is already stored in one cloud service or another. Switching machines is quick (mostly) and painless these days, so making full clones feels unnecessary. And so for the last 12–18 months, my backup process has been mirroring the masters folder within the Photos app with S3.
And that is something I would love to automate.
Hazel
Thankfully, this is another scenario where we’re blessed as Mac users. Small companies like Panic make some of the best software available and they’re 100% focused on software for Apple devices. In this scenario, Transmit is the key piece of my set up.
First, I have Hazel set to watch the masters folder in Photos.
Tip: in order to use this folder, you cannot choose it from the macOS system open dialog that Hazel uses. The Photos Library will be grayed out (shown below).
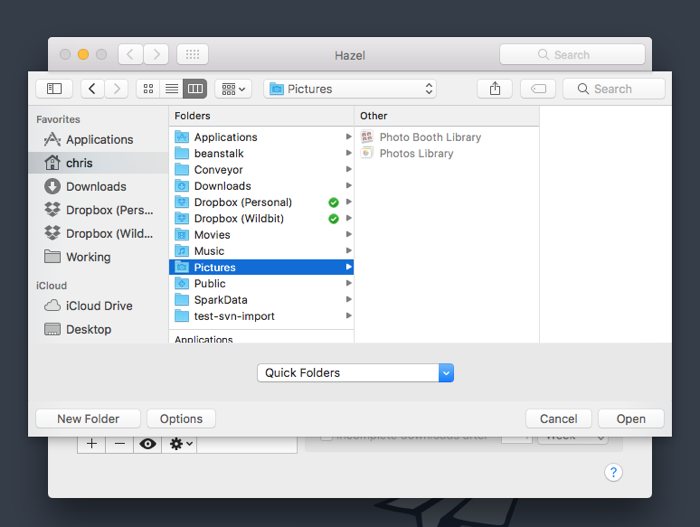
However, if you view your Photos Library in Finder, right-click the library icon, choose Show Package Contents, and then you can view the masters folder. Now you can drag that folder into the Hazel Preference Pane and it’s available for monitoring.
For this Hazel scenario, we need two rules in place. The first copies any new images that are added to your Photos Library. All I do with mine is take any file created in the last day and copy that. Now, where do you copy the file to? Hazel has an upload option that may work nicely if you want to back up your photos to your own server, but the option does not allow you to connect to an S3 account. This is where Transmit comes in.
Transmit
This powerful little app allows you to select a location on a server or any of the services it can connect to, then make a mountable drive that points to it.
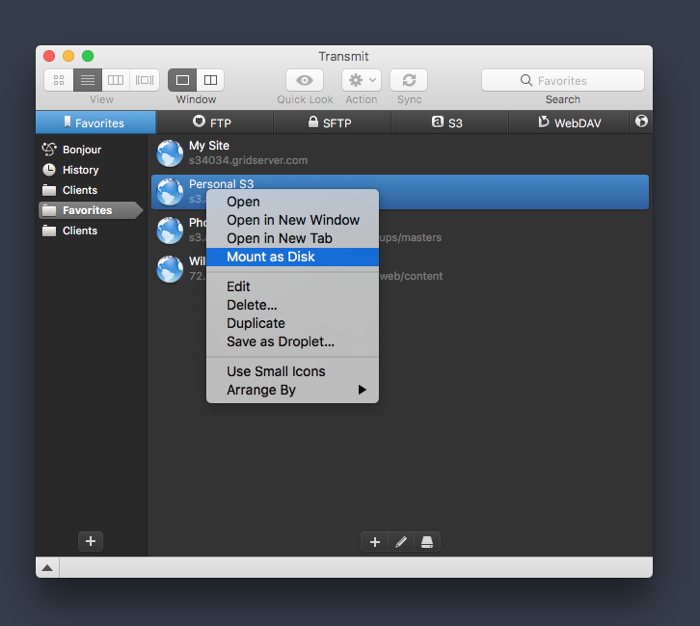
So, I created a Favorite in Transmit that points to the location where I want the new images to be copied on my S3 account. The path is simply an aptly named bucket (cb-photo-backups) with a folder structure that mimics what Photos uses. From there, you can right-click the Favorite and use the Mount as Disk option to make this location available in macOS.
I’m using the latest version of Transmit 4 here, but Panic released Transmit 5 this summer. It has a number of great services it connects to right out of the box (S3, Box, Backblaze, Amazon Drive, and more). We covered this app in more depth, but the key feature here is the ability to access these remote services as if they are another folder on the local file system.
The only issue with this setup is that the mounted drive is gone when you restart your computer. As I did not want to have to remember to mount this folder every time I reboot, I looked for options to automate this. Thankfully, the Panic team have a short AppleScript for doing so. All it takes are a few tweaks to the sample, saving it as an application, then you add it to your Login items.
Now the required folder is available whenever I’m using my MacBook.
Back to Hazel
The last piece of this puzzle is back in Hazel. In my rule where I tell Hazel to copy new files to this mounted disk, there are a couple options that Hazel makes available. These are located under the Options drop-down menu (shown here).
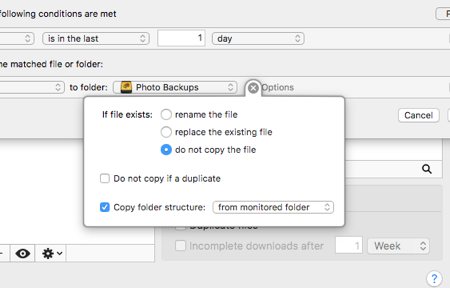
I tell Hazel not to copy a file if it already exists in the remote location. More importantly, Hazel will mirror the folder structure from the monitored folder. This is an excellent subtlety to Hazel. If you’ve ever looked in the Photos Library contents, you’ll know that the masters folder isn’t simply a massive folder full of all your images. Rather, it’s a structure of folders and files, and the folders are ordered by date.
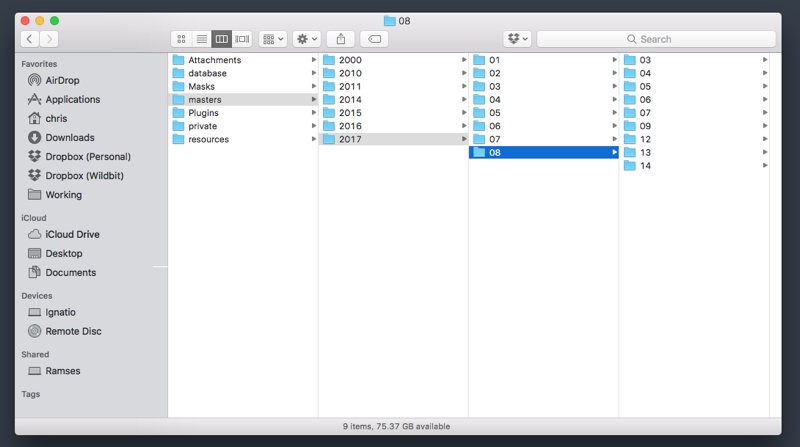
This entire workflow would be a lot messier if it took all the end image files and dumped them into one folder on the remote service, but this little options ensures that the same date-based structure is replicated on the backup location. Nice and orderly!
There is one last piece to this setup, and Hazel will never make any updates without it. When you create the first rule to back up any new files in the masters folder, Hazel only watches the masters folder — not all the folders beneath it. Since Photos uses this date-based folder structure, Hazel would never see the new files being added 4 folders deep.
To address this, you must create another rule that tells Hazel that the subfolders also apply. It looks like this:
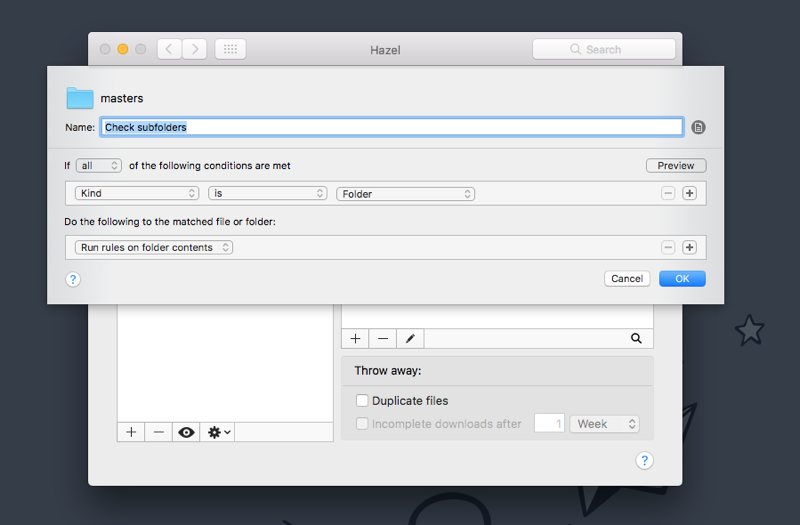
Now Hazel will take the rules you’ve specified and run them on the contents of all subfolders of the primary monitored folders. And that’s it!
This entire workflow is very smooth and fairly simple overall. This best part is peace of mind. I can be out with my family, taking photos of my kids with my phone, then watch those images be copied to S3 when I get to work the next day. No more recurring task to copy images once a month!
You can set Hazel to watch for any period of time that makes sense to you and it will ensure you have a duplicate set of master images on the location of your choice. I like this to run daily, as your Mac has to be on and logged in.
We have more useful workflow examples right here.
Wait. There’s a Bonus….
Custom Productivity Templates
We have a set of custom productivity templates that work well with the iPad app, GoodNotes. And if you want to try them out, we’ve put together a free guide that can help you.
We’ll show you…
- How to create and save custom page templates in GoodNotes.
- How to use those page templates to transform GoodNotes into your own productivity notebook (or any other type of notebook replacement).
Plus, we also have included a couple of our custom productivity templates for you to get started with. These templates are right out of our popular productivity course.
The custom templates and the guide are available for FREE to our email subscriber community. And you can get it right now. By joining the Sweet Setup community you’ll also get access to our other guides, early previews to big new reviews and workflow articles we are working on, weekly roundups of our best content, and more.