Automating Drafts to Create Custom Documents in Seconds

You can technically write an entire novel inside of Apple Notes or compose your blog posts in Notepad on your Windows computer. The basic concept of letting users type text into an app is not special, and yet writing apps are one of those things that everyone is very particular about. It’s all about the little things, and what feels right for each person.
Drafts is one of those apps that people see and want to use. It is so powerful and the productive people you follow online always seem to be using it, so it must be great, right? Drafts is great, but it is also a bit intimidating to people the first time they open it. It’s a blank canvas, which means you can turn it into whatever you want. However, you may need some help getting it there.
Today we’re going to look at how I’ve set up Drafts to be where all my writing happens for YouTube videos. This involves a document with specific formatting, tags to sort things in my Drafts library, and a few more small details. I’ve been able to make this work well for me, and even if you’re not working on YouTube, you could also use this process to make Drafts a nice writing app for publishing to Micro.blog, Ulysses, Day One, and more.
Setting Up Drafts for Writing
Drafts is solid right out of the box — if a little plain — so first off we need to do two things to make it a better writing app.
First, let’s install the Markdown action group from the Drafts Directory. This will make some of the most common keyboard shortcuts like CMD+B (bold) and CMD+I (italic) work as you’d expect in the app. Drafts saves everything as plain text while you’re using the app, but it can export fully-styled text, and these Markdown actions will make sure you get all the formatting options you need when exporting your drafts.
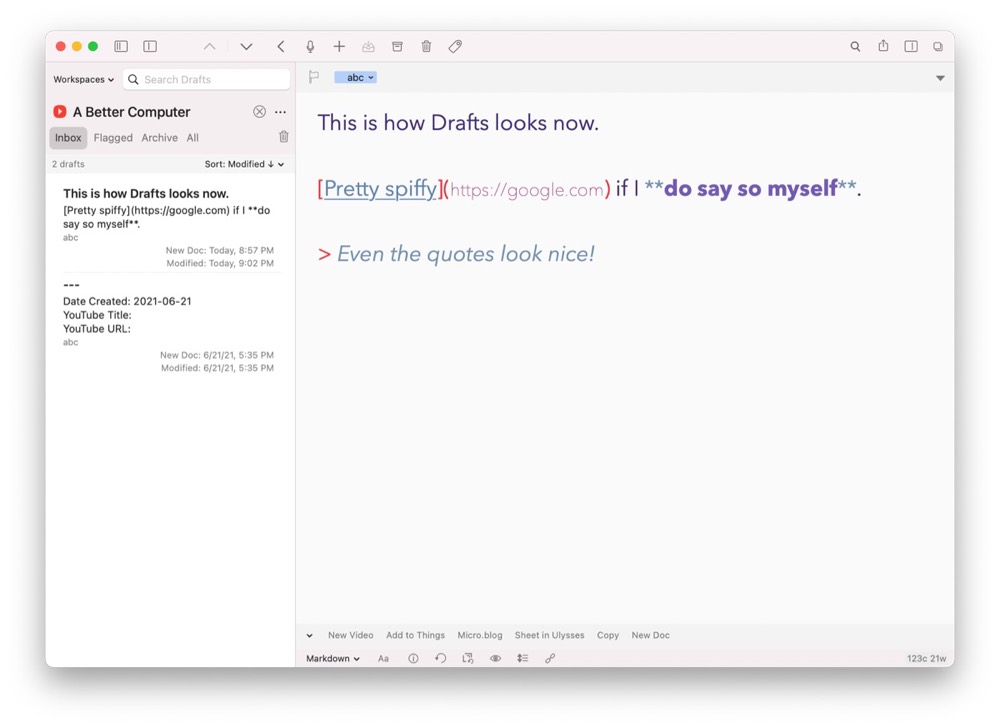
Next, we need to make Drafts look a little more to our taste. Head back to the Drafts Directory to look at some of the themes you can download to make Drafts look how you want. This is a rabbit hole all on its own, as you can also create your own themes for Drafts, but the Drafts Directory has a bunch of nice themes you can use. Just choose one, tap install, and it will load it into Drafts on your device. Drafts will even sync these themes over iCloud, so you can have them on your iPhone, iPad, and Mac.
Creating Your Document Template with Drafts Actions
Creating a template is easy in Drafts, you just have to know what you want. I’m going to show you how I set up a template for my YouTube videos. These include research notes, a script, what I am going to have in the video description, and some general metadata around dates, URLs, and video titles.
It is worth noting here that creating your own actions requires a Drafts Pro subscription, which is $29.99/year or $2.99/month.
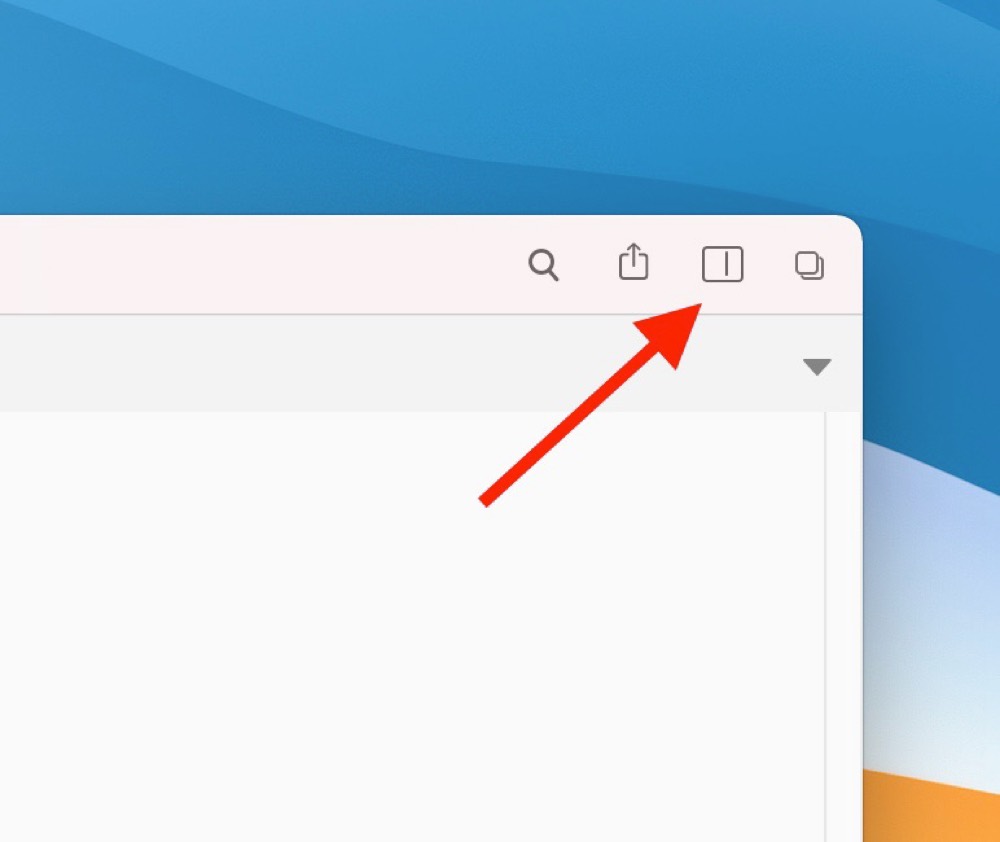
The first thing you need to do is to pull up your “actions” panel on the right side of the screen. The easiest way to do this is to swipe to the left on your iPhone or iPad, or by clicking this button in the top right of the Mac app.
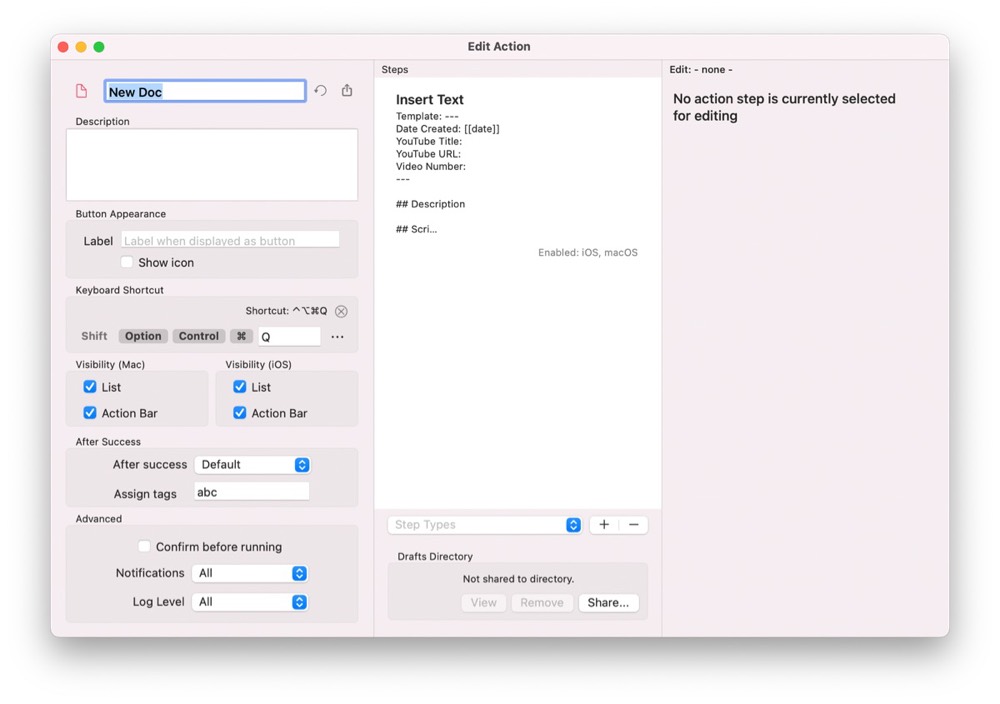
Now tap the “plus” icon to create a new action (or right click in the list and select Insert Action on the Mac), and now we’re off to the races with tons of possibilities in front of us. I’ll leave most of the fiddly settings to you, but there are a few things you likely want to configure.
- Give the action a name.
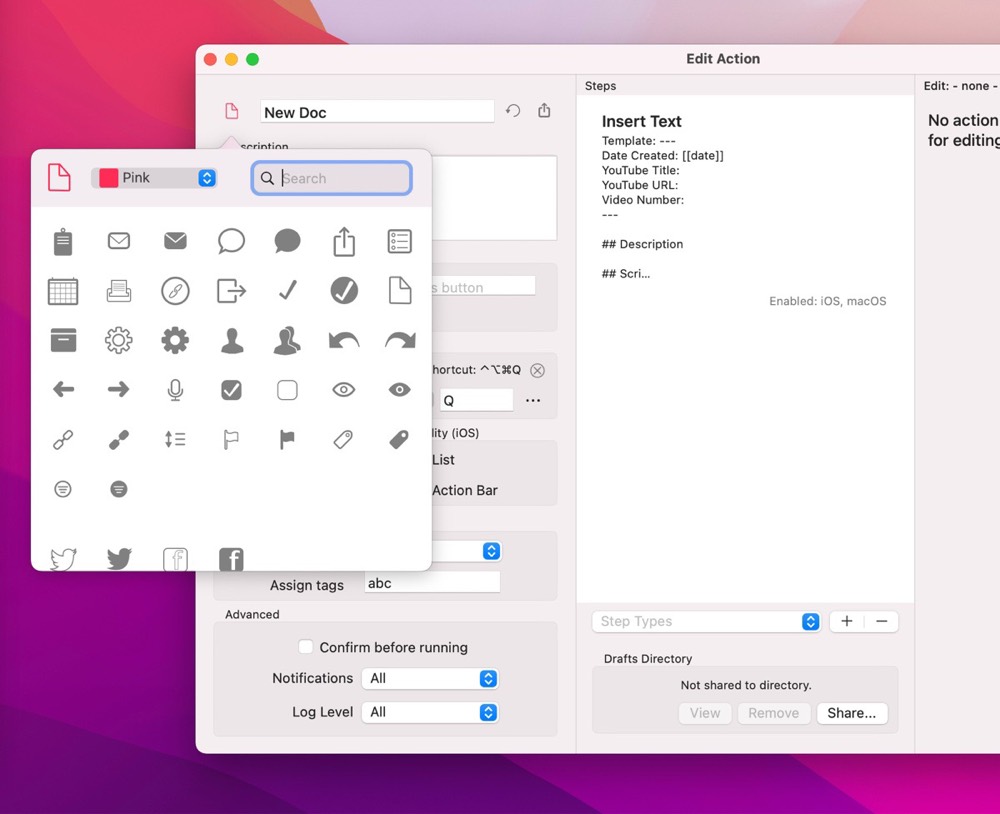
- Tap the icon next to the name to change the icon for that action. Make it something fun, but recognizable at a glance.
- Change the color of the icon (again, for fun and distinctivness).
- Scroll down to the “after success” section and add a tag to assign to the draft when you run this action. I like this since it can help me filter down to seeing only these documents in Drafts.
- Enable a keyboard shortcut to activate this action quickly from an iPad or Mac (I like
Cmd+Opt+Ctrland a letter to do this, but Drafts lets you set up basically anything you want.
Now let’s actually tell this action what to do, so let’s go to the top of the action configuration page and go into steps. Hit the “plus” icon to add a step, and while there are tons of options here, we’re just going to use one of them, Insert Text.
The Insert Text action is pretty simple, and all you need to do is type out the template you want. I use a couple headings to separate out the title of the video, the description, my research notes, and my script. It’s pretty darn simple, but it gets me to a good starting point where I can start filling in the specifics for this project. If you want to dive deeper into Drafts, you can do things with JavaScript that create dynamic content for actions (for example, you can enter a timestamp in the document if you want to see when you created it), but we don’t have time to get into all of the details here. If you’d like to learn more, the official Drafts documentation can help.
While I can’t tell you exactly how to format your action, I will say that if you plan on exporting to another app once you’re done, then it’s generally good practice to do something like this:
# Document Title Here

Post content goes here.
Most actions have been created to look for a heading in the first line that is used as the post title (like when posting to a blogging platform), and then everything under that is the content of the document (the blog post itself, for example). Some actions allow for more customization, such as including tags or something like that, so make sure to read the documentation on any action you use to export your drafts when creating your own actions.
Exporting Your Documents
My use case doesn’t really require me to export my document when I’m done with it, but you may, and the Drafts Directory is here to help with a bunch of export options to export to basically anywhere you want. A few choice options people have already been kind enough to make and share with the world include:
- Share to Evernote (Markdown will be converted to rich text in Evernote)
- Post to your WordPress blog (again, Markdown will convert to HTML)
- Post to Micro.blog (very similar, but lets you post to this indie darling service)
- Create a new sheet in Ulysses
- Create a new note in Bear
- Create a new entry in Day One
All of these actions work great, but again, make sure the document template you created above works with what the sharing action you’re using expects. When they’re lined up, it makes Drafts feel like a really clean, fast place to create content that shares seamlessly with whatever other apps you’re using.
Wrapping Up

Drafts is a powerful text editor, and while it has potentially infinite possibilities, there’s no requirement that you use all of that power. By setting up a simple template that I can use to take notes and record basic information about the things I’m working on, Drafts has added some consistency and simplicity to my workflow. There’s potential to get more complicated down the road, but that’s better to build up to rather than starting there.
Drafts is available for free on the App Store (with optional pro subscription), and runs on the iPhone, iPad, and Mac.