A Few of Our Favorite Keyboards
When drafting the idea for this guide, the initial title was The best keyboard for your Mac.
It’s easy to see how that would be a terrible, terrible headline. I could see the opinionated emails hitting my inbox before I finished the title.
So instead, it seemed easiest to poll the entire Sweet Setup team to find which keyboards we all use and love on a daily basis. Each and every one of us uses a keyboard for a large portion of our daily work, and with the number of key actuations taking place, it’s no wonder each of us has our own special keyboard (or several).
From iPad keyboards to Microsoft keyboards bending to fit a Mac to mechanical keyboards with nothing more than the necessary QWERTY keys, you’re bound to find a great writing/mathematical/development/email-specializing keyboard in this bunch.
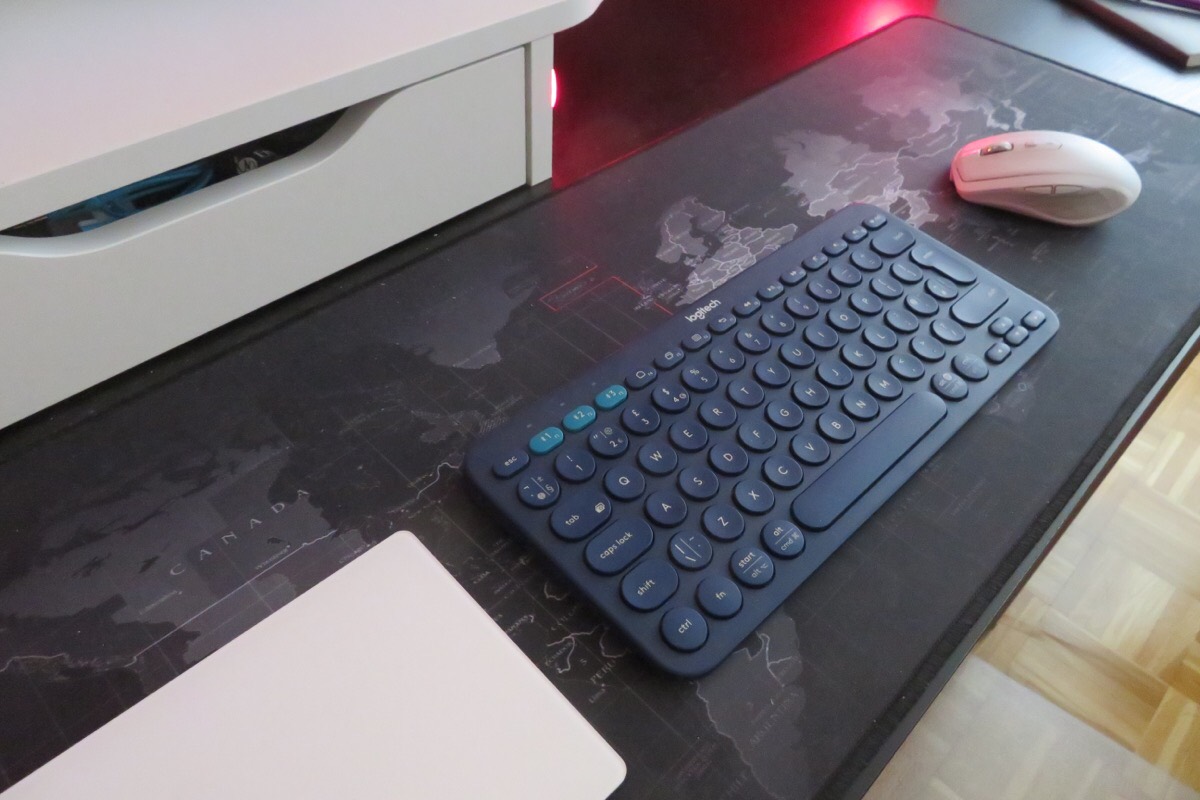
Logitech K380 (Rose)
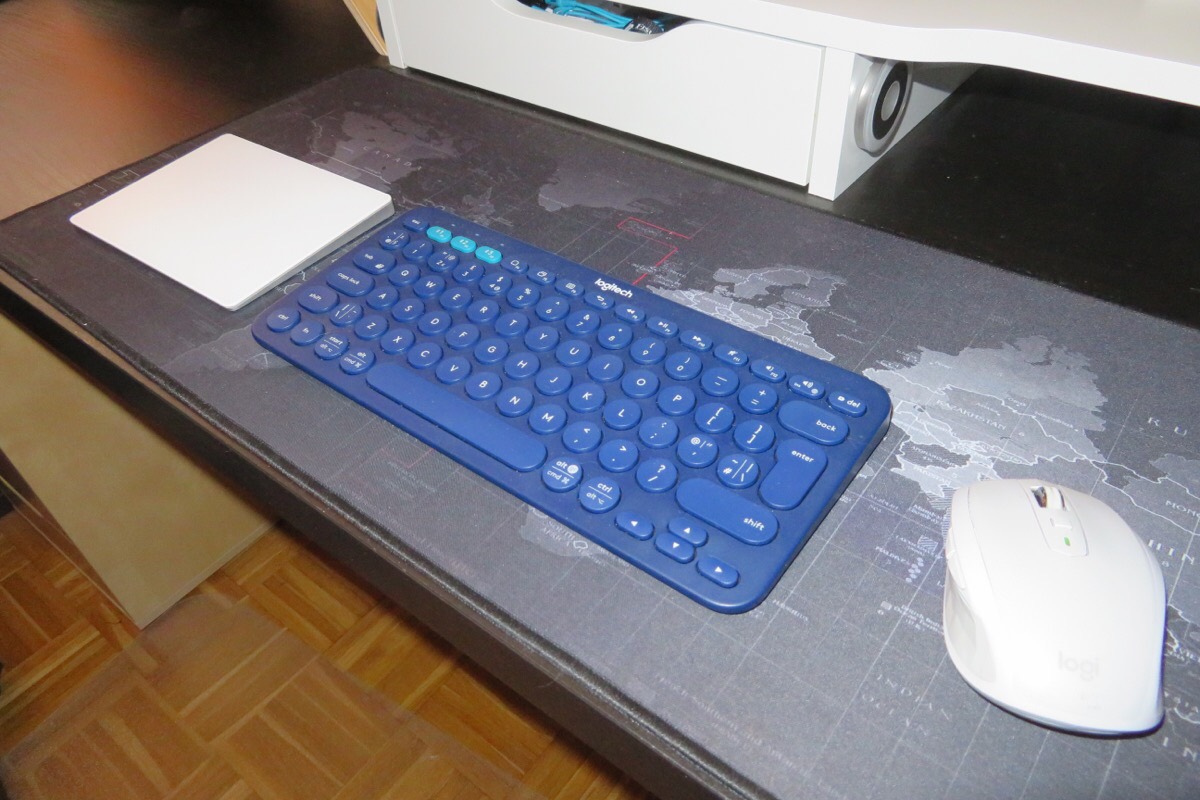
The Logitech K380 always struck me as an odd looking keyboard — nice enough, but odd. This is because of the key shape! Every key is round and day to day what we see is square or rectangular keys. Size-wise, the K380 is very similar to the Magic Keyboard (without the number pad), but despite being plastic it feels like a very sturdy alternative. It also comes in dark gray or blue, which is a change from the standard silver and white we often see in front of a Mac!
This keyboard has what feels to me like good key travel — short enough that it doesn’t feel like your fingers are falling into a ravine, but deep enough that I’m not worried about breaking a nail or mashing my finger tips. Speaking of breaking nails — I’ve noticed my manicures do last longer when I use this keyboard as my primary keyboard, which might be a factor of interest for some!
This keyboard can be paired with three Bluetooth devices which uses the F1-3 keys. These keys are also a brighter color than the other keys on the keyboard to set them apart, though there are no braille dots to help users identify these buttons. The F4-7 buttons can be programmed on Mac or Windows using the Logitech Options software and by default they’re set to Launchpad, Mission Control, Menu and the back button. On iOS they do work differently though with F4 and F7 being Home, and F6 showing or hiding the virtual keyboard. The remainder of the F buttons are media keys and volume control as well as a delete key — one not often found on keyboards used with Macs but a welcome addition.
As well as letting you change the functions executed by the functions keys, the Logitech Options software can also enable Logitech Flow if you have a compatible mouse. This allows you to control multiple computers at the same time just by moving your mouse from screen to screen and your keyboard follows it. This is definitely a niche requirement, but when you have a chance to use it, the usefulness immediately becomes apparent.
This keyboard is powered by two AAA batteries which are included and has a physical on/off toggle on the side. This makes it a great device to take with you on the road, and the keycaps haven’t popped off of mine despite it being yanked in and out of bags! For testing purposes (ahem), I even spilled apple juice on it and, after a few days to loosen back up, it worked fine (though I wouldn’t recommend this, of course).
I upgraded to this keyboard from an Apple Magic keyboard as I wanted something with multi-device support that I could take on the road with me as needed. I’m very pleased to say it does a wonderful job and is nice to type on. The additional features from the Logitech Options software are the icing on the cake!
CODE Keyboard (Mike)

I’ve used several mechanical keyboards over the years, including a couple different DAS keyboards, but I was never fully satisfied with the look and feel of them. Eventually, I bit the bullet and spent the extra coin on the keyboard I had really wanted all along: the CODE keyboard with Cherry MX Clear switches.
The thing I love most about this keyboard is how heavy it is. It feels substantially more sturdy than either of the DAS keyboards I had previously, and it is extremely comfortable to type on. The keyboard has a clean, simple design that I absolutely love. I also really like the backlighting (which IMHO looks amazing) and the ability to get keycaps that match the Mac keyboard layout. You can even configure or “program” the keyboard using a series of DIP switches on the back of the keyboard itself — no software required.
It’s not cheap, but I’ve tried a couple other mechanical keyboards that I “got a great deal on,” and they just never “clicked” for me. I love my CODE keyboard and plan to keep it for a very long time. The only thing I might change if I had to do it over is get the Cherry MX Brown switches, which feel a tiny bit better than the Clears. I highly recommend you check out the WASD key tester to identify which switches you like best before investing in any mechanical keyboard.
Belkin QODE Ultimate Pro Keyboard Case for iPad 2 (Chris)

I’ve been using the Belkin QODE Ultimate Pro keyboard case for my iPad Air 2 since October 2015. (I’ve got the emails to prove it.) That’s the same month my wife and I officially took our RV on the road full-time — which we’ve been doing ever since — and it happens to be the month I first decided I was going to grow my hair out.
That is to say, this keyboard has been with me on every adventure I’ve had across the US for over the past nearly four years. My iPad is also my primary device for work and such (I’m one of THOSE guys), so you can imagine how much use the thing gets.
I’m utterly at home typing on it, to the point that using any other keyboard feels weird. In fact, I actually don’t look forward to upgrading my iPad because Belkin never updated this case to work with newer models.
If you’re unfamiliar, the QODE Ultimate Pro is comprised of two pieces:
- The keyboard unit itself, which has a faux-leather flap up top with a magnetic strip running along it.
- A hardshell case that the iPad clips into, which sits on a separate magnetic strip on the keyboard while the flap attaches to the back of the case to prop it up. This works in landscape (my primary use) or portrait mode.
What that means is, the iPad can easily be taken away from the keyboard when you want to curl up in a chair and read/watch something, without having to remove the protective case. It also means you can rotate the device to vertical orientation and still use the keyboard with it! And what’s more, there are two magnetic strips on the keyboard, allowing you to adjust the viewing angle comfortably for different situations.
None of those things can be said for the Logitech Slim Folio, which is otherwise the best option for current-gen iPads. Moreover, the Slim Folio has no key backlighting — something I’ve made extensive use of with the QODE Ultimate Pro, which has three levels of brightness to toggle between.
To this day, my one quibble with the QODE is that the dedicated Siri key that sits between fn and alt/option is too easy to hit accidentally. Whenever I actually want to trigger Siri, I just hold the keyboard’s home button at the top left like I would with the iPad’s physical button. It’d be better if the fn key were simply bigger.
Other than that, I couldn’t be happier with the QODE as my writing workhorse. It’ll be a real shame whenever it’s time to upgrade my iPad, and believe me, I’ll be waiting as long as possible on that one.
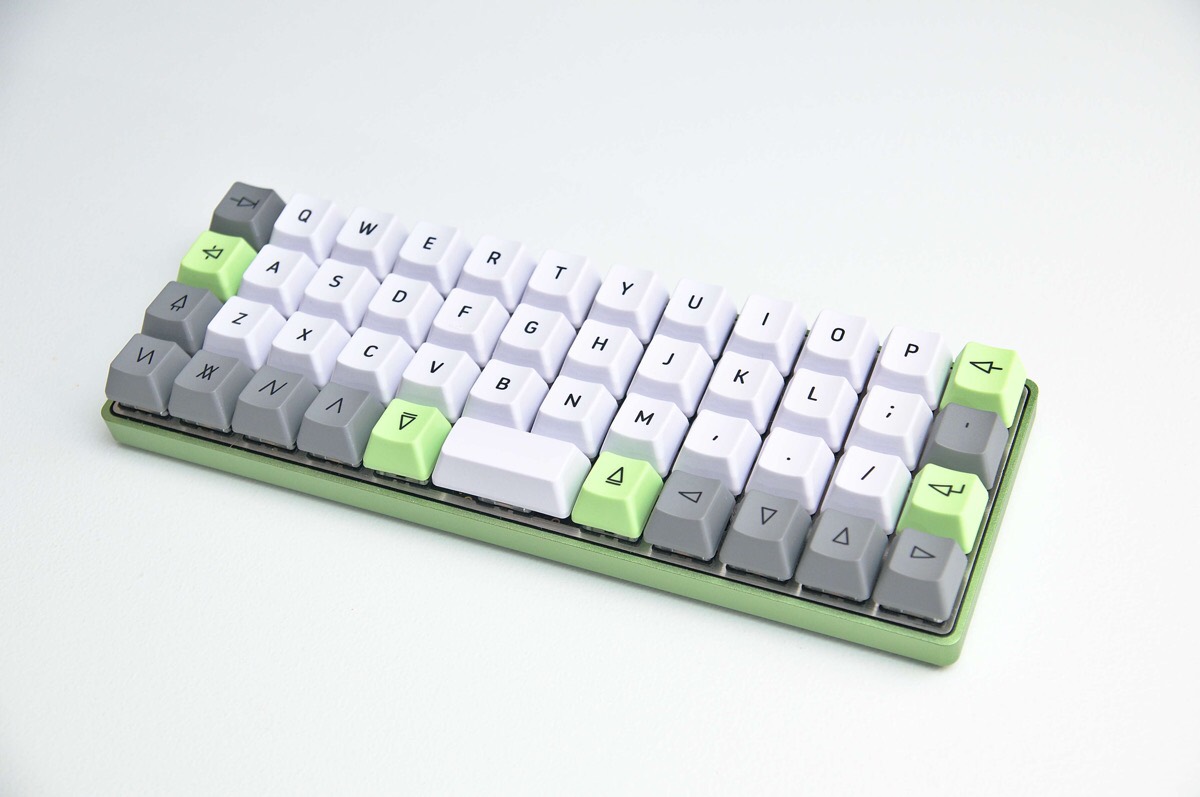
OLKB Planck (Jeff)
I have, what some may call, a problem when it comes to collecting keyboards. Instead of going through all my beloved boards, I’ve chosen the two that I use most often: the Planck from OLKB and the Ergo Pro from Matias.
The Planck is a compact 40% keyboard that came to me as a kit that I had to put together. If you’re interested in understanding how mechanical keyboards work, then there’s no better way than building one yourself. This board did not require any soldering due to the fancy PCB, so this also allows me to switch out the switches fairly easily without any soldering. I’m currently using Gateron Brown switches, and I’m not sure I’ll be replacing them any time soon. The keycaps that came as part of this Massdrop buy are a thick PBT plastic that are so satisfying to use.
The obvious challenge with this keyboard is the size. I’ll admit, I had quite a rough time retraining my fingers to use the various layers for symbols and numbers, but after a week of use I really don’t have any more problems. I’ve learned new muscle memory and can go back and forth between this and standard layouts easily. Now that I’m competent with the layout, I can also choose to modify all the keys on multiple layers since this board is 100% customizable.
Another unique feature of this keyboard is the ortholinear layout. The keys are all arranged in a square grid versus the staggered layout of standard keyboards. Again, this took some practice since they keys weren’t where my fingers expected them to be, but after a week-long adjustment, I can tell that my fingers are more comfortable using this ortholinear layout. Fingers just aren’t that great at moving side to side!
Matias Ergo Pro (Jeff)
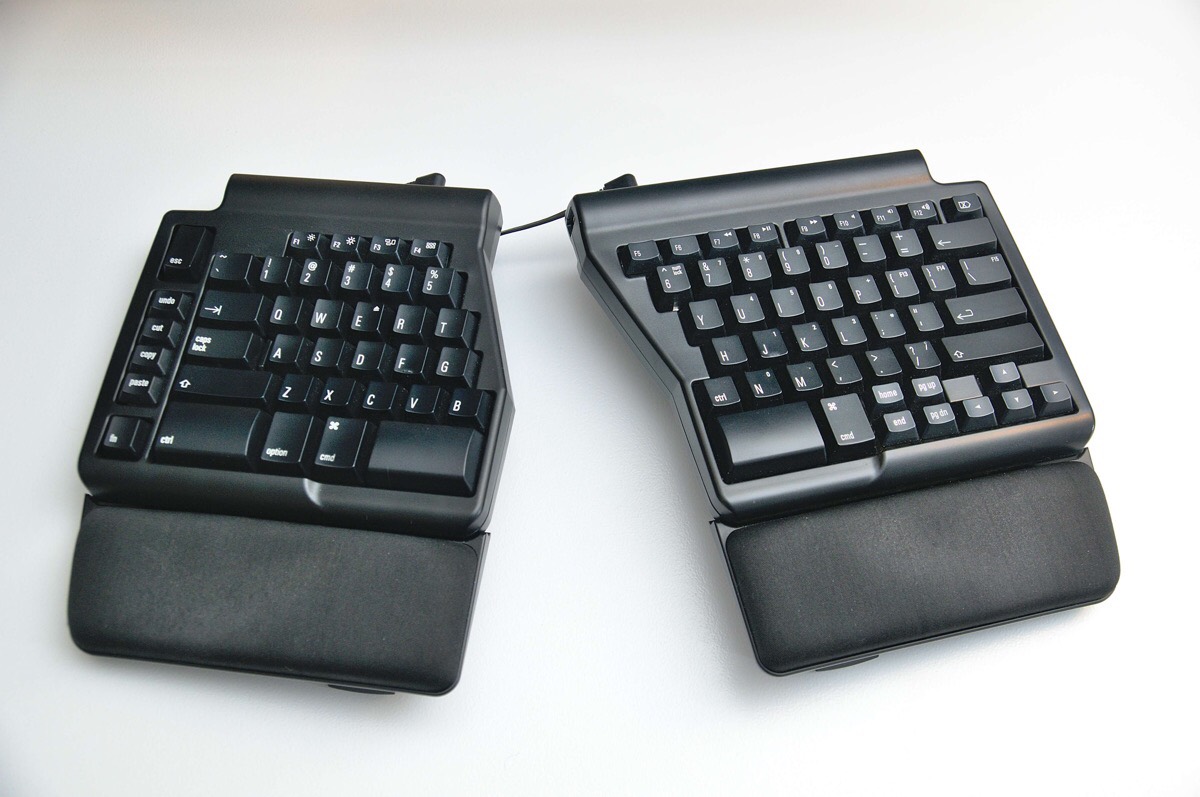
Moving on to another weird-looking keyboard, the Matias Ergo Pro has been more of a love-hate story. Before I mention the issues I’ve had, let’s go over the basics. The Ergo Pro is a split keyboard that features Matias’ own proprietary switches. The model I have is the Quiet Click variant, which means it’s a tactile switch with no audible click. In general, it’s very similar to a Gateron or Cherry MX Brown, but a tad lighter. I really enjoy this switch, and I can speak from about 4 years of full-time use. Each half of the keyboard has three retractable feet that allow you to elevate the wrist pad or configure the halves in a “tented” configuration, which is how I use mine 99% of the time. I find this position extremely comfortable, and the added gel wrist pads are a nice touch since the front of the keyboard is elevated in this position.
To connect the two halves together, there’s a 6-inch TRRS cable (3.5mm headphone/microphone jack) included with the keyboard along with a retractable 20-inch cable if you want to spread out further. One of my favorite features is the inclusion of three USB-A 2.0 ports on the right half. This is convenient for plugging in a USB mouse or any other low-speed peripheral that I want to use next to the keyboard.
As I alluded earlier, this keyboard has not been my favorite all the time. There are quality issues with the Matias switches, which lead to “chatter” when they start to fail. Key chatter means that when you press a key, it registers more than one press, resulting in repeating characters and unintentional typos! Not cool. Matias have been great through this process by simply sending me a replacement keyboard half to replace the faulty half. Within my 12-month warranty period, Matias ended up sending me two and a half replacement keyboards(!). After my warranty expired, I dug out my soldering kit from college and tried my hand at replacing some of the switches on the faulty keyboard half. This worked like a charm, and now I have two fully-functioning keyboards as a result.
Typing on the Ergo Pro is a great experience, and I really love the layout and ergonomic features. If you ignore my faulty switch problems, I can easily recommend the keyboard to anyone. But, if you’d rather avoid any quality issues, I can’t say this is the keyboard for you.
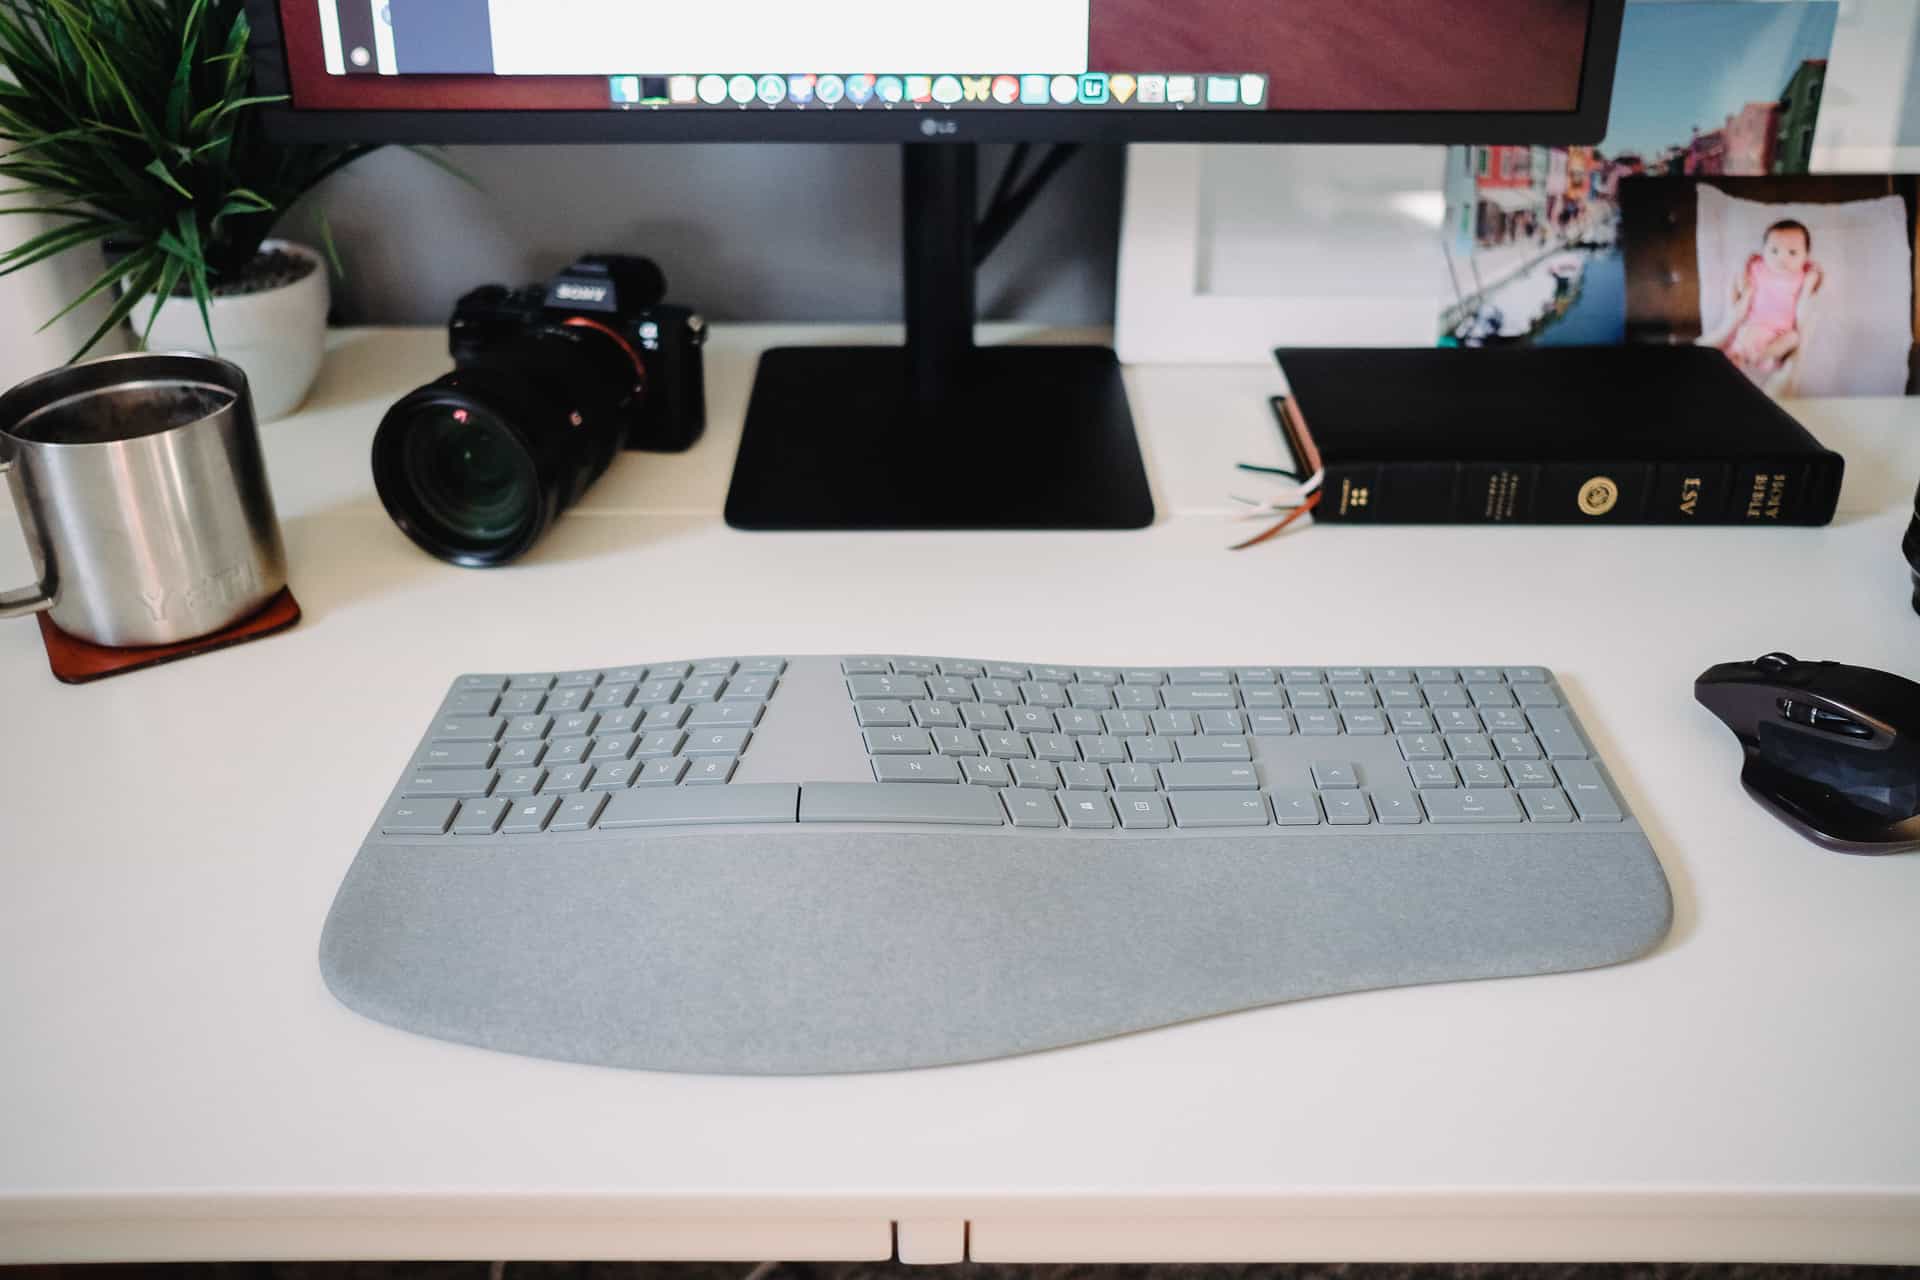
The Surface Ergonomic Keyboard from Microsoft (Josh)
Either I’m indecisive, or I’m just special — I get to write about two keyboards today. I prefer to justify it this way: I have a keyboard for long-form writing and another keyboard for everything else.
The Surface Ergonomic Keyboard falls into the long-form writing category. This is the keyboard I turn to when I have a 1,000+ word article or review due for The Sweet Setup, or if I have an entire day of work ahead of me. Between the comfort, extra key travel, and Alcantara wrist base, the Surface Ergonomic Keyboard feels like it’s been made for multi-hour writing sessions.

I’m particularly fond of the Surface Ergonomic’s key travel. Between Apple’s latest MacBook Pros and even their Magic Keyboards (more on that in a bit), getting into a typing rhythm not only feels more difficult, it also becomes somewhat painful when your fingertips constantly bottom out at the bottom of the keyboard. The Surface Ergonomic doesn’t suffer from this in any way — key travel is just right, with the actuation down feeling initially easy and soft to end, and the actuation up feeling springy and immediately ready for another keystroke. Typing on this keyboard is a dream.
Battery life is particularly impressive. I purchased the Surface Ergonomic over a year ago and I still haven’t changed the two original AAA batteries. The keyboard never turns off, per se, as there’s no particular on/off switch. Instead, the keyboard is always semi-alive and ready to go. How these batteries continue to work is beyond me.
Working with the Surface Ergonomic and a Mac is a lesson in bending a keyboard to your will. I use Karabiner Elements to map Windows keys to their position on an Apple keyboard. The Alt key becomes Command, Windows key becomes Option, and so on. Karabiner Elements requires you map both the left and right control keys in the bottom row separately, so you have to spend a few minutes getting everything setup just right.
Lastly, media keys don’t line up properly either — display brightness adjustment keys are, by default, SrlLk and Pause on the Surface Ergonomic.

If you can get around the Surface Ergonomic not being designed for a Mac, then this is just about a perfect keyboard. It’s a bit big, carries the number pad (essential for my accounting day job), and has a massive Alcantara wrist base to boot. But if you have the desk space, I can’t recommend it enough.
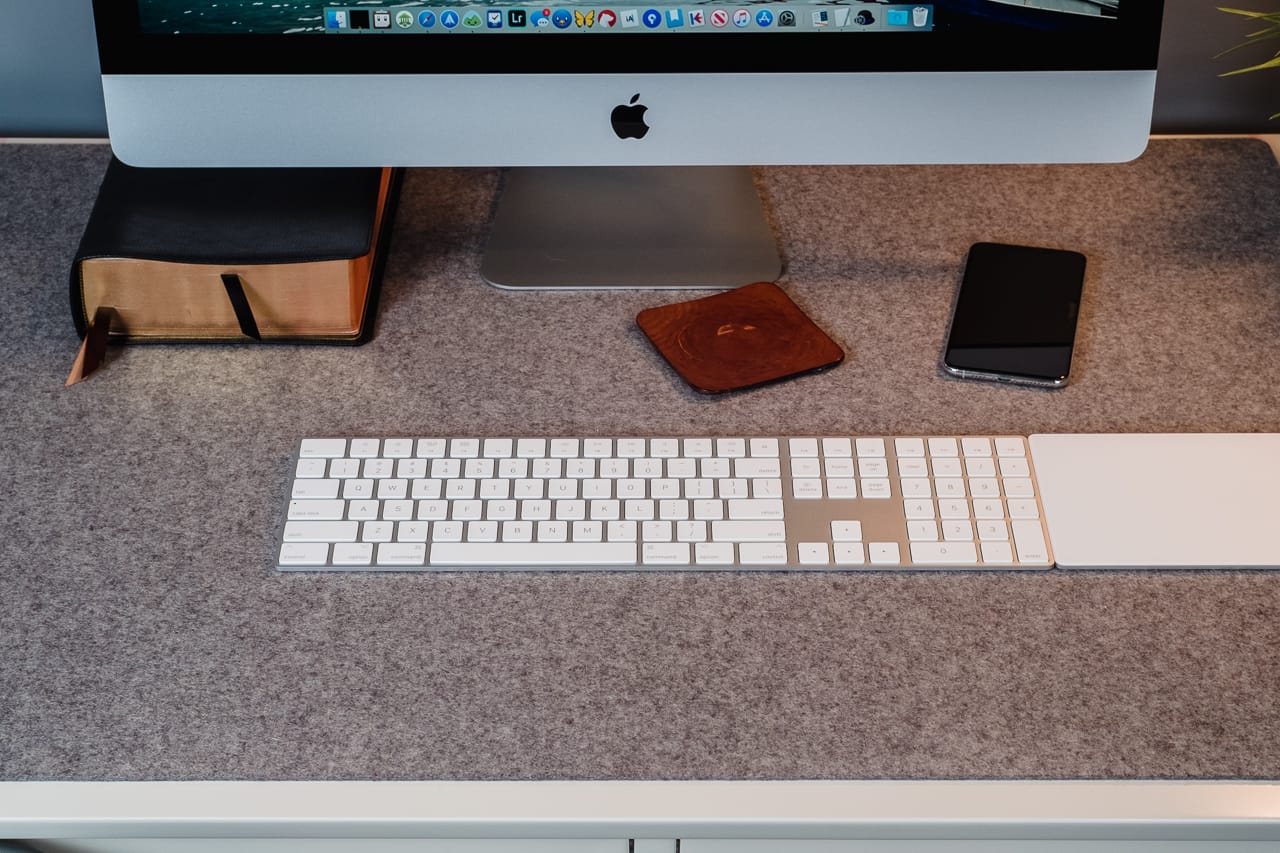
Apple Magic Wireless Keyboard with Numeric Keypad (Josh)
In every way the Surface Ergonomic fails, the Apple Magic Keyboard with Numeric Keypad picks up the slack. (And vice versa — hence why I use two keyboards regularly).
The Apple Magic Keyboard with Numeric Keypad is the tool for Mac users if they want 100% functionality across macOS. The large media keys at the top of the keyboard, full-sized T-shaped arrow keys for text navigation, a wonderful keypad for working in spreadsheets, and a plethora of extra function row keys for special programming. If you want the full breadth of macOS capabilities in your keyboard, the Magic Keyboard with Numeric Keypad is the winner.
(I also like the full sized control keys at the bottom row of the keyboard. The Magic Keyboard sans Numeric Keypad has a pesky “fn” key there that squishes all the other keys by a fairly large margin. I greatly prefer the larger Command and control keys.)
Battery life, like any Apple peripheral these days, is phenomenal and easily rechargeable. The Magic Keyboard charges via an included Lightning cable, which also acts as the initial point of connection. Simply plug the USB-to-Lightning cable into the keyboard and your Mac, and poof, connected.
But of course, I use the Surface Ergonomic for a few reasons as well.
For one, the Magic Keyboard with Numeric Keypad’s key travel is still disappointingly short. I’ve written this entire section with the keyboard and I’m already feeling my finger tips bottoming out and becoming sore.
Second, I’ve found it difficult to change muscle memory in terms of the layout of the numeric keypad itself. I generally do most of my numerical work with a Windows-based laptop, and as such, all the operator keys are located in different spots. I find myself constantly hitting the wrong operator keys when using the Magic Keyboard.
Third, and I think this has been rectified, I’ve had issues with the Magic Keyboard with Numeric Keypad warping in the middle. I had a model from the first run of these keyboards and it was a nightmare. The warping resulted in the feet of the keyboard not coming into proper contact with my desk, and the keyboard slid all over the place. The latest Magic Keyboard with Numeric Keypad that came with my new iMac hasn’t had this issue so far. Perhaps time will tell.
The first nitpick is more than a nitpick — it’s the fundamental reason why I have the Surface Ergonomic at the ready for long writing sessions.
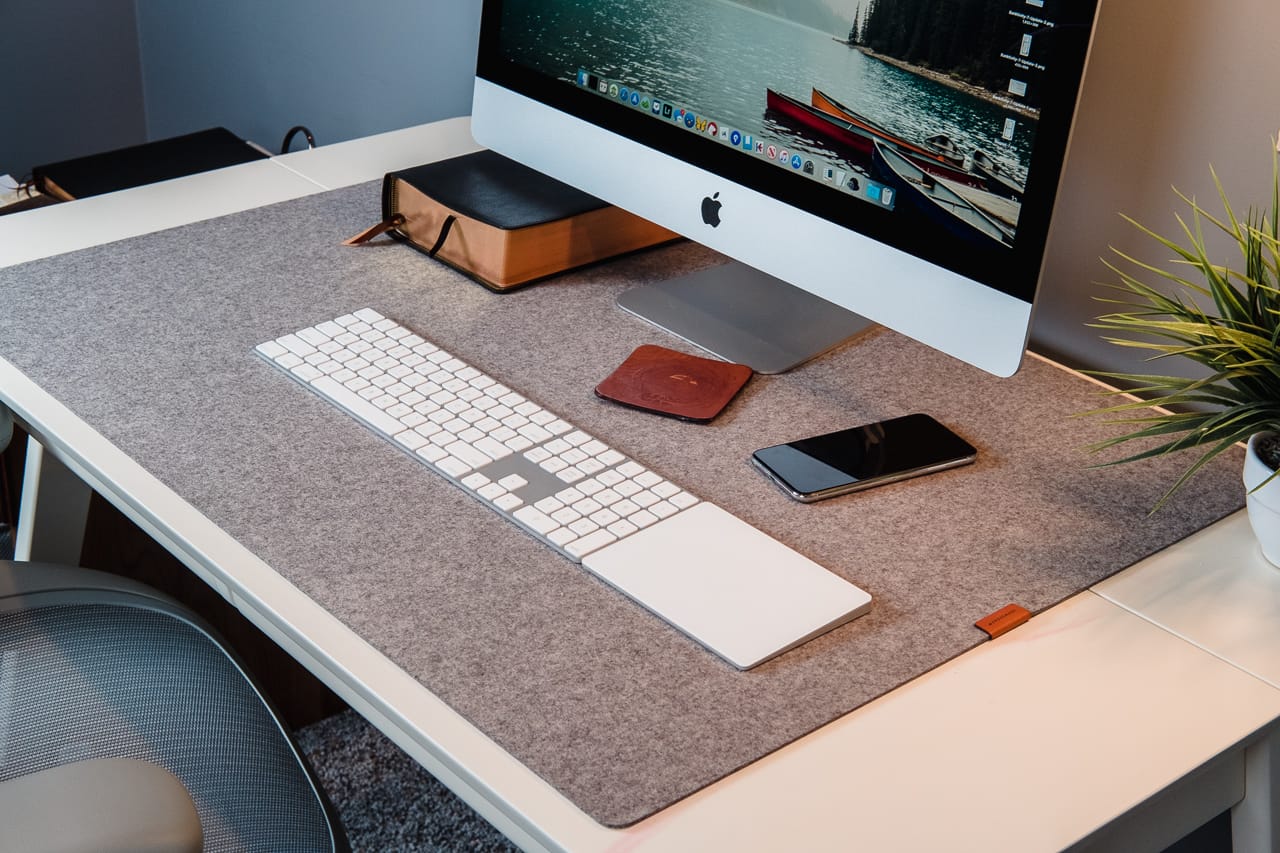
But overall, the Apple Magic Keyboard with Numeric Keypad gets a glowing review from me. I love the full-size arrow keys and Command/control keys. I love the potential of having extra function row keys for an app like Alfred, and I think the design of the Magic Keyboard nicely complements the look of the iMac and the Magic Trackpad.
Plus, it now comes in a sexy space gray color.
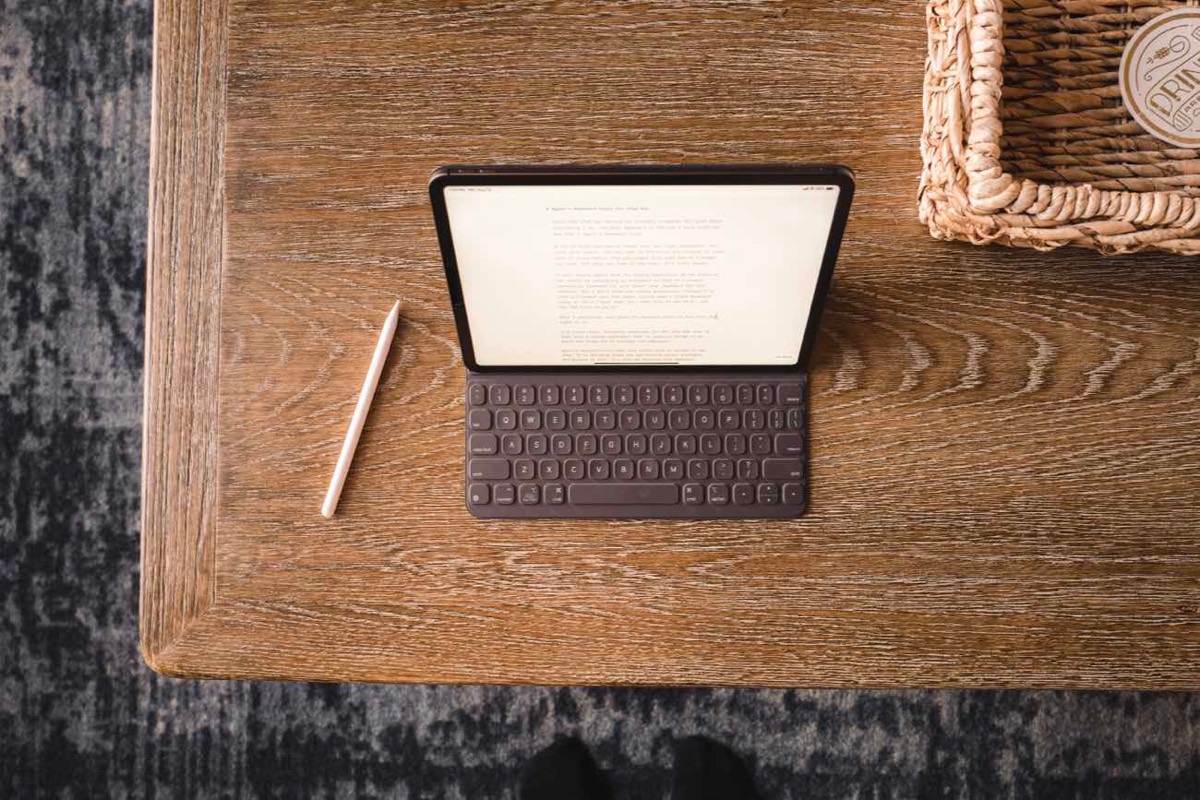
Apple’s Keyboard Folio for iPad Pro (Shawn)
Since the iPad has become my primary computer for just about everything I do, the best keyboard is the one I have with me. And that’s Apple’s Keyboard Folio.
A lot of folks poo-poo these thin and light keyboards, and with good reason. The key caps on the Folio are covered in some sort of shiny fabric that you might find over top of a budget car seat, and when you type on the keys, it’s a bit mushy.
I will freely admit that the typing experience of the Folio is not nearly as satisfying or enjoyable as that of a proper mechanical keyboard (or just about any keyboard, for that matter), but I don’t mind the typing experience. Perhaps I’ve just acclimated over the years, having used a Smart Keyboard Cover on the 9.7-inch iPad Pro, then also on the 10.5”, and now the Folio on my 11”.
What I absolutely love about the Keyboard Folio is how thin and light it is.
I’ve tried other 3rd-party keyboards for the iPad and none of them have a typing experience that is superior enough to be worth the trade off of thinness and lightness.
Apple’s Keyboard Folio adds very little bulk or weight to the iPad. It is the most sleek and low-profile option available. For these reasons, it’s also my favorite iPad keyboard.
Wait. There’s a Bonus….
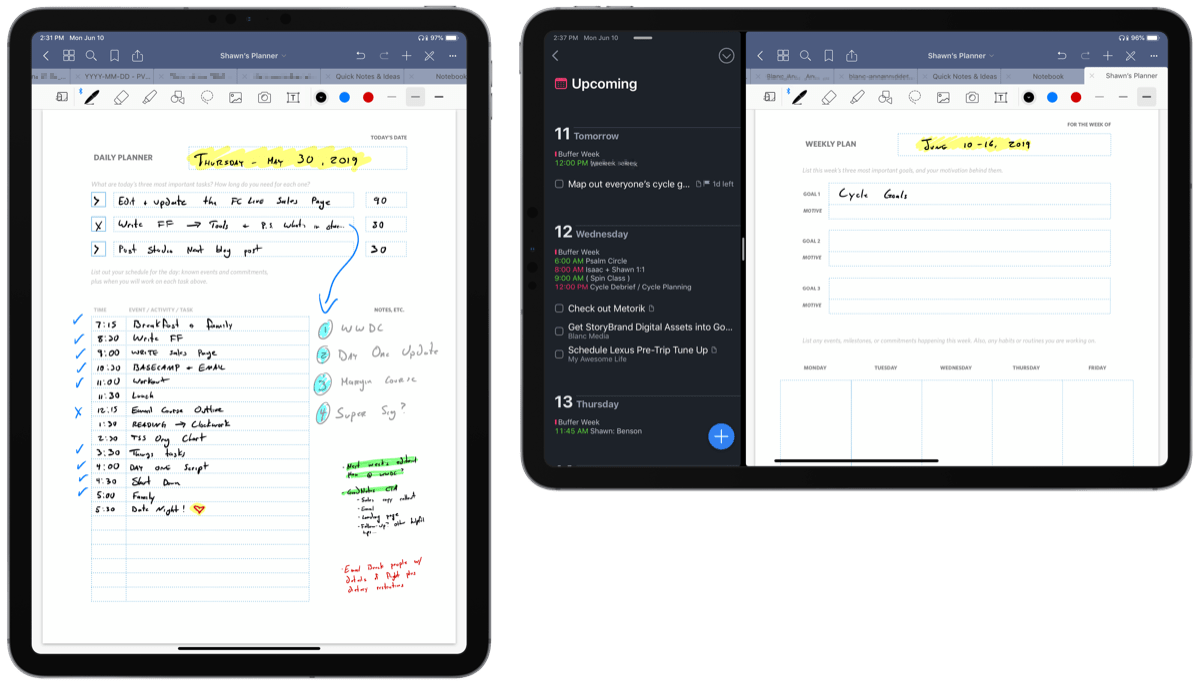
Custom Productivity Templates for Your iPad
If you want to use custom productivity templates on your iPad, we’ve put together a free, walkthrough guide along with two of our in-house templates that can help you get started.
We’ll show you…
- How to create and save custom page templates.
- How to use those page templates to transform GoodNotes into your own productivity notebook (or any other type of notebook replacement).
Plus, we also have included two of our custom productivity templates for you to get started with.
This guide is available for FREE to our email subscriber community. And you can get it right now.
By joining the Sweet Setup community you’ll also get access to our other guides, early previews to big new reviews and workflow articles we are working on, weekly roundups of our best content, and more.