How to allow individual contacts to bypass Do Not Disturb in iOS 10
One of the new features of iOS 10 is Emergency Bypass. I am a big huge fan of Do Not Disturb on iOS, and Emergency Bypass makes it that much better. I first heard about this feature from Katie Floyd, and it’s something I immediately activated for a few people.
In the Do Not Disturb settings (Settings → Do Not Disturb), you’ve always been able to alllow your Favorite or a certain contact group to bypass Do Not Disturb. With the Emergency Bypass option, you can set individual contacts to bypass Do Not Disturb.

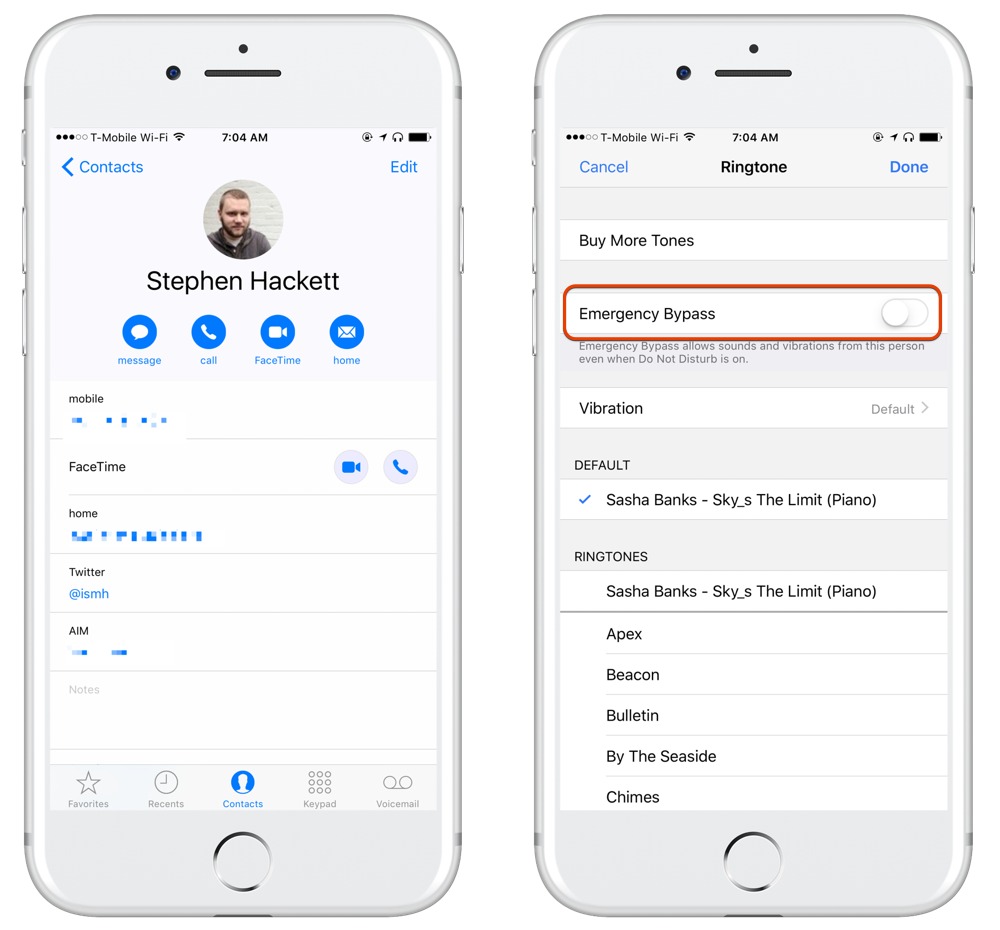
To access this setting, go to the contact you want to allow through the Do Not Disturb wall. Tap Edit → Ringtone, and enable the Emergency Bypass option at the top. This will always allow calls from this person regardless of your Do Not Disturb settings.
Bonus Tip: If you edit the Text Tone, you can also allow messages from this person to bypass Do Not Disturb as well.
We have more helpful tips right here.
Free Productivity Guide: Download our simple guide to productivity to help you improve your workflows and be more focused with your time and attention. Get it here.
