Producing Podcasts with Ferrite Recording Studio
Moving to an iPad-only workflow meant that I needed to find a new audio editor to produce my podcasts. I had made fairly heavy use of Audacity on my Mac and felt quite comfortable with it for editing podcasts. Luckily, I quickly came across Ferrite Recording Studio by Wooji Juice.
Within a few editing sessions, Ferrite felt like a much newer and nicer home to edit audio. Ferrite is not a pared-down iOS audio editing application — rather, it’s a full-featured podcast production platform.
Get Our Best Photography Tips & Workflows
Transform your photos and edits from average to awesome with our in-depth, mobile photography course. It’s jam-packed with training, ideas, and lessons that can literally transform your photography overnight.
Recording into Ferrite
For those of us that are iPad first, Ferrite starts by providing the ability to record any audio source that is input into your iPad. For me, it means that I plug in my Blue Snowball via USB and then I can record directly into Ferrite.
Ferrite lets you record in Lossy AAC/.M4A or in lossless ALAC/.CAF. I generally record in Lossy formats because I can’t hear the difference between the two, and in my previous iPad I was always bumping up against the storage limits on the device.
Ferrite does succumb to a limitation in iOS when it comes to recording, though. It doesn’t allow you to change the input device. If I have my wireless headset turned on, then Ferrite defaults to it as my input device. This is resolved simply by unplugging it, but I wish that iOS would let me choose audio inputs and outputs.
Editing Audio
Where recording is mostly a check in the proper box (due to iOS limitations), editing is where you really get to see the thought that Wooji Juice have put into building this awesome tool.
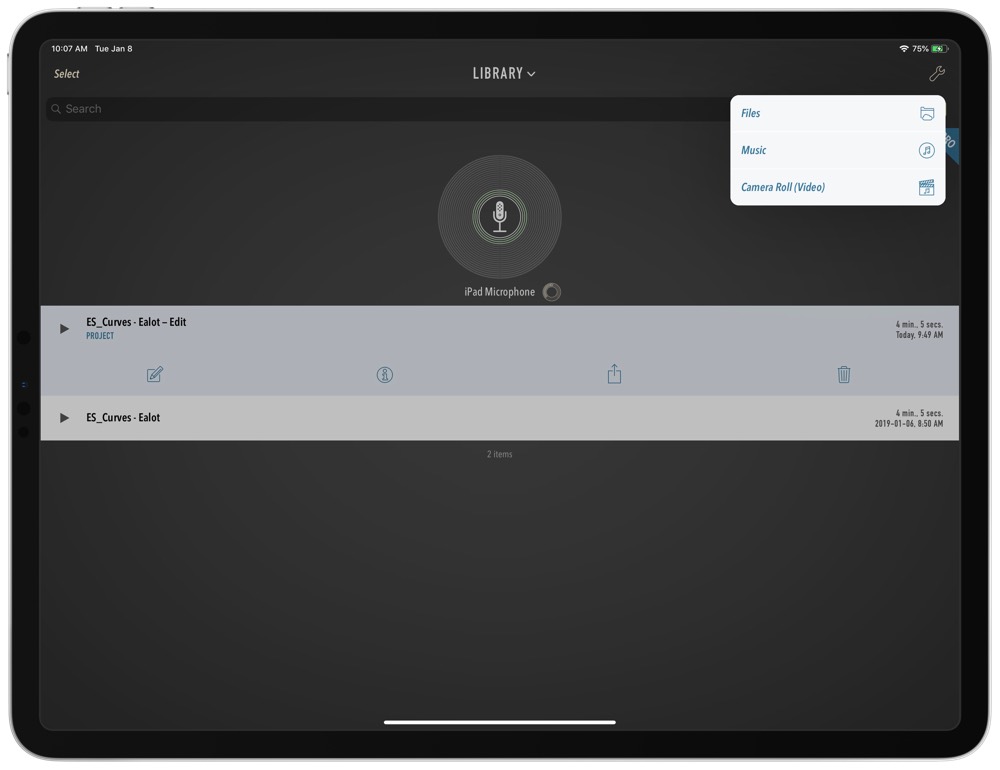
If you haven’t recorded directly into Ferrite, then editing audio starts by importing the audio you want to edit. You can import from Files, Music, or from your camera roll. As a side-note, you can’t import a file from Music if it is protected by DRM.
Once your audio is imported, you can select multiple sources to edit. This will create a new project in Ferrite, while leaving the original files in their original state. Ferrite also shows up in the share sheet on your device, so you can share files in any of the cloud services on your iPad directly into the application.
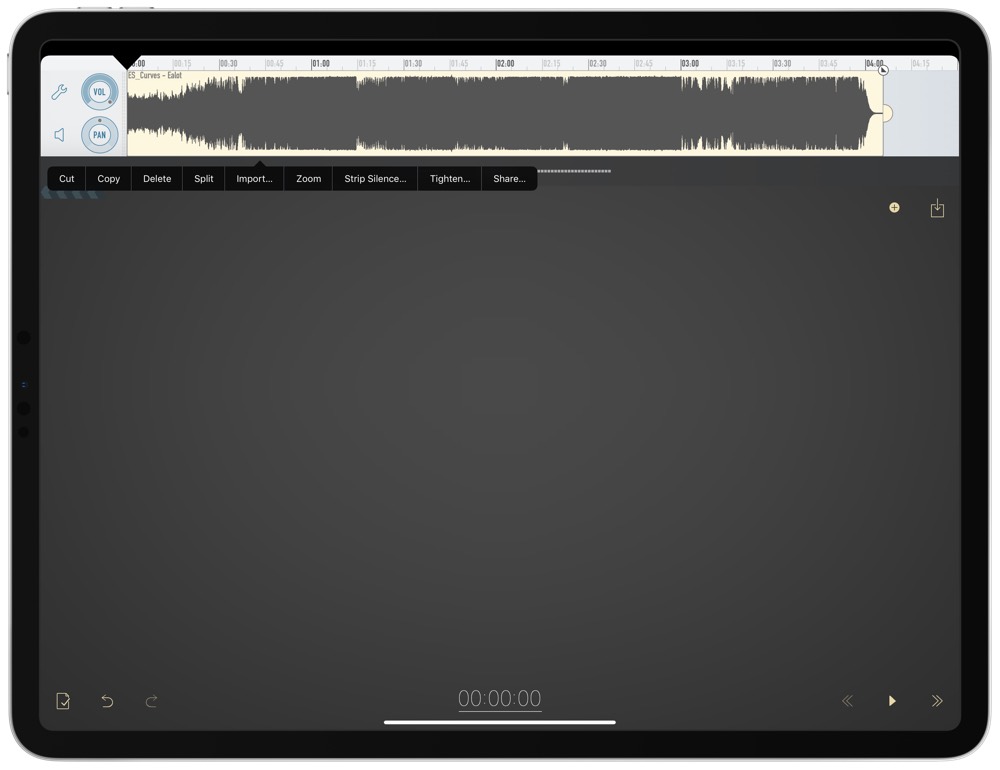
Then it’s all about the editing you need to do. Cutting out the pauses or the times you need to repeat a sentence because you were a bit tongue tied.
Ferrite helps you strip pauses in audio by providing that as an option per track. I generally start by stripping silence, and then use the tighten option to close all the gaps that have been created in the audio.
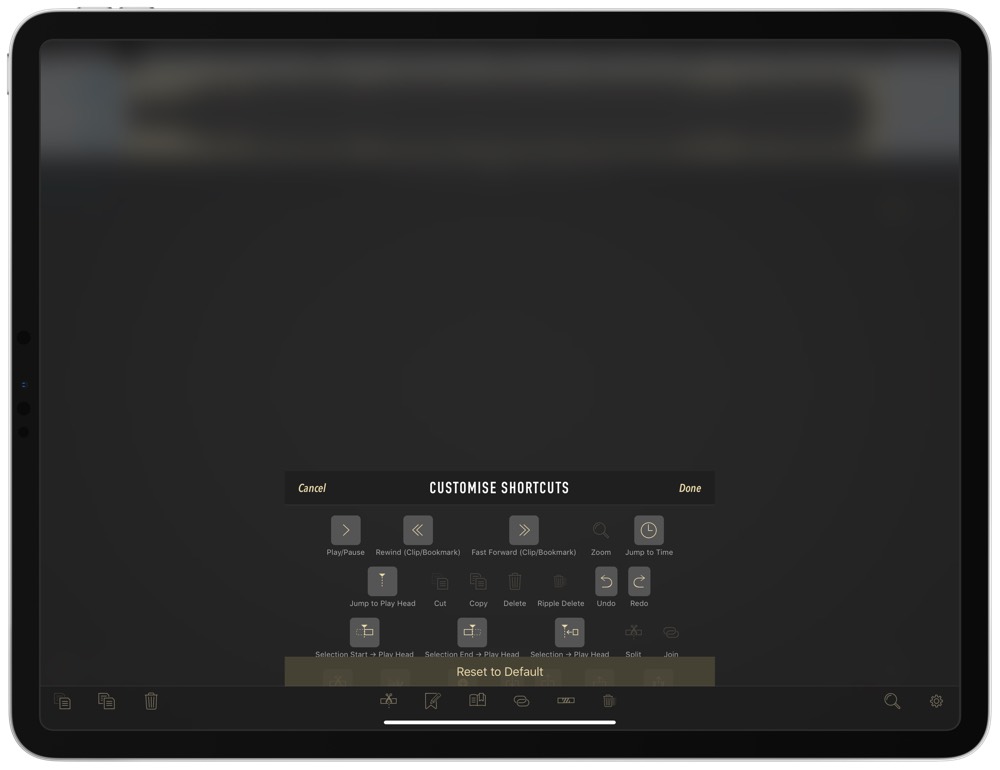
One of my favorite features is the ability to customize the shortcuts in Ferrite. I’ve set them up so that I can do 99% of the editing I do from a single hand. I’m able to jump forward in tracks, jump backward, make cuts, and use ripple delete all without moving my right hand from the standard home row place it sits when I’m typing.
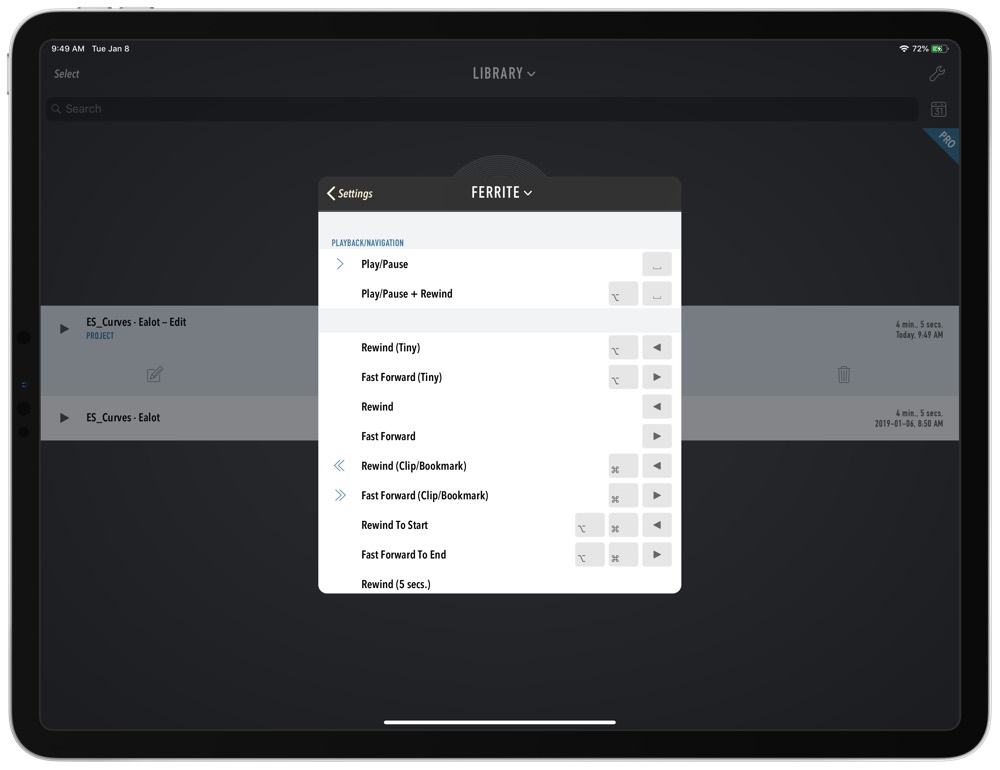
In fact, one of my initial frustrations with Ferrite was that I couldn’t automatically use ripple delete without touching the screen. I spent months being frustrated with this until I decided to dive into the settings and check out the keyboard customization. Turns out, I should have done this on day one because you can customize the keyboard shortcuts to do exactly what you want.
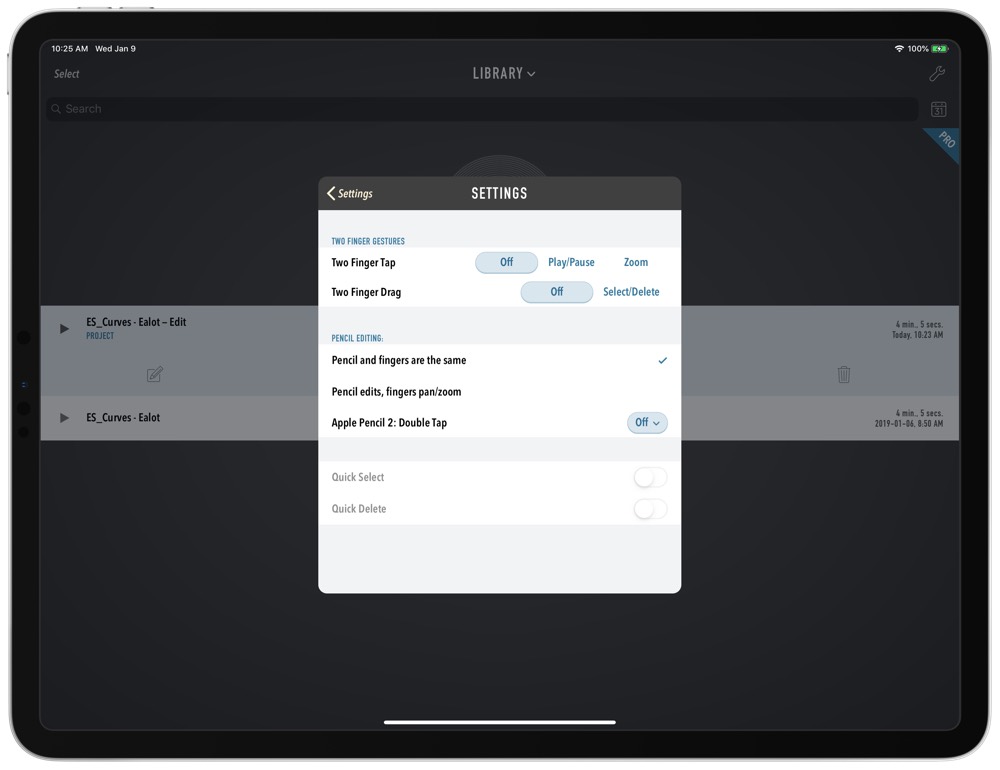
If you’re a heavy Apple Pencil user, then Ferrite also allows you to customize what actions different gestures perform. The settings here are nowhere near as extensive as they are for keyboard actions. I don’t even have them turned on because I edit audio 99% of the time sitting down with my iPad with a keyboard in front of me. I can’t think of a time when I’ve wanted the pencil or my fingers for anything more than selecting a track on the screen, and this can already be accomplished with the default settings.
One of the final bits of customization I take advantage of with Ferrite is changing the tools available in the Shortcuts Bar. You have to start by turning this on under the main settings in the application. Then, when you’re editing audio, press the small gear icon in the bottom right hand side of the screen to edit which quick controls are available at the bottom of your audio project.
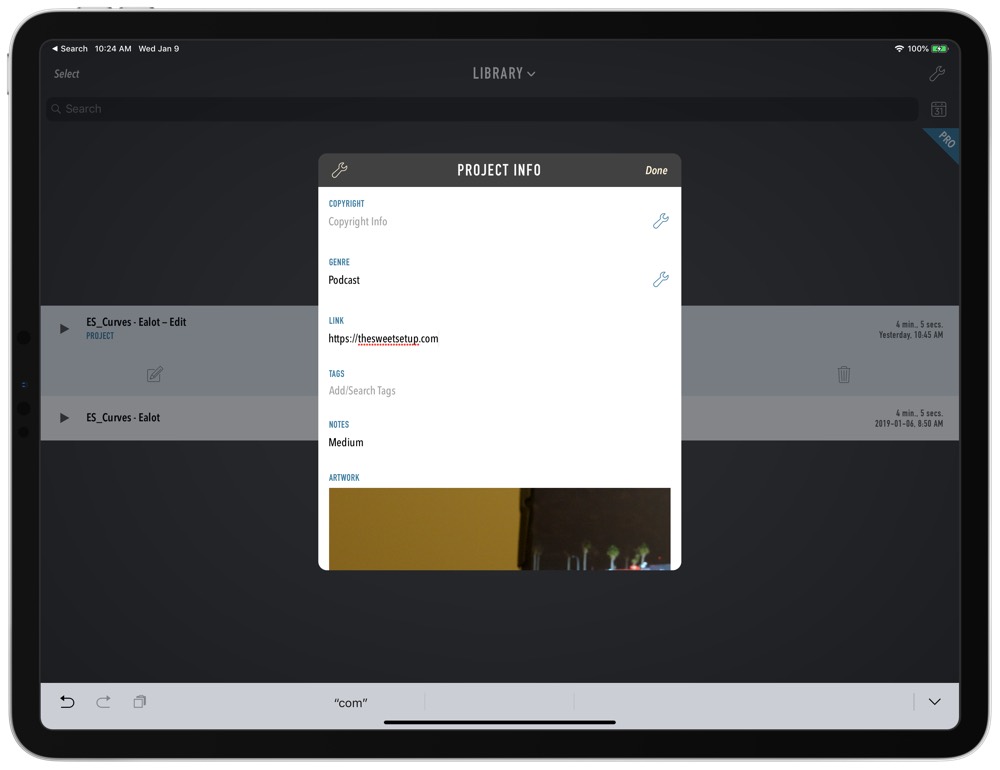
When it was time for me to produce an audiobook version of some of my content, I was easily able to record each chapter into Ferrite and then combine them all into a single project. From there, I used Ferrite’s chapter editor to add MP3 chapters to my audio, and then on export Ferrite allows you to add artwork to the audio so that it shows up when you browse the file.
Audio Plugins
Ferrite also comes equipped with the ability for other audio apps to be used directly inside. I use Brusfri regularly to remove noise from my audio. Brusfri shows as an available effect inside Ferrite so you can use noise reduction on a single channel, and then edit that channel instead of round tripping the audio.
While this is possible and certainly convenient, I’ve actually had better luck with Brusfri when I export the audio and run Brusfri on it’s own to remove noise, then reimport the audio into Ferrite. Sometimes when I’ve used it inside Ferrite, I get odd peaking that makes the audio almost unusable. I’ve tried many configurations, but always had best results by running my audio through Brusfri first, then editing the exported file.
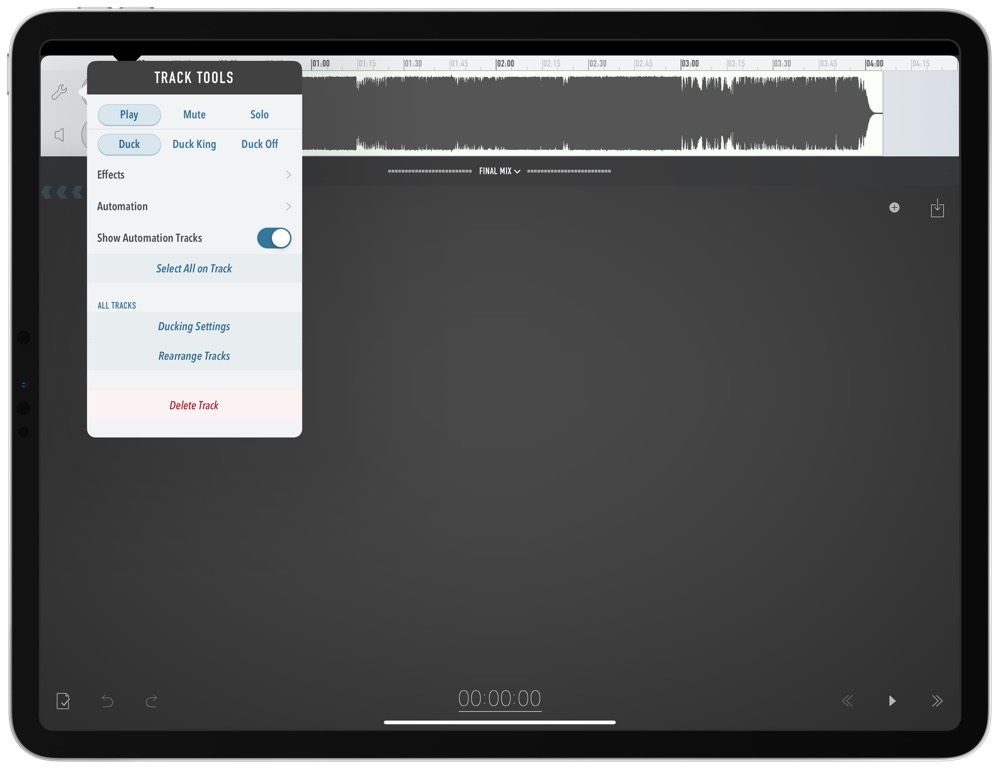
Ferrite also comes loaded with a bunch of its own audio plugins (called Effects in Ferrite), like a peak limiter. Any of the effects can be applied per channel or to the entire recording.
To apply an effect to a specific channel, press the wrench icon beside the track to which you want to apply an effect.
To apply the effect to the entire recording, look at the Final Mix panel.
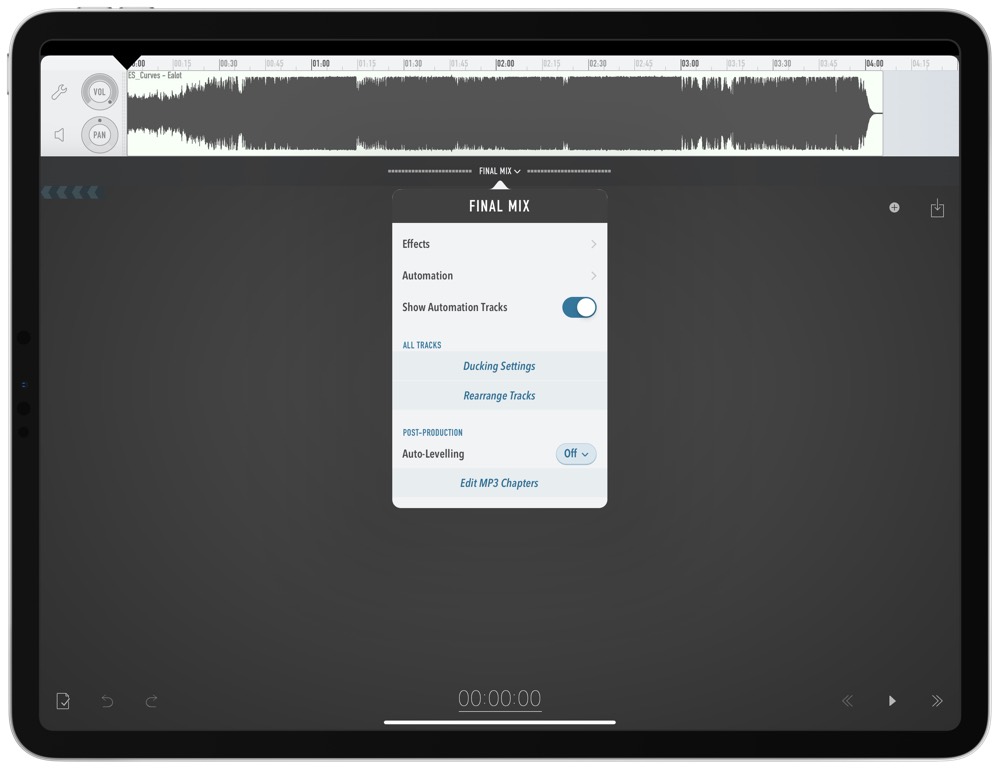
I generally apply effects to a single track of audio, but I do turn on the Auto-Leveling for the entire audio export.
You can even dive deeper into Ferrite once you’ve got mastered the basics. It provides you with project templates for your podcasts, which means that you can store all the little parts that make up your podcast individually without cluttering up the Ferrite interface. You can also change your export options to suit your preferences.
If you’re looking for a robust podcast editing platform for iOS, then you should stop looking and purchase Ferrite. Then, upgrade to the Pro bundle to unlock all of the advanced features it offers.
We have more useful workflow examples right here.
Wait. There’s a Bonus….
Custom Productivity Templates
We have a set of custom productivity templates that work well with the iPad app, GoodNotes. And if you want to try them out, we’ve put together a free guide that can help you.
We’ll show you…
- How to create and save custom page templates in GoodNotes.
- How to use those page templates to transform GoodNotes into your own productivity notebook (or any other type of notebook replacement).
Plus, we also have included a couple of our custom productivity templates for you to get started with. These templates are right out of our popular productivity course.
The custom templates and the guide are available for FREE to our email subscriber community. And you can get it right now. By joining the Sweet Setup community you’ll also get access to our other guides, early previews to big new reviews and workflow articles we are working on, weekly roundups of our best content, and more.