How to Set Up VIP Notifications in Apple Mail
It doesn’t take long for an email inbox to overflow, does it?
If you’re like most people and leave notifications enabled for every new message, you’ll quickly find yourself frustrated by the number of times these notifications interrupt your focus. Luckily, Apple Mail allows you to designate certain contacts as VIPs, which gives you two key benefits:
- A new inbox folder appears that displays only messages from these contacts, making it easy to zero in on important correspondence.
- You can set Apple Mail to notify you exclusively for messages from VIP contacts, minimizing interruptions.
Here’s how to set up and use VIP notifications in Apple Mail on both macOS on iOS.
Setting Up VIP Notifications on macOS
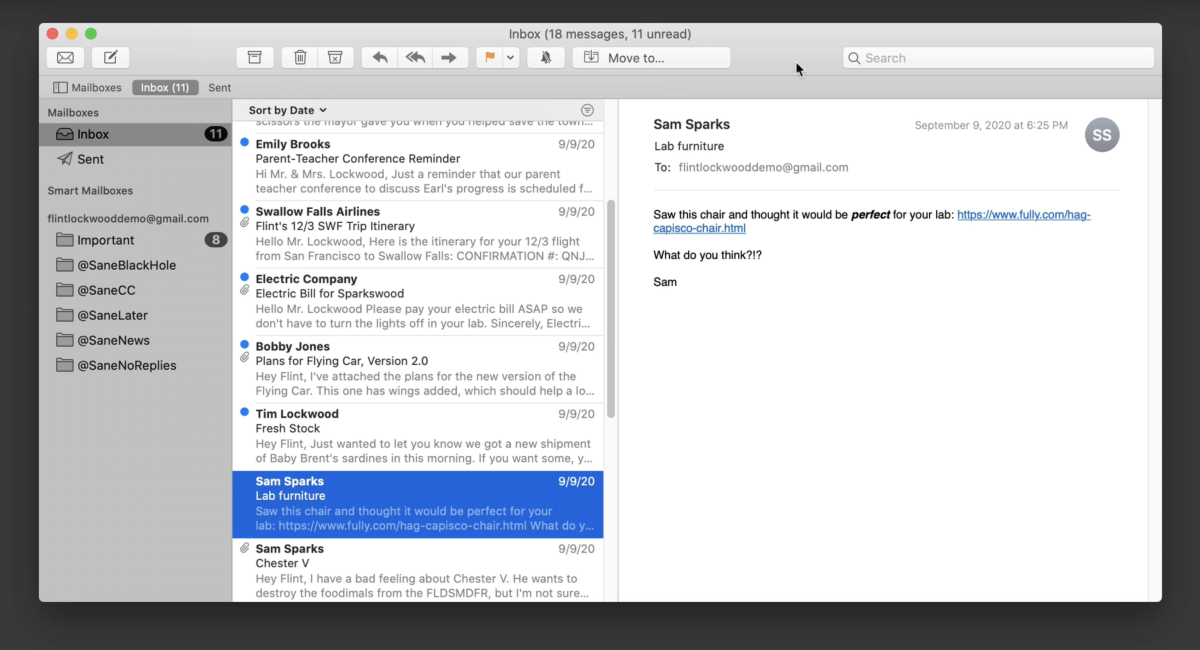
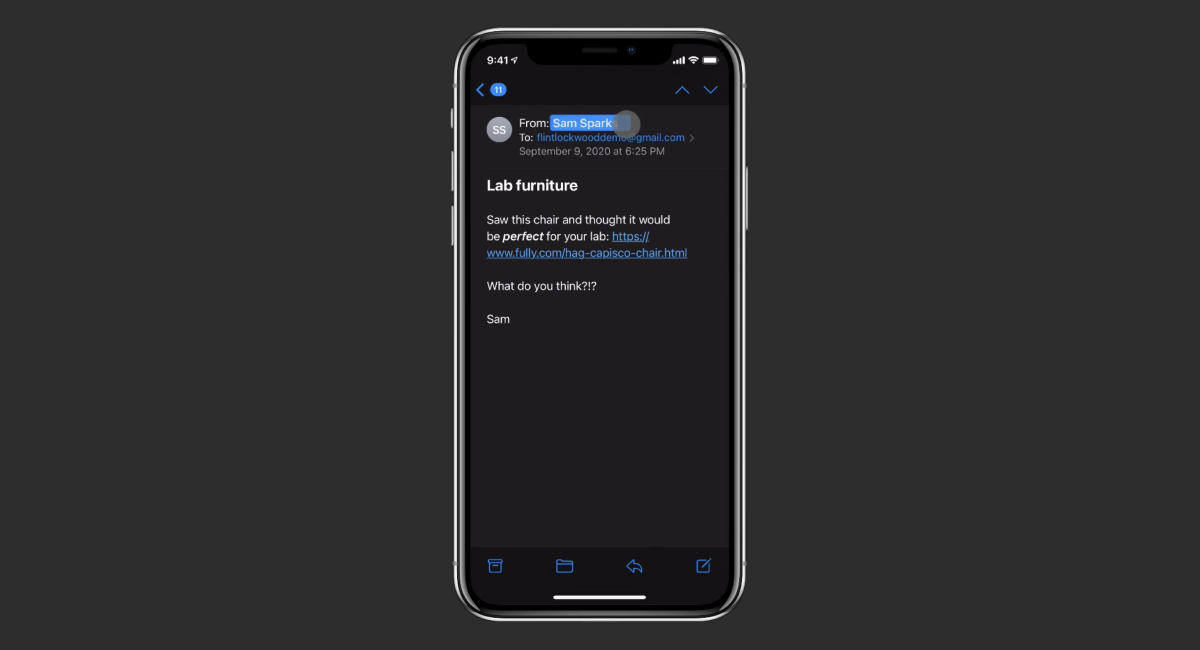
To begin, open up Apple Mail and find a message from one of the contacts you want to designate as a VIP.
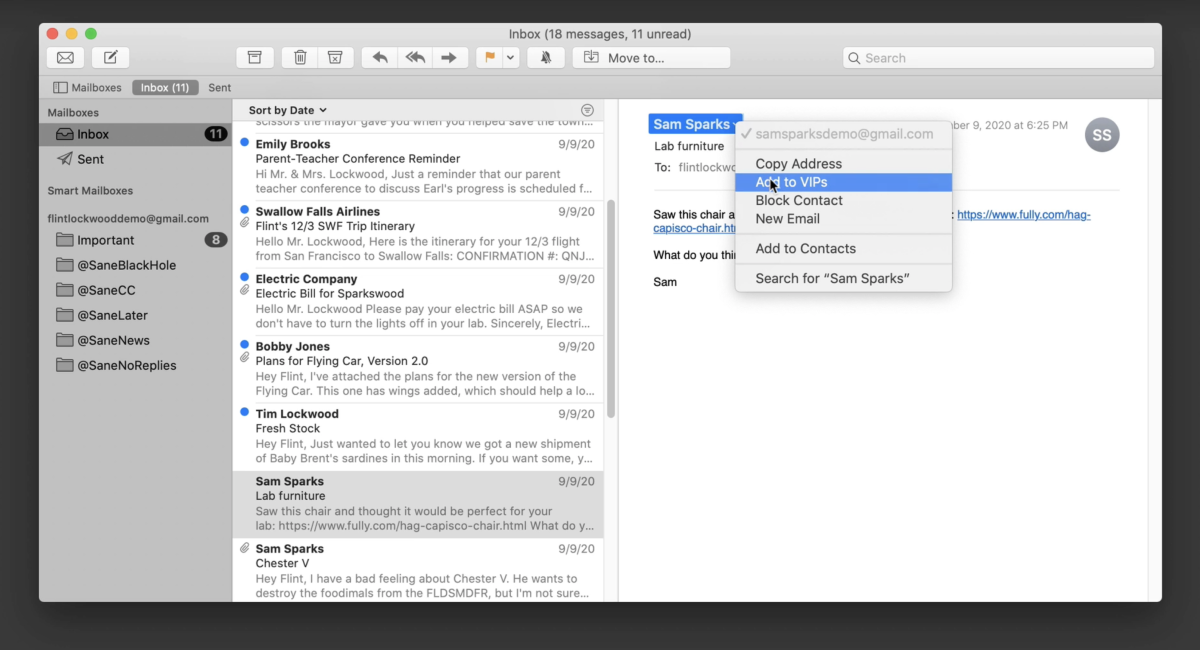
Next, hover over the sender’s name and click the downward arrow that appears to open up an options menu. Within that menu, find and click the entry called Add to VIPs and your contact will be added.
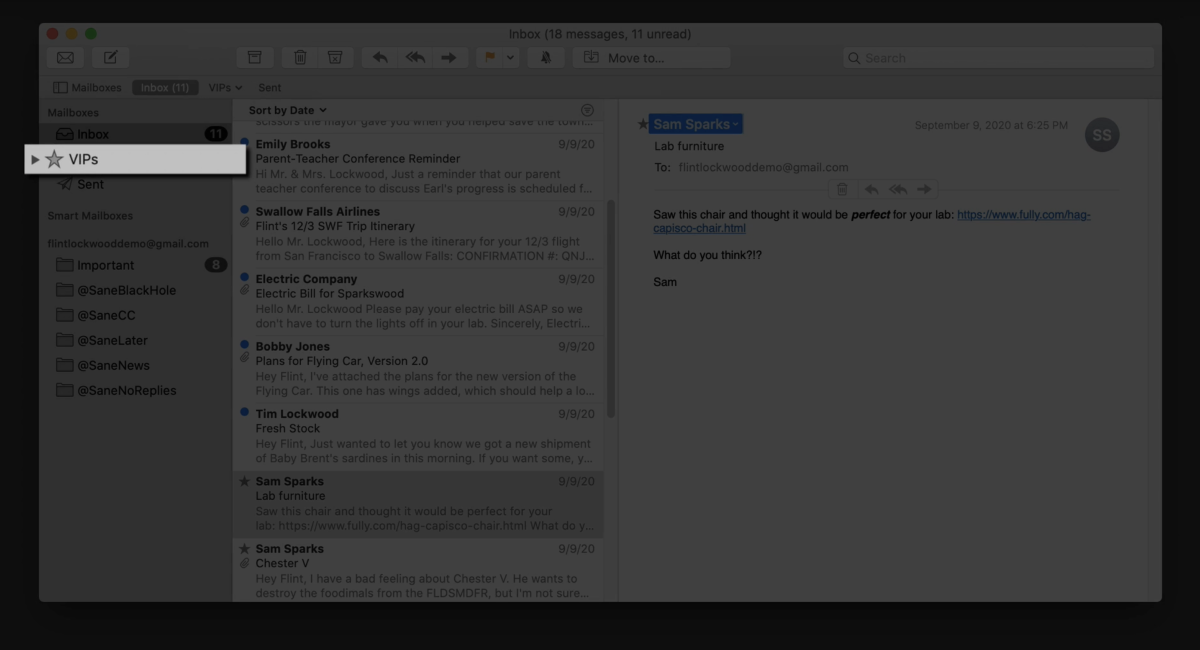
If this is your first VIP contact, you’ll notice that a special new VIP mailbox has appeared in your Mail app sidebar.
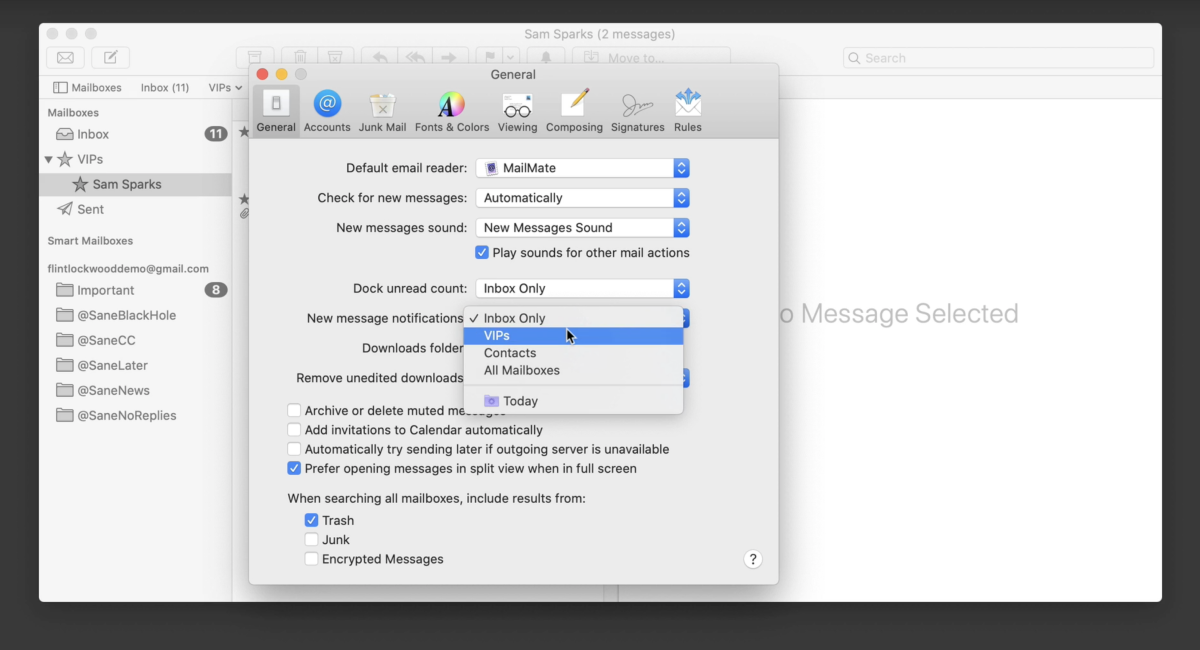
The final step is to adjust our notification settings so that we only receive notifications for messages that come in from our VIPs.
To accomplish this, open up the Mail app’s preferences using Command + , and make sure you’re on the General tab. In the menu called New message notifications, use the dropdown menu to select VIPs.
That’s all there is to it! Going forward, you’ll only be notified of messages from your VIPs, with all other messages flowing silently into your inbox for whenever you decide to make time for them.
Setting Up VIP Notifications on iOS
The process is very similar on iPhone and iPad.
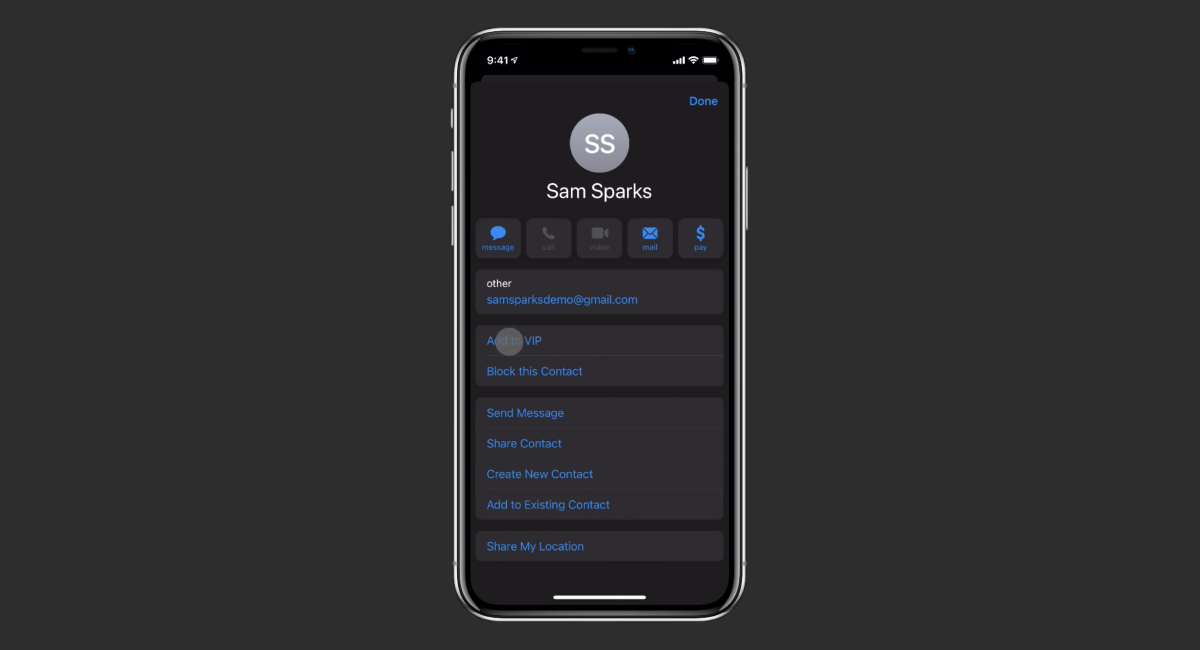
Just like on the Mac, we begin by opening an email message from the sender you want to designate as a VIP. Tap the sender’s name to open a separate modal page with options.
On this page, tap Add to VIP to mark this contact. You’ll notice that a star appears beside their email address to indicate their VIP status.
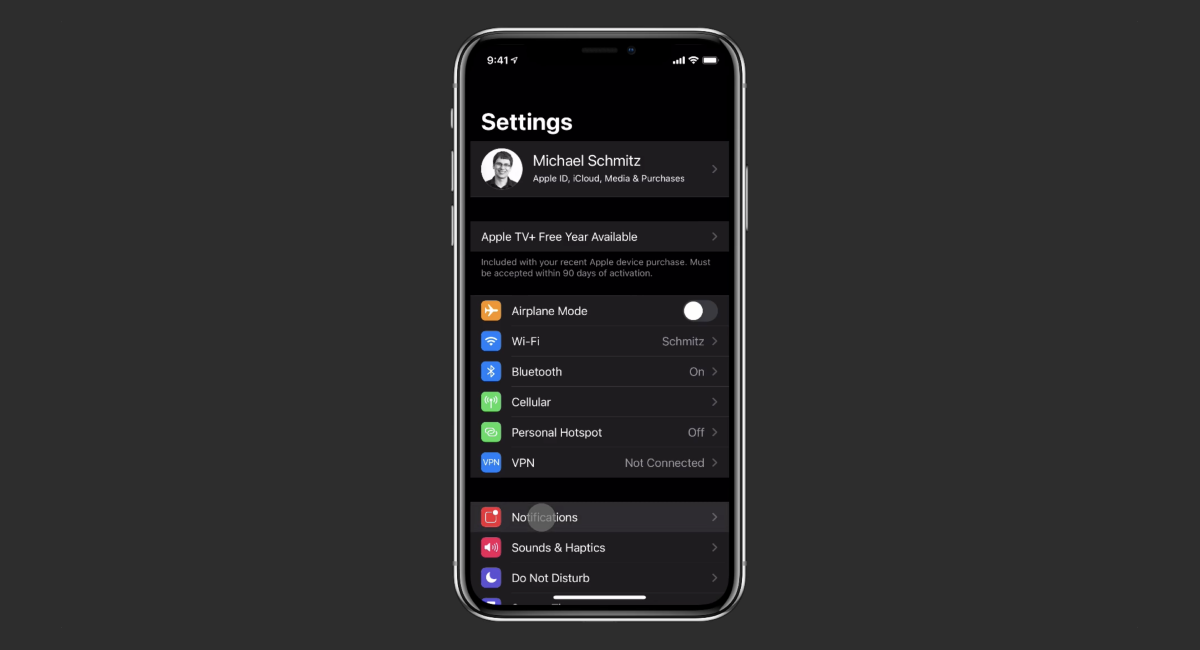
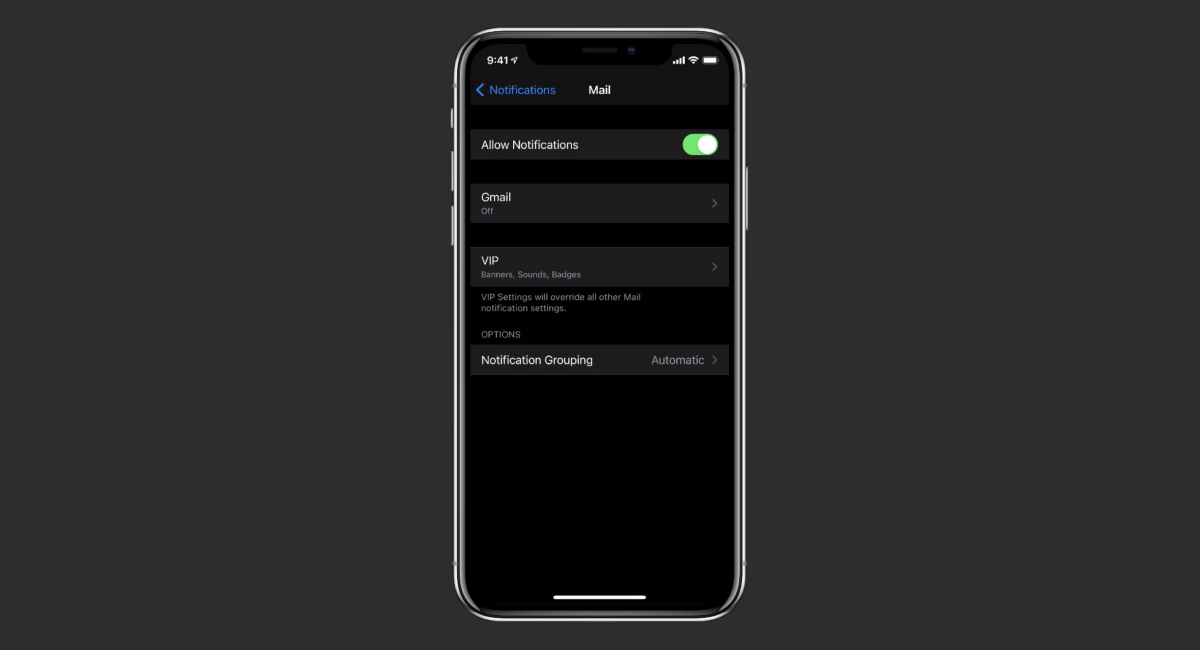
To configure our notifications, we have to switch over to the system Settings app. Look for the Notifications section and tap it.
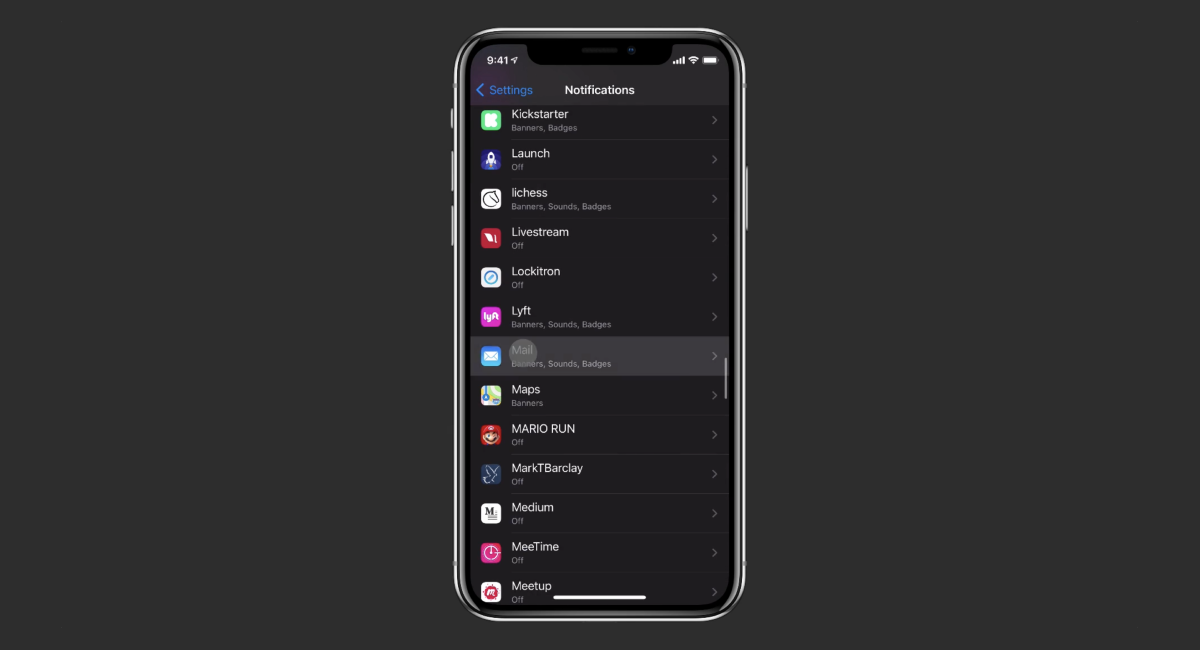
Next, scroll down until you see the entry for the Mail app and tap through.
Here, make sure that the Allow Notifications toggle is left on, but turn notifications off for your designated account(s). Instead, turn on the kinds of notifications you want (banners, sounds, badges) in the VIP section.
If you’d like, you can also configure your phone to allow silent badges for all email but only trigger a sound or banner notification for VIPs if you prefer to have a less drastic option.
Wrapping Up
With VIP contacts, you can either wrangle your email notifications down to the bare minimum, or use them to create a distinction between important and less-important notifications.
Either way, you allow yourself more opportunity for uninterrupted work.